Hot Thai Kitchen

  • Recipes by Categories
  • Kitchen Tips & Ingredients
  • Thailand Vlogs
  • My Cookbooks
  • Newsletter
  • Patreon
  • Shop Ingredients & Tools
  • Find an Asian Grocer
  • Merch
  • About
  • Contact
menu icon
go to homepage
subscribe
search icon
Homepage link
  • Recipes by Categories
  • Kitchen Tips & Ingredients
  • Thailand Vlogs
  • My Cookbooks
  • Newsletter
  • Patreon
  • Shop Ingredients & Tools
  • Find an Asian Grocer
  • Merch
  • About
  • Contact
    • Facebook
    • Instagram
    • Pinterest
    • Twitter
    • YouTube
  • ×
    Home

    Types of Rice Explained: Jasmine vs Sushi vs Basmati

    September 27, 2024 by Pailin Chongchitnant Leave a Comment

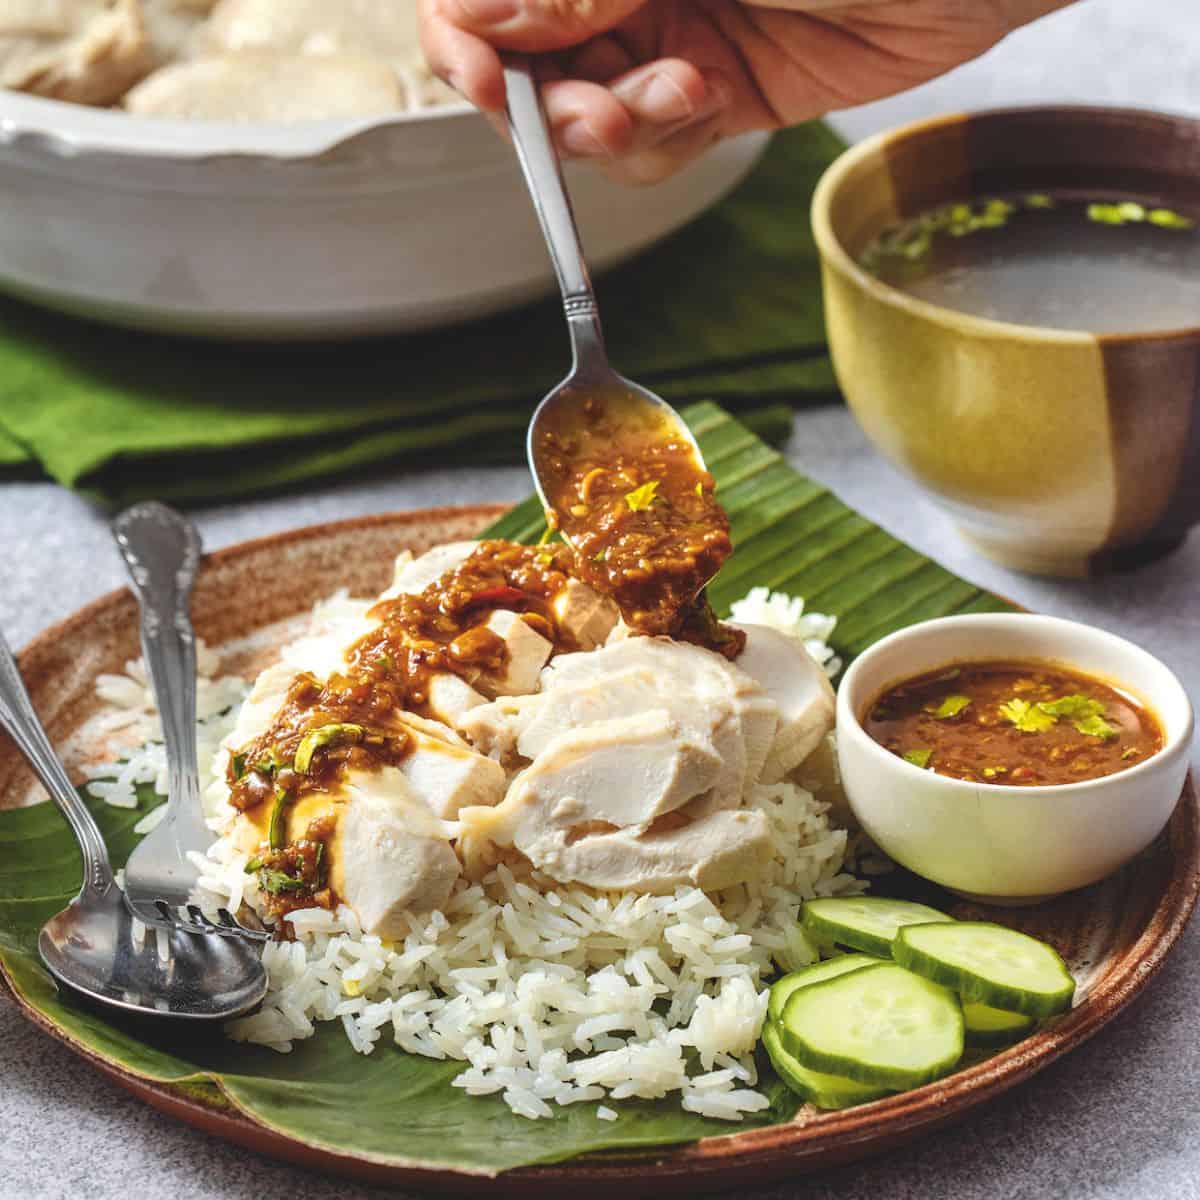
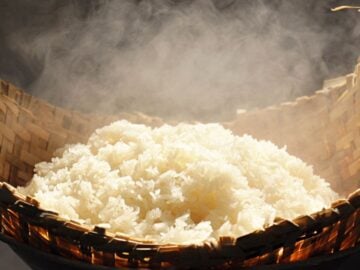
    Rice is a foundational ingredient of Thai cuisine, as it is for many other Asian cuisines. And over the years I’ve gotten a lot of questions about different types of rice: jasmine rice, basmati rice, short grain rice. How are they different? When should you use which rice? And do they need to be cooked differently? So in this article I want to demystify all of that and help you make the right rice decision for your next meal!

    I’m going to talk about the 3 most common types of rice used in Asia: Japanese short and medium grain rice (aka "sushi rice"), basmati rice, and jasmine rice.

    [feast_advanced_jump_to]

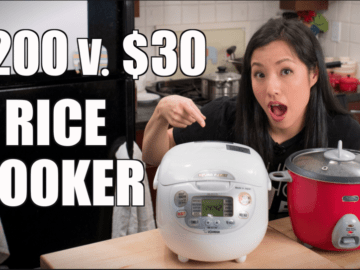
    Video: Sushi, Jasmine and Basmati Rice Explained + How to Cook Them

    If you prefer watching to reading, in this video I cover most of what is included in this article, but you may find the visuals of the video more helpful as they more clearly show the differences between the types of rice. The video also includes a demo for how to cook each type properly.

    The 3 Types of Rice Most Commonly Eaten in Asia

    Let's go through the types of rice we're going to cover here.

    First is what most people call "sushi rice." There are many varieties that fall into this category, some are considered short grain and others are considered medium grain. For this article I’ll call it "sushi rice" for simplicity, but know that in addition to Japan, this is also the type of rice that’s also eaten in Korea and parts of China. 

    raw jasmine rice on a blue tray beside raw sushi rice

    Then we have jasmine rice which is the staple rice of Southeast Asia. For our discussion jasmine rice will also represent other varieties of long grain rice that are similar but not technically jasmine. I’ll call these “jasmine adjacents,” which will also include the generic “long grain white rice” that you see in most Western grocery stores. 

    raw jasmine rice on a blue tray beside raw basmati rice

    Finally basmati rice, the longest grain of them all, and this is the rice eaten in the Indian subcontinent and the Middle East. Like the other two this also represents the many other subtypes of basmati rice that also exist.

    Thai People Don't Eat Only Jasmine Rice

    There's a misconception that Thai people, and Southeast Asians in general, only eat jasmine rice, but this is not true. Thai jasmine rice or hom mali rice is the best, most prized rice of Thailand, and it is our most popular exported rice. But it is also the most expensive, which is why when you go to Thailand and you're eating at an inexpensive street-side restaurant, they're likely not using jasmine rice, but one of the many other varieties of long grain white rice that we have.

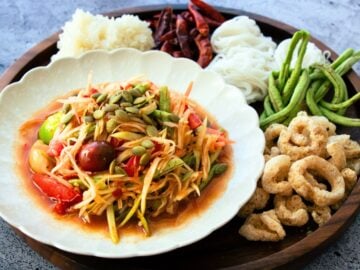
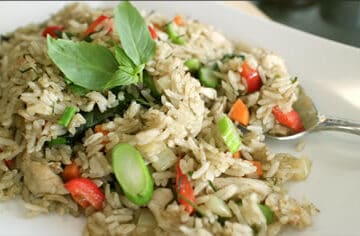
    Aside from being more fragrant, Thai hom mali rice also tends to be softer and stickier than other adjacent varieties, making it not ideal for fried rice So many restaurants who make fried rice will choose another variety, such as sao hai rice, which is less soft and sticky. Or they may also do a mix of varieties.

    a bag of Kirkland Thai Hom Mali rice on the counter

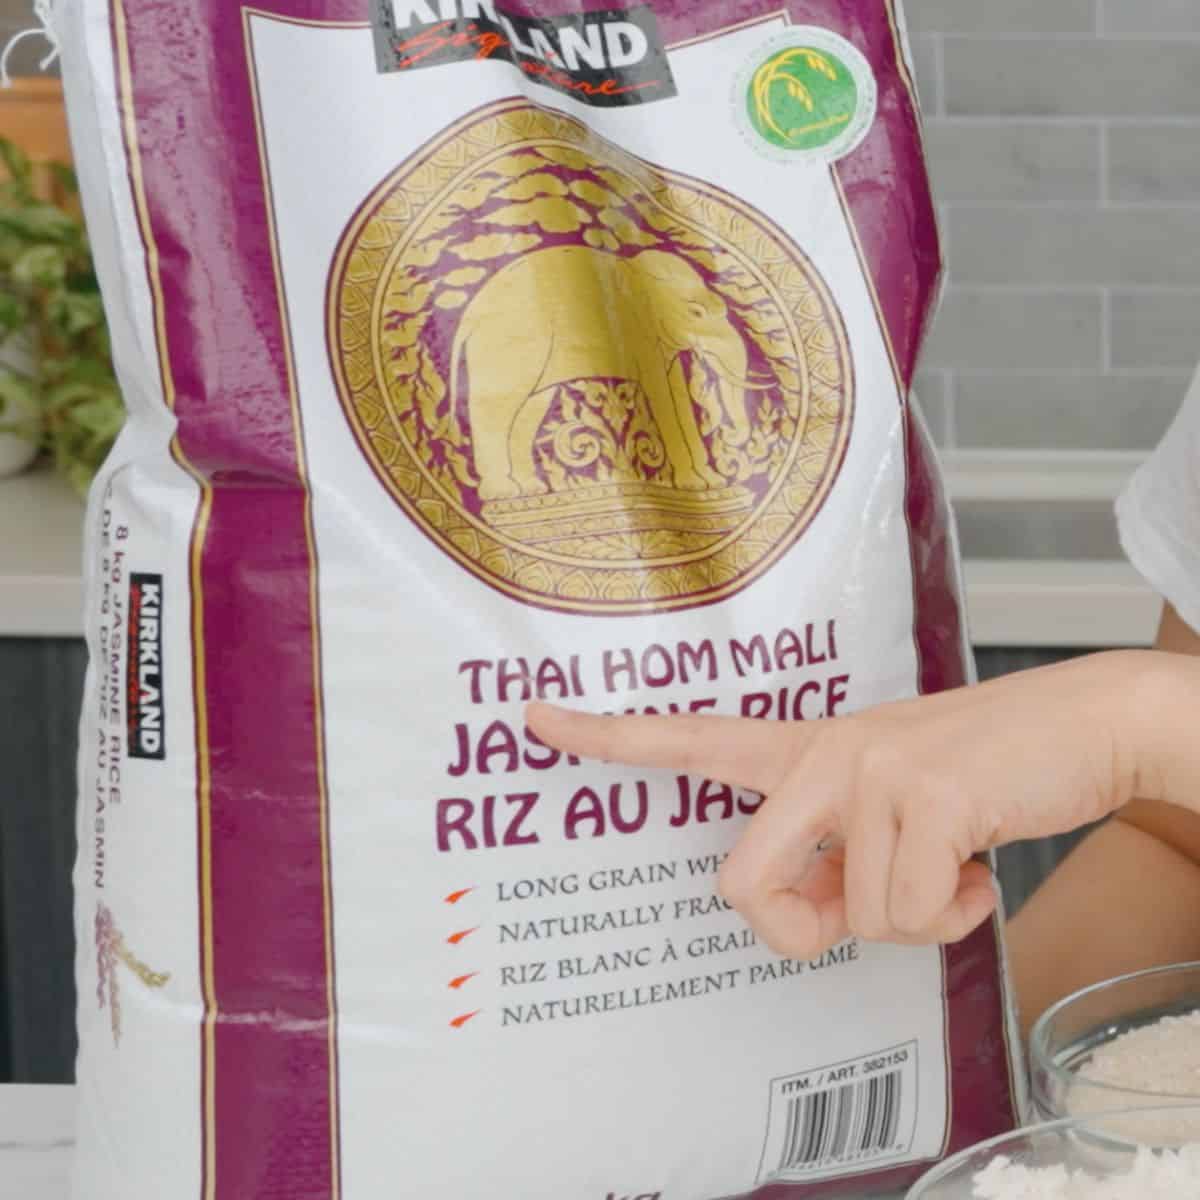
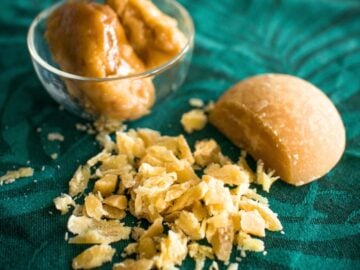
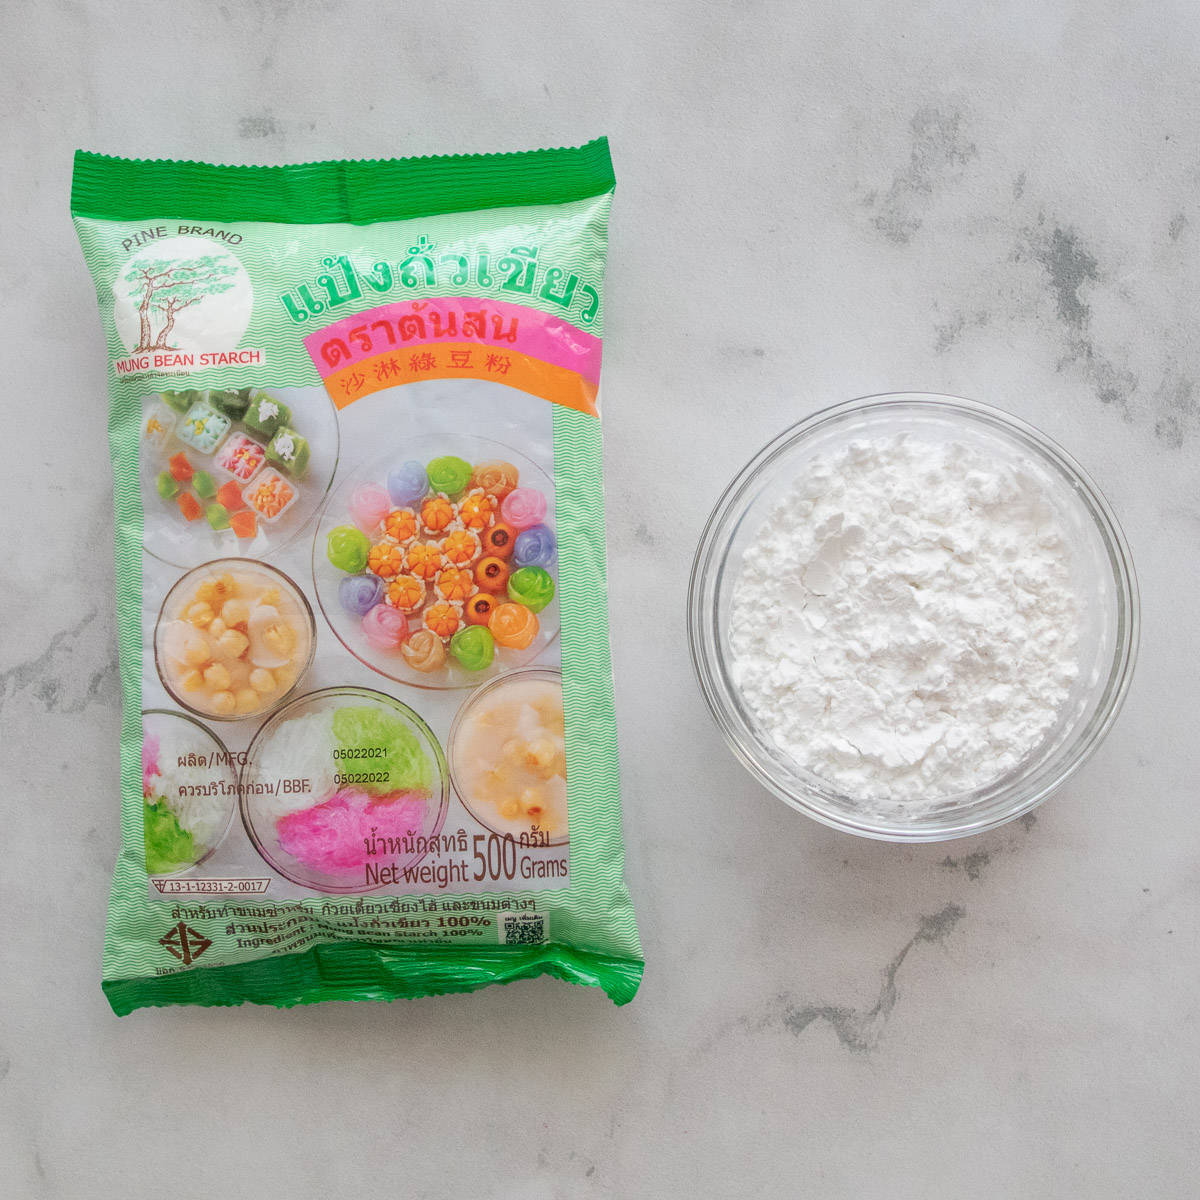
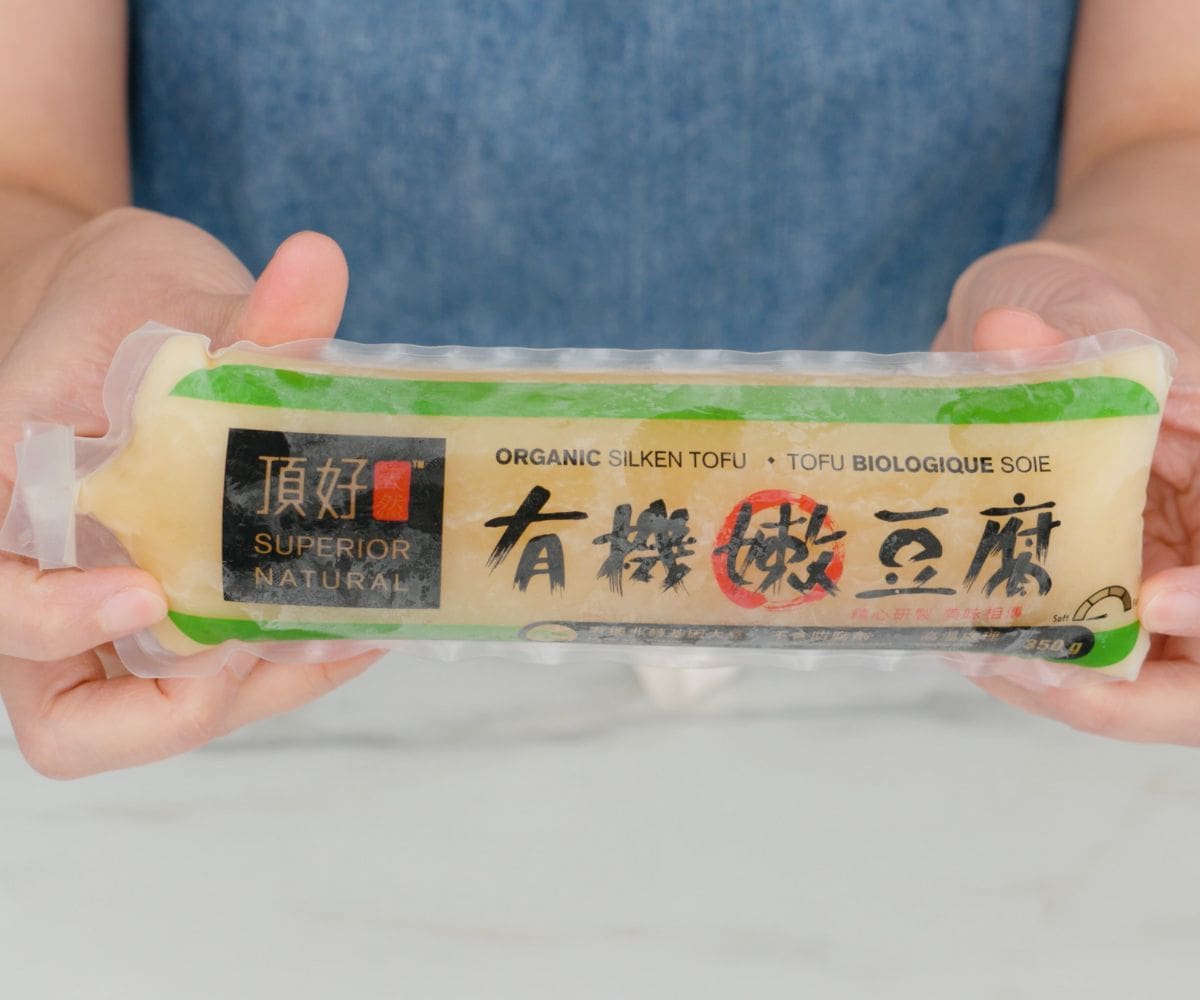
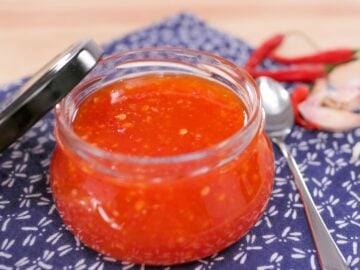
    It is worth noting that the word "jasmine rice" is not regulated. So it may say jasmine rice on the bag, but it may not be the prized jasmine hom mali rice Thailand is known for. So if you want real hom mali rice, look for the green round logo at the top of the bag in the picture above This is the government seal certifying that the rice is genuine hom mali. Now, the logo has also been known to be faked, so go with a reputable brand if you can (Royal Umbrella, Kirkland, or 3 Ladies, for example.)

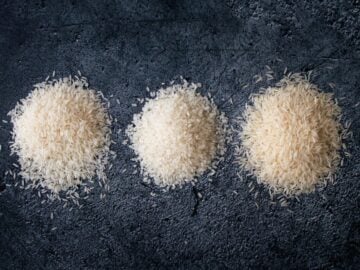
    Appearance, Taste, and Texture Comparison
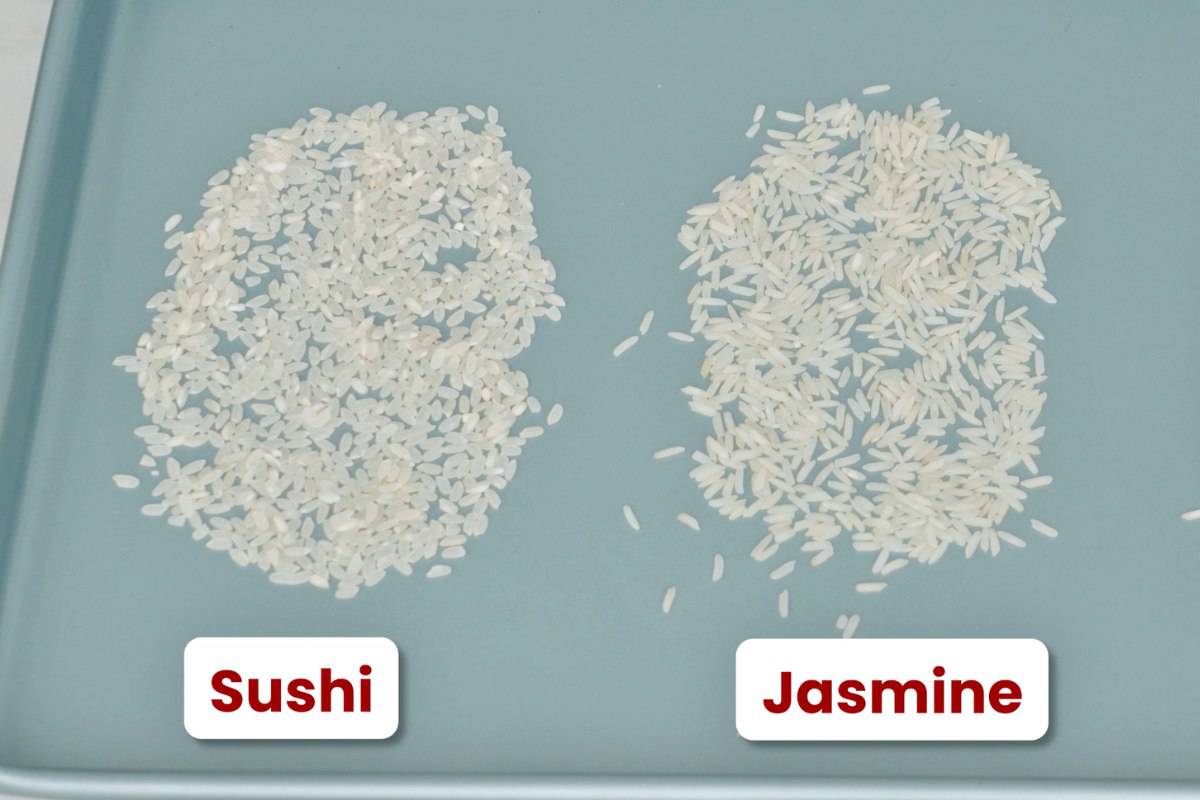
    Sushi Rice

    a bowl of sushi rice being picked up by fingers

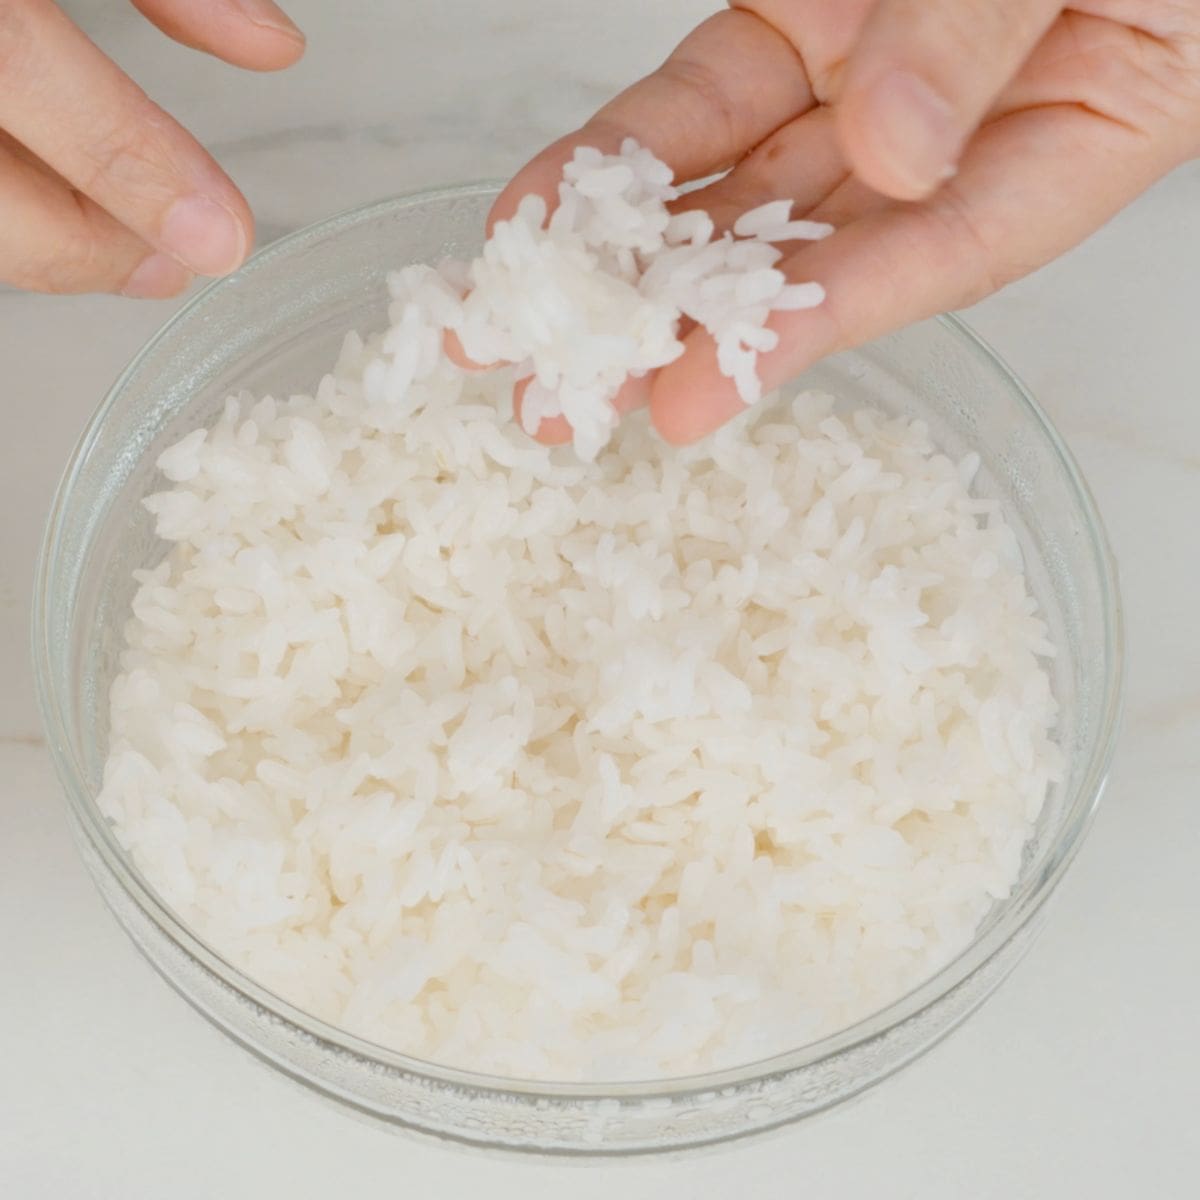
    Sushi rice grains are short and chubby when compared to the other two rices, and the key feature here is that when cooked it is quite sticky. So when I try to pick it up with my hand, it sticks to my hand AND the grains stick to each other very well.

    This is why it’s great for making sushi or kimbap where you want the rice to stick together - and this is why cultures that eat this kind of rice can eat it with chopsticks.

    The texture, when cooked properly, is also a little bit chewy because it’s more dense than long grain rice. It is a very satisfying, toothsome texture.
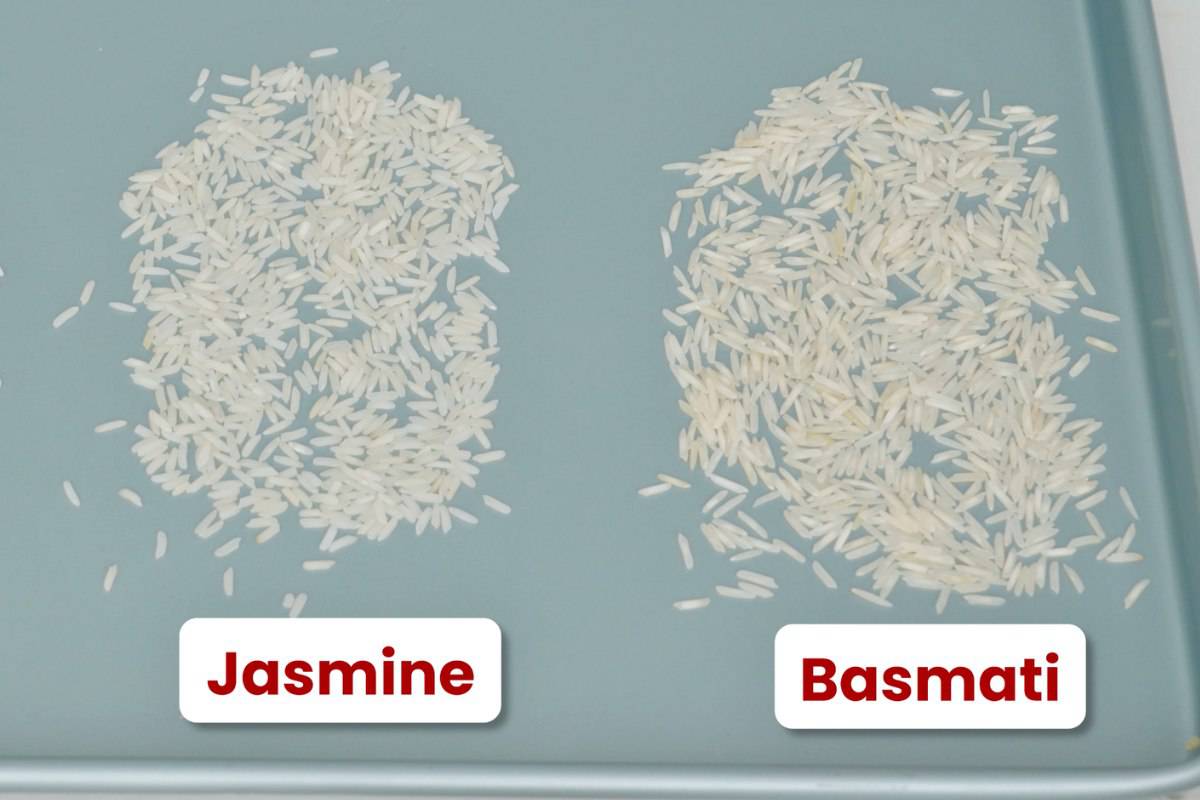
    Basmati Rice

    a bowl of basmati rice being picked up by fingers

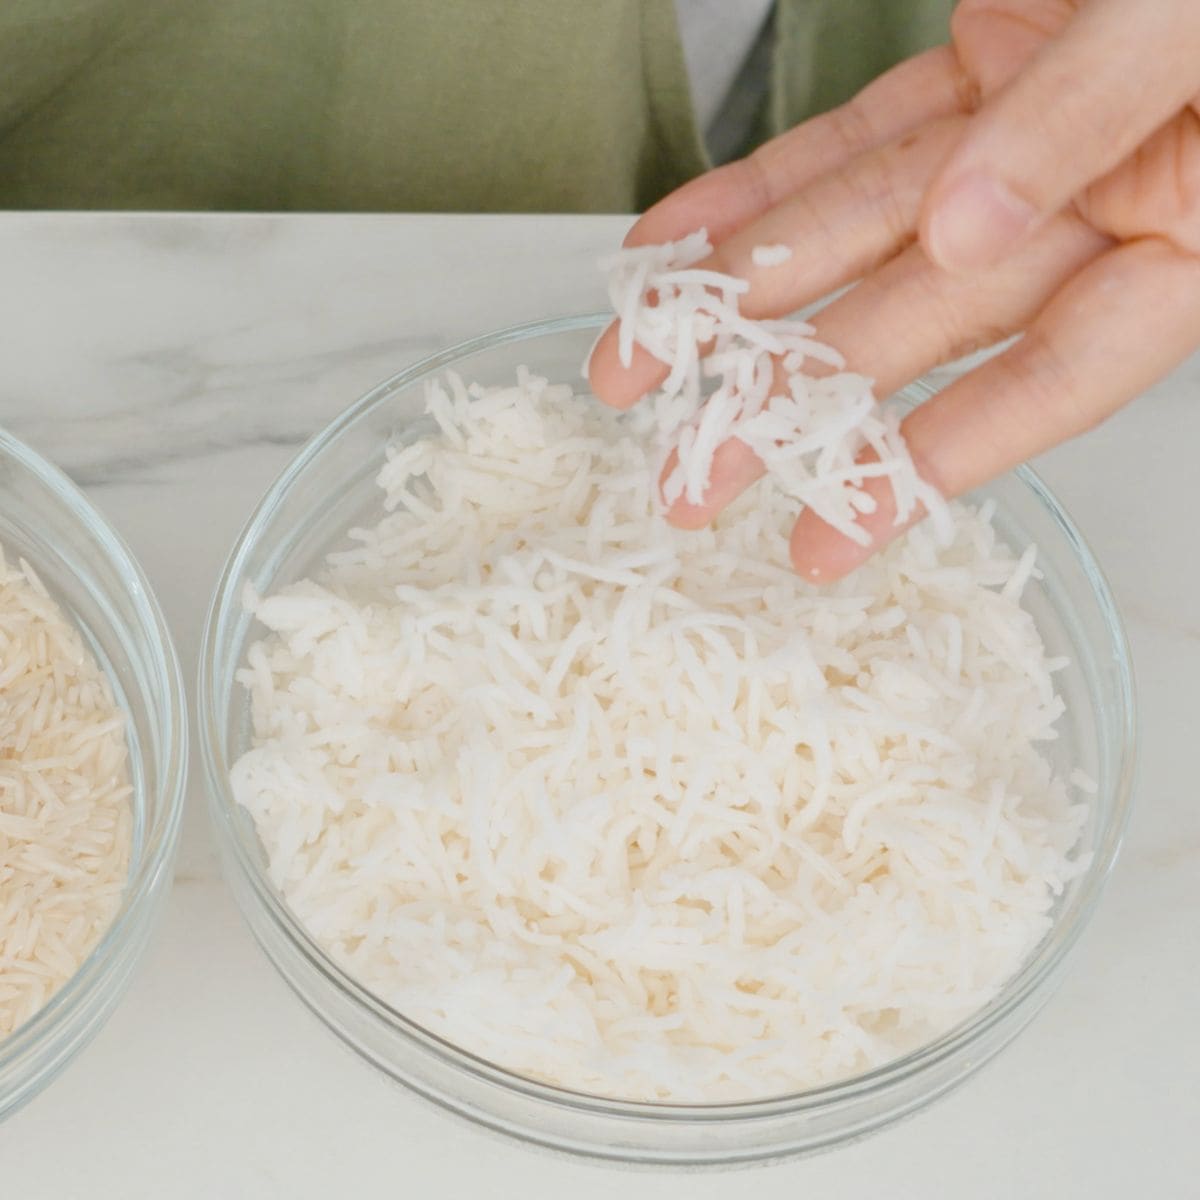
    On the other end of the spectrum, we’ve got basmati rice which are not sticky at all. If I pick it up with my fingers they won’t stick to my fingers AND won’t stick to each other.

    The grains are very long and skinny, and this becomes even more obvious after you cook them because the grains get significantly longer but not much wider.

    The texture is not chewy at all. It is tender, but there’s also a brittleness or a snappiness to it when you bite into the grains. Because they don’t stick together at all, the mouthfeel of basmati rice tends to feel a little bit drier, and this is why it is often cooked with added fat such as butter or oil.
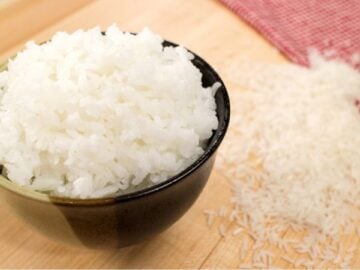
    Jasmine Rice

    a bowl of jasmine rice being picked up by fingers

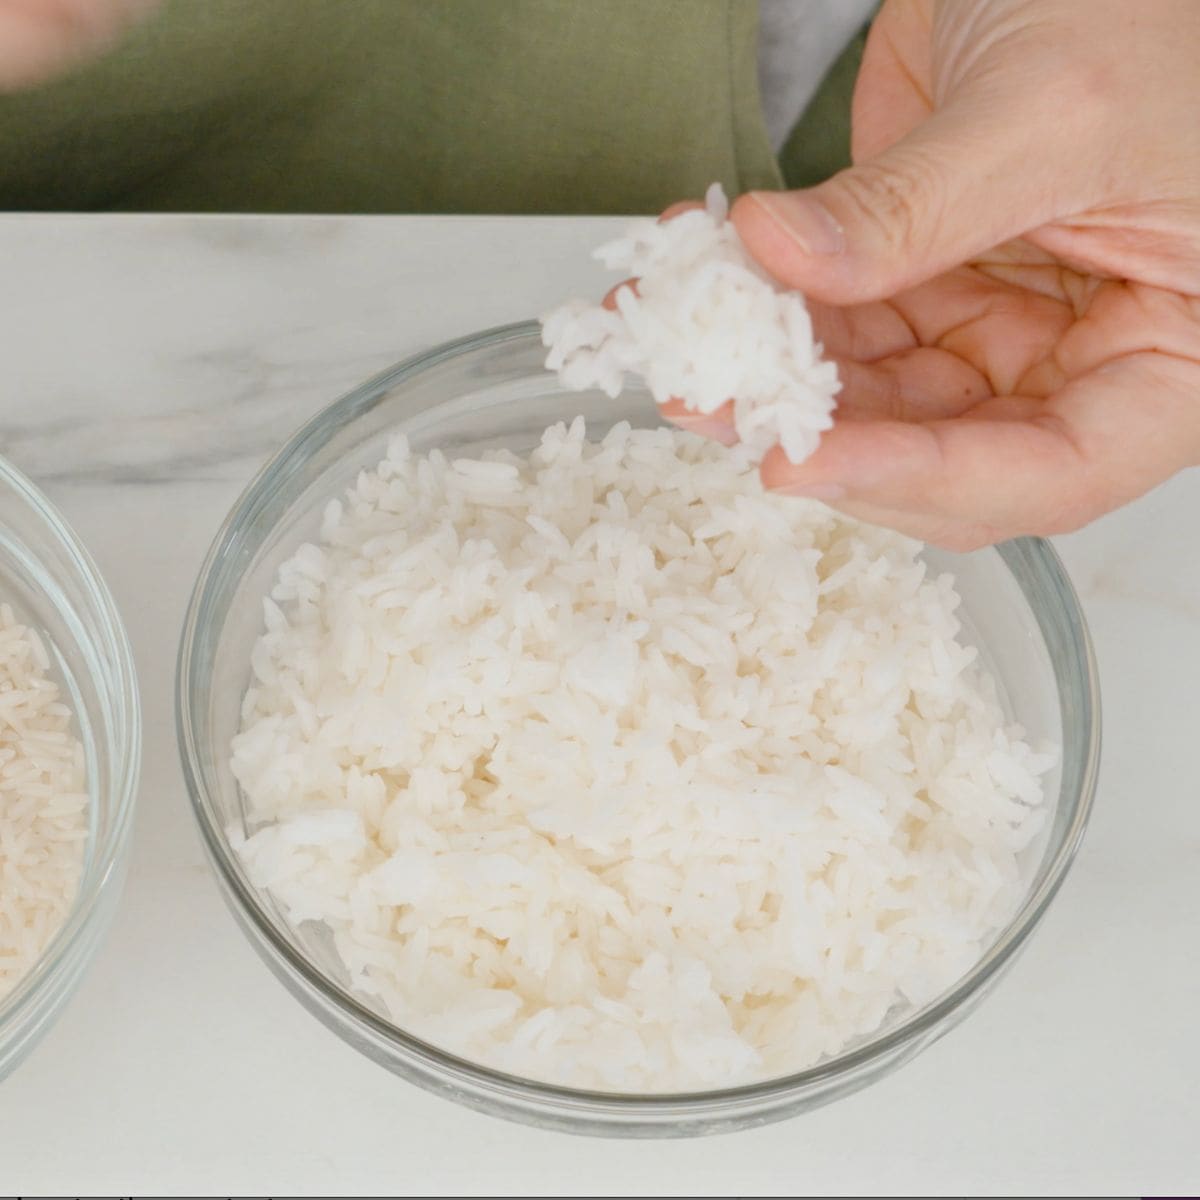
    And in between these two extremes is jasmine rice and its adjacents. The grains are shorter and fatter than basmati, but longer and skinnier than sushi rice. It sticks together better than basmati, but not as much as sushi rice. The texture is not chewy, but compared to basmati it is softer and cushier, with a fluffier texture - though some non-jasmine varieties, such as the generic long grain white rice at Western stores, tend to be less soft. The mouthfeel of jasmine rice also feels quite moist compared to basmati and short grain.

    Important: Sushi rice is NOT sticky rice.

    A lot of people call sushi rice "sticky rice" because, for all intents and purposes, it IS pretty sticky. But it is not true "sticky rice". REAL sticky rice is wayyyyy stickier than this and it is technically called glutinous rice. Glutinous rice comes in both short AND long grain; the short grain is what the Japanese call mochigome or “mochi rice”, and the long grain is what Thai people call khao niew which literally means “chewy rice”.

    If you want to dig deeper into sticky rice see my post on sticky rice 101, but for now just know that they cannot be used or cooked in the same way as their non-glutinous counterparts.

    Aroma Comparison

    There is also big a difference in the way these types of rice smell. Most known for its fragrance is Thai jasmine rice. The reason it is called jasmine rice is because of its beautiful floral aroma similar to jasmine flower. In Thai jasmine rice is called "hom mali" rice which means "fragrant of jasmine flowers." You can smell this scent even before you cook the rice!

    Basmati rice is also fragrant, though the aroma is different from jasmine rice. I’d describe it as having a grassier aroma, whereas jasmine is more floral.

    Sushi rice is not as fragrant as the other two. It does have that smell you associate with rice in general, but it isn't distinctly aromatic. That was one thing I immediately noticed the first time I cooked sushi rice after a lifetime of cooking jasmine!

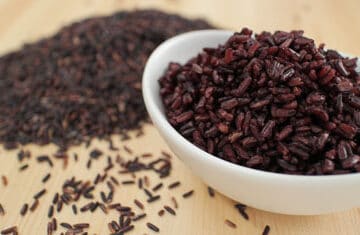
    What About Brown Rice?

    a plate of brown rice with rice on a spoon

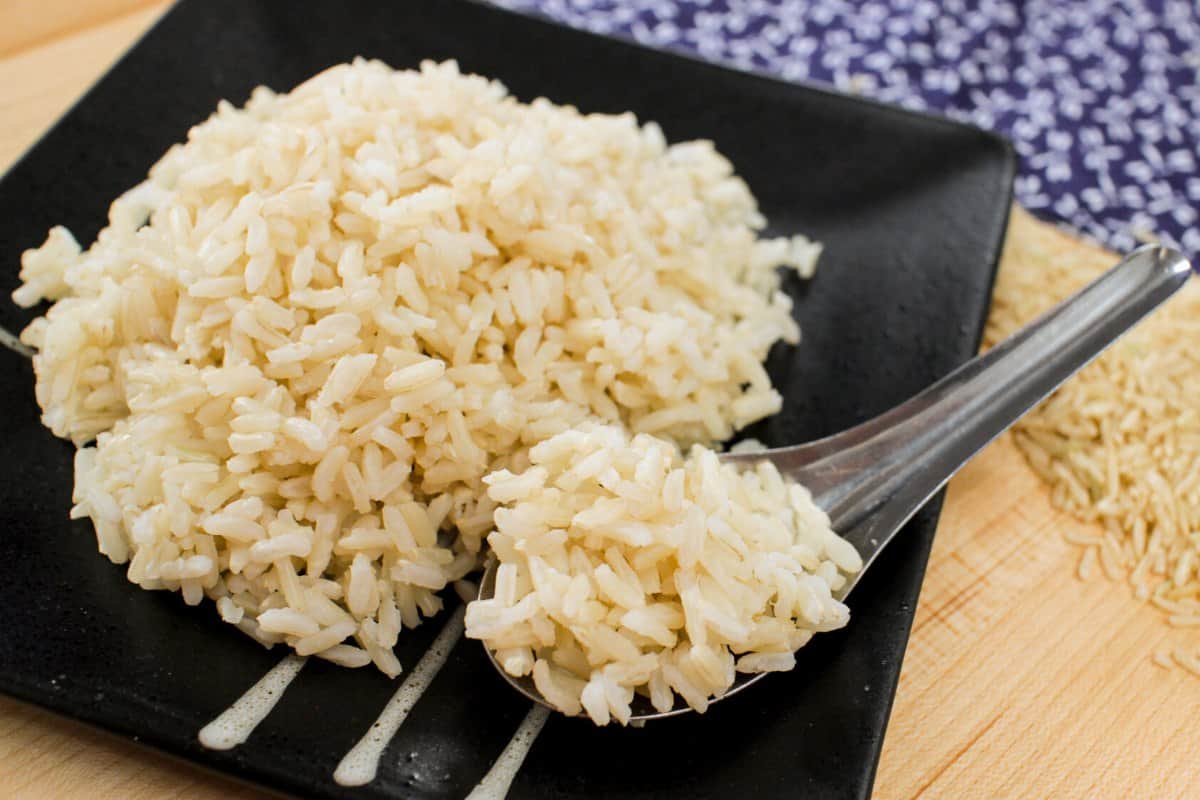
    So where does brown rice fit into all this? Brown rice is not another type of rice, it's just processed differently. All white rice has a brown version because white rice is simply brown rice with the bran removed.

    So brown rice is going to be more fibrous, and chewier than their white counterpart, but the chew is coming from the brown bran on the outside, and not the rice on the inside. You can cook brown rice using the same method as white rice, but you’ll need a little more water and a little more time because it takes more time for the water to penetrate through the bran. 

    Here’s my hot tip: If you don’t like brown rice because you think it tastes like chewy twigs, try brown Thai jasmine rice; meaning real hom mali rice. It is the best tasting, softest brown rice I’ve had, and the jasmine aroma will counteract any twiggy flavour from the bran.

    How to Cook Different Types of Rice

    The good news is that even though they are very different, you can actually cook all 3 types of rice using this standard method of cooking rice most common in Asia. It's the simplest, it's the same method that electric rice cookers use, and I think it yields the best results.

    BUT you will need different amounts of water to match the rice you're cooking, as outlined below. There are other factors that can affect how much water you need, and we’ll talk more about that in a bit, but the type of rice is by far the biggest determinant.

    If you're using a rice cooker, you still need to add the correct amount of water. The rice cooker is not magic, all it's doing is stopping the cooking when all the water has been absorbed, it cannot fix dry or mushy rice. So here is a guideline for how much water you need for each type of rice.

    How Much Water Do You Need To Cook Different Types of Rice?

    If you're using the standard stovetop method, OR if you're using a rice cooker, here's the amount of water you need:

    For sushi rice (Japanese short grain and medium grain, including US grown brands)

    • You need a ratio of 1 part rice to 1 part water, by volume.

    So 1 cup of rice, 1 cup of water. Whatever kind of cup, coffee cup, rice cup, measuring cup, it doesn't matter, it's all about the ratio. This ratio also seems to be quite stable between brands in my experience, but you can adjust according to your preference.

    If you have a Japanese rice cooker like a Zojirushi, and you’re using the rice cup that comes with the cooker to measure your rice, you’ll notice that this ratio of water corresponds to the “white rice” line in the rice cooker, so you can go with that line to simplify. By extension, if you're cooking jasmine or basmati rice in a Japanese rice cooker, you cannot use those water lines. 

    For jasmine rice and its adjacents.

    • You need a ratio of 1 part rice to 1¼ to 1½ parts water, depending on the variety, brand, and your preference.

    If your rice cooker comes from a country that eats primarily jasmine and long grain white rice, including Thailand, Hong Kong, even US and Canada, AND if you’re using the measuring cup that came with the rice cooker to measure, you’ll notice that the water lines in these rice cooker corresponds to a ratio of 1 part rice to 1 ½ parts water.

    For basmati rice

    • You need a ratio of 1 part rice to 1 ¾ - 2 parts water, again depending on the variety, brand and your preference.

    Useful Fact: What's the Volume of the "Rice Cup?"

    rice cup sitting next to a glass measuring cup with ¾ cup of water in it

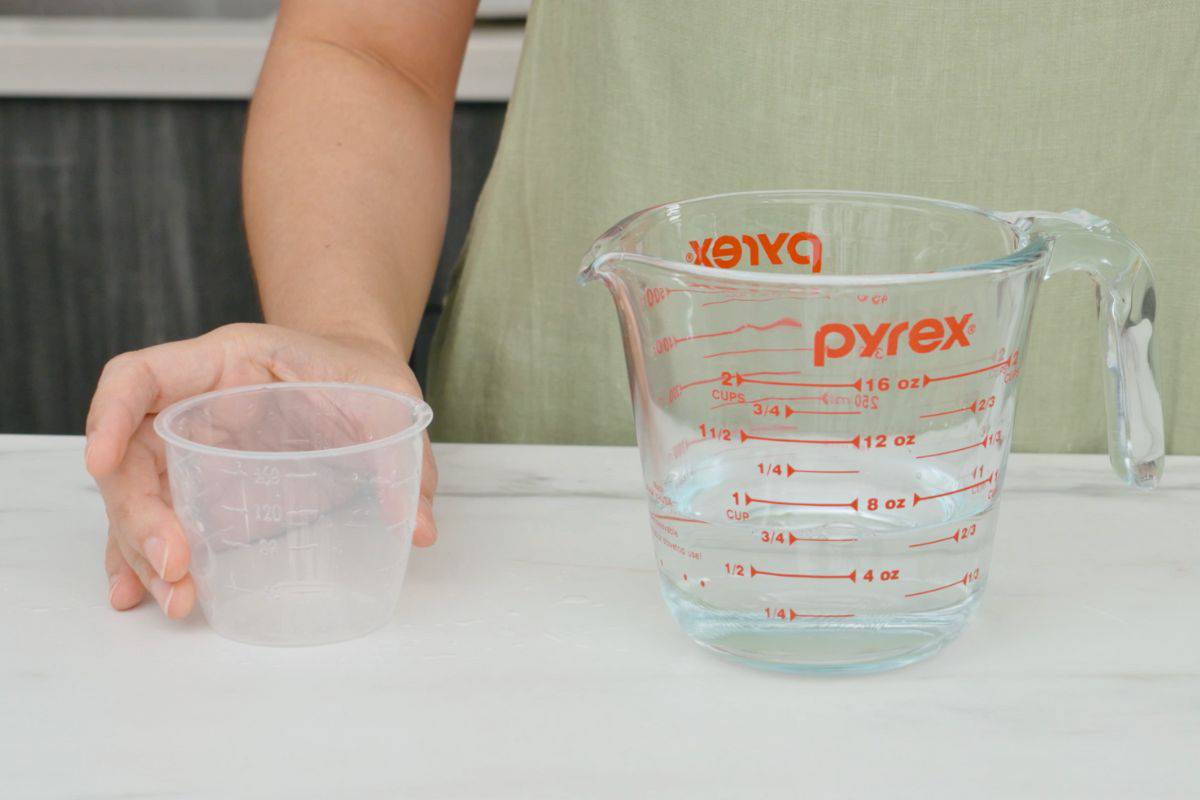
    The measuring cups that come with every rice cooker are equivalent to 180 ml or ¾ cup. Useful to remember if you ever lose the cup! I'm pretty confident that this is consistent across all brands of rice cookers, because I've used many rice cookers in my life, and I have never seen one with a different size cup. (*The Zojirushi provides an additional green cup that's 10 ml smaller, made specifically for Japanese no-rinse rice.)

    The benefit of using this rice cup to measure your rice is that you can use the water lines in the rice cooker to measure the water, but ONLY IF you're using the type of rice that matches the nationality of the rice cooker. Which means...

    The water lines in a Japanese rice cookers are made for Japanese rice, so it corresponds to a 1:1 rice to water ratio. And the water lines in most N. American rice cookers are made for long grain white rice (jasmine and adjacents) and it corresponds to a 1:1 ½ rice to water ratio. Do Indian rice cookers have basmati-specific water lines? Probably? Though I've never seen an Indian rice cooker before so I can't say for sure!

    Other factors affecting the amount of water needed to cook rice

    The ratio of water I provided is just a guideline, as there are other factors that can affect the amount of water needed, beyond the type of rice.  

    1. The brand of rice. Even though you’re cooking the same type of rice, the specific plant varieties can be different between brands. AND the processing can most certainly be different. Rice has to be dried before it’s milled and packaged, and how LONG the rice was dried will affect how much water is required to rehydrate it in the cooking process.
      So if you’re working with a new brand of rice, be aware that it may require a different amount of water than you're used to.
    2. Evaporation during cooking. How much water you add is one thing, but how much is lost during cooking is another. This depends on how high your heat is, how wide or narrow your pot is, how tight fitting your lid is, etc. Some people leave the pot uncovered in the beginning in order to see if the rice is boiling, so they’ll lose more water that way. All these things are slightly different for everyone.
    3. Your preference. Some people like rice that is firmer and dryer, others prefer it softer. I always find the rice at my parents' house too soft, but that’s how they like it, and that's okay! Also, if you're going to use the rice for fried rice, you may want to add slightly less water.

    Does the 1-Knuckle Rule Work?

    Some of you might have been taught to cook rice by adding enough water so that it is “1 knuckle” above the rice, specifically the first knuckle of your index finger. Does this method work? 

    Well, it CAN work, but not always.

    If you use the 1-knuckle rule, the rice to water ratio will be roughly equivalent to 1 : 1 ½ IF you're cooking at least 2 rice-cups of rice (1.5 measuring cups). So this is why it generally works for jasmine rice and its long grain white rice adjacents. And if you talk to people who follow the 1-knuckle rule, you’ll find that they are usually cooking this type of rice and cooking enough to feed a family. (I'm looking at you, my East Asian friends.)

    And because jasmine rice is generally quite forgiving, meaning you can add a little more or a little less water and still have decent rice, the 1-knuckle rule seems to work for a lot of people despite different finger lengths.

    But there are a few situations where the 1-knuckle rule does not work:

    1. If you’re using Japanese short/medium grain rice, basmati rice, or another kind of rice that takes a different ratio of water, it won't work.
    2. Your rice pot is not straight sided. If the pot has sloped or curved sides, like the pot of my Zojirushi rice cooker, it won't work.
    3. If your rice happens to be new crop, the 1-knuckle rule might produce slightly too-wet rice.
    4. If you're cooking a tiny bit of rice, i.e. 1 rice-cup (¾ measuring cup) or less, it will not work. These days I often cook only half a rice-cup at a time because it's the perfect amount for my son's lunch box, and using 1-knuckle would mean way too much water.
    5. This is obvious but it must be said: if you have unusually long or short knuckle!

    Which Type of Rice Should You Use For Which Dish?

    This is a important aspect of cooking with rice. You could cook the perfect rice, but if it's the wrong rice for the job, it won't be a perfect meal. We now know that there are huge differences between types of rice, so it should go without saying that they are NOT interchangeable.

    Here’s my rule of thumb: You should always serve the rice that matches the cuisine. If you’re making japanese food, use Japanese rice. If you’re cooking Thai food, use jasmine rice. Indian food, basmati rice, etc.

    Each country’s cuisine has been designed to pair with the rice that is local to their country. The food was not developed independent of the rice.

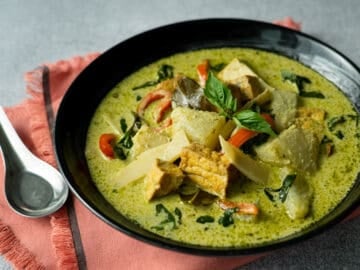
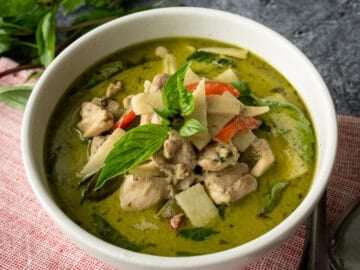
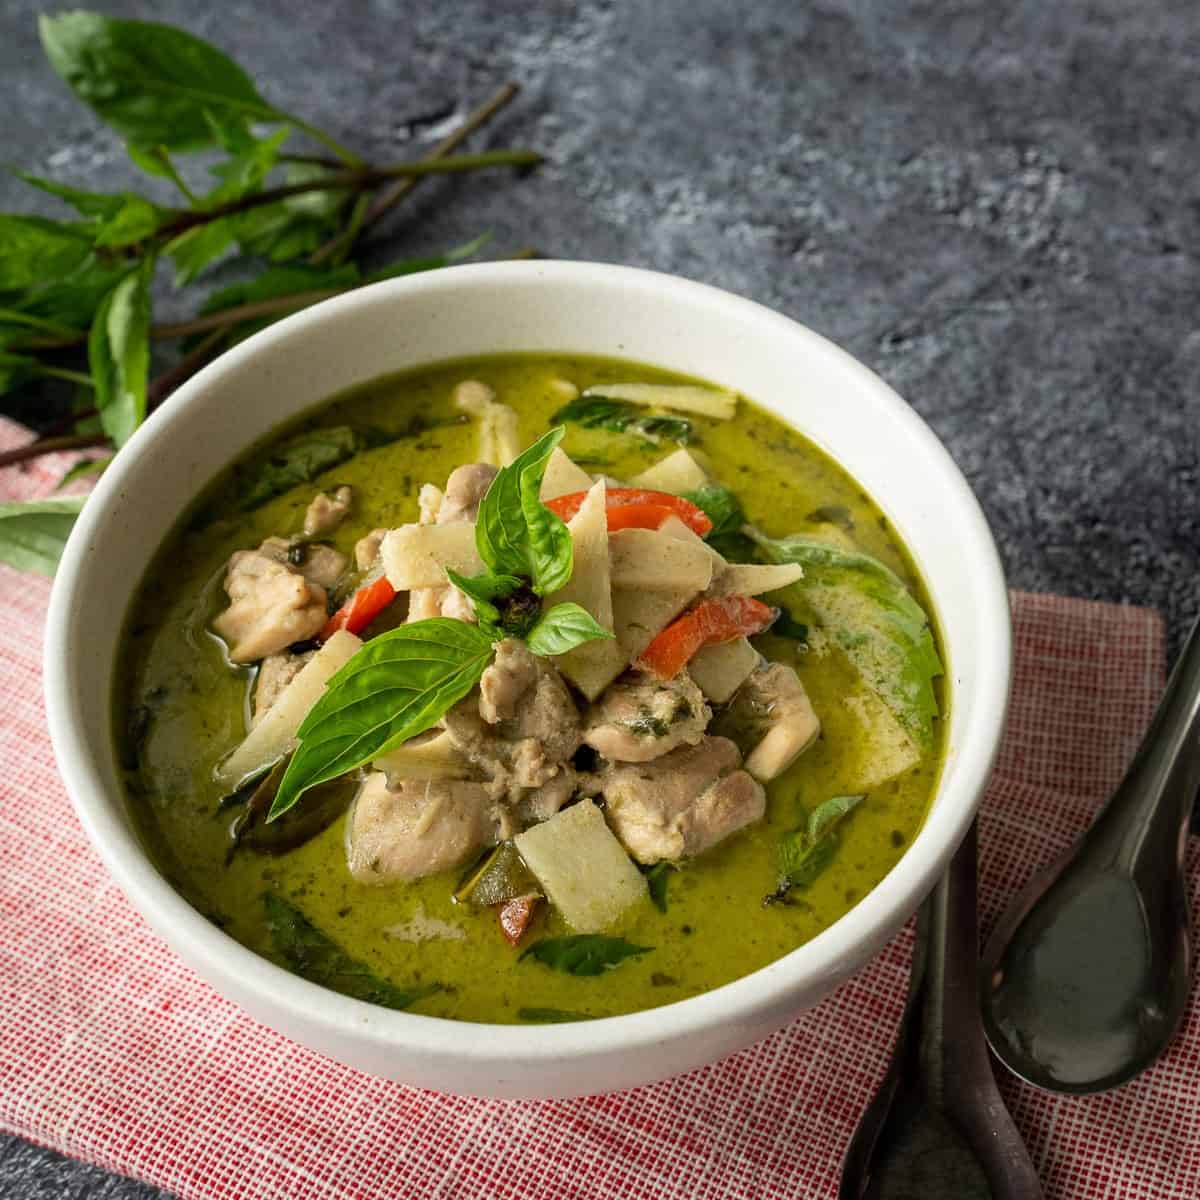
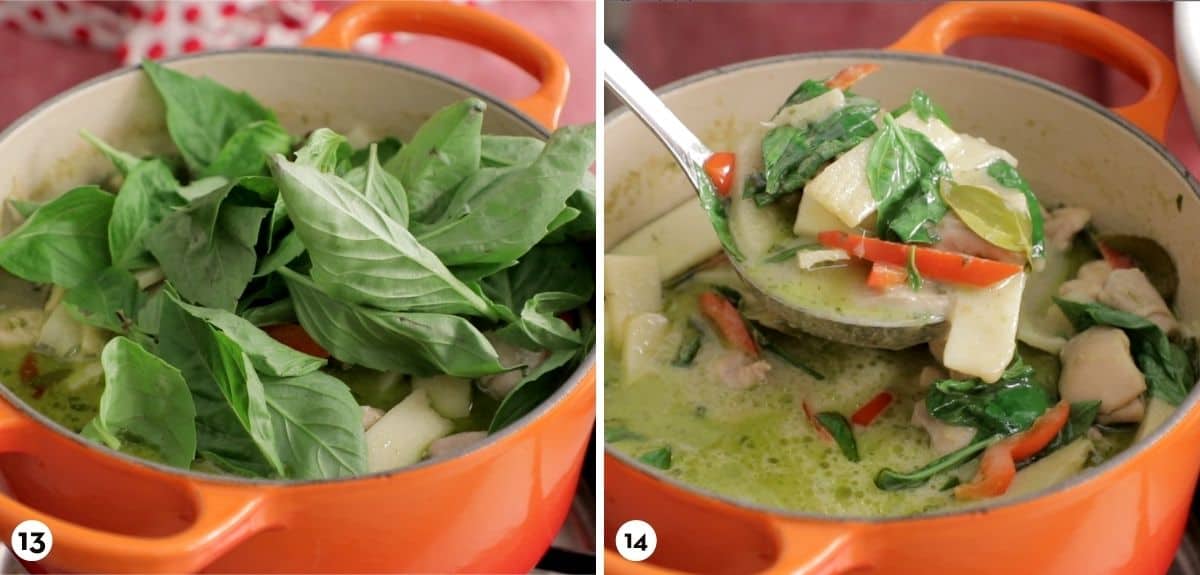
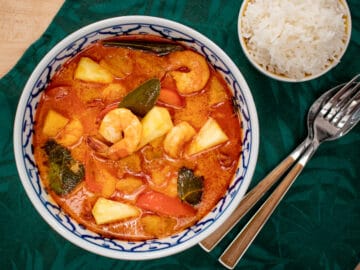
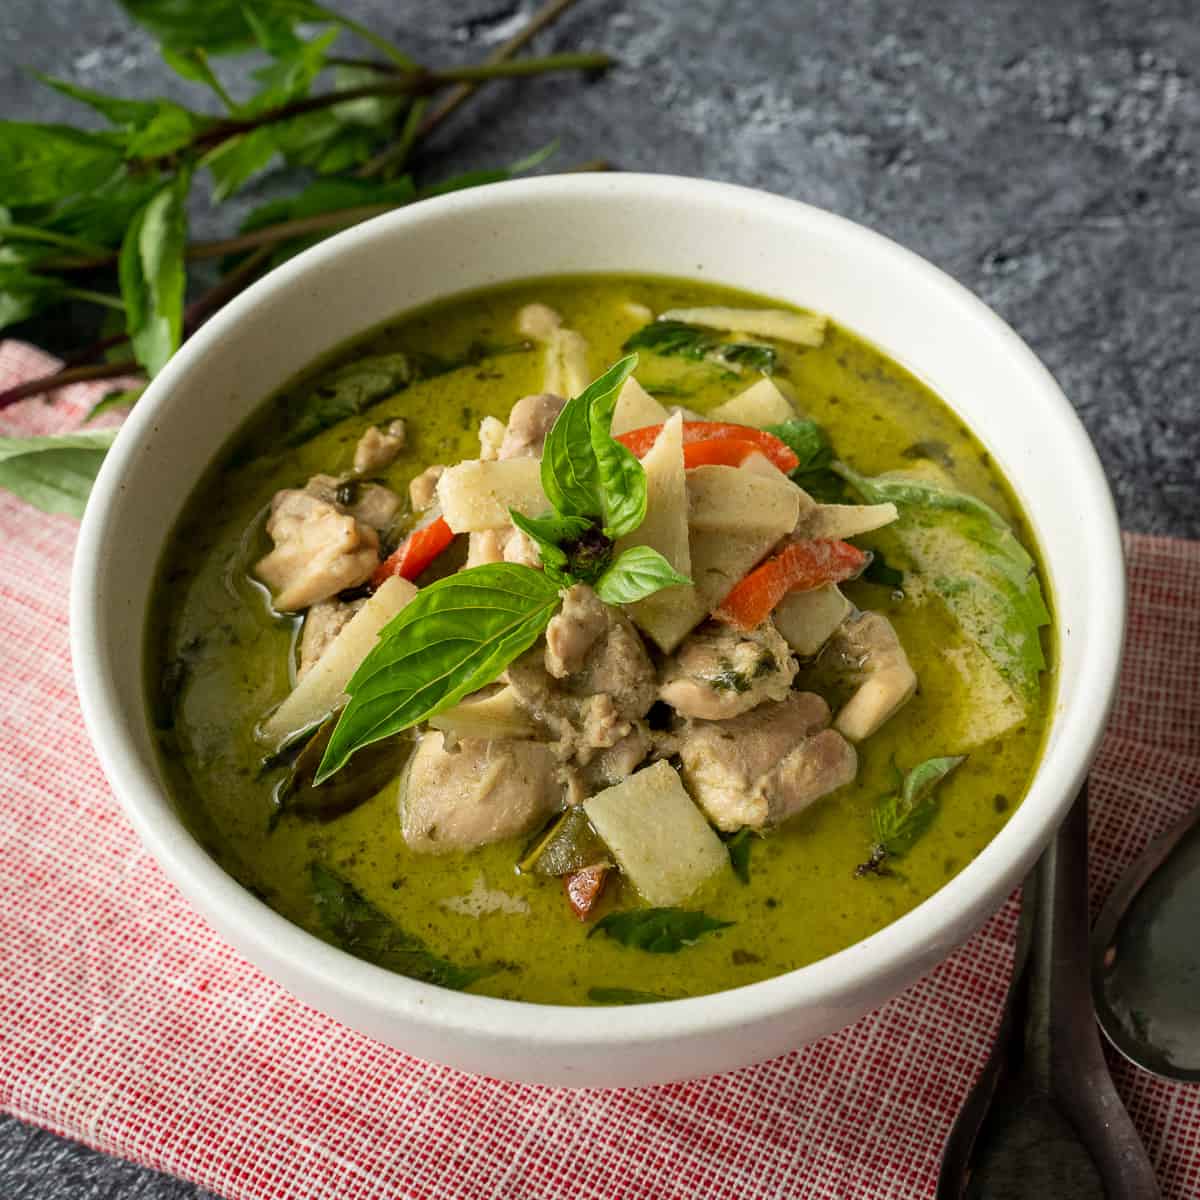
    So if you mix and match, sometimes it might be okay, but other times it’s not. The extreme example is if you try to make sushi using basmati rice. Basmati rice will not hold together. But a more subtle example is if you try to eat a Thai green curry with basmati rice. Thai green curry, and most other Thai curries, are very thin and soupy, and if you poured it over basmati rice which doesn’t stick together at all, the rice will just turn into a soupy mess. But Thai rice with stick together enough.

    Come Down the Rice Rabbit Hole!

    If you're interested in learning about Thai rice, there is SO much more you can learn. So here are just a few more posts about rice, and if you're ready to get cooking, here are all of my rice-based recipes!

    • sticky rice on bamboo tray
      Thai Sticky Rice 101 - Everything You Need to Know
    • What is Riceberry and How to Cook it + a Recipe!
    • A bowl of jasmine rice
      How to Cook Perfect Rice without a Rice Cooker
    • $200 vs $30 Rice Cooker Review & Taste Test

    Authentic Thai Drunken Noodles Recipe - Pad Kee Mao

    July 16, 2021 by Pailin Chongchitnant 42 Comments

    A plate of drunken noodles with shrimp on red placemat

    Pad kee mao ผัดขี้เมา or drunken noodles is stir fried rice noodles with holy basil and lots of chilies. It's a cult-favourite Thai street food. The combination of chewy fresh rice noodles, the epic savoury sauce, and the fragrance of holy basil ... there is nothing quite like it and it never gets old.

    In this recipe I share 7 secrets to making the perfect, authentic pad kee mao, guaranteed to make this better than take out; and once the prep is done it takes literally 3 minutes to make each portion. You can see the video in the recipe card where I show the cooking in real time!

    Ingredients and Notes

    Here are all the ingredients for drunken noodles and important notes about them. Ingredient amounts will be in the recipe card below. You can change up the vegetables and I love using carrot and Chinese broccoli, though traditionally baby corn, long beans, and straw mushrooms are often added.

    • Soy sauce. I use Healthy Boy Brand soy sauce which is a classic Thai brand, but any other kind of regular or light soy sauce can be used.
    • Golden Mountain Sauce. This is another kind of soy sauce with a slightly more intense flavour, you can substitute Maggi Seasoning which is very similar, or use more soy sauce.
    • Oyster sauce. See this post for how to choose good oyster sauce.
    • Fish sauce. See this post for how to choose good fish sauce.
    • Sugar
    • Chinese broccoli, also known as gai lan. Choose young, small stems if you can as they are less bitter.
    • Carrot
    • Young peppercorns. These are totally optional. They can be found fresh or brined in glass jars at some Southeast Asian stores. They are added whole and still on the stems, and when eating you can pick out the peppers and eat them for extra heat.
    • Fingerroot (grachai). Also optional but they do add a lovely herbaceous aroma. They can be found fresh or brined in a glass jar at Southeast Asian stores.
    • Holy basil. Holy basil can be hard to find, you can sub regular Italian basil or Thai basil instead, but I do find Italian basil to have a flavour more similar to holy basil.
    • Garlic
    • Thai chilies. Add as many as you want depending on your spice tolerance. If your tolerance isn't high, add just one to start.
    • Large, mild red chilies such as spur chilies (pic below), anaheim peppers or red bell pepper.
    • Protein of your choice, I'm using shrimp. If using chicken, pork, or beef, a quick and simple marinade will be helpful. Instructions in the recipe card below.
    • Fresh rice noodles also known as ho fun noodles. If you buy them from the store they may be cold and stuck together in a block. You'll need to reheat them before separating, following instructions in the recipe card. It is possible to use dried large rice noodles instead but it is not as good, and you will need to cook them first before using.

    Why I use 2 types of chilies in this recipe

    Pad kee mao uses a lot of chilies, so the chili flavour, not just the heat, is part of the flavour profile. If we only used the fiery Thai chilies, we can only add a few before it becomes too spicy, and not enough chili flavour would come through. So we also use the milder chilies to add more chili flavour without the heat.

    In Thailand, prik chee fa, or spur chilies are used, but any mild red pepper such as anaheim peppers or even red bell pepper would work in a pinch.

    How to Make Authentic Drunken Noodles

    Be sure to check out the detailed recipe and full video tutorial in the recipe card below to ensure success - but here's a bird's eye view of what you'll need to do.

    1. Make a rough paste with chilies and garlic.
    2. Cook off the protein and remove from the pan.
    3. Sauté the chili garlic paste.
    4. Add gai lan stems, carrots, grachai and young peppercorns.
    1. Add the noodles, the sauce, and sugar and toss until the sauce has been absorbed.
    2. Let noodles sit and char slightly before tossing. Then repeat the charring a few times.
    3. Add gai lan leaves and holy basil.
    4. All done!

    7 Secrets to Epic Pad Kee Mao

    It is not hard to make a decent plate of drunken noodles, but an epic one? Not so simple. There are a few things you need to know:

    1. Do not eyeball the ingredients. Weigh the noodles, and measure all sauce ingredients. There are times when winging it is okay, and using your cook's intuition is romantic. But this is not one of those times. The noodle-to-sauce ratio is extremely important, and there's nothing more disappointing than pad kee mao that's bland, or worse, too salty (which cannot be fixed afterward).
    2. Make a chili and garlic paste. One of the great flavours of drunken noodles come from the garlic and chilies. Adding chopped garlic and chilies can only get you so far, but pounding them into a paste in a mortar allows for more flavour to come out and infuse into the whole dish. Also, adding extra peppers that are not spicy gives more chili flavour without it becoming too spicy.
    3. Cook 1 portion at a time. This is the secret to well-charred noodles that are not broken or soggy. Crowding the pan traps too much moisture and causes you to stir more which breaks the noodles. If you have a large wok and a high BTU burner, you can probably get away with 2 portions at a time. It seems tedious but watch the video below and you will see that once the prep is done, each batch literally takes 3 minutes to cook!
    4. Cook the protein separately, and do a "mini brine". By cooking off the protein first and adding it back in at the end you can control exactly how long it cooks, ensuring perfectly cooked protein every time. Good news is you do not have to cook the protein 1 portion at a time, just cook it all off together in the beginning. Also, if using chicken, pork, or beef, marinate it with seasoning plus a little extra water, like a mini brine, to get extra juicy meat.
    5. Allow noodles to char. Once noodles are mixed with the sauce, allow them to sit and "grill" a bit on the hot pan. This creates a little browning, a little smokiness, and a little extra flavour that makes all the difference.
    6. Use fresh noodles. Yes, dry rice noodles exist; and they will work, but it is not the same and not nearly as good as fresh. Cooked previously-dried rice noodles do not yield the same soft and springy texture of fresh noodles, in the same way that cooked dried pasta is not the same as fresh pasta. I understand you gotta use what you have, but if you can, it's worth either looking around for them or making them yourself.
    7. Use a stick-resistant pan. These fresh rice noodles are notoriously sticky. So it's important you use either a well-seasoned carbon steel wok, a well-seasoned cast iron skillet, or a nonstick wok. BUT if using a nonstick material that cannot be used with high heat, you will have to give up some noodle charring.
      *If you only have a stainless steel pan, you can try this: Heat the pan until very hot - until water sprinkled onto the pan beads up into little balls and glides around - then add the oil and begin cooking. This is a trick that turns stainless steel pan nonstick which I've tried with eggs with success, but have not tried with fresh rice noodles.

    ALSO IMPORTANT: Make sure you watch the video in the recipe card below! You'll see me cooking pad kee mao in REAL TIME with no cuts. It'll show you how it's done in only 3 minutes, give you an idea of how the process goes and how to organize your prep, and I promise it'll be so helpful for when you cook!

    Frequently Asked Questions

    I can't find fresh rice noodles, what can I use instead?

    You can make them using my recipe here! You can also use dried wide rice noodles, but the results are not nearly as good and you will need to fully cook them before adding to the pan. You can read my post here all about mastering rice noodles to learn more about different types of noodles and how to cook them properly.

    I don't eat shrimp, can I substitute other protein?

    Yes! Anything works, or even omit the protein altogether. If using chicken, pork, or beef though, I would marinate them following the instructions in the recipe card. That simple marinade yields wonderfully tender meat with the extra bit of water that gets absorbed into the meat.

    How can I make these vegetarian or vegan?

    You can use vegetarian stir-fry sauce instead of oyster sauce, and use soy sauce instead of fish sauce. You can also do a simplified version and use 2 parts soy sauce to 1 part Golden Mountain Seasoning Sauce.

    How do I store and reheat leftovers?

    These noodles do not keep well, so if at all possible, cook only as much as you can eat. Once refrigerated and reheated, the noodles will not have as good of a texture and can be a bit mushy. Having said that, if you do end up with leftovers, do not keep it for any longer than 1 day. The next day, reheated pad kee mao is still edible, but after a couple of days...I wouldn't eat it.

    To reheat, you can microwave it, but stir it halfway through and make sure the noodles are thoroughly heated through or they will not be soft, which is really awful. You can also re-fry it quickly in a nonstick pan, again, making sure the noodles are steaming hot.

    A plate of drunken noodles with shrimp on red placemat

    Pad Kee Mao - Drunken Noodles

    By: Pailin Chongchitnant
    Popular Thai street food made with stir fried fresh rice noodles and holy basil. Be sure the watch the video of me cooking this dish in REAL TIME to see how fast it goes!
    4.87 from 22 votes
    Print Recipe Pin Recipe Share
    Prep Time 30 minutes mins
    Cook Time 10 minutes mins
    Course Main Course
    Cuisine Thai
    Servings 2 servings
    Calories 439 kcal

    Ingredients


    • 1 lb fresh wide rice noodles, (see note 1)
    • 4-5 cloves garlic
    • 1-3 Thai chilies, or to taste
    • 1 spur chili, or ⅛ red bell pepper, chopped
    • 8 oz protein of your choice, (see note 2)
    • 2 oz carrots , cut in thin sticks
    • 2.8 oz Chinese broccoli, (see note 3)
    • 2 tablespoon julienned grachai , (optional)
    • 2 stems young peppercorns, cut in small chunks (optional)
    • 2 ½ teaspoon sugar
    • A dash black or dark soy sauce, (optional, see note 4)
    • 2 cups holy basil leaves , (see note 5)

    Pad Kee Mao Sauce - For 2 Servings (see note 6)

    • 2 tablespoon oyster sauce
    • 1 tablespoon soy sauce
    • ½ tablespoon Golden Mountain Sauce, or substitute more soy sauce
    • ½ tablespoon fish sauce

    Want to save this recipe?

    We can email this post to you, so you can come back to it later!

    Check Out Ingredients and Kitchen Tools I Use

    Notes

    1. Fresh wide rice noodles can be purchased from some Asian grocery stores in the refrigerated section. Dry wide rice noodles can be used, though the results are not as good. You will need 6oz of dry noodles; and they need to be soaked, boiled and rinsed in cold water before using.
    2. If using chicken, pork or beef, thinly slice and marinate in 2 teaspoon soy sauce, ¼ teaspoon sugar and 1 tablespoon water for at least 15 minutes.
    3. Slice the stems thinly on a bias and roughly chop the leaves. Keep the leaves and stems separated.
    4. Thai black soy sauce or Chinese dark soy sauce can be added to darken the colour if you prefer, though I don't think it needs it and have decided to simplify for this new version. If using Chinese dark soy sauce, reduce the amount of sauce slightly as it's quite salty, but Thai black soy sauce is not very salty. 
    5. Regular Italian basil is a fine substitute for holy basil.
    6. In the video I made enough sauce for 4 servings so amounts in the video are different from in the written recipe.

    FULL VIDEO TUTORIAL

    All my recipes come with step-by-step video tutorials with extra tips not mentioned in the blog post, so make sure you watch the video to ensure success. If you enjoy them, consider subscribing to the YouTube Channel to not miss an episode. Thank you!

    Subscribe to my YouTube Channel

    Instructions
     

    • *I highly recommend cooking 1 portion at a time for best results, so divide up your prep before you start cooking.
    • Mix the sauce ingredients together in a small bowl and stir to combine.
    • Separate the rice noodles from each other (see video for technique). If they are cold, hard and stuck together, you need to heat them up until soft or they will break when you try to separate them. Carefully divide the noodles into 3-4 smaller bundles and spread them out onto a large plate. Microwave at 70% power, stopping every minute to move the noodles around for more even heating. Once they are soft, pull the noodles apart and divide them into portions.
    • Add Thai chilies into a mortar and pestle and pound until fine. Add garlic and spur chilies and pound into a rough paste.
    • Before you cook, organize your prep: 1) separate the ingredients into batches; 2) combine all non-leafy vegetables, grachai and young peppercorns together; 3) put the basil and leafy greens together; 4) put a tablespoon measure into the sauce and a teaspoon into your sugar crock.; 5) have a bowl ready to put your cooked protein into.
    • In a well-seasoned or non-stick wok, heat about 2 tablespoon of vegetable oil over high heat. Once very hot, add your protein to the pan and spread it out into a single layer. Sear on one side until browned or halfway cooked, then flip or toss and cook the other side until done. Remove from the pan and set aside.
    • Put the pan back on the stove with the heat still off, add the chili/garlic paste and a little more oil if needed. Turn heat on to medium and stir just until the small pieces of garlic start to turn golden brown.
    • Add your bowl of non-leafy vegetables, turn the heat on high and stir for about 30 seconds.
    • Add the noodles, drizzle the sauce (2 tablespoon per serving) and sprinkle the sugar (1¼ teaspoon per portion; you can eyeball the ¼ tsp) and toss until all the noodles are evenly coated and the sauce has been absorbed. If you want a darker colour, you can add a dash of black or dark soy sauce at this time, a little at a time.
    • Once the noodles are well coated, add the protein back in and toss to mix. Then let the noodles sit in the pan without stirring for 15-20 seconds or until the noodles are charred in some spots. Flip the noodles and repeat 1-2 more times.
    • Add the basil and any leafy greens and turn off the heat. Toss for just a few seconds until they wilt. Plate and repeat with your other batches. Enjoy!
    Watch my videos AD-FREE and get bonus content on Patreon!

    Nutrition

    Calories: 439kcalCarbohydrates: 72gProtein: 30gFat: 2gSaturated Fat: 1gPolyunsaturated Fat: 1gMonounsaturated Fat: 1gCholesterol: 284mgSodium: 2476mgPotassium: 336mgFiber: 4gSugar: 8gVitamin A: 6722IUVitamin C: 49mgCalcium: 273mgIron: 4mg
    Tried this recipe? Share a pic!Tag @hotthaikitchen on Instagram and Twitter!

    Ultimate Guide to Palm Sugar and Coconut Sugar

    October 11, 2019 by Pailin Chongchitnant 33 Comments

    palm sugar on green cloth partially chopped, and some more palm sugar in a glass cup

    Palm sugar is a delicious sweetener made from the nectar of the coconut or toddy palm flowers. It's an integral ingredient in Thai and Southeast Asian cooking, especially desserts. It is what I like to call the "original sugar" in traditional Thai cuisine before white granulated sugar became a thing.

    However, I get a lot of questions about it and importantly not all palm sugars are created equal. So in this article I will answer all of your questions so you have the confidence to buy the right palm sugar, and know how to use it.

    piles of palm sugar blogs in a THai market.
    Coconut palm sugar sold at a market in Thailand (50 baht per kg).

    What's Covered In This Article?

    [feast_advanced_jump_to]

    Watch The Video: Palm Sugar 101

    If you prefer to watch rather than read, most of the information covered in this article is also covered in this video. The one part I encourage you to watch is when I show you the 3 different brands of palm sugar of varying quality, so you can see what to look out for when shopping:

    What exactly is palm sugar and coconut sugar?

    Palm sugar is sugar that's made from the nectar of the flowers of *either* the coconut tree or the toddy palm tree (sometimes called sugar palm tree, pic below). If it's made from the coconut tree, then it's also called coconut sugar. In other words, coconut sugar is a type of palm sugar. So all coconut sugar is palm sugar, but not all palm sugar is coconut sugar, makes sense? 🙂

    toddy palm trees in a field
    Toddy palm trees in Thailand are super tall!

    And in Thai, the generic term for all types of palm sugar is nam taan peep น้ำตาลปี๊ป or nam taan peuk น้ำตาลปึก. Coconut sugar is called nam taan maprao น้ำตาลมะพร้าว and sugar made from toddy palm is called nam taan tanoad น้ำตาลโตนด.

    While the two sugars come from different plants, the flavor, however, are very, very similar. The one time I tasted them side by side I could tell that they were slightly different, but I couldn't identify which was which. So in Thai cooking palm sugar can be used interchangeably with coconut sugar, with some caveats. More on these caveats in the discussion around choosing the right palm sugar below.

    Is Palm Sugar, Jaggery and Gula Melaka The Same Thing?

    Jaggery is a term that's used to refer to any unrefined chunk of sugar. So yes, palm sugar is a type of jaggery, but you can also have jaggery made from cane juice that's been cooked down. In everyday speak however, we don't refer to Thai palm sugar as jaggery.

    Gula melaka is the Malaysian term for palm sugar that is made from coconut nectar. Though the raw material is the same as Thai coconut palm sugar, gula melaka is reduced and caramelized further, as you can see in the pic below, so it is darker and has a different flavour. So the two are generally not interchangeable in recipes, especially if the sugar is added in large enough quantities that the flavour difference will be perceptible. So, you should use Thai palm sugar in Thai recipes, and gula melaka where it is called for specifically.

    disks of gula melaka
    Gula melaka

    And to further clarify, palm sugar is also not the same as piloncillo or panela, which is made from sugar cane.

    How is Palm Sugar Made?

    Palm sugar is quite a labour intensive process. It's done in 4 major steps.

    Step 1: Collecting the nectar.

    bucket attached to palm flower collecting nectar

    The palm sugar farmer first climbs up to the top of the tree to reach the flowers. They then cut the flowers and tie a bucket to it to collect the nectar that drips out. Now, you have to imagine that these are not short trees. Toddy palm trees can be anywhere from 25 to 40 meters tal (see pic above)l!! Coconut trees are not as tall, and this is why toddy palm sugar is less common - because it is much harder and more dangerous to collect their nectar.

    The palm nectar starts out as a watery liquid that is aromatic, sweet and insanely delicious. You can get the nectar actually as a drink In Thailand, and it's one of my absolute favourite things to drink ice cold. I always seek out whenever I'm in Thailand.

    Step 2: Reducing the sugar.

    left: sugar syrup boiling with bamboo basket on the wok. Right: palm sugar syrup in a wok.

    The nectar gets transferred to a large wok, and it is reduced over flame to evaporate the water so that you're left with is just the thick, caramelly, tasty syrup. It's a very similar idea to making maple syrup! At this point, non-artisanal makers will also add various amounts of granulated sugar as a filler. More on this below.

    During the boiling process, a woven bamboo "cage" is placed in the wok (pic above) to prevent the syrup from boiling over.

    Step 3: Whipping the sugar.

    palm sugar being whipped with a whisk

    The hot syrup is then whipped using a springy whisk, or a machine (think a boat propeller attached to a stick blender). The aeration is so that the sugar will cool down quickly AND evenly. If they let the sugar cool without whipping it, it will cool from the outside in, causing the exterior to harden while the inside is still liquid.

    Step 4: Placing the sugar into molds.

    palm sugar being put into molds

    Once the sugar is cool enough that it is a thick paste, it'll either be packed into containers such as tubs or jars, or if they are to be sold as hard pucks, they will be placed into molds. The molds are usually round and can be small or large. The molds are lined with cloth to prevent sticking, and once the pucks are cool and hard they are packaged for sale.

    Are all palm sugars created equal?

    Nope. Not even close. As mentioned in Step 2 above, most producers of palm sugar add in some amount of granulated sugar as a filler, and I saw it with my own eyes during my visit to the palm sugar factory in Thailand.

    As you saw, palm sugar is a labour intensive process and fewer and fewer Thai people are choosing this line of work, so there is way more demand for it than there is supply. There would never be enough palm sugar for everyone if it were all pure, and we'd probably all pay a very high price for it!

    So the quality is determined by how much white granulated sugar is mixed in. When I spoke to the palm sugar maker during my visit, she said that it could be anywhere from 25% to 75% depending on the brand (the factory made palm sugar for many different brands, many of which are exported).

    Essentially ALL Thai palm sugar available on the market, even in Thailand, is not pure. Yes, even if it says 100% palm sugar on the package, that is 100% a lie. Unfortunately there is no palm sugar police that makes sure the packaging is honest.

    There is an opportunity to taste pure palm sugar, however, and that is if you visit a place that demonstrates how palm sugar is made traditionally in Thailand. These are usually open to visitors, and are more of an educational/touristy place than an actual sugar producer. What they do produce is a small amount that's sold mostly locally.

    How to Choose Good Quality Palm Sugar?

    If you're just looking at the sugar, it is quite hard to tell, but there are some signs. I encourage you to watch the video where I taste 3 different qualities of palm sugar so you'll see the differences more clearly that way.

    But here's the bottom line: Looks can be deceiving, so the only real way to tell is to taste them side by side. The more palm necar it contains, the more flavourful and aromatic it will be. It will taste like a floral, butterscotch candy, not merely sugar.

    Even though looks can be deceiving, it can tell you something. Most importantly, look for palm sugar with a smooth texture. It should not look crystalized, and it should not be very pale. The worst one I've seen is Cock Brand. It's so pale, and you can even see the granulated texture! It has a very faint palm sugar flavour with a crunchy texture that palm sugar should not have. This sugar has a TON of white sugar added. Of course it's the one that says 100% palm sugar on the packaging, which is obviously not true.

    While you don't want super pale palm sugar, darker doesn't always mean better. A dark colour can also be imitated by adding brown sugar rather than white sugar. This is not a practice I've seen in palm sugar from Thailand, but I have seen it in palm sugar produced in Vietnam. While I think brown sugar is better than white sugar, cuz at least it has some flavour, colour alone should not be used as an indicator of purity.

    Choose the more expensive one. If you have a few brands to choose from, I encourage you to choose the one with a higher price tag. Stores usually price items according to their cost, and if one palm sugar costs more than the other, you've got a higher chance that it is more pure. This is no guarantee of course, but since the difference in price is usually just a few bucks, I think it's worth the gamble.

    Choosing Between Hard vs Soft Palm Sugar

    palm sugar on green cloth partially chopped, and some more palm sugar in a glass cup
    Right: Hard palm sugar which needs to be chopped. Left: Softer palm sugar which can be spooned.

    Palm sugar is sold in stores in two major forms, hard solid pucks and a soft paste in a tub or jar. Neither one indicates a better quality, but here's what you need to know:

    Palm sugar can be reduced to various degrees, so if they leave enough moisture in the syrup, it will not completely harden once cool. This palm sugar is then packed into tubs, jars or even plastic bags, designed to be spooned out. This is the most common type in Thailand because we use palm sugar a lot, and the soft paste is more convenient to use, and it dissolves more easily.

    But in the export market I more often see palm sugar in hard pucks, which is better if you don't cook with palm sugar often. Why? Because like brown sugar, palm sugar dries out over time. And if you've store palm sugar in a tub for a long time, it can completely solidify in the tub, making it a total pain to use. If this happens, check out the "how to use" section below.

    So here I always buy the pucks of palm sugar, which can be chopped and then measured in a tablespoon (more on this below).

    What Palm Sugar or Coconut Sugar NOT To Buy for Thai Cooking

    left: bob's red mill coconut sugar. Right: Roger's coconut sugar

    In recent years we've started to see granulated "coconut sugar" in non-Asian stores. Can those be used for Thai cooking? Well yes and no. Generally I encourage you to buy Thai palm sugar because that's how you ensure the right flavour profile, especially when making desserts. But let's go through some other products on the market that may cause confusion.

    Some granulated coconut sugar is very dark and has an entirely different flavour, like the Roger's one above. It looks almost like dark brown sugar. And while it is made from the same stuff - coconut nectar - the processing is different resulting in a different tasting product. It's very toasty, almost a little smoky, burnt toast-ish. So this is not a good one to use in Thai recipes that call for palm sugar because the flavour difference is too much.

    Some granulated coconut sugar is very light and has a much milder flavour. It CAN be used in Thai recipes because it won't introduce any off flavours like the dark one, but seeing as it is not caramelized at all, it has a lighter flavour than Thai palm sugar. The Bob's Red Mill coconut sugar looks like it's medium-dark, though I haven't personally tasted it so I can't comment on how well it'll work as a Thai palm sugar substitute.

    Worth noting that Red Boat sells palm sugar from Cambodia that they claim is pure (and FWIW I believe it). But the processing must be quite different because it is so much darker and more acidic than Thai palm sugar. A little bit in savoury applications would be fine, but I would not to use it in Thai desserts where the intense flavours will be quite prominent.

    How to Use Palm Sugar

    If your palm sugar comes in a puck, simply chop it with a chef's knife, shaving it thinly with each stroke like you would a block of chocolate. Some people like to use a box grater, but I find it easier to chop.

    Important: if your palm sugar is really old, it will have dried out and it will become so hard that chopping it will be nearly impossible without ruining the edge of your knife! So, if you know that you will have the sugar for a long time (say, a year) I would chop it all in advance to prevent such a situation.

    If you end up with rock hard pucks of palm sugar, try whacking it in a heavy duty stone mortar and pestle and it'll break into bits.

    If you have soft palm sugar from a tub and it's soft enough to spoon, great, spoon away. But if it has hardened, you'll need to heat it up in the microwave, then use a spoon to scoop it out while it is still warm. Work quickly because once it cools down, it'll harden again.

    Measuring Palm Sugar For My Recipes

    If you are measuring palm sugar by tablespoon or cup, finely chop it and then pack it tightly into the measuring spoon or cup. 1 Tablespoon of finely chopped packed palm sugar weighs about 12 grams.

    If your palm sugar is a soft paste, you will need to use the weight measure provided in my recipes because more of it will pack into a measuring spoon. Or if you're willing to wing it, you can also just eyeball a little bit less than the volume called for.

    How to store palm sugar

    Palm sugar can be stored at room temp indefinitely. It's sugar and it won't go bad, BUT it can dry out. Make sure it's well sealed in an airtight container, and again, if you won't use it often, consider chopping it all in bulk while it's still soft.

    Substituting Palm Sugar

    What can I use instead of palm sugar? It depends. Generally, light brown sugar is a good all-purpose substitute, and it measures about the same in a tablespoon which is convenient!

    If palm sugar is added in a small amount to a recipe with a lot of strong flavours, like a curry, then you can substitute with any other kind of sugar or sweetener you have because the flavour of the sugar won't come through.

    But in a recipe where it is also contributing flavour, like in a salad, pad thai, and definitely in desserts, you want to use light brown sugar or perhaps you can try maple syrup, which has obviously a different flavour but might be good nonetheless!

    Recipes with Palm Sugar

    Want to start cooking with palm sugar? Here are a couple of recipes that really showcase the flavour of palm sugar:

    • Classic Pad Thai
    • Thai Coconut Bananas Foster
    • Durian and Sticky Rice

    Classic Thai Noodle Soup - Street Style

    August 23, 2024 by Pailin Chongchitnant 9 Comments

    A bowl of noodle soup with fish cakes

    Noodle soup or guay tiew nam ก๋วยเตี๋ยวน้ำ, is one of the poster children of Thai street food. No matter where you are in the country, you can find a shop selling some type of noodle soup near you. But this one, with clear pork broth and Asian style meatballs, is what I consider the "OG," the basic, the margherita pizza of pizzas. It's the simplest and easiest of noodle soups, and the ultimate comfort food. Make the stock in advance, and it's quick enough to put together for a weeknight meal.

    If you're a fan of Vietnamese pho, you're going to love this one!

    A bowl of noodle soup with fish cakes with a lime wedge and condiments on the side

    What is a "Classic" Thai Noodle Soup?

    There are many, many different kinds of noodle soups in Thailand, ranging from the famous and flavourful boat noodles, the unique pink yentafo, and the rich curry noodle soup khao soi. But if you take away all of the particular spices and sauces and toppings used in other more elaborate noodle soups, this classic comforting noodle soup is what we end up with.

    In Thai we call this guay tiew look chin, or noodles with meatballs, but usually you'd also specify what kind of meatballs. So here we're using fish balls and fish cakes, so it's guay tiew look chin pla. If using pork balls, another very common version, it is guay tiew look chin moo.

    Fish balls and pork balls are the two most common types of meatballs used for this dish in Thailand, but you can definitely use chicken or beef meatballs instead, or sub any other kind of protein, more on this below.

    Ingredients and Notes

    Here are all the ingredients you'll need and important notes about them. For amounts, see the the full recipe card below. Don't be deterred by the list of ingredients! May of the ones listed are optional but I want to give you the whole range of possiblities, and the basics that you really need are not that many!

    ingredients for classic Thai noodle soup with fish cakes

    For the Pork Stock (or chicken stock)

    There are times when store bought stocks are totally fine, and this is not one of them. The pork stock is the foundation of the soup, and it really needs to be made Thai style to have the right flavour and aromatics. If you don't eat pork, you can substitute chicken bones.

    • Pork neck bones or back bones, I prefer neck bones because it has more meat which you can either save for another dish of simply top the noodle soup with it. Sub chicken bones if you don’t eat pork.
    • Daikon. I used to think that daikon was an optional stock aromatic, but after having made stocks with and without daikon, I now believe it is essential. It makes the stock so sweet and flavourful, and is a must have in Thailand for stocks.
    • Garlic.
    • Onion. Onion is not actually added to stocks in Thailand, but I love the added sweetness that it gives, and don't we always have an onion around the house anyway? 🙂
    • Cilantro roots, or cilantro stems, smashed gently to bruise.

    For the Broth

    • Good Thai style pork stock from above.
    • Soy sauce.
    • Fish sauce. See my post on how to choose good fish sauce here.
    • Sugar.
    • Ground white pepper, to taste

    Noodle Soup Components

    • Noodles of your choice. The noodle soups vendors will always offer several noodle options. You can choose whichever you prefer, and I've listed them all, along with cooking instructions below.
    • Asian style fish cakes/fish balls, or other types of Asian style meatballs of your choice. You can buy fish cakes at any Asian grocery stores, either fresh in the seafood counter or frozen. There are many flavours, and you can use anything you like, but try to stick with ones with fewer ingredients as they tend to be of higher quality.
      Other protein options: Because the soup is quite plain, I encourage you to use protein that is flavourful such as: the meat you picked off from the bones after making the pork stock tossed with some soy sauce and pepper, chopped leftover meats that is flavourful like a good steak or roast chicken, thinly sliced marinated pork or chicken, or ground pork cooked with some soy sauce.
    • Bean sprouts.
    • Fried garlic and garlic oil. Really important toppings for Thai noodle soup! You simply need to fry some chopped garlic on low heat until golden, but you can see the full recipe for fried garlic here.
    • Chopped cilantro and/or green onions for garnish
    • Optional: "tang chai" preserved cabbage bits. These are little bits of crunchy salted cabbage that we often add to our noodle soups. You can see them at the end of the video, but they are totally optional.

    Optional Tableside Condiments:

    Thai people always provide extra condiments for noodle soup so people can make it taste exactly how you want it. You can also make it “tom yum style” which is a hot and sour version (more on this below).

    • Chili vinegar, the basic version is simpley chopped chilies and white vinegar. You can also blend the chilies and the vinegar together. Read more about this on my chili vinegar post.
    • Fish sauce, if you want to soup to be more salty.
    • Sugar.
    • Roasted chili flakes, or any kind of spicy chili powder if you want to make it spicy. this is also needed for the tom yum style. You can buy or easily make your own roasted chili flakes.
    • Lime, only for tom yum style, more about tom yum style below.

    How to Make Classic Thai Noodle Soup

    Here's a bird's eye view of the process. The full instructions are in the recipe card below, and if this is your first time, I highly recommend watching the video tutorial to ensure success!

    Process shots for making thai noodle soup steps 1-4
    1. Simmer pork neck bones in water for about 30 minutes, then skim off the scum.
    2. Add the daikon, onion, garlic, cilantro roots/stems, and white pepper and simmer for another hour, at minimum.
    3. Remove the pork bones and vegetables; the stock is now ready to use. Once the bones are cool, pick off the meat from the bones and you can season it with some soy sauce and use it to top the noodle soup, or save it for another dish.
    4. If using rice noodles, soak them in room temperature water until they are fully pliable. Timing varies between noodles, more on this below.
    Process shots for making thai noodle soup steps
    1. Add soy sauce, fish sauce, sugar and white pepper to the broth and bring to a boil.
    2. Add all of the fish cakes and simmer for about 2 minutes or until the fish cakes are hot. Keep covered until ready to use.
    3. Blanch one portion of the noodles and beansprouts in a noodle strainer or sieve for the required amount of time (varies between noodles). Drain and place into a serving bowl.
    4. Top with the hot broth and fish cakes along with all of the garnishes.
    a bowl of noodle soup with condiments on the side
    1. Serve immediately with tableside condiments, if desired, or make it tom yum style (see below).

    Noodle Options and Cooking Instructions

    At most Thai noodle soup vendors, you will have several noodle options and they all need slightly different preparations below. You can learn more about how to cook rice noodles properly in my post on mastering rice noodles.

    noodle options for boat noodles on a baking tray
    • Rice vermicelli (sen mee) - The smallest of noodles and the quickest to prep. Simply soak them in room temp water for 5-15 mins (timing varies between brands) until they are completely limp, then drain. DO NOT OVERSOAK as these overcook very easily.
      To cook, blanch them in boiling water, one portion at a time, for 3 seconds.
    • Small dry rice noodles (sen lek) - The most classic option. These noodles are 1.5 mm wide when dry. Soak in room temp water for 20-30 minutes or until they turn opaque white and are completely limp - they should have lost all of the kinks - and then drain.
      To cook, blanch them in boiling water, one portion at a time, for 5 seconds.
    • Glass noodles (woon sen) - woonsen is thin, delicate, and has a neutral flavour and is delicious in boat noodles. Soak in room temp water for 10 minutes until softened before cooking.
      To cook, boil in hot water for 2 minutes. You can cook all of the glass noodles at once since they take a longer time to cook, then separate into portions immediately after draining.
    • Fresh wide rice noodles (sen yai) - This is the noodles commonly associated with pad see ew. If cold and stuck together, microwave the noodles until they are hot and soft, so they can be peeled apart without breaking. Separate all the noodles before cooking.
      To cook, blanch them one portion at a time for literally 1-2 seconds just to heat them up and wash off the oil that's used to coat them. Do not let them linger in hot water for too long because they're already fully cooked and will quickly turn mushy.
    • Wonton noodles or egg noodles (bamee) - These vary greatly between brands, so you'll have to change the cooking time according to what you've got.
      But if you have thin wonton noodles like the one shown in the pic (fresh and coated in flour), loosen the noodles and boil them in hot water for 1 minute. If you're making many portions, you can cook them all at once and separate them immediately after draining.
    • Mama Instant Noodles (sen mama) - Mama are the Thai instant noodles and they are super tasty in boat noodles! Buy any flavour of mama since you won't need the seasoning packets, but make sure the noodles are the classic wheat fried noodles as shown in the pic.
      Boil the noodles in water for about 1 minute, and you can cook all portions together and separate them after draining.
    • Medium size rice noodles (not pictured): These are 3mm wide rice noodles, but they are actually not offered in Thailand for noodle soups because they are meant for stir fries. But if these are what you have, soak them in room temp water for 1 hour until fully pliable, then blanch in boiling water for 8 seconds.

    Pro Tip: Making it Tom Yum Style

    In Thailand, when you go to most noodle soup shops you can order your noodle soup "tom yum" style. This is not to be confused with the famous tom yum soup. In the context of noodle soup, this means that they will make your soup hot and sour with the addition of lime juice and roasted chili flakes, and you can have tom yum style for most types of noodle soups that have a clear broth.

    The fully loaded tom yum style also has coarsely ground roasted peanuts and ground pork, but the lime and chilies are the most important. I have a recipe for the fully loaded tom yum noodle soup here if you want to give it a go!

    Advance Prep & Storage

    The only thing that takes time is the pork stock, everything else is super easy to come together. So I would make the pork stock in advance, and that should be all you need to do.

    You can also soak rice noodles in advance, drain, and keep them in the fridge. But do not soak rice vermicelli in advance as I find they tend to become mushy as they sit in the fridge and absorb excess moisture around them.

    You can store leftover soup in the fridge for up to 1 week, and you can freeze it of course.

    Before you start, if this is your first time, be sure to watch the video tutorial to ensure success! 

    Love Thai street food? You'd also love these!

    • A bowl of Thai herb nuts.
      Chili Lime Peanuts with Thai Herbs
    • Thai Viral Saucy Tossed Noodles
    • A plate of kanom ko with one piece cut open.
      Pandan Palm Sugar Dumplings (Kanom Ko)
    • papaya salad lao style on a plate with a side of crispy pork rind, long beans, rice noodles, dried chilies and sticky rice
      Umami Thai Green Papaya Salad (Som Tum Pla Ra)
    A bowl of noodle soup with fish cakes

    Classic Thai Noodle Soup - Street Style

    By: Pailin Chongchitnant
    This simple noodle soup is the epitome of Thai street food. Your noodle of choice, in a comforting clear pork broth, topped with fish cakes or meatballs of your choice. Prep the stock in advance and you'll have the perfect quick meal for a cozy evening.
    5 from 1 vote
    Print Recipe Pin Recipe Share
    Prep Time 30 minutes mins
    Cook Time 2 hours hrs
    Course Main Course
    Cuisine Thai
    Servings 4 servings

    Ingredients


    Pork Stock

    • 2 lb pork neck bones or back bones , or sub chicken bones if you don’t eat pork
    • 3.5 L water
    • 4 inch piece daikon, peeled and large diced
    • 1 medium onion, large dice
    • 5 cloves garlic, smashed until broken
    • 3 cilantro roots, or 8 cilantro stems, smashed gently to bruise

    Broth

    • 4 ½ cups Thai style pork stock, from above, see note 1
    • 2 Tablespoons soy sauce
    • 1 Tablespoon fish sauce
    • 1½ teaspoon sugar
    • Ground white pepper, to taste

    Noodle Soup

    • 8 oz Thai rice vermicelli noodles, or another noodles of your choice (see note 2)
    • 8 oz Asian style fish cakes and fish balls, or other types of meatballs of your choice
    • 2 cups beansprouts
    • Fried garlic and garlic oil, recipe here (see note 3)
    • Chopped cilantro and/or green onions, for garnish
    • Tang chai (salted cabbage bits), optional

    Optional Tableside Condiments: Thai people always provide extra condiments for noodle soup so people can make it taste exactly how you want it. You can also make it “tom yum style,” more in the post above.

    • Chili vinegar
    • Fish sauce
    • Sugar
    • Roasted chili flakes, to make it spicy or if you want it tom yum style (see blog post above)
    • 1 Lime, if you want to make it tom yum style

    Want to save this recipe?

    We can email this post to you, so you can come back to it later!

    Check Out Ingredients and Kitchen Tools I Use

    Notes

    1. Please do not use store bought stock for this, it really will not be the same.
    2. The weight given only applies to dry rice noodles. If using fresh egg noodles you’ll need about 12 oz for 4 servings. If using something else, please use your judgement and eyeball it!
    3. Don’t skip the garlic oil! The aroma it adds to the soup is incredible and in Thailand no noodle soup is ever served without it! You can make it in advance and keep it in the fridge. More detail on my post on fried garlic and garlic ol.

    FULL VIDEO TUTORIAL

    All my recipes come with step-by-step video tutorials with extra tips not mentioned in the blog post, so make sure you watch the video to ensure success. If you enjoy them, consider subscribing to the YouTube Channel to not miss an episode. Thank you!

    Subscribe to my YouTube Channel

    Instructions
     

    For the pork stock:

    • Wash the bones in cold water and add to a large stock pot. Cover the bones with room temp water and bring to a simmer over high heat. Reduce heat to medium to medium-low to maintain a simmer, and after about 30 minutes of simmering, skim off the scum that has floated to the top.
      2 lb pork neck bones or back bones, 3.5 L water
    • Add the daikon, onion, cilantro root or stems, garlic, and white pepper, then simmer gently for 1 more hour at minimum. You can keep it going for longer if you have time, just be sure to top up the water if needed to keep the bones submerged.
      4 inch piece daikon, 1 medium onion, 5 cloves garlic, 3 cilantro roots
    • Once done, remove the bones with tongs and set aside to cool. Use a skimmer to fish out all the vegetables and discard; alternatively you can strain it through a colander.
    • The stock is now ready to be used or stored. It will last a week in the fridge and it can be frozen indefinitely.
    • Pick any meat off the pork bones, and you can toss it with some soy sauce and use it to top the noodle soup or keep it for another dish (you can add it to fried rice, curry, pasta dishes, anything you like!)

    For the noodle soup:

    • If using Thai rice vermicelli, soak the noodles in room temp water for 5-10 minutes until completely pliable - DO NOT OVER SOAK THEM. If using other kinds of noodles, change soaking time accordingly.)
      8 oz Thai rice vermicelli noodles
    • Bring a large pot of water to a boil for cooking the noodles (use A LOT of water so that temperature doesn’t drop drastically once you add the noodles). Meanwhile, add 4 ½ cups of the pork stock to another pot and add soy sauce, fish sauce, sugar and ground white pepper and bring to a boil.
      4 ½ cups Thai style pork stock, 2 Tablespoons soy sauce, 1 Tablespoon fish sauce, 1½ teaspoon sugar, Ground white pepper
    • Once the broth is boiling, add the fish cakes/balls and cook them for about 30 seconds or until heated through. Taste the broth and adjust the seasoning as needed, making sure the broth is strongly seasoned as it’ll be diluted once the noodles are added. Cover and keep hot while you cook the noodles.
      8 oz Asian style fish cakes and fish balls
    • Once the blanching water is boiling, place 1 portion of the noodles and 1 handful of bean sprouts into a noodle strainer or metal sieve that fits inside the pot. Dunk the noodles into the water and shake them around for 3 seconds (or change cooking time accordingly if using other noodles). Lift the noodles out, shake off as much excess water as you can, and place into a serving bowl. Repeat with the remaining portions of noodles, waiting for the water to come back to a boil each time before you cook the next portion.
      2 cups beansprouts
    • Ladle the broth and the fish balls over the cooked noodles, then top with garlic oil, fried garlic, tang chai, and green onions and/or cilantro.
      For a hot and sour “tom yum style” add a good amount of spicy roasted chili flakes and a good squeeze of lime (about 2-3 teaspoon of lime juice per bowl), plus about ¼ teaspoon of sugar to help balance the lime.
      Fried garlic and garlic oil, Chopped cilantro and/or green onions, Tang chai (salted cabbage bits)
    • Serve with tableside condiments, if desired.
    Watch my videos AD-FREE and get bonus content on Patreon!
    Tried this recipe? Share a pic!Tag @hotthaikitchen on Instagram and Twitter!

    Khao Soi: Thai Curry Noodle Soup

    May 12, 2023 by Pailin Chongchitnant 54 Comments

    a bowl of khao soi with chicken drumsticks with condiments on the side.

    Regional Thai food isn't very well known, but khao soi ข้าวซอย, with egg noodles in an aromatic curry broth is an exception. Because Northern Thailand is such a popular tourist destination, this Northern Thai curry noodle soup has become popular amongst foreigners.

    Some might even say if you visit the North of Thailand and didn't eat khao soi, you didn't really make it there! It's a truly unique dish, and with this recipe you can recreate the experience of Northern Thailand at home.

    a bowl of khao soi with chicken drumsticks with condiments on the side.

    What is Khao Soi and Where Did it Come From?

    Khao soi ข้าวซอย is a northern Thai noodle soup that uses wheat-based egg noodles and is served in a coconut milk curry broth. It's typically made with chicken or beef, and the bowl is topped with crispy deep fried noodles. Although it is sometimes called "Chiang Mai Noodles" in the West, it is not unique to, nor originated from, Chiang Mai. 

    Khao means rice and soi means to julienne. It's an interesting name because there is no rice involved in the process. Some say this is because the dish used to use rice noodles made by julienning sheets of dough. Others say khao is short for khao salee which means wheat. Yet some think that the word came from a similar Burmese dish called ohn no khao swe, which I think is more likely because the two dishes are really quite similar.

    The exact origin of khao soi is debated, but the prevalent theory seems to be that it came into northern Thailand via Chinese-Muslim immigrants from the Yunnan region, which is why khao soi is not usually made with pork; despite the fact that pork is the most common meat in Thailand.

    The Yunnanese, or jeen haw in Thai, would've had to travel through Myanmar in order to get to Northern Thailand, so it is possible that they encountered ohn no khao swe there and brought it with them to Thailand, hence the similarity of the two dishes.

    Khao soi in Thailand can vary significantly. This is because after khao soi arrived in Thailand, in whatever form that was originally, Thai people in various places started to modify the dish to suit their own palate. So when you're in Northern Thailand, don't just try one khao soi and think you've "been there done that!"

    For example, in northern Thailand you can find something called "Yunnanese khao soi" that bares almost no resemblance to this recipe - the broth has no coconut milk, and the noodles are big fat rice noodles. Aside from the fact that they're both noodles in soup, and a few common ingredients...there is very little else alike. This is possibly as close to the "original" khao soi as it gets.

    Ingredients and Notes

    Here are all the ingredients and important notes about them. For amounts, see the full recipe card below. There are a number of components to khao soi: the curry paste, the curry, the crispy noodles, and the condiments. Sounds like a lot but many of them are quite simple!

    Curry Paste Ingredients

    Unfortunately you can't buy store-bought curry paste for khao soi (at least not that I've seen). But the ingredient list for the curry paste isn't long.

    khao soi curry paste ingredients
    • Dried chilies. Khao soi is not typically very spicy, so I stick with milder dried chilies such as guajillo or puya. If using spicier chilies, remove all of the seeds and pith to reduce the heat.
    • Coarse salt, the coarseness of the salt will add friction and helps the curry paste grind more easily.
    • Ginger, scrub or scrape any loose bits of skin off and trim the woody ends, but there is no need to peel everything off.
    • Fresh turmeric, wash it well and there is no need to peel it. You can substitute ground turmeric, but I do prefer the flavour of fresh turmeric.
    • Shallots
    • Coriander seeds
    • Black cardamom, this is the spice that will make this curry truly unique. It is not used in all variations of khao soi, but I think it does make it stand out from other kinds of Thai curries. Black cardamom (tsaoko) has an aroma that reminds me of leather, smoke, peaty scotch, and menthol. You can find it at Chinese or Indian grocery stores. If you can't find it, you can try using green cardamom, which is NOT similar, but it'll still taste good and it'll be better than nothing.

    Noodle Soup Ingredients

    khao soi curry ingredients
    • Coconut milk, read about how to choose good coconut milk here.
    • Chicken drumsticks or drumettes. Drumsticks are the most common in Thailand as the bones make the broth rich and flavourful. If you're short on time, use drumettes and they will cook in half the time of drumsticks. You can substitute boneless chicken with some caveats; see more on this in the FAQ below.
    • Soy sauce. It might surprise you to see soy sauce used in a Thai curry, but that's because this is a dish of Chinese Muslim origin! See more on the history of khao soi above.
    • Fish sauce. Optional, I use fish sauce to do my final seasoning adjustment because I like the flavour, but you can also just use more salt or soy sauce.
    • Palm sugar, finely chopped. But brown or granulated is fine also.
    • Wheat-based egg noodles, also known as wonton noodles, can be bought fresh in the refrigerated section at Asian markets. Most commonly khao soi uses flat noodles, but sometimes round ones are used, so whatever you prefer is fine. Some of these noodles will be used for frying as crispy noodles on top.
    • Chopped cilantro for garnish, optional (not pictured).

    Condiments for Khao Soi

    These four condiments are iconic, and khao soi is not complete if served without them! However, if you don't eat spicy, you can skip the fried chili flakes.

    khao soi condiment ingredients
    • Lime wedges for a little acidity to help brighten the flavour of the broth.
    • Chopped shallots, or red onion for some freshness. I personally prefer red onions as they are sweeter and less pungent, but shallots are also fine.
    • Pickled mustard greens. These really make a difference! They are tart and crunchy and help counter the richness of the broth, a component that's very important in Thai cuisine (more on this below). You can buy pickled mustard greens at many Asian grocery stores, just make sure they are a product of Thailand. You can substitute another crunchy sour pickle though such as pickled carrots or cauliflower.
    • Fried chili flakes. This is optional for those who want to add some heat to their bowl, and it's made simply by sauteing some chili flakes in oil until dark and smokey.

    KHAO SOI SHORTCUT: If you don't have time for a homemade curry paste, in my book SABAI: 100 Weeknight Thai Recipes, I have a "cheat" version that uses modified store-bought red curry paste. Doesn't taste the same, but it'll do in a pinch.

    How to Make Khao Soi Step-By-Step

    Here's a bird's eye view of the process. Since all the components can be made in advance, I recommend you spread the work out over two days to make it easier. See more on advance prep below. Also if this is your first time, I highly recommend watching the video tutorial to ensure success.

    For khao soi curry paste

    Process shots for making khao soi steps 1-4
    1. Remove the seeds from the black cardamom pods and place the seeds into a medium dry skillet along with the coriander seeds. Toast over medium high heat, moving them constantly, until the coriander seeds darken slightly. Set aside.
    2. In the same skillet over high heat, place the ginger and turmeric slices down and let them sear until they're slightly charred. Then flip and char the other side and remove from the pan.
    3. In the same skillet, add the shallots and let them char; stirring them around to char them more evenly. Remove from the pan.
    4. Cut the chilies into chunks and pour out most of the seeds.
    Process shots for making khao soi steps 5-8
    1. In a coffee/spice grinder, grind the chilies, black cardamom and coriander seeds into a powder, remove and set aside.
    2. In a heavy-duty mortar and pestle, pound the ginger and turmeric into a fine paste. (*You can also double the recipe to get more volume and use an immersion blender, as shown in my red curry paste recipe.)
    3. Add the shallots and the coarse salt and pound; and once it starts to get wet and slippery, add some of the ground spices to help absorb moisture and add friction.
    4. Pound into a fine paste, then add any remaining dried spices and pound to mix.

    For khao soi broth

    Process shots for making khao soi steps 9-12
    1. Add ½ cup (120 ml) of the coconut milk and bring to a boil over medium heat. Add the curry paste and stir for a few minutes until the mixture is very thick and coconut oil starts to sizzle around the edges of the paste.
    2. Add the remaining coconut milk and stir to dissolve the paste. Then add water, soy sauce, black soy sauce, and sugar.
    3. Add the chicken drumsticks and bring to a simmer. Simmer gently for 40 minutes or until the drumsticks are fork tender. (Now's a good time to prep condiments and fry the noodles.)
    4. Taste and adjust seasoning, adding more fish sauce if it needs a little more salt.
    Process shots for making khao soi steps 13-16
    1. For crispy noodles: Cut the noodles for frying to about 4 inches, then fry them in a 350°F oil, pressing them down to keep them submerged. Once they are golden brown and the bubbling has almost completely stopped, remove from the oil and drain on a paper towel.
    2. When ready to eat: Boil the noodles until they are fully cooked - timing will vary between brands and noodle sizes. Mine take 3 minutes. Drain and divide into serving bowls.
    3. Place 1 or 2 drumsticks into the bowl and ladle the curry on top.
    4. Serve immediately with the condiments.

    For The Fried Chili Flakes (optional)

    Of the 4 khao soi condiments, this is the only one that needs to be prepped beyond chopping, but it's a snap. It is also optional and only needed if you want to let your guests to make it spicier.

    Process shots for making fried chili flakes, steps 1-2
    1. Add the chili flakes and oil to a small pot or skillet - you can make as much as you want here, it keeps indefinitely in the fridge. Then add just enough oil so that the chili flakes look like wet sand.
    2. Turn the heat on medium low and keep stirring until the chilies start to darken and smell smoky. Transfer into a small bowl immediately to stop the cooking.

    "Gae Lien" - The Importance of The Condiments

    I admit that on my laziest of days I have had khao soi without the condiments, BUT... it's also not as good. The condiments serve a purpose that we call gae lien, a very important concept in Thai cuisine.

    Gae lien can be loosely translated as "to counter the richness." Thai cuisine places great importance in having well balanced flavours in a meal, so when we serve something that is rich and fatty, we always make sure there's something tart, light and crunchy to "counter the richness," and prevent things from becoming cloying and reducing your appetite.

    This is why we usually include salads or dip platters in a multi-dish meal, as I explained in this video. But since khao soi is meant to be a meal in itself, the pickled mustard greens, shallots, and lime are necessary for gae lien.

    Advance Prep Tips

    There are several components to khao soi, so unless you're doing this as a weekend project, I suggest you break the work up over a couple of days. Here are the things you can do ahead of time and how to store them.

    • Make the curry paste in advance. If you do one thing in advance, this should be it. Make the curry paste, and then if you'll be cooking the curry in the next day or two, keep it refrigerated. Beyond that amount of time, you should freeze the curry paste. It can be frozen for a few months so you can make a big batch and freeze the remainder.
    • Make the curry broth in advance. The broth will keep well in the fridge for up to a week. You can even freeze it in smaller portions if you want to save it for a rainy day. It will actually taste better once it's had time to sit.
    • Fry the noodles in advance. The noodles can be fried and kept in an airtight container for up to a week. If you're frying them a few days ahead, fry them until all the bubbles are completely gone to make sure there is no moisture left in them. This will ensure they stay crispy for a long time.
    • Prep the condiments. Getting the condiments together is the kind of fiddly thing that I hate dealing with on the day I'm busy serving guests. So I prep the condiments the day before and put them in little bowls/ramekins, put them on a plate, then wrap the whole thing and refrigerate. Then you just bring the whole plate out when ready to serve.

    Frequently Asked Questions

    Can I make this recipe using boneless chicken?

    Yes. I recommend you to use dark meat, cut into chunky pieces, then let them braise in the broth until they are fork tender. I would then use unsalted or low sodium chicken stock instead of water to make up for the lack of bones. I don't recommend using chicken breast for this. 

    How can I make khao soi using other kinds of meat?

    You can substitute the chicken with any other meats that can be braised. Stew-friendly beef cuts such as beef shank or chuck would work, cut in smaller pieces, but you will need to extend the cooking time accordingly. You can also use pork butt, though khao soi pork is less common in Thailand.

    Can I make a vegan khao soi?

    Yes. I would substitute the water with a good vegetable stock, then use mushrooms of your choice and tofu and simmer for 15-20 minutes. Frozen tofu would be excellent in this as it can absorb more flavour.

    a bowl of khao soi with chicken drumsticks with condiments on the side.

    Khao Soi: Northern Thai Curry Noodle Soup

    By: Pailin Chongchitnant
    Khao soi ข้าวซอย is a northern Thai noodle soup with egg noodles served in a coconut milk based curry broth and topped with crispy deep fried noodles. It's a dish that will impress!
    5 from 25 votes
    Print Recipe Pin Recipe Share
    Prep Time 40 minutes mins
    Cook Time 1 hour hr
    Course Main Course
    Cuisine Thai
    Servings 4 servings

    Equipment

    • mortar and pestle see note 1
    • Coffee grinder

    Ingredients


    For the Curry Paste

    • 2 pods black cardamom
    • 1.5 tablespoon coriander seeds
    • 0.75 oz ginger, thinly sliced
    • 1.5 inch fresh turmeric (about 5 g) , thinly sliced, or sub 1 teaspoon ground turmeric
    • ½ cup shallots, sliced ¼-inch thick
    • 0.75 oz mild dried chilies , such as guajillo or puya
    • 1 teaspoon coarse salt

    For the Noodle Soup

    • 1 batch khao soi curry paste , from above
    • 1 ½ cups coconut milk, plus extra for drizzling, if desired (see note 2)
    • 8 pieces chicken drumsticks
    • 3 cups water
    • 3 tablespoons soy sauce
    • 1 tablespoon black soy sauce
    • 2-3 teaspoons fish sauce, optional, as needed
    • 1 tablespoon palm sugar, finely chopped, packed, or sub brown sugar
    • 12 oz flat fresh egg noodles (also known as wonton noodles), divided
    • Chopped cilantro and/or green onions for garnish, optional

    Condiments

    • 1 lime, cut into wedges
    • ¼ cup chopped shallots or red onion
    • ½ cup chopped pickled mustard greens
    • Fried chili flakes, to taste (instructions below)

    Want to save this recipe?

    We can email this post to you, so you can come back to it later!

    Check Out Ingredients and Kitchen Tools I Use

    Notes

    1. You can also use an immersion blender to make the curry paste as shown in my red curry paste recipe, but you will need to double the recipe to make it blend properly. Extra curry paste can be frozen for months. 
    2. Some people prefer a richer khao soi, and an easy way to do this is to drizzle a little extra coconut milk for on top (1-2 tablespoon per serving). The extra drizzle also makes for a prettier presentation!

    FULL VIDEO TUTORIAL

    All my recipes come with step-by-step video tutorials with extra tips not mentioned in the blog post, so make sure you watch the video to ensure success. If you enjoy them, consider subscribing to the YouTube Channel to not miss an episode. Thank you!

    Subscribe to my YouTube Channel

    Instructions
     

    For the Curry Paste

    • Smash the cardamom pods with a pestle or something heavy and take out the seeds; place the seeds into a medium dry skillet. Add the coriander seeds and toast over high heat, moving them constantly, until the coriander seeds darken slightly. Remove and set aside.
      2 pods black cardamom, 1.5 tablespoon coriander seeds
    • In the same skillet over high heat, place the ginger and turmeric slices down and let them sear until they're slightly charred, this will take 2-3 minutes. Then flip and char the other side and remove from the pan. (See video for what all this charring should look like.)
      0.75 oz ginger, 1.5 inch fresh turmeric (about 5 g)
    • In the same skillet over high heat, place the sliced shallots and let them sear until charred spots form; this will take just a few seconds. Then stir the shallots and let them char a bit more, then remove from the pan.
      ½ cup shallots
    • Remove the stems from dried chilies and use scissors to cut them into chunks, pouring out the seeds as you cut them, but no need to get every seed out. Add the chilies to a coffee/spice grinder along with the black cardamom and coriander seeds and grind into a powder, remove and set aside.
      0.75 oz mild dried chilies
    • In a mortar and pestle, pound the ginger and turmeric slices into a fine paste. Then add the shallots and the coarse salt and pound into a fine paste. Once the mixture starts to get wet and slippery, add some of the ground spices to help absorb moisture, which will make it easier to grind.
      Once you've got a fine paste, add any remaining dried spices and pound just to mix.
      1 teaspoon coarse salt

    For the Curry Broth

    • In a medium pot, add ½ cup (120 ml) of the coconut milk and bring to a boil over medium heat. Add the curry paste and stir to dissolve, then keep stirring for a few minutes until the mixture is very thick and coconut oil starts to sizzle around the edges of the paste. (If the paste is very thick and the coconut oil has not sizzled, this is okay, you can move on.)
      1 ½ cups coconut milk, 1 batch khao soi curry paste
    • Add the remaining coconut milk and stir to dissolve the curry paste. Then add water, soy sauce, black soy sauce, sugar, and the chicken drumsticks. Bring to a simmer, then turn the heat to low and let simmer gently for about 40 minutes or until the drumsticks are fork tender. While the chicken is simmering, make the crispy noodles and prep the condiments.
      *Keep the simmer gentle as we do not want the soup to reduce too much.
      3 cups water, 3 tablespoons soy sauce, 1 tablespoon black soy sauce, 1 tablespoon palm sugar, 8 pieces chicken drumsticks
    • Once the chicken is done, taste and adjust seasoning with more fish sauce or salt if needed (I love adding fish sauce). Remember to make the broth strongly seasoned as it will be diluted slightly once noodles are added. If it has become salty from reducing too much, you can simply add more water.
      2-3 teaspoons fish sauce

    For the Crispy Fried Noodles

    • Take 3 oz (85 g) of the noodles for frying. Loosen them and shake off excess flour, then use scissors to cut them a few times so they are about 4 inches long.
    • Heat about 2" of frying oil in a wide pot or wok to 350°F (175 °C).
    • Turn the heat down to medium-low and add a SMALL handful of noodles (they will expand A LOT) into the oil and press the noodles down as they fry to submerge them. Fry until the noodles are golden brown AND the bubbling is almost gone. Remove and drain on a paper towel and repeat with the remaining noodles. Tip: If you've put in too many noodles and they cannot be submerged, you'll need to flip them halfway through to fry the top.
      *No bubbling means noodles are crispy so you want to wait until the bubbles are almost gone before you take them out. If the noodles are browning faster than the bubbles can slow down, your heat is too high.
      12 oz flat fresh egg noodles (also known as wonton noodles)

    For the Fried Chili Flakes (if using)

    • Add any amount of spicy chili flakes to a small pot and add just enough neutral flavoured oil so the chili flakes look like wet sand.
    • Turn the heat on medium low and keep stirring until the chilies start to darken and smell smoky - just a few minutes. Transfer into a small bowl immediately to stop the cooking.

    Assembly

    • Bring a large pot of water to a full boil on high heat. Meanwhile, loosen the noodles and shake off any excess flour.
    • Once the water is boiling, add the noodles and cook until they are done - this will vary from brand to brand so if you're not sure, keep checking them every minute or so. (As a reference, the flat wonton noodles shown in the video take 3 minutes.)
    • While the noodles are cooking, and if you're cooking multiple servings, prepare a mixing bowl for the cooked noodles to go into, and add about a tablespoon of oil into the bowl to help noodles separate. (If you have garlic oil, this is a great place to use it!)
    • Use a slotted skimmer to fish the noodles out, shake off excess water, and add them into your bowl with oil. Toss the noodles in the oil, then divide the noodles into serving bowls.
    • Place 1 to 2 chicken drumsticks into each bowl, then ladle the hot curry broth over them - the broth is quite rich so you don't need much broth. For an extra flare, drizzle 1-2 tablespoons of coconut milk on top which will make it look prettier and adds a little more richness.
      Top with a handful of the crunchy noodles and some chopped cilantro if desired, then serve immediately with all the condiments.
      Chopped cilantro and/or green onions for garnish, 1 lime, ¼ cup chopped shallots or red onion, Fried chili flakes, ½ cup chopped pickled mustard greens
    Watch my videos AD-FREE and get bonus content on Patreon!
    Tried this recipe? Share a pic!Tag @hotthaikitchen on Instagram and Twitter!

    Thai Breakfast Rice Soup with Shrimp (Khao Tom Goong)

    December 29, 2017 by Pailin Chongchitnant 20 Comments

    a bowl of rice soup with shrimp

    We don't have many breakfast-specific dishes in Thailand, but of the few we do have, kao tom (aka khao tom) is an absolute classic. You can think of kao tom as the Thai sister of congee. Instead of being porridge-like with the rice grains broken down, it's more of a brothy soup with the rice still in whole grains. It's one of the most comforting dishes Thailand has to offer, and a staple in Thai breakfast buffets in hotels.

    At the basic level it's simply jasmine rice added to a flavourful broth. The components can be prepped ahead, and then comes morning time it takes just a few minutes to come together!

    Watch The Full Video Tutorial!

    All my recipes come with step-by-step video tutorials with extra tips not mentioned in the blog post, so make sure you watch the video below to ensure success - and if you enjoy the show, please consider subscribing to my YouTube channel. Thank you!

    Ingredients and Notes

    Here are all the ingredients you'll need to make this recipe and some important notes about them. For amounts, check out the full recipe card below.

    • Pork stock or chicken stock, unsalted. In Thailand this would most likely be pork stock, so use that if you want to recreate the exact Thai version, but chicken stock would also be just fine. For the right flavour, homemade Thai style stock is best. Here are my recipes for Thai style pork stock and chicken stock.
    • Garlic
    • White peppercorns
    • Cilantro stems or cilantro roots
    • Shrimp, cut into small chunks, plus a few extra whole ones for garnish if you so desire.
    • Fish sauce, see my post on choosing good fish sauce here.
    • Soy sauce
    • Cooked jasmine rice, if you have had trouble cooking jasmine rice, see my post here on how to cook perfect rice without a rice cooker. Having said that, this recipe would work perfectly with rice that you might have accidentally overcooked or under cooked, it's a great way to use it up!

    Optional Condiments

    • Fried garlic & garlic oil, this is made simply by frying garlic in oil. It takes less than 10 minutes to make and it keeps well so you just have to make it once. I always keep a stash in my fridge as we use it to finish all kinds of dishes, especially noodle soups. See my fried garlic recipe here. *You can buy fried garlic from Asian stores, but you won't get the garlic oil which is arguably the more flavourful part!
    • Green onion and/or cilantro, for some greenery 🙂
    • Chinese preserved cabbage (optional), this is called tang chai in Thai and it is salty, crunchy bits of preserved (salted) cabbage. It is okay to omit this as it's hard to find, it just adds salty bits to the soup which is nice.
    • Extra ground white pepper, to taste.

    How to Make Thai Breakfast Rice Soup with Shrimp (Kao Tom Goong)

    Here are all the steps to make this recipe. If this is your first time, I highly recommend watching the video tutorial to ensure success.

    Process shots for making kao tom goong, steps 1-4.
    1. Pound white peppercorns until fine, then add garlic and cilantro stem/roots and pound until fine.
    2. Add half of the garlic mixture to the small pieces of shrimp and mix well. 
    3. Saute the small pieces of shrimp in a pan with a little bit of oil just until it's cooked through.
    4. If you're not using a nonstick pan and there is some bits of herbs stuck to the pan, deglaze the pan with a splash of stock to release the tasty bits of herbs. Then remove from pan and set aside.
    Process shots for making kao tom goong, steps 5-8.
    1. If using whole garnish shrimp, sear the whole shrimp over medium high heat until browned and cooked through, set aside. 
    2. Bring the stock to a boil in a pot, add the other half of the garlic paste and simmer for one minute. Then season the broth with fish sauce and soy sauce, then taste and adjust seasoning.
    3. When ready to serve, bring the broth to a boil then add the rice and the shrimp. Bring the soup back to a simmer, and immediately turn off the heat (if you let this simmer for a long time the rice will swell up and absorb too much stock).
    4. Serve immediately, if you let this sit, the rice will continue to absorb liquid. Ladle into a bowl, and top with all the condiments as desired. Enjoy!

    Advance Prep Tip

    If you're not an early bird and need breakfast to be quick, it's totally doable! Once components are prepped, it takes just minutes to get it on the table. You can even prepare it for the week. Here's what to do:

    Up to a week ahead, cook the rice, the broth, the shrimp, and the fried garlic and keep them in the fridge (in separate containers). Comes time to eat, bring the broth to a boil, and while you wait you can chop up the cilantro/green onions and set the table.

    Once the broth boils, add the rice and the shrimp and let it heat up thoroughly for a few minutes, et voila! Gourmet Thai breakfast in minutes!

    Recipe Card

    Print
    clock clock iconcutlery cutlery iconflag flag iconfolder folder iconinstagram instagram iconpinterest pinterest iconfacebook facebook iconprint print iconsquares squares iconheart heart iconheart solid heart solid icon
    a bowl of rice soup with shrimp

    Thai Breakfast Rice Soup with Shrimp (Khao Tom Goong)

    5 Stars 4 Stars 3 Stars 2 Stars 1 Star 5 from 5 reviews
    • Author: Pailin Chongchitnant
    • Prep Time: 20 mins
    • Cook Time: 25 mins
    • Total Time: 45 minutes
    • Yield: 4 servings
    Print Recipe
    Pin Recipe

    Description

    A classic Thai breakfast is khao tom, or rice soup. Comforting and satisfying, it's the perfect way to start the day. Once components are prepped in advance, the soup comes together in just a few minutes. This version uses shrimp, but chicken can be used instead.


    Ingredients

    • 3 cups pork stock or chicken stock, unsalted (homemade is best, here's a recipe!)
    • 3 cloves garlic
    • ¼ tsp white peppercorns
    • 6 cilantro stems or 2 cilantro roots
    • ~150g shrimp, cut into small chunks, plus a few extra whole ones for garnish if you so desire
    • 1 Tbsp fish sauce
    • ½ Tbsp soy sauce
    • 3 cups cooked jasmine rice (this amount is flexible depending on whether you like thick or brothy soup)

    Optional Condiments

    • Fried garlic & garlic oil
    • Green onion and/or cilantro, chopped
    • Chinese preserved cabbage (tang chai)
    • Extra ground white pepper if needed

    Ingredients and Kitchen Tools I Use

    Want to save this recipe?

    We can email this post to you, so you can come back to it later!


    Instructions

    1. Pound white peppercorns until fine, then add garlic and cilantro stem/roots and pound until fine. Add half of this paste to your small pieces of shrimp and mix well. 
    2. Saute the small pieces of shrimp in a pan with a little bit of oil just until it's cooked through. Deglaze the pan with some stock as needed and scrape any bits of herb stuck to the bottom. Remove from pan and set aside.
    3. If using whole garnish shrimp, sear the whole shrimp over medium high heat until browned and cooked through, set aside. 
    4. Bring the stock to a boil in a pot, add the other half of the herb paste and simmer for one minute.
    5. Season with fish sauce and soy sauce, then taste and adjust seasoning.
    6. When ready to serve, bring the broth to a boil over high heat then add the rice and the shrimp. Bring the soup back to a simmer, and immediately turn off the heat (if you let this simmer for a long time the rice will swell up and absorb too much stock).
    7. Serve immediately, if you let this sit, the rice will continue to absorb liquid. Ladle into a bowl, and top with all the condiments as desired. Enjoy!

    Join us on Patreon for bonus content & rewards!


    Did you make this recipe?

    Tag @HOTTHAIKITCHEN on Instagram and hashtag it #HotThaiKitchen!

    Thailand's Favorite Sauce for Meats - Nam Jim Jeaw

    October 6, 2023 by Pailin Chongchitnant 16 Comments

    a bowl of nam jim jeaw with cilantro and dried chilies in the background

    Give Thai people a piece of meat and we're going to ask, "Where's the nam jim jeaw?" Nam jim jeaw is Thai people's #1 go-to sauce for all kinds of meats, especially grilled meats. A must-have for any Thai barbecue, but it's also amazing on steaks, roast chicken, or pork chops. It's also easy to make and can be made in advance!

    [feast_advanced_jump_to]

    What is Nam Jim Jeaw?

    Nam jim jeaw is the classic Thai dipping sauce for all manner of meats, especially grilled meats. It's made from fish sauce, lime juice and/or tamarind, sugar, dried chilies, toasted rice powder and fresh herbs. The spicy acidity, with toasted rice aroma and fresh herbs, makes it the perfect thing to enhance and balance the richness of meats.

    Nam jim means dipping sauce and jeaw also means dipping sauce, but in the Northeastern Thai dialect! This is because the sauce originated in Northeastern Thailand, but it quickly spread to the rest of the country due to its ease, versatility, and deliciousness. So nam jim jeaw essentially means "the dipping sauce from the Northeast"!

    Ingredients

    There aren't many ingredients for nam jim jeaw, and they're all staples in Thai cuisine!

    • Fish sauce. See my post here on how to choosing good fish sauce
    • Tamarind. Store bought tamarind paste (aka tamarind concentrate) is fine, just be sure to buy one from Thailand. If you want to make your own from pulp it is easy! Follow my guide to making homemade tamarind.
    • Lime juice.
    • Palm sugar or white sugar. Read all about palm sugar here!
    • Toasted chili flakes. You can buy store bought chili flakes and toast in a dry pan briefly until smokey, or toast whole chilies (arbol is a good choice) and then grind. The toasting is optional, but adds a nice smokiness.
    • Shallots.
    • Toasted rice powder. This is absolutely key to this recipe! Adds an iconic toasty aroma that makes all the difference. It's made simply by toasting raw rice (pictured) in a dry skillet and then grinding it.
    • Fresh herbs, commonly green onion and cilantro, though mint, sawtooth coriander or even dill can be used.

    How to Make Nam Jim Jeaw

    Here's a bird's eye view of the process, for amounts and detailed instructions, see the recipe card below!

    Process shots for making nam jim jeaw, steps 1-4
    1. If making toasted chili flakes from whole chilies, toast them in a dry skillet over medium high heat for a few minutes, stirring constantly, until some charred spots form on the chilies. You can also toast store bought chili flakes in this way.
    2. Grind the chilies in a coffee grinder or spice grinder.
    3. Make the toasted rice powder by toasting the rice in a dry pan over high heat, stirring constantly, until dark brown.
    4. Grind into a powder using a coffee grinder or mortar and pestle.
    Process shots for making nam jim jeaw, steps 5-8
    1. Combine the fish sauce, tamarind, lime juice, and palm sugar or white sugar.
    2. Stir until most of the sugar is dissolved. Any stubborn chunks of palm sugar should dissolve in 5 minutes or so as it sits in the liquid.
    3. Add the shallots, toasted rice powder, chilies, and fresh herbs.
    4. It's now ready to use!

    3 Useful Variations of Nam Jim Jeaw

    Nam jim jeaw is not a fixed recipe, it's more of a concept. So depending on what is being served, people will change the ratios of ingredients to better pair with the food. Nam jim jeaw from 2 restaurants will rarely be the same!

    In the recipe card, I give you 3 different versions:

    • "Original" All-Purpose Jeaw. When in doubt, this is the one to make. A good balance of salty, sour, and sweet that will go with most thing; especially BBQ chicken, steak, and pork jowl. It has a bit of a thicker body so it will cling well to meats when dipped.
    • Light Jeaw. Made to be lighter in body with more lime juice, it will cling lightly to meats when dipped, making it perfect for thin, delicate pieces of meat such as in hot pot. It is also less sweet and more tart and salty, which helps it cut the grease of very fatty meat such as pork belly, or meat that is already quite sweet.
    • Mellower Tomato Jeaw. The original jeaw is very intense, making it easy for those unfamiliar to overdo it. So I came up with a mellower version with the addition of diced tomatoes that people can more generously spoon onto their meat.

    What to Serve with Nam Jim Jeaw

    Some classic dishes that are always served with nam jim jeaw are:

    • Thai BBQ chicken (gai yang). This is a staple in my house, and you can bake the chicken instead as well.
    • Grilled steaks. We love it so much that even some Western steak houses will offer nam jim jeaw alongside gravy because some Thai people (me included) just cannot have meat without it!
    • Grilled pork jowl.
    • Northeastern Thai hot pot (aka jim jum or jeaw hon). Since the pieces are delicate, we use the lighter jeaw for this one.
    • Crispy pork belly, I especially love it with crispy pork belly because the jeaw cuts the fat so well that you'll be able to enjoy it without it feeling overly greasy. I also recommend the light version for this.

    But really, any meat, Thai or not, can benefit from nam jim jeaw. Try it on roast beef, roast chicken, or even some firm-flesh fatty fish such as salmon, trout, or mackerel.

    Storage and Advance Prep

    Storage: You can keep leftover nam jim jeaw in the fridge for up to a week. The herbs will look wilted, of course, and the sauce will thicken slightly because the rice will have absorbed some liquid, but it will still taste fine. So ideally, you don't want to make more than you need. But you can....

    Make nam jim jeaw "base" in bulk! If you want quick and easy access to nam jim jeaw you can absolutely make a bunch of the "base" ahead of time and keep it in the fridge. You simply need to omit a couple of things:

    • Leave out the leafy herbs and add when serving. Otherwise the herbs will look dodgy within a day. If you're lazy you can definitely serve the sauce without the herbs at all.
    • Leave out the toasted rice powder and add when serving. You can toast the rice ahead of time and keep it whole in a jar. When ready to serve, grind it up and add to the sauce. The aroma of toasted rice is fleeting so you don't want to add it far ahead of time.
    a bowl of nam jim jeaw with cilantro and dried chilies in the background

    Thai Dipping Sauce for Meat (Nam Jim Jeaw)

    By: Pailin Chongchitnant
    This is Thai people's #1 go-to sauce for meat; especially grilled and barbecued meats. Works great on beef, pork, chicken and firmer fish such as salmon.
    5 from 7 votes
    Print Recipe Pin Recipe Share
    Prep Time 15 minutes mins
    Cook Time 5 minutes mins
    Course Sauces
    Cuisine Thai
    Servings 4 servings

    Equipment

    • mortar and pestle or coffee grinder

    Ingredients


    "Original" All-Purpose Nam Jim Jeaw

    • 1 tablespoon jasmine rice or glutinous rice, uncooked
    • 2 tablespoon tamarind paste, (see note 1)
    • 1 tablespoon fish sauce
    • 1 tablespoon lime juice
    • 1 tablespoon palm sugar, finely chopped, packed
    • 2 tablespoon finely diced shallots
    • 1 teaspoon toasted chili flakes, or to taste (see note 2)
    • 3 tablespoon chopped herbs such as cilantro, green onions, mint, or sawtooth coriander

    Light Nam Jim Jeaw (see note 3)

    • 1 tablespoon jasmine rice or glutinous rice, uncooked
    • 2 tablespoon fish sauce
    • 1 ½ tablespoon lime juice
    • 1 tablespoon tamarind paste, or sub another ½ tablespoon lime (see note 1)
    • 1 teaspoon sugar
    • 1 teaspoon toasted chili flakes, or to taste (see note 2)
    • 2 tablespoon minced shallots
    • 3 tablespoon chopped herbs such as cilantro, green onions, mint, or sawtooth coriander

    Mellower Tomato Jeaw (see note 3)

    • 1 recipe All-Purpose Nam Jim Jeaw, from above
    • ⅓ cup small diced juicy tomatoes

    Want to save this recipe?

    We can email this post to you, so you can come back to it later!

    Check Out Ingredients and Kitchen Tools I Use

    Notes

    1. Use tamarind paste from Thailand which comes in plastic tubs or glass jars. Sometimes they're labelled "tamarind concentrate." Do not use tamarind paste from India for this.
    2. Toasting the chili flakes are optional but adds a nice smokiness. You can buy store bought chili flakes and toast them in a dry skillet on medium heat for a few minutes until they darken and smell smokey. Or buy whole dried chilies, toast them in a dry skillet until charred spots form, then grind in a coffee grinder. (Arbol chilies are a good "medium heat" option.)
    3. Light jeaw is what I prefer for delicate meats (hot pot) or very fatty meats (pork belly). Mellower tomato jeaw is less intense and allows you to use it as a "spoon-over" sauce, as opposed to a dipping sauce, without it becoming overpowering. More info on these variations in the blog post!

    FULL VIDEO TUTORIAL

    All my recipes come with step-by-step video tutorials with extra tips not mentioned in the blog post, so make sure you watch the video to ensure success. If you enjoy them, consider subscribing to the YouTube Channel to not miss an episode. Thank you!

    Subscribe to my YouTube Channel

    Instructions
     

    For All-Purpose and Light Nam Jim Jeaw

    • Make the toasted rice powder by adding the raw rice into a small dry skillet over medium high heat. Stir constantly until the grains are dark brown (it may get a bit smokey). Remove from the pan immediately to stop the toasting, and grind into a powder using a mortar and pestle or coffee grinder.
      1 tablespoon jasmine rice or glutinous rice
    • In a small bowl, combine the tamarind paste, fish sauce, lime juice and sugar; stir until the sugar is mostly dissolved.
      *If using chopped palm sugar, any stubborn chunks that won't dissolve after a good stirring should dissolve in 5 minutes or so as they sit in the liquid. So no need to worry about them unless you're serving it immediately; in which case you can warm it up in the microwave briefly (5-8 seconds) to help the final bits of sugar dissolve. Smashing the chunks with a spoon will also help.
      2 tablespoon tamarind paste, 1 tablespoon fish sauce, 1 tablespoon lime juice, 1 tablespoon palm sugar
    • Add the shallots and chili flakes and stir to mix.
      2 tablespoon finely diced shallots, 1 teaspoon toasted chili flakes
    • Close to serving time, add the toasted rice powder and all of the fresh herbs; stir to mix.
      1 tablespoon jasmine rice or glutinous rice, 3 tablespoon chopped herbs such as cilantro, green onions, mint, or sawtooth coriander

    For the Mellow Tomato Jeaw

    • Make the all-purpose jeaw as per instructions above, and stir in the diced tomatoes along with the fresh herbs. If you can, let it sit for a few minutes before serving to allow flavours to mingle.
      ⅓ cup small diced juicy tomatoes
    Watch my videos AD-FREE and get bonus content on Patreon!
    Tried this recipe? Share a pic!Tag @hotthaikitchen on Instagram and Twitter!

    Authentic Thai Peanut Dressing (Salad Kaeg)

    February 26, 2016 by Pailin Chongchitnant 6 Comments

    A bowl of salad veggies with a boiled egg with a bowl of peanut dressing on the side.

    If you want a Thai peanut dressing that Thai people actually eat in Thailand, and not some peanut buttery concoction you find in hundreds of recipes written by non-Thai people, this is it right here. This dressing is what we use in salad kaeg สลัดแขก, which is is a filling and satisfying salad that is a specialty of Muslim-Thai cuisine.

    The dressing is made from freshly ground roasted peanuts, NOT peanut butter (which isn't even a Thai ingredient). It's rich and flavourful, but mildly spiced, though the spiciness is customizable. We serve it with a classic mix of veggies and protein, but free to use it on whatever salad vegetables you like, or use it as a vegetable dip!

    A bowl of salad veggies with a boiled egg with a bowl of peanut dressing on the side.

    Watch The Full Video Tutorial!

    All my recipes come with step-by-step video tutorials with extra tips not mentioned in the blog post, so make sure you watch the video below to ensure success - and if you enjoy the show, please consider subscribing to my YouTube channel. Thank you!

    Ingredients and Notes

    Here are all the ingredients you'll need to make this recipe. For amounts, check out the full recipe card below.

    Thai Peanut Dressing

    • Large, mild dried chilies, such as puya or guajillo peppers, but anything that's not too spicy will work. You can find these at Latin American stores.
    • Shallots
    • Garlic
    • Ground coriander, I like to grind coriander from seeds because store bought pre-ground coriander tends to be stale and lacks aroma.
    • Coconut milk, check out the post on how to choose good coconut milk.
    • Water
    • Roasted peanuts. It’s best to buy raw peanuts and roast them yourself because the flavour is so much better than using pre-roasted peanuts which can often be stale. I'm including roasting instructions below.
    • Tamarind paste. You can buy tamarind paste for cooking, also labeled as "tamarind concentrate" but always make sure it is tamarind from Thailand! Indian tamarind paste is different and cannot be used in the same way. You can also make it from pulp using this homemade tamarind paste recipe.
    • Palm sugar, finely chopped. You can also sub light brown sugar. Read more about palm sugar here.
    • Salt or fish sauce. If you don't need this to be vegetarian, I recommend using fish sauce for extra umami.

    Salad Components

    Note: These are all classic components of a salad kaeg, but feel free to change things up! My only tip is that because the dressing is rich, make sure you have some sturdy veggies in the mix as delicate leafy greens will be easily overwhelmed by the dressing.

    • Greens: any kind you like, but I recommend including sturdy leaves such as iceberg lettuce or romaine lettuce. Delicate greens alone will not hold up well under the rich dressing.
    • Cucumber, sliced
    • Tomatoes or cherry tomatoes, cut in wedges, or cut cherry tomatoes in half.
    • Carrots, cut into thin sticks or juliennes. Using a julienne peeler makes easy work out of this
    • Boiled eggs. The doneness is up to you, but for this I personally like boiling for 9 minutes for large size eggs which will get you doneness as per the photo above.
    • Fried firm tofu. Deep fried tofu is traditional and it gives them a nice chewy texture, but you don't need to fry the tofu if you prefer then fresh. You can also pan fry them in a little oil just until browned on both sides, or toss the tofu in oil and air fry them at 400°F (200°C) until browned.
    • Potato chips or fried potato sticks. Totally optional but they add a super nice crunch!
    • Fried shallots. You can buy fried shallots from Asian grocery stores, but making your own is also an option. I also like to bake store bought fried shallots to refresh them and get them crispier. See more details in my fried shallots recipe here.

    How to Make Thai Salad with Peanut Dressing

    Here are all the steps to make this recipe. If this is your first time, I highly recommend watching the video tutorial to ensure success.

    To roast peanuts:

    1. Preheat the oven to 350°F (180°C). Place peanuts on a baking sheet and spread them out into one layer and roast for 15-20 minutes. After 10 minutes, stir the peanuts around. Check them often once they are close to finish, they burn fast!
    2. Remove from oven after they have turned golden brown. Once they are cool, grind them into a coarse meal (not peanut butter!) in a mortar and pestle or a food processor.

    Note: If you have extra roasted peanuts, store them in the fridge to prevent them from going rancid. For even longer storage, put them in the freezer.

    Make the curry paste:

    process shots for making Thai peanut dressing steps 1-4
    1. Cut the dried chilies into chunks with scissors and remove all the seeds.
    2. Add them to a coffee grinder along with the coriander seeds and grind into a powder.
    3. In a mortar and pestle, pound together shallots, garlic, ground chilies and coriander into a paste (does not have to be super fine).
    4. Bring ¼ cup of the coconut milk and bring to a boil. Add the curry paste and cook, stirring constantly, until it is reduced and thick.
    process shots for making Thai peanut dressing steps 5-8
    1. Once it is thick, continue to cook the paste for one more minute, adding a splash of coconut milk if it is sticking to the bottom.
    2. Add the remaining coconut milk and stir to dissolve the paste.
    3. Add the water, ground roasted peanuts, tamarind, palm sugar, and salt. Simmer the dressing for 20-30 minutes over low heat, until thickened to the desired consistency, scraping the bottom frequently to prevent it from scorching.
    4. I like the dressing to be on the thicker side, but if you prefer a lightly dressed salad you can make it thinner by adding a splash of water. Taste and adjust seasoning as needed, making sure it's got a strong flavour since it will be served with lots of veggies. Let it cool a bit before drizzling over your salad!
    Print
    clock clock iconcutlery cutlery iconflag flag iconfolder folder iconinstagram instagram iconpinterest pinterest iconfacebook facebook iconprint print iconsquares squares iconheart heart iconheart solid heart solid icon
    A bowl of salad veggies with a boiled egg with a bowl of peanut dressing on the side.

    Authentic Thai Peanut Dressing (Salad Kaeg)

    5 Stars 4 Stars 3 Stars 2 Stars 1 Star 5 from 3 reviews
    • Author: Pailin Chongchitnant
    • Yield: Serves 4
    Print Recipe
    Pin Recipe

    Description

    Forget peanut-butter laden dressings that are an American invention, this flavourful authentic Thai peanut dressing is made from freshly ground roasted peanuts and dried chilies, the way Thai people have it in Thailand!


    Ingredients

    Peanut Dressing

    • 15 g mild dried red chilies, such as puya or guajillo, seeds removed
    • ⅓ cup chopped shallots
    • 8 cloves garlic
    • ½ tsp coriander seeds, toasted preferably
    • 1 cup (240 ml) coconut milk
    • ½ cup (120 ml) water
    • ½ cup (120 ml) roasted peanuts (it’s best to buy raw peanuts and roast them yourself because the flavour is so much better! I'm including roasting instructions below.)
    • 4-6 tablespoon (60 - 90 ml) tamarind paste, store bought or homemade (see note 1)
    • 3 Tbsp (35 g) palm sugar, finely chopped, packed
    • ¾ tsp fine grain salt (you can also use fish sauce if not making this vegetarian)

    Options for the Salad

    Note: These are all classic components of a salad kaeg, but feel free to change things up! My only tip is that because the dressing is rich, make sure you have some sturdy veggies in the mix.

    • Greens: any kind you like, but I recommend including sturdy leaves such as iceberg lettuce and baby spinach in the mix. Delicate greens alone will not hold up well under the rich dressing.
    • Cucumber
    • Tomatoes or cherry tomatoes
    • Carrots
    • Boiled eggs (boil for 9 minutes for large eggs)
    • Fried firm tofu (fry in 350°F oil until golden brown)
    • Potato chips or fried potato sticks
    • Fried shallots (you can buy fried shallots from Asian grocery store, but I much prefer making my own. See instructions in my fried chicken recipe here)

    Ingredients and Kitchen Tools I Use

    Want to save this recipe?

    We can email this post to you, so you can come back to it later!


    Instructions

    To roast peanuts: Preheat the oven to 350°F (180°C). Place peanuts on a baking sheet and spread them out into one layer and roast for 15-20 minutes. After 10 minutes, stir the peanuts around. Check them often once they are close to finish, they burn fast! Remove from oven after they have turned golden brown. Once they are cool, grind them into a coarse meal (not peanut butter!) in a mortar and pestle or a food processor.

    Note: If you have extra roasted peanuts, store them in the fridge to prevent them from going rancid. For even longer storage, put them in the freezer.

    Make the curry paste: Cut chilies into chunks with scissors and remove all the seeds. Grind into a powder in a coffee grinder along with the coriander seeds. In a mortar and pestle, pound together shallots, garlic, ground chilies and coriander into a paste (does not have to be super fine).

    Make the dressing: In a small pot, add ¼ cup of the coconut milk and bring to a boil. Add the curry paste and cook, stirring constantly, until it is reduced and thick. Once it is thick, continue to cook the paste for one more minute, adding a splash of coconut milk as needed if things are sticking to the bottom.

    Add the remaining coconut milk, water, ground roasted peanuts, tamarind, palm sugar, and salt. Simmer the dressing for 20-30 minutes over low heat, until the dressing has the desired consistency, scraping the bottom frequently to prevent it from scorching.

    If the dressing is too thick, feel free to thin it out a bit with water. Taste and adjust seasoning as needed, making sure it's got a strong flavour since it will be served with lots of veggies. Let the dressing cool down slightly before pouring over the salad, but it should still be warm.

    Tip: I made the dressing quite thick in the video because I like the richness of a thick dressing, but in Thailand, some people make the dressing quite thin so that you can toss the salad in it. If you prefer a thinner dressing, you can just add more water or more coconut milk to achieve a desired consistency, and you may have to increase the amount of seasoning accordingly.  

    Join us on Patreon for bonus content and rewards!


    Notes

    1. Use tamarind paste from Thailand, not from India, and it should be a loose brown liquid. Tamarind varies greatly in acidity between brands, so start with 4 tablespoon and taste and adjust from there. 

    Did you make this recipe?

    Tag @HOTTHAIKITCHEN on Instagram and hashtag it #HotThaiKitchen!

    Wing Bean Salad ยำถั่วพู (Yum Tuapu)

    November 28, 2014 by Pailin Chongchitnant 2 Comments

    a plate of wing bean salad with boiled eggs on the side and shrimp on top.

    Wing bean salad or yum tua pu is one of the most interesting and complex Thai salads, which makes it one of my favourite Thai salads! Crunchy sliced wing beans look like little stars tossed in a Thai yum dressing enriched with coconut milk and Thai chili paste. It's a filling salad, so you can definitely have this as your main meal with some jasmine rice, and it's super festive, perfect for the holiday table!

    a plate of wing bean salad with boiled eggs on the side and shrimp on top.

    What are wing beans?

    Before we get into the recipe, for those unfamiliar, here are some wing bean basics. Wing beans, or tua pu in Thai are like green beans with 4 little "wings" extending around them. So when you slice them, the look like little 4-point stars ✨! The middle are crunchy, with a relatively neutral, slightly nutty flavour, very much like green beans.

    You can buy wing beans from some Asian grocery stores. Here in Vancouver I see them occasionally at various stores, but not all the time, so when I do see them, this is 100% the dish I make to celebrate the find!

    How to cook wing beans?

    Most of the time we cook them by blanching in boiling water, and I only blanch them for 1 minute because I want them to remain crunchy. After 1 minute, to stop the cooking and keep the bright green colour, immediately dunk them into a large bowl of ice water, though in the winter in Canada the tap water is so cold I don't need the ice! 🥶

    Once they are cool, simply slice and add them into this salad or whatever salad you make (they would be great in a salade niçoise!).

    Technically you can also stir fry them or cook them however you would cook green beans, but Thai people only use them in salads or toss them into kanom jeen rice noodles to add extra crunch. My guess is that the "wings" wilt when extensively cooked in a stir fry, so they look best when minimally cooked.

    Watch The Full Video Tutorial!

    All my recipes come with step-by-step video tutorials with extra tips not mentioned in the blog post, so make sure you watch the video below to ensure success - and if you enjoy the show, please consider subscribing to my YouTube channel. Thank you!

    Ingredients and Notes

    Here are all the ingredients you'll need to make this recipe and some important notes about them. For amounts, check out the full recipe card below.

    • Wing beans or green beans. You can find wing beans at many Asian grocery stores.
    • Chicken breast
    • Shrimp, this is traditionally added but it is optional. You can stick with just the chicken, or conversely, use only shrimp.
    • Shredded coconut, unsweetened, toasted. You can toast the coconut simply by adding it to a dry skillet and stirring it over medium high heat constantly until they are deep brown. (see video for desired colour.)
    • Roasted peanuts, finely crushed. If possible buy raw peanuts and roast them yourself in the oven and they'll taste much better!
    • Shallots, thinly sliced
    • Eggs, for making boiled eggs. Though technically optional, this is a classic accompaniment to yum tua pu and they are so good together! The dressing soaks into the egg yolks and it's just uber tasty, so I recommend not skipping it!
    • Mint leaves.

    Dressing:

    • Lime juice, fresh lime juice is best for this recipe.
    • Fish sauce. See my guide on how to choose good quality fish sauce.
    • Thai chili paste, also called nam prik pao. This is a key flavour in yum tua pu. You can buy nam prik pao at Asian stores, or make your own using my Thai chili paste recipe (it's not hard!)
    • Coconut milk, read more about how to choose good coconut milk here.
    • Garlic, grated or minced
    • Thai chilies, finely chopped
    • Sugar. Be prepared to adjust this amount as the Thai chili paste's sweetness can vary between brands.

    How to Make Wing Bean Salad

    Here are all the steps to make this recipe. If this is your first time, I highly recommend watching the video tutorial to ensure success.

    Prep The Proteins - Chicken, shrimp and eggs:

    *We typically poach our chicken and shrimp, but you can also cook them however you like - grill, bake, etc.They just need to be cooked one way or another. You can also use leftover roast chicken for this.

    1. For the eggs: Slowly add the eggs into a pot of boiling water and boil them for 8 minutes - this gets you medium-cooked eggs. Use a slotted spoon to scoop out the eggs (cuz you'll need to water so don't drain it) and put them in cold water to cool.
    2. For the chicken: Turn the temperature of the water down to about medium or medium low so the water is rapidly steaming, but not bubbling (this should be 165-175°F). Cut a chicken breast in half lengthwise (you only need half for this recipe). Salt the water until the water tastes like a well-seasoned soup, then add the chicken and poach until the chicken is fully cooked, about 7 minutes. Remove the chicken (keep the water) and once cool enough, pull into shreds with your hands.
    3. For the shrimp: In the same pot you used to cook the chicken, bring the water to a boil and add the shrimp and poach them until done; 30 sec-1 min. Remove from water and cool.

    For the Salad

    Process shots for making wing bean salad steps 1-4
    1. Blanch the wing beans in a large pot of boiling salted water for 1 minute, then remove from water and immediately add them to a big bowl of ice water.
    2. Drain well and slice beans into ¼-inch slices crosswise. If using green beans, cut into 1-inch pieces on a bias.
    3. Toast the dried coconut in a dry pan over medium high heat until it's got a deep brown colour; immediately remove from the pan.
    4. Grate the garlic with a microplane into the bowl, then add finely minced chilies.
    Process shots for making wing bean salad steps 5-8
    1. Add the lime juice, fish sauce, sugar, Thai chili paste and stir until the chili paste is dissolved. Add the coconut milk and stir to mix.
    2. Add wing beans, shallots, and peanuts; toss to mix well.
    3. Add the chicken, shrimp and toasted coconut and mix well.
    4. Transfer onto a serving plate and serve alongside halved medium-boiled eggs. Serve with jasmine rice.
    Print
    clock clock iconcutlery cutlery iconflag flag iconfolder folder iconinstagram instagram iconpinterest pinterest iconfacebook facebook iconprint print iconsquares squares iconheart heart iconheart solid heart solid icon
    a plate of wing bean salad with boiled eggs on the side and shrimp on top.

    Wing Bean Salad (Yum Tua Pu)

    5 Stars 4 Stars 3 Stars 2 Stars 1 Star 5 from 1 review
    • Author: Pailin Chongchitnant
    • Prep Time: 15 mins
    • Cook Time: 30 mins
    • Total Time: 45 minutes
    • Yield: Serves 3-4
    Print Recipe
    Pin Recipe

    Description

    One of the most interesting and unique Thai salads, and also one of my favourites! Crunchy wing beans are tossed in a dressing enriched with coconut milk and Thai chili paste. With shredded chicken and poached eggs, it's filling enough to be a meal! You can sub green beans if wing beans are not available. 


    Ingredients

    • 175g wing beans or green beans
    • ½ chicken breast*
    • 6-8 shrimp*
    • 3 Tbsp shredded coconut, toasted (see video for how to toast coconut on the stove)
    • 1 Tbsp roasted peanuts, finely crushed
    • ½ head shallots, thinly sliced
    • 3 eggs (estimate about 1 egg per person)
    • ⅓ cup mint leaves

    Dressing:

    • 3 Tbsp lime juice
    • 1.5 Tbsp fish sauce
    • 2 Tbsp Thai chili paste
    • 3 Tbsp coconut milk
    • 1 clove garlic, grated or minced
    • 2-3 Thai chilies, finely chopped
    • 1 tsp sugar

    Note: I'm providing instructions for poaching the chicken and the shrimp; however, you can cook them using whatever methods you wish (grill, bake, steam, sauté, etc.).

    Ingredients and Kitchen Tools I Use

    Want to save this recipe?

    We can email this post to you, so you can come back to it later!


    Instructions

    Poaching chicken and shrimp: Heat a pot of water until 165 degrees Fahrenheit (water is steaming heavily but isn’t simmering yet), salt the water until the water tastes like a well-seasoned soup, then add chicken and poach until done, about 7 minutes or longer if poaching a whole breast. If you have a thermometer, the internal temperature of the chicken should reach 165 F. Remove chicken and cool. Add shrimp and poach them until done; remove from water and cool.

    When chicken is cool enough to handle, pull the meat into shreds.

    Blanching beans: Bring a large pot of water to a full boil and add enough salt until the water tastes like a well-seasoned soup. Add the wing beans and cook for 1 minute—it's important to use a large pot of water so that the water temperature doesn't drop drastically; if not using a large pot, cook in batches. Remove from water and immediately add them to a big bowl of ice water. Drain well and slice beans into ¼-inch slices crosswise. If using green beans, cut into 1-inch pieces on a diagonal.

    Make medium-boiled eggs: Bring water to a full boil, gently lower eggs into the water and boil for 8 minutes. Remove from pot and immediately submerge them in a bowl of cold water. Peel them once cool enough to handle.

    Assembly: Combine all dressing ingredients in a large mixing bowl and stir until the chili paste is dissolved. Add wing beans, chicken, shrimp, shallots, toasted coconut, peanuts and mint; toss to mix well. Transfer onto a serving plate and serve alongside halved medium-boiled eggs.

    Join us on Patreon for bonus content and rewards!


    Did you make this recipe?

    Tag @HOTTHAIKITCHEN on Instagram and hashtag it #HotThaiKitchen!

    Spicy Salmon Sashimi Salad (My Fave Salmon Ever)

    August 9, 2024 by Pailin Chongchitnant 15 Comments

    During my last trip to Thailand I visited an iconic restaurant called Jeh O Chula to try a viral instant noodle dish, which I then recreated. But while I was there, I tried another one of their signature dishes which blew me away; their raw salmon salad, which instantly became my favourite salmon dish ever. Fresh salmon tossed in a spicy, garlicky, lime dressing...it's incredibly delicious I could have it everyday. Lucky for us, it's very easy to make at home!

    a plate of thai salmon salad with mint and lime slices garnish.

    What is a Thai Salmon Salad?

    In Thai this dish is called yum pla salmon sod (lit.: raw salmon salad), but to be clear this is not a traditional Thai dish (and salmon is not a Thai ingredient!). It's a dish that Jeh O came up with, and this is what they call it on the menu.

    "Yum" is a type of Thai salad, so in theory a dish with this name can be any kind of yum that uses salmon as a main ingredient, but in this particular version, salmon is the ONLY main ingredient, and the salad dressing is the classic Thai seafood dipping sauce, nam jim seafood.

    The Most Important Component: Nam Jim Seafood

    There are really only 2 components to this dish, salmon and dressing, and the success of this dish relies entirely on the dressing (assuming your salmon is fresh). The dressing is in fact a sauce that's extremely important within Thai cuisine called nam jim seafood.

    "Nam jim" means dipping sauce, and seafood, well, is seafood. It is the sauce that Thai people dip all kinds of seafood in. In fact, Thai people never do seafood without it, and sometimes we dip non-seafood in it as well (try it with crispy pork belly!)

    I have shared a recipe for nam jim seafood before that was an all-purpose dipping sauce, but this recipe is slightly different as it was developed specifically to work in this application. You can, however, use this recipe as an all-purpose seafood sauce as well.

    Ingredients and Notes

    Here are all the ingredients you'll need and important notes about them. For amounts, see the the full recipe card below.

    • Salmon. You want to buy salmon that is safe for eating raw, so when shopping, ask your fishmonger if it's okay for sashimi. I buy mine (from Sungiven for folks in Vancouver) frozen and specifically labelled as "sashimi salmon." More on this below.
    • Garlic, you'll need some for the sauce, and if you want, some for garnish. Yes! Garlic for garnish! At Jeh O they put thinly sliced raw garlic on top and I was surprised to find that it actually tastes great together with the salmon. Just make sure you slice it really thin otherwise it'll be overpowering.
    • Chilies, I use red Thai chilies for this, and feel free to reduce or increase the amount depending on your heat preference.
    • Cilantro, stems and leaves all together.
    • Lime juice, fresh only for this recipe!
    • Fish sauce, read more about choosing good fish sauce here.
    • Palm sugar, or light brown sugar. Learn more about palm sugar here.
    • Salt, this is to replace some of the fish sauce to reduce the overall amount of liquid so that the sauce isn't too runny.

    Step-By-Step:

    Here's a bird's eye view of the process. The full instructions are in the recipe card below, and if this is your first time, I highly recommend watching the video tutorial to ensure success!

    process shots for making salmon salad steps 1-4
    1. Blend all sauce ingredients until there are no more big chunks, but there are still some small bits. The amount in the recipe will likely be too small for a jug blender, so a bullet or immersion blender is great for this. Instructions for using a mortar and pestle is also provided in the recipe card.
    2. Cut the salmon first so the pieces are about 2-inches wide, then slice them into ¼-inch thick strips.
    3. Toss the salmon with the dressing.
    4. plate and top with garlic slices, mint leaves, and lime slices for garnish, if desired. Eat it soon or it'll turn into ceviche!

    Safety Notes on Working with Raw Salmon

    In the video I mentioned that you want "sashimi grade" salmon, but actually, that is not a real grade as determined by any governing body. But I said this to make sure that you stop to question the safety, that you don't just buy any old fish at the supermarket without first checking that it is safe to eat raw. You can read more about raw fish safety in this Serious Eats article, but here's my summary for you.

    Fish can be made safe for eating raw by freezing at a very low temperature (much lower than your home freezer so don't try to DIY this) so that any parasites are killed. Farmed salmon is usually free of parasites, but parasites aside, it can still be contaminated with pathogens during the handling and butchering of the fish. So it's important to buy from a supplier who will handle your fish with care and cleanliness, here are some tips for deciding where to buy your raw fish from.

    • If possible, buy from a vendor who specializes in seafood, rather than a generic grocery store. Not only do fish tend to be fresher from these places, you can talk to the vendors directly to ensure that the fish you're buying is safe for eating raw.
    • Look around the shop for clues of cleanliness: the vendor should have a shop that is clean, doesn't smell fishy, and staff should practice safe handling practices such as wearing gloves and cleaning work surfaces regularly.
    • One easy option is to buy sashimi from your trusted Japanese restaurant. It'll be more expensive than buying from a fishmonger, but you'll at least be sure it's safe, and you don't have to cut anything!

    And once you bring the fish home, now it's YOUR turn to make sure you handle it with cleanliness and care! Here are some tipes:

    • Make sure you wash your hands properly, with soap, before handling the fish.
    • Use a fresh, clean cutting board and knife to cut the fish.
    • Keep your fish in the fridge until ready to use, and eat it soon after preparing.
    • To thaw frozen salmon, wrap it in paper towel and allow it to thaw in the fridge overnight. Thawing in the fridge ensures that the fish never reaches "dangerous" temperature (room temp) as it thaws, and the paper towel will help absorb the excess liquid that comes out.

    Frequently Asked Questions

    Can I make this dish in advance?

    You can make the dressing up to a day in advance and keep it in the fridge, but longer than that and the colour will start to dull and the flavour of the lime juice will not be as good.

    But don't toss the fish and the sauce together until ready to eat, because once you mix the salmon with the dressing, the acid in the dressing will slowly "cook" the salmon and turn it into ceviche, which will change the texture and colour of the salmon. So ideally, you should eat this dish right away, or at least within 20 minutes of it being made.

    Can I substitute another kind of fish or seafood?

    Yes, absolutely, as long as you ensure that said seafood is safe to eat raw. I can see this sauce being fantastic with raw scallops, hamachi, or even tuna. The dressing will work well with any kind of seafood because, after all, it is a nam jim seafood! But be sure not to cut the seafood so thin that it will be overwhelmed by the dressing.

    What if I have leftovers?

    Try not to make more than you can eat as it's not gonna be the same the next day. If you do have leftovers, you can keep it in the fridge and eat it the next day, but you will discover that the salmon looks like it's been cooked; because it has been "cooked" by the acid in the sauce. It will actually still taste fine, but the texture will have firmed up significantly.

    Love seafood? You'd also love these!

    • red curry custard in a ramekin
      Thai Steamed Red Curry (haw mok)
    • A bowl of noodle soup with fish cakes
      Classic Thai Noodle Soup - Street Style
    • Spicy Salmon Sashimi Salad (My Fave Salmon Ever)
    • Easier Weeknight Pad Thai (Sen Chan Pad Pu)

    Before you start, if this is your first time, be sure to watch the video tutorial to ensure success! 

    Spicy Salmon Sashimi Salad

    By: Pailin Chongchitnant
    My favourite salmon dish EVER. Raw salmon slices tossed in a Thai seafood sauce that's tart, fresh, and spicy. It's a copycat recipe from a famous restaurant in Bangkok. A snap to make, and it's the perfect summer dish!
    5 from 10 votes
    Print Recipe Pin Recipe Share
    Prep Time 10 minutes mins
    Cook Time 10 minutes mins
    Course Appetizer, Main Course
    Cuisine Thai
    Servings 4

    Equipment

    • Small blender such as immersion or bullet blender (see note 1)

    Ingredients


    Nam Jim Seafood

    • 6 sprigs cilantro
    • 3 red Thai chilies, or more/less to taste (3 chilies is about medium spicy)
    • 4 cloves garlic, smashed until broken
    • 2 tablespoons fish sauce
    • 3 tablespoons lime juice
    • 1 ½ tablespoons palm sugar, finely chopped, packed
    • ⅛ teaspoon fine grain salt

    The Rest

    • 12 oz sashimi grade salmon
    • 10-15 mint leaves
    • 2 cloves garlic, very thinly sliced (optional)
    • ½ a lime, thinly sliced for garnish (optional)

    Want to save this recipe?

    We can email this post to you, so you can come back to it later!

    Check Out Ingredients and Kitchen Tools I Use

    Notes

    1. I prefer using a blender for this, but because the amount is small, an immersion or bullet blender works better than a jug blender. If you only have a large blender and it won't blend properly, you can double the recipe and keep the extra in the fridge and use it to dip anything! Alternatively you can use a mortar and pestle which can handle small amounts of stuff (instructions provided).

    FULL VIDEO TUTORIAL

    All my recipes come with step-by-step video tutorials with extra tips not mentioned in the blog post, so make sure you watch the video to ensure success. If you enjoy them, consider subscribing to the YouTube Channel to not miss an episode. Thank you!

    Subscribe to my YouTube Channel

    Instructions
     

    For the Sauce:

    • If using an immersion or bullet blender: Add all ingredients into the blending container and blend, starting on low speed and increase gradually, just until there are no more big chunks, but some small bits are still visible.
      6 sprigs cilantro, 3 red Thai chilies, 4 cloves garlic, 2 tablespoons fish sauce, 3 tablespoons lime juice, 1 ½ tablespoons palm sugar, ⅛ teaspoon fine grain salt
    • If using a mortar and pestle: Pick cilantro leaves off the stems and set the leaves aside for now. Finely chop the stems and add to a mortar and pestle and pound into a paste. Add the garlic and chilies and pound into a fine paste. Add the palm sugar and salt and pound until the sugar is melted, then add the fish sauce and lime juice and swirl the pestle around to dissolve the sugar. Chop the cilantro leaves finely and stir it into the sauce.

    Assembly:

    • Pat the salmon dry with a paper towel, then cut the filet down in half or thirds as needed so you end up with pieces that are about 2-inches wide. Then cut each piece into ¼-inch-thick slices. Place into a mixing bowl.
      12 oz sashimi grade salmon
    • Add the dressing to the salmon and toss well. Plate and garnish with mint leaves, garlic slices, and lime slices as desired. Serve immediately or within 20 minutes to avoid the salmon changing colour and firming up due to being cured by the lime juice.
      10-15 mint leaves, 2 cloves garlic, ½ a lime
    Watch my videos AD-FREE and get bonus content on Patreon!
    Tried this recipe? Share a pic!Tag @hotthaikitchen on Instagram and Twitter!

    Homemade Glass Noodles with Sesame Soy Dressing

    August 25, 2023 by Pailin Chongchitnant 5 Comments

    a bowl of glass noodle salad made with mung bean jelly noodles with cucumber and carrots.

    I use glass noodles all the time, but I never thought I could make it at home. Turns out, it is one of the easiest noodles to make, AND the process is so incredibly satisfying!

    Fresh homemade glass noodles are more tender than dry ones, but they still have that subtle elasticity. They make the perfect cold salads, and in this post I will share how to make the noodles and a simple soy-sesame dressing that pairs perfectly with them.

    a bowl of glass noodle salad made with mung bean jelly noodles with cucumber and carrots.
    Homemade glass noodles; a beautiful, healthy, and super easy dish to make!

    What are glass noodles?

    "Glass noodles" is a term that's used to refer to any noodles that are clear; and there are a few varieties made from different things. In Thailand, they are made from mung bean starch, (which is what we're using today), but Korean glass noodles are made from sweet potato starch. Some brands will mix in other starches such as pea starch to cut costs.

    In my recipes when I refer to glass noodles I am talking about woonsen, which are the very thin Thai noodles made from mung bean starch; and you can buy them dry at most Asian grocery stores. What we're making today is made from exactly the same ingredients, but using a different process. These fresh noodles are also called "mung bean jelly noodles."

    Korean and Chinese Mung Bean Jelly Dishes

    I first came upon the idea of homemade glass noodles not from a noodle recipe, but from a Korean mung bean jelly appetizer in Maangchi's cookbook. I was intrigued because these are cubes of jelly made from mung bean starch just like glass noodles.

    Sometime later I walked by a Uyghur restaurant in my neighborhood, and they had a "mung bean jelly noodles salad" on their sandwich board. This intrigued me further and sent me researching, which is when I discovered a Chinese dish called liang fen. The process of making these noodles looked so cool yet so easy that I just HAD to try it.

    The recipe I ended up landing on is different from the aforementioned dishes, particularly in regard to the starch-to-water ratio (which is really all there is to this recipe!). I used a higher starch ratio that I think yielded the perfect texture for the size of the noodles that I ended up with.

    Ingredients for Homemade Glass Noodles

    You need only two ingredients to make homemade glass noodles (mung bean jelly noodles), but you will need a couple of tools.

    a bag of mung bean starch and a bowl of mung bean starch
    • Mung bean starch. I am using the classic Thai brand of mung bean starch, Pine Brand, who sponsored this post. If you cannot find it, Korean grocery stores also carry mung bean starch, it is called Cheongpomuk-garu. Well-stocked Southeast Asian markets and Chinese markets are also worth checking out.
    • Water. That's it!

    A couple of tools you'll need:

    • Large hole grater. I loooove this Microplane extra coarse grater (pic below) which worked perfectly and yielded the perfect size noodle. This is also my go-to grater for everything else - cheese, zucchini, carrots, etc. - because I find it to be easier to handle than a box grater and takes up wayyyy less room!
      Note: They do sell liang fen graters online made specifically for this job, but they do have bigger holes and will create bigger noodles. I have not personally tried using it.
    • A rectangular mold. You will need a heat resistant container that is no larger than 8x8 inches. A glass food storage container or a loaf pan is perfect.
    A large hole grater is a great tool for making noodles, but you can also hand-cut them with a sharp chef's knife.

    Ingredients for the Glass Noodle Salad

    Here are all the ingredients you'll need for the salad; for the amounts, see the recipe card below.

    ingredients for glass noodle salad
    • Garlic
    • Soy sauce, I used Japanese soy sauce for this one.
    • Sugar
    • Rice vinegar
    • Toasted sesame oil
    • Green onion, you can also add chopped cilantro, mint, or other fresh herbs.
    • Chili crisp or chili oil. This really makes the dish. A Sichuan style chili crisp such as lao gan ma is great for this and is what I use.
    • Roasted peanuts, chopped, or sub toasted sesame seeds (optional)
    • English cucumber
    • Carrot, feel free to sub other crunchy veg.

    How to Make Fresh Glass Noodles

    process shots for making glass noodles steps 1-4
    1. Pour about ⅔ of the water into a medium pot and bring to almost a simmer over high heat. Meanwhile, stir the mung bean starch together with the rest of the water.
    2. Once the water steams and bubbles start to form (but it is not simmering) reduce the heat to medium high, then give the starch slurry a stir and pour it into the pot while stirring.
    3. Keep stirring CONSTANTLY until the thickens into a white paste.
    4. Once it turns white, keep stirring until the paste turns translucent. Once it is no longer changing and everything looks evenly translucent, remove from heat.
    process shots for making glass noodles steps 5-8
    1. Pour into the prepared mold and let cool to room temp, then chill for at least 3 hours and ideally overnight where it will solidify and firm up.
    2. Pop the chilled jelly out onto a clean work surface.
    3. Use a grater to grate the jelly, creating noodles, by applying even pressure as you pull the grater towards you.
    4. There're your noodles! These are ready to use now, but for a more elastic texture and clarity I recommend blanching them.
    process shots for making glass noodles steps 9-12
    1. Blanch the noodles in boiling water.
    2. Once the noodles turn translucent (about 10 seconds) they are done.
    3. Drain and cool them by running them under cold tap water. They are now ready to use!
    4. Combine the ingredients for the salad dressing together, pour over plated noodles and place the veggies on the side. Mix it up before you eat!
    a bowl of glass noodle salad made with mung bean jelly noodles with cucumber and carrots.

    Homemade Glass Noodles with Sesame Soy Dressing

    By: Pailin Chongchitnant
    Easy homemade glass noodles (mung bean jelly noodles) are tender, slightly elastic and so refreshing. Tossed in a sesame soy dressing, it is the perfect side to a summer meal, or as a light healthy lunch! Gluten free and vegan.
    5 from 2 votes
    Print Recipe Pin Recipe Share
    Prep Time 20 minutes mins
    Cook Time 15 minutes mins
    Noodle chilling time 3 hours hrs
    Course Appetizer
    Cuisine Chinese
    Servings 2

    Equipment

    • Large hole grater or use a sharp knife
    • Glass or metal rectangular mold, no larger than about 8x8 inches

    Ingredients


    Homemade Glass Noodles (mung bean jelly noodles)

    *Makes enough for about 3x of the salad recipe below (6 servings total)

    • ⅔ cup mung bean starch
    • 3 cups water

    The Salad (serves 2)

    • 1 clove garlic
    • 2 Tablespoons soy sauce
    • 2 teaspoons sugar
    • 2 teaspoons rice vinegar
    • 1 teaspoon toasted sesame oil, add more for a stronger sesame flavour
    • 9 oz homemade glass noodles, (mung bean jelly noodles)
    • 1 green onion, chopped
    • 2 teaspoons chili crisp, such as lao gan ma
    • 2 Tablespoons chopped roasted peanuts, or toasted sesame seeds
    • 3- inch section of an English cucumber, julienned
    • 2- inch section of a carrot, julienned

    Want to save this recipe?

    We can email this post to you, so you can come back to it later!

    Check Out Ingredients and Kitchen Tools I Use

    FULL VIDEO TUTORIAL

    All my recipes come with step-by-step video tutorials with extra tips not mentioned in the blog post, so make sure you watch the video to ensure success. If you enjoy them, consider subscribing to the YouTube Channel to not miss an episode. Thank you!

    Subscribe to my YouTube Channel

    Instructions
     

    For the noodles:

    • Have the mold ready, which should be a rectangular, heat-resistant container such as a glass food storage container or loaf pan. Size should not be any bigger than 8x8 inches to allow for enough thickness.
    • Add roughly two thirds of the water to a medium pot and bring to almost a simmer over high heat. Meanwhile combine the remaining water with the mung bean starch and stir until there are no more lumps.
      3 cups water, ⅔ cup mung bean starch
    • Once the water is steaming and bubbles start forming at the bottom (but it's not simmering or boiling), reduce the heat to medium high.
      Give the starch mixture a stir once more and pour it into the water WHILE STIRRING with a rubber spatula. Keep stirring constantly until the mixture is thick and uniformly translucent. (I highly recommend watching the video to see what this looks like.) This process should take only 2-3 minutes, so do not walk away or stop stirring. Remove from heat and immediately pour into the prepared container, smoothing out the top.
    • Let cool at room temperature for about 2 hours, then refrigerate for at least 3 hours (or ideally overnight) until the jelly is completely chilled and has become cloudy. (Refrigerating the jelly makes it firmer and much easier to cut/grate the jelly into noodles.)
    • Unmold the jelly by loosening the sides with a knife (if needed), then turn the mold over and the jelly should just pop out easily.

    To cut the noodles (this is the fun part!):

    • Using a grater: Press the grater gently onto the top of the jelly and pull it towards you, maintaining firm pressure on the jelly as you grate so the noodles are not too thin.
      Place the noodles into a bowl and repeat the grating. Once you reach the end of the block, you will find it more difficult to grate, so at this point I switch to a knife and cut them by hand.
    • Using a knife: Slice the jelly into sheets as thinly as you; aim for somewhere between 1/16 - ⅛ of an inch. Then cut each sheet into noodles about ¼ inch wide (or whatever width you like).
    • Serving tips: Once you have the noodles you can use them right away, but for a more elastic texture and clearer noodles, I recommend blanching them in boiling hot water for about 10 seconds until the noodles are translucent again. Drain and rinse them under cold tap water until they are completely cooled.

    To make the salad:

    • Make the dressing by grating the garlic with a microplane into a small mixing bowl; or alternatively press or finely mince it. Add the soy sauce, rice vinegar, sugar and sesame oil and stir until the sugar is dissolved.
      1 clove garlic, 2 Tablespoons soy sauce, 2 teaspoons sugar, 2 teaspoons rice vinegar, 1 teaspoon toasted sesame oil
    • Plate the noodles into a shallow serving bowl. (For a nicer presentation, see video for how to make pretty little noodle bundles.) Drizzle the dressing evenly over the noodles, then top with the chili crisp, green onions and roasted peanuts or sesame seeds. Place the cucumber and carrots on the side and serve. Mix everything together before enjoying!
      9 oz homemade glass noodles, 1 green onion, 2 teaspoons chili crisp, 2 Tablespoons chopped roasted peanuts, 2- inch section of a carrot, 3- inch section of an English cucumber
    • *Storage: Leftover salad will keep for a day in the fridge, but the noodles will firm up slightly and become cloudy again, and the noodles will also give off some water as they sit, diluting the dressing. So it is best to not keep any leftovers, but if you must, it will still taste "fine" after 1 day in the fridge.
      It is best to grate/cut only as much noodles as you will eat; but if you do have leftovers, they will keep in the fridge for a few days, but they will give off water as they sit and become firmer. Leaving it in a block will minimize water loss.
    Watch my videos AD-FREE and get bonus content on Patreon!
    Tried this recipe? Share a pic!Tag @hotthaikitchen on Instagram and Twitter!

    Classic Hainanese Chicken Rice (Khao Man Gai)

    April 18, 2014 by Pailin Chongchitnant 13 Comments

    a plate of Hainanese chicken rice with sauce being drizzled on it. A bowl of broth on the side.

    Hainanese chicken rice, known as khao man gai or khao mun gai in Thai, is popular dish not only in Thailand, but in many Asian countries such as Singapore, Hong Kong and Malaysia. Each country serves it slightly differently, with different sauces, but the heart of it is the same: tender-poached chicken served over rice that has been cooked in chicken fat and chicken broth. 

    This recipe is the Thai version, of course, and it's a dish near and dear to my heart because my grandmother is from Hainan, and this is her signature dish that she makes every time I see her. So if you're looking for authentic Hainanese chicken rice recipe, from an actual Hainanese grandma, this is it right here.

    a plate of Hainanese chicken rice with a bowl of dipping sauce on the plate and a bowl of broth on the side.

    What is Hainanese Chicken Rice (khao man gai)?

    Known as khao mun gai or khao mun gai in Thai, this dish originated on the Chinese island of Hainan (obviously!), which is off the coast of Southern China. There are many Hainanese immigrants in Southeast Asia due to the island's proximity. And indeed, my mother's side of the family are Hainanese immigrants to Thailand!

    Hainanese chicken rice is made by first poaching a whole chicken. Then the chicken cooking liquid, which will have turned into tasty chicken broth, is used to cook the rice. The rice is also first sauteed in rendered chicken fat that you get from trimming excess fat from the chicken.

    In my family, we make khao man gai usually during Chinese New Year or Qingming festival (Tomb-Sweeping Day) because these are days when we poach whole chickens to offer to our ancestors. Once the ancestors have had their share, we bring the chickens home and make delicious Hainanese chicken rice!

    Khao Mun Gai in Thailand

    Khao mun gai is the epitome of Thai street food. You can find them sold by street vendors, mom-and-pop restaurants, and food courts. It's cheap, fast, delicious, truly the food of the people. It was even featured in my Top 5 Rice Dishes in Thailand video!

    Since it was brought into Thailand by Chinese immigrants, you'll find it more in areas with a large Chinese communities, such as Bangkok. But because of its popularity, it is available just about anywhere in the country so you will definitely come across one.

    Khao man gai in different countries vary slightly, but most notably the sauce that's served with khao man gai in Thailand is unique. Ours is made from ginger and fermented soybean paste (taojiew), and in my opinion, I think it really is the best pairing with poached chicken!

    As you'll see below, in my household we actually serve 2 different sauces with this dish, the classic taojiew one, and one that my grandmother created herself!

    Ingredients and Notes

    Here are all the ingredients you'll need to make khao man gai and important notes about them. For amounts, check out the full recipe card below.

    This recipe is the traditional method that uses a whole chicken, and it does take time. If you are looking for something easier and quicker, check out my Quick & Easy Hainanese Chicken Rice Recipe that can even be done in a rice cooker! 

    THE POACHED CHICKEN

    • Whole chicken, preferably on the smaller side. If you can get free-range chicken it would also be better for this recipe as they tend to be smaller and more flavourful. If you are shopping at an Asian grocery store, you may find smaller whole chickens with head and feet attached, with the skin slightly more yellow, and these are THE perfect chicken for this recipe!
    • Cilantro roots, or 6 cilantro stems
    • Garlic, smashed until broken
    • Onion, roughly chopped
    • Daikon, cut in big chunks. This wasn't used in my original video but daikon makes for a super sweet, tasty broth and I highly recommend it! 
    • White pepper, ground or crushed
    • Ginger, sliced
    • Fine grain salt, I specify fine grain for accuracy in measurements. If you're using coarse grain salt, you'll need to measure out a bit more.
    • Green onions and/or cilantro, for garnishing the broth for serving, if desired.

    THE RICE

    • Jasmine rice
    • Chicken fat trimmings, ​you just need to trim these off the chicken before poaching. There's usually a lot of fat around the neck.
    • Chicken broth from poaching the chicken, you don't need to buy this!
    • Garlic, chopped or pounded in a mortar and pestle
    • Cucumber slices, for serving.

    SAUCE OPTION 1: The Classic Nam Jim Taojiew

    ​If you only make one dipping sauce, this is the one to make. This is the classic Thai dipping sauce that every khao man gai vendor serves in Thailand. 

    • Ginger, just wash the ginger well and no need to peel
    • Thai chilies, put as much or as little as you wish depending on how spicy you want it to be
    • Tao Jiew (Thai fermented soybean paste) which comes in a glass bottle and in export market this will usually be Healthy Boy Brand. It has the same colour as miso. You can also substitute an equal amount of miso paste of Korean doenjang.
    • Sugar
    • Black soy sauce, or dark soy sauce. Thai black soy sauce gives it a rich molasses flavour and a dark colour, but it isn't very salty. You can also use Chinese dark soy sauce instead, but because it's saltier, I'd reduce the amount of regular soy sauce. If you have sweet soy sauce, you can also use it and reduce the amount of sugar. Read more about different types of soy sauce here.
    • Soy sauce, whatever your regular soy sauce is fine.
    • White vinegar, or another type of mild-flavoured vinegar such as white wine vinegar or rice vinegar.
    • Chopped cilantro, optional

    SAUCE OPTION 2: Grandma's Signature Spicy and Sour Dipping Sauce

    You won't find this sauce sold at any khao man gai vendors in Thailand, but my grandma always makes 2 different sauces. For many years I thought that this sauce was the "Hainanese style" that she made back in her hometown. But I just found out from my aunt, during my most recent trip home (2024), that in fact my grandma made it up!

    Apparently one day she made the classic sauce, and people said it wasn't good, so she went back into the kitchen and came out with another sauce that she just made up on the fly. And people LOVED it. Since then she's been making two sauces. I find a mix of the 2 makes for the perfect combo, and I always have the 2 together!

    • Garlic
    • Thai chilies
    • Cilantro, stems and leafy parts separated and chopped.
    • Soy sauce
    • Lime juice
    • Sugar

    *In the video I put ginger in this sauce, but I misremembered. This sauce only has garlic!

    How to Make Hainanese Chicken Rice

    Here is an overview of all the steps to make this recipe. See the recipe card below for all the details and ingredient amounts. If this is your first time, I highly recommend watching the video tutorial to ensure success.

    Process shots for how to make kao mun gai steps 1-4
    1. If your chicken comes with the head and feet, cut off the neck, feet, and wing tips and add to a stock pot large enough to put the chicken into. And onions, daikon, garlic, ginger, cilantro roots and white peppercorns. Add enough water to generously submerge all ingredients and simmer for 20 minutes to render a stock.
    2. Meanwhile, trim excess checking fat from the chicken (lots around the neck and butt areas) and add these trimmings to a wok or to the pot you will use to cook the rice. Set it aside for now.
    3. Once the stock is ready, season with 1 tablespoon of salt and fill the pot about ⅔ full with cold water. Add the chicken to the pot and add more water as needed to keep the chicken submerged.
    4. On medium high heat, bring the temperature of the water up to about 170°F. If you don't have a thermometer, the water should have lots of steam coming off the top but it is should not be bubbling. Reduce the heat to maintain this temperature and cook until the chicken's internal temperature is at least 175°F at the thickest part of the thighs, and 165°F at the thickest part of the breast. This should take about 40-50 minutes, but it will vary according to the size of the chicken.
    Process shots for how to make kao mun gai steps 5-8
    1. While the chicken is cooking, make the rice by first washing the rice a few times, and drain. In a wok or the pot you're using the cook the rice, saute the chicken fat trimmings over medium heat until you have at least 2 tablespoon of rendered chicken fat.
    2. Remove the chicken bits from the oil and discard, then add the garlic to the chicken fat and saute until the garlic is golden.
    3. Add the washed-and-drained rice and stir until the rice is thoroughly heated through, about 2 minutes. If you're sauteing the rice in a wok, transfer the rice to the pot you'll use to cook the rice or the rice cooker. Leave it here for now while the chicken finishes cooking.
    4. Once the chicken is done cooking, remove it from the broth and allow to cool. Taste the broth and add more salt as needed to make it taste like a lightly-seasoned but still delicious soup. Use the broth to add to the rice, and stir the rice over medium high heat until it starts to simmer.
    Process shots for how to make kao mun gai steps 9-12
    1. Once the water is simmering, cover the pot and reduce the heat to LOW and let the rice cook slowly until all the liquid has been absorbed, about 15 - 20 minutes. Meanwhile, make the sauces (instructions below).
    2. Once the chicken is cool enough to handle, and the rice and sauces are ready, carve the chicken. If you need guidance for carving the chicken, watch this video: How to carve a chicken.
    3. Cut the chicken into bite-sized pieces. The thighs will be a bit harder as you'll need to cut around the bone first before cutting the meat.
    4. Serve the chicken over rice with the sauces and some cucumber slices - the chicken can be room temp, but the rice should be hot. It's traditional to serve the remaining chicken broth on the side as well!
    kao mun gai dipping sauce being poured from a mortar into a bowl

    The sauces are both made in a mortar and pestle. If you don't have one you can finely mince everything, but you will be able to get flavours out of the herbs better by pounding in the mortar and pestle. If you're making a large amount you can also make them in a blender.

    For the Classic Dipping Sauce

    1. Pound together the ginger and chilies into a rough paste. Then add fermented soybean paste, sugar, black soy sauce, regular soy sauce, and vinegar. Stir until the sugar is completely dissolved. Stir in chopped cilantro, if desired.

    For the Spicy & Sour Dipping Sauce

    1. Pound together garlic, chilies, and cilantro stems into a rough paste, then add the sugar, soy sauce, and lime juice. Stir to dissolve the sugar and then stir in chopped cilantro leaves.

    FAQ

    I've seen Hainanese chicken rice served with different sauces, what are those?

    As mentioned, different countries have different sauces to go with Hainan chicken rice. In Singapore, for example, they serve it with a sauce similar to the Thai sweet chili sauce. In Hong Kong, they serve it with a ginger scallion oil made by pouring hot oil over some finely chopped ginger, green onions and salt. You can definitely try them out! 

    Can you make this in an instant pot? 

    This is one dish I do not recommend using a pressure cooker for. Yes it take time, but the low temperature cooking is key to getting the best Hainanese chicken with tender, juicy meat. High heat will squeeze all the juices out of the chicken and leave you with tough and dry meat. If anything, sous vide is your best bet! 

    If you're looking for a faster way to make this dish, check out my Easy Hainanese Chicken Rice Recipe!

    Classic Hainanese Chicken Rice (khao man gai)

    By: Pailin Chongchitnant
    Hainanese chicken rice of "khao man gai" is a popular street food, not only in Thailand, but all over Southeast Asia! This dish will amaze you how good "chicken and rice" can be. This recipe is the traditional method that poaches a whole chicken; for a weeknight, check out my Easy Hainanese Chicken Rice Recipe.
    4.89 from 9 votes
    Print Recipe Pin Recipe Share
    Prep Time 30 minutes mins
    Cook Time 1 hour hr
    Course Main Course
    Cuisine Thai

    Ingredients
      

    The Chicken

    • 1 whole chicken, preferably small
    • 2 Cilantro roots, or 6 cilantro stems
    • 4 cloves garlic, crushed
    • ½ onion, rough chopped
    • 3 -inch section daikon, peeled and cut in chunks, optional
    • ½ teaspoon white peppercorns, crushed, or ground white pepper
    • 2 slices ginger
    • 1 tablespoon fine grain salt

    The Rice

    • 2 cups jasmine rice, uncooked
    • 2 ⅔ - 3 cups chicken broth, from cooking the chicken
    • 2 tablespoon chopped garlic

    Sauce 1: The Classic Dipping Sauce (Nam Jim Tao Jiew)

    • 2 tablespoon finely chopped ginger
    • 2 Thai chilies
    • 3 tablespoon Taojiew (Thai fermented soybean paste), or substitute miso or doenjang thinned out with a little water
    • 1 tablespoon sugar
    • 1-2 tablespoon black soy sauce, see note 1
    • 1 tablespoon soy sauce
    • 1 teaspoon white vinegar
    • 2 sprigs cilantro, chopped, optional

    Sauce 2: Spicy & Sour Dipping Sauce (My Grandma's Signature)

    • 4 cloves garlic
    • 3 red Thai chilies, or to taste
    • 3 sprigs cilantro, stems and leafy parts separated and chopped
    • 2 tablespoon soy sauce
    • 2 tablespoon lime juice
    • 2 teaspoon sugar

    Want to save this recipe?

    We can email this post to you, so you can come back to it later!

    Check Out Ingredients and Kitchen Tools I Use

    Notes

    1. The "blackness" of Thai black soy sauce varies greatly between brands, so start out with 1 tablespoon and go from there. If you're substituting Chinese "dark soy sauce" for this, use only 1 tablespoon and reduce the amount of regular soy sauce by ½ Tbsp. See this video on the differences between dark and black soy sauce.

    FULL VIDEO TUTORIAL

    All my recipes come with step-by-step video tutorials with extra tips not mentioned in the blog post, so make sure you watch the video to ensure success. If you enjoy them, consider subscribing to the YouTube Channel to not miss an episode. Thank you!

    Subscribe to my YouTube Channel

    Instructions
     

    • If your chicken comes with the head, neck and feet, chop them off along with the wing tips and add to a stock pot large enough to put the chicken into. Add onions, daikon (if using), garlic, ginger, cilantro roots and white peppercorns. Add enough water to generously submerge all ingredients. Bring to a simmer over high heat, then reduce heat to medium and simmer for 20 minutes to infuse the herbs.
      1 whole chicken, 2 Cilantro roots, 4 cloves garlic, ½ onion, ½ teaspoon white peppercorns, 2 slices ginger, 3 -inch section daikon
    • Meanwhile, trim excess fat from the chicken (lots around the neck flap and around the chicken cavity opening). Add these fat trimmings to a wok or the pot you will use to cook the rice. Set it aside for now.
    • Once the stock is ready, season with 1 tablespoon of salt and fill the pot about ⅔ full with cold water. Add the chicken to the pot and add more water as needed to keep the chicken submerged.
      1 tablespoon fine grain salt
    • On medium high heat, bring the temperature of the water up to 170°F (77°C). If you don't have a thermometer here's what to aim for: the water should have lots of steam coming off the top but is not simmering (no bubbling!).
    • Once the temperature is reached, reduce the heat to medium-low, or whatever is needed to maintain the temperature there. Taste the broth and add more salt as needed until it tastes like a nice-but-mildly-salted soup.
    • Cook until the chicken is done, flipping the chicken halfway through and keeping an eye on the heat to make sure the water is not simmering. Cook until the internal temperature reaches 165°F at the thickest part of the breast, and 175°F at the thickest part of the thighs. This takes about 40-50 minutes, but timing varies depending on the size of the chicken. Note: Cooking time starts AFTER water temperature has reached 170°F. 
    • When the chicken is done, use tongs to remove it from the stock and let cool. Make the rice and the sauces while the chicken cools.

    For the Chicken Rice

    • Wash the rice a few times until the water runs mostly clear. Drain well.
      2 cups jasmine rice
    • Heat the collected chicken fat over medium heat until you've got about 2-3 tablespoon of rendered chicken fat. If for some reason you do not have enough rendered fat, you can supplement with vegetable oil. Remove the solids and discard.
    • Add the garlic to the chicken fat and saute until the garlic is golden. Add the rinsed rice, turn the heat up to high and toss until it is heated through, 2-3 minutes. If the rice is in a wok, transfer it to the rice cooker or whatever pot you're using to cook the rice. Hold the rice here until the chicken is done cooking, if it isn't already.
      2 tablespoon chopped garlic, 2 ⅔ - 3 cups chicken broth
    • Once the chicken is done, take 2 ⅔ cups of chicken cooking water and add it to the rice. Over medium high heat, stir the rice occasionally until water is bubbling and the fat is mixed into the liquid and no longer floats on top. Cover and cook on LOW heat until rice is done, about 15 minutes. (If using a rice cooker, you can just let it go until it's done.) Make the dipping sauces while the rice cooks.

    For the Classic Dipping Sauce:

    • Pound together the ginger and chilies into a rough paste. Then add fermented soybean paste, sugar, black soy sauce, regular soy sauce, and vinegar. Stir until the sugar is completely dissolved. Stir in chopped cilantro if using.
      2 tablespoon finely chopped ginger, 2 Thai chilies, 3 tablespoon Taojiew (Thai fermented soybean paste), 1 tablespoon sugar, 1-2 tablespoon black soy sauce, 1 tablespoon soy sauce, 1 teaspoon white vinegar, 2 sprigs cilantro

    For the Hainanese Dipping Sauce:

    • Pound together garlic, chilies, and cilantro stems into a rough paste. Add the sugar, soy sauce, and lime juice and stir until the sugar is dissolved. Stir in chopped cilantro leaves.
      3 red Thai chilies, 3 sprigs cilantro, 2 tablespoon soy sauce, 2 tablespoon lime juice, 2 teaspoon sugar, 4 cloves garlic

    Assembly

    • Taste the remaining broth and adjust seasoning as needed; we always serve a bowl of broth alongside the rice. You can add some chopped green onions or cilantro to the broth also if you wish. 
    • Carve the chicken, debone the thighs and drumsticks, and slice them into thick slices. You can follow this video for instructions: How to carve a chicken.
    • Serve the sliced meat over the rice, along with some sliced cucumber on the side, and a bowl of chicken broth as a palate cleanser. Don't forget the sauces! I like to use both sauces in combination.
    Watch my videos AD-FREE and get bonus content on Patreon!
    Tried this recipe? Share a pic!Tag @hotthaikitchen on Instagram and Twitter!

    Quick & Easy Hainanese Chicken Rice (Khao Man Gai)

    January 11, 2019 by Pailin Chongchitnant 8 Comments

    Easy Hainanese chicken rice recipe

    The traditional way to make Hainanese chicken rice, known in Thai as khao man gai or khao mun gai, is a bit of a project as it requires poaching a whole chicken, as per my classic Hainanese Chicken Rice recipe. This recipe simplifies it by using chicken parts and cooking the chicken and rice at the same time, making it instantly weeknight friendly without compromising the flavour at all. It now only takes 30 minutes to cook, and I no longer go back to the whole-chicken method after discovering this one!

    a plate of Hainanese chicken rice with sauce being drizzled on it. A bowl of broth on the side.

    However this does require that you have some good chicken stock on hand. You can use store bought chicken stock if you wanna make it super quick, but for the most authentic flavour I recommend you use homemade Asian style chicken stock.

    I always keep homemade chicken stock in my freezer, and I recommend you do too because it comes in so handy in so many situations! Chicken noodle soup in a snap, anyone?

    A note on the chicken stock

    Though store bought stock is okay to use, if you want it to taste like in Thailand, you'll get best results with homemade, Thai style chicken stock. At the very basic level, you can simply simmer chicken bones in water and you'll have chicken stock. But to boost the flavour, adding some aromatics will help.

    I like to use daikon and/or onions, garlic, white pepper and cilantro roots or stems. But If you're making the stock specifically for Hainanese chicken rice, adding a few slices of ginger works wonderfully.

    Watch The Full Video Tutorial!

    All my recipes come with step-by-step video tutorials with extra tips not mentioned in the blog post, so make sure you watch the video below to ensure success - and if you enjoy the show, please consider subscribing to my YouTube channel. Thank you!


    Print
    clock clock iconcutlery cutlery iconflag flag iconfolder folder iconinstagram instagram iconpinterest pinterest iconfacebook facebook iconprint print iconsquares squares iconheart heart iconheart solid heart solid icon
    Easy Hainanese chicken rice recipe

    Quick & Easy Hainanese Chicken Rice (Khao Mun Gai)

    5 Stars 4 Stars 3 Stars 2 Stars 1 Star 5 from 6 reviews
    • Author: Pailin Chongchitnant
    • Prep Time: 15 mins
    • Cook Time: 40 mins
    • Total Time: 55 minutes
    • Yield: Serves 3-4
    Print Recipe
    Pin Recipe

    Description

    An easier version of the classic Hainanese chicken rice. No need to poach a whole chicken, we can make an equally delicious dish using chicken parts, all cooked in one pot!


    Ingredients

    For the Chicken:

    • 3 pc skin-on, bone-in chicken thigh (see note 1)
    • 1 large skin-on chicken breast (or 2 small ones)
    • 1⁄2 tsp salt

    For the Rice:

    • 1 1⁄2 cups jasmine rice, rinsed until the water runs clear and drain well (note by "cup" I mean measuring cup and not the rice cooker cup)
    • 1 2⁄3 cups chicken stock, unsalted, preferably homemade (see note 2, recipe follows)
    • 1⁄2 tsp salt
    • 2 Tbsp chopped garlic
    • 2 Tbsp chopped ginger
    • Optional: Extra chicken stock for serving on the side, about 1⁄2 cup per person (see note 3)
    • Optional: Fresh cucumber slices for serving

    Classic Dipping Sauce:

    • 1-inch knob ginger, finely chopped
    • 2 cloves garlic
    • 1 Thai chili, optional, to taste
    • 3 Tbsp Tao Jiew (Thai fermented soybean paste) OR  2 tablespoon Korean doenjang + 1 tablespoon water
    • 1 Tbsp sugar
    • 2 tsp dark soy sauce (or use Thai black soy sauce)
    • 2 tsp soy sauce
    • 1 tsp vinegar
    • 3 sprigs cilantro, chopped

    My Grandma's Signature Spicy & Sour Dipping Sauce:

    If you only make one sauce, make the classic sauce. But this one is my grandma's own creation, and in our household we make 2 sauces, and I always love it with both!

    • 4 cloves garlic
    • 3 red Thai chilies, or more to taste 
    • 3 cilantro sprigs, stems and leaves separated, roughly chopped 
    • 2 Tbsp soy sauce
    • 2 Tbsp lime juice 
    • 2 tsp sugar 

    Basic Asian-Style Chicken Stock
    (This makes more than you need, but you can freeze the rest)

    • 2 lb chicken bones
    • 3 L water
    • 3-inch section daikon, peeled and cut into big chunks
    • Half and onion, large dice
    • 5 garlic cloves, smashed until broken
    • 1⁄2 tsp cracked white pepper
    • 5-6 slices ginger, optional
    • 3-4 cilantro roots or 6-8 cilantro stems

    Special tools: A heavy bottomed pot or a rice cooker big enough so that the chicken pieces can be laid in one layer.

    Check out ingredients and tools I use 

    Want to save this recipe?

    We can email this post to you, so you can come back to it later!


    Instructions

    1. Trim extra fat and skin off your chicken thighs and reserve. You will need to render fat from these trimmings for the rice.
    2. Sprinkle salt over chicken and rub it in. Let sit at room temp while you prep other things.Note: You can do everything from this point on right in the pot that you will use to cook the rice and chicken, and it'll be a one pot meal. But I prefer to sauté the rice in a wok and then transfer.
    3. In a wok, or the pot you're using to cook the rice in, add just a tiny bit of vegetable oil along with chicken fat/skin trimmings. Saute over medium-low heat to render chicken fat until the trimmings are browned. You want to have about 2 tablespoon of fat total, so if there is too much, remove some. If there isn't enough, add a little more vegetable oil to supplement. Remove chicken trimmings, leaving the fat in the pot.
    4. In the same pot/wok you used to render chicken fat, add chopped ginger and garlic and saute over medium high heat until garlic starts to turn golden.
    5. Add raw, rinsed rice and salt, and turn heat up to high, tossing rice for about 2 minutes until hot throughout and dry.
    6. Transfer rice into a rice cooker or a heavy bottomed pot (unless you're already using that pot). Note: A rice cooker is more convenient, because it will turn itself off, but I personally prefer using a pot so I can use low heat to gently cook the chicken so it will be less likely to overcook.  
    7. Add chicken stock to the rice and and stir to mix. Place chicken in one layer on top of rice.
    8. Turn heat to high and watch until you start to see the first sign of simmering. Then turn the heat down to low, cover with a tight fitting lid and cook for 25 minutes or until the chicken is done. While you wait for it to cook, make the dipping sauce and the broth.
    9. When chicken is cooked, remove chicken from the rice and let rest for at least 5 minutes before slicing.
    10. Fluff rice to distribute seasoning and chicken juices evenly.
    11. To serve: Slice chicken into thin pieces, and place on top of rice. Serve with dipping sauce, some fresh cucumber and extra chicken broth as soup. Enjoy!

    For the Classic Dipping Sauce:

    1. Pound garlic, ginger and chilies into a paste. Alternatively, finely chop everything and add to a small bowl.
    2. Add the soybean paste, sugar, dark soy sauce, soy sauce and vinegar.  Stir until the sugar is dissolved.
    3. Before serving stir in the chopped cilantro right before serving.

    For My Grandma's Signature Sauce:

    1. In a mortar and pestle, pound together garlic, chilies, and cilantro stems into a rough paste, then add the sugar, soy sauce, and lime juice. Stir to dissolve the sugar and then stir in chopped cilantro leaves.

    For the chicken broth to be served on the side (optional):

    1. heat the chicken stock in a pot until it comes to a simmer. Season lightly with salt or soy sauce and a dash of ground white pepper. Garnish with some chopped cilantro or green onions if desired.

    To Make Chicken Stock:

    1. Gently simmer chicken bones for 1 hour in the water, skimming off foam and scum as they come up. However, if you want to keep the fat for your rice, I would not skim after about 30 minutes so you don't end up skimming off the fat.
    2. After 1 hour of simmering, add all the vegetables/aromatics and simmer for another 45 minutes to 1 hour.
    3. Drain off the stock and skim off any fat on top of the stock and reserve for your rice. If you are making the stock ahead of time, you can skim the fat after the stock has been refrigerated to make it easier. 

    Join us on Patreon for Exclusive Content!


    Notes

    1. If you only want to use white meat for this dish, that's fine, but the chicken thighs are also going to be your main source of chicken fat trimmings that you need for the rice. So you need to make sure that whatever chicken you use, you are able to trim enough chicken fat off of it. Or, if you’re making your own chicken stock, choose bones with fatty bits attached (back bones are good for this) and you can skim the fat off the stock when it’s done. You can also trim fat and skin off of chicken thighs that you can save for another dish!
    2. You can use store bought stock for a super quick/easy version, but for the most authentic flavour I highly recommend using Asian-style homemade stock for this one.
    3. It’s traditional to serve a bowl of chicken broth on the side since the dish itself isn’t very saucy. The broth can be simply seasoned with salt and pepper, but you’ll sometimes see people putting a few pieces of winter melon in it.

    Did you make this recipe?

    Tag @HOTTHAIKITCHEN on Instagram and hashtag it #HotThaiKitchen!

    How to Stir Fry Anything in 5 Simple Steps

    June 14, 2024 by Pailin Chongchitnant 1 Comment

    a bowl of green beans and chicken stir fry

    Growing up in Thailand, there was one kind of food that made it to every single dinner in our household: stir fries. That’s because they are fast, easy, and incredibly versatile. Here's the important part: if you know the basic principles of stir frying, you can make a good stir fry with any ingredients you have on hand; and that is what you'll learn in this article. And once you know the basic stir frying technique, you can be creative and have more fun!

    The Plan: First we will cover "the structure" of stir fries and some ingredient options, then we will talk through the techniques.

    a bowl of green beans and chicken stir fry
    Chicken and green beans stir fry with Thai chili paste, a dish I used to demo my stir frying techniques.
    [feast_advanced_jump_to]

    Watch The Video

    If you prefer to watch rather than read, most of the information I include in this blog post is also covered in the video, and the technique section will be more easily understood visually via the video!

    The Structure of Stir Fries

    This is the important mindset shift: once you start thinking about stir fries in terms of its structure instead of seeing different stir fries as different recipes, you can stir fry anything. There are 3 major components to any stir fries:

    1. The Nuggets: Proteins and Veggies

    "The nuggets" is my term for all the chunky pieces in your stir fry; basically the proteins and the vegetables. Most people are stuck thinking that they need a mix of protein and veggies to make a stir fry, but it doesn’t have to be. It can be an all veggie stir fry like my cabbage fish sauce stir fry, or gailan oyster sauce stir fry - or it can be an all-meat stir fry like my grandma’s garlic shrimp stir fry, or garlic pepper chicken.

    For proteins: Chicken, pork, beef, shrimp, fish, tofu, you name it, it’s all stir-fryable. Leftover proteins are great and make it easy cuz it’s already cooked, such as in my black pepper beef recipe where I use leftover cut-up steak.

    a variety of meats and seafood, tofu and eggs.
    Protein options for stir frying.

    For veggies, absolutely anything works. ANYTHING is stir-fryable. Even things you don’t associate with stir fries, like cucumber - which is great in stir fries - and also romaine lettuce!

    a bell pepper, cucumber, squash, mushrooms, green beans and cabbage on a tray

    Important Tips for Preparing Proteins for Stir Frying

    • The chewier the protein, the thinner the pieces should be. Pork and beef should always be sliced between ⅛ - ¼ inch (3-5 mm) thick. Chicken can be cut around ½ -inch (1.25 cm) thick. And fish should be kept in big 1-inch chunks at minimum.
    • Always slice pork and beef against the grain. If you're starting from steaks where the meat grain runs up and down, cut the steak into 1-inch-wide pieces, then turn it on its side so the grain now runs left-to-right - and you can now slice thinly against the grain.
    • Preventing fish from falling apart. Choose fish that is firmer and thicker, such as salmon and halibut, and cut them into big chunks; at least 1-inch thick. Pre-sear the fish pieces so they are about 80% done, or even 60% if using fish that can be eaten medium such as salmon. Then briefly toss them in at the end just to coat them in the sauce. You can also dredge fish chunks in flour and deep fry them before tossing into stir fries at the end - this is a restaurant trick for preventing fish from falling apart.
    • Tofu. Use firm, extra firm, or pressed tofu for stir frying. If using pressed tofu, such as the one I used in pad thai, you don't need to fry it as it is very sturdy. If using firm or extra firm, it should be fried or air-fried to prevent crumbling and to create chewiness. You can also use frozen tofu which is sturdy and can absorb sauce better. See this post all about the science of frozen tofu and how to use them in dishes.

    1. The Sauce

    Once you’ve decided on the big stuff (the nuggets), now we think about the sauce. The main job of the sauce is to bring taste elements into the dish. Note I said taste not flavour. The 5 tastes are: sweet, salty, sour, umami and bitter; although bitter is not really a part of most stir fries so we will leave that out for this discussion. Let’s break these down:

    Salty - An element every dish needs

    a variety of soy sauces in bottles
    Common sauces for stir frying in Thai cuisine.

    This is non-negotiable. You NEED something salty in your stir fry (or any dish, really). Some common options are: soy sauces of all kinds, fish sauce, oyster sauce, fermented soybean pastes (Thai taojiew) or miso, shrimp paste, salt, or anything else salty you can think of. You can use just one, like in my cabbage fish sauce stir fry, or a combination of a few which is more common in Asian stir fries.

    Sweet - The salt balancer, or the star

    sugar, brown sugar, palm sugar, honey, sweet soy sauce and thai chili paste
    Sweeteners for stir fries.

    Sometimes you'll want the sweetness to be the star of the dish, like in sweet and sour stir fry, but more commonly you want just a liiiiiitttle bit of sweetness to balance the salt, such as the little bit of sugar in my mixed veggies stir fry. Or maybe something in between. It depends on the flavour profile of the dish - and is something you, the chef, have to decide upon.

    In terms of ingredients, white sugar is great if you’re using just a small amount, but if sweet is a prominent flavour, then palm sugar, brown sugar, sweet soy sauce, maple syrup, honey, etc. will bring in more complexity. Note that Thai chili paste aka chili jam would also fall into the sweet category, but it’s also bringing in a lot of other great flavours as well, such as in my cashew chicken recipe.

    Sour - Maybe you want it, maybe not.

    vinegar, tamarind paste, sriracha and a lime

    Unlike salty, sour is not a taste that every stir fry needs. Like sweet, it depends on what you’re going for, though it is used much less frequently than sweet.

    If you do want an element of sour, you can use vinegar, like in my sweet and sour stir fry, or tamarind paste, like in my tamarind shrimp recipe, or even vinegary hot sauce such as sriracha as in my cucumber chicken stir fry recipe.

    Lime juice and lemon juice are less common in stir fries, but if you're gonna add them it’s best to add them at the end as they taste better when they’re not cooked in high heat.

    Other Sauce Ingredients

    There are other sauce ingredients that don't offer any taste but bring on lots of flavour (remember taste and flavour are not the same thing). Things like sesame oil, coconut milk, or even chicken stock.

    Pro Tip: Make sauce in bulk

    If you’ve got a favourite stir fry, say cashew chicken, you can make 10x of the cashew chicken sauce and now you won't have to make it from scratch every time. Most stir fry sauces will last indefinitely in the fridge.

    Also check out my Universal Stir Fry Sauce that you can make in bulk and use to stir fry anything including fried rice and noodles. This is something I learned working at Thai restaurants where they'd have a vat of this sauce and it goes into almost every stir fry that they make!

    3. Aromatics

    garlic, shallots, chilies, thai basil, makrut lime leaves, green onion, curry paste.
    Some aromatics you can use for stir frying.

    You could make a stir fry with just the nuggets and the sauce, but every good stir fry has aromatics. They're what give complexity to the dish. Aromatics include anything you’d call a herb or a spice. This can be as simple as chopped garlic, but you can also add shallots, chilies, black or white pepper, onions, lemongrass, basil, cilantro, or even curry paste. The possibilities here are endless.

    The Technique - 5 Steps to Great Stir Fries

    Now that we have the structure, let's talk technique. While everything will be written down, this part is better understood visually, so I highly recommend you watch the video tutorial where I show you two different stir fries using recipes that require slightly different treatment.

    These steps are not Thai cuisine specific; you can use these techniques with any ingredients from any cuisine. But there are a few other techniques that are unique to other cuisines, or more common to restaurant cooking, that we won’t get into here.

    Okay, my basic stir frying technique is done in 5 steps:

    Step 1: Cook the meat separately.

    cooked chicken in a wok

    I first sear the meat in a hot wok until browning develops on the underside. Then I toss and stir the meat until it's cooked through, then remove from the pan. If your meat is already cooked, like leftover proteins, you can obviously skip this step.

    Why cook the meat separately? You don't have to, but I like to do it because it gives me control over meat "doneness". If you add the meat in raw with everything else, how long the meat spends in the pan is tied up with how long other things take to cook, and you might then overcook the meat. You also won't get any browning if you don't sear it separately, and browning is flavour! 

    Tip: I always ensure the meat is marinated so that the seasoning isn’t just in the sauce around the meat but IN the meat as well. A simple fish sauce or soy sauce marinade is fine.

    Step 2: Sauté Non-Delicate Aromatics

    garlic and chilies in a wok

    In the same pan you used to sear the meat, add more oil if needed, then sauté any aromatics that are not leafy and don't "wilt". That's your garlic, onions, shallots, chilies, curry pastes, etc. Use medium heat at this stage as aromatics can burn easily.

    Give the aromatics a couple of minutes to cook and infuse their flavour into the oil, and then the oil will carry the flavour of the aromatics into the rest of the dish. This is why we don’t just throw garlic in midway; the flavour wouldn't have a chance to permeate the whole dish. 

    If using garlic, once the smallest bits of garlic turn golden, that's your cue for Step 3.

    Step 3: Stagger-add vegetables and sauce

    stir fy sauce being poured into a wok full of green beans

    The longest-cooking veggie goes in now, and give them a good toss in the heat and the oil, then add the sauce (which I always have mixed up in advance so that I only have to add 1 thing). In this example I'm using the sauce from my Chili Paste Stir Fry recipe.

    Bell pepper and green beans in a sauce in a wok.

    If you’re using different types of vegetables that take different amounts of time to cook, stagger-add them accordingly. For example, if you like bell pepper crisp, add them after the beans are almost done.

    kabocha squash in a wok with a lid over it

    If a certain vegetable takes a long time to cook, add a splash of water then cover the pan and let it steam. Come back a minute before it's done. If you're not sure how long it takes, keep poking it with a fork every minute or so to check. In this example I'm making the kabocha squash stir fry recipe.

    Okay once your veggies are done, we go to Step 4

    Step 4: Add the protein back in

    Bell pepper and green beans and chicken in a sauce in a wok.

    Your pre-cooked protein goes back into the pan to be tossed in the sauce. If your protein is fully cooked and is still hot, it just needs to be tossed for a few seconds. If you are using cold leftover protein from the fridge, be sure to give it enough time to heat through.

    kabocha squash and eggs in wok

    If using eggs, they can go in at this step; and let them set a bit before scrambling so that they remain in chunks (best to see this technique in the video).

    Step 5: Off the heat and ddd delicate aromatics

    a wok with kabocha squash, eggs and thai basil

    Now is the time for any leafy aromatics like basil and green onions to go in, and which I add off-heat so they don't wilt too much. For suuuuper delicate herbs that wilt very easily in heat like cilantro, you can even add them after plating. I always add them off-heat because the residual heat is more than enough to wilt the herbs without over-cooking everything else. 

    And that is how you stir fry anything!

    What about fried rice?

    Fried rice is also a kind of stir fry, or what Thai people call a pad. Generally, the same steps still apply, with a few modifications:

    • Treat rice like vegetables. Add them in at step 3, after aromatics but before the sauce. The sauce should be drizzled over the rice as the liquid from the sauce will help the rice grains separate.
    • If adding eggs to fried rice, add the eggs in after the aromatics and before the rice. Scramble the eggs and then add the rice.
    • Allow the rice to toast. For good fried rice, you want the rice to toast and brown slightly to develop a deeper flavour. After the rice is well mixed with the sauce, let it sit undisturbed over high heat for 15-20 seconds to allow the rice to brown, then flip and repeat a few more times. Timing for how long to let the rice sit each time will depend on the strength of your stove, so a bit of trial and error is required.

    What about noodle stir fries?

    Noodle stir fries are harder to generalize because different kinds of noodles require different techniques. Step 1 (meat) and Step 2 (aromatics) are gonna be consistent, but from that point onward it kind of depends which noodles you're using.

    My advice is to learn how to work with each kind of noodle separately. So if you want to learn how to stir fry fresh rice noodles, start by learning a pad see ew recipe, or for dry rice noodles learn an easy pad thai recipe, or for egg noodles, learn my mie goreng recipe.

    Once you’ve mastered that, you can start generalizing the technique and change out ingredients. Keeping in mind of course that different ingredients may require different treatments, so you gotta use some critical thinking here. 

    FAQ: The Best Cookware for Stir Frying

    If you want to stir fry with any regularity at all, I suggest you get a wok, and it'll change your stir frying life.

    Why wok? Because with a wok you can actually STIR and toss to your heart's content without worrying about things jumping out. Yes, you can stir fry with a large skillet, but it's so much more difficult to try to toss, flip, and stir without having things escape the pan.

    If you need to use a skillet, make sure it is LARGE (12-inch at least) and I recommend you practice the "pan toss" - i.e. flipping things in a skillet without utensils - because that will allow you to toss and mix things more quickly and efficiently.

    But...what kind of wok?

    The best kind of wok is a whole other discussion, and it really depends on your specific needs. If you are a casual stir-fryer who just wants to stir fry with ease and convenience, Korean, flat-bottom, nonstick woks are a great, low-maintenance option. They also come in a few sizes to match your storage needs. That's what I use at home often where convenience is a priority. You can get them at most large Asian grocery stores, and definitely at H-Mart.

    If you want to get serious with stir fries, and you want to get that smoky wok char and use max-high heat, you'll want to get yourself a carbon steel wok. It comes with some special maintenance however and are generally pretty big if you only have limited space.

    For further discussion:

    WATCH: My video about the best wok to buy

    WATCH: My video about how to care for a carbon steel wok.

    Salted Fish Fried Rice

    February 7, 2017 by Pailin Chongchitnant 6 Comments

    A plate of salted fish fried rice

    Salted fish fried rice is comfort food for many Thai people. Such simple ingredients: salted fish, Chinese broccoli, rice and eggs...yet the flavours are just so satisfying! In Thailand we buy salted fish already made, but in this recipe I also show you how to make your own, which requires very little effort and I can make is less salty than the commercially made one so I can put more fish in my fried rice!

    *In my cookbook SABAI, since it is all about weeknight-friendly Thai cooking, I have a quick version of this recipe as well.

    A plate of salted fish fried rice
    Salted fish fried rice using homemade salt-cured salmon.

    Salted Fish Fried Rice in Thailand

    In Thai, this dish is called khao pad kana pla kem ข้าวผัดคะน้าปลาเค็ม which literally means fried rice with Chinese broccoli (gai lan) and salted fish. The fish would normally be salt-cured king mackerel which is commonly available at any market.

    It's a simple, rustic dish you can commonly find at food courts and some ahaan taam sung shops which are street-side restaurants that offer a variety of quick, wok-based dishes.

    Fun fact: ahaan taam sung อาหารตามสั่ง means "food as you order," which conveys the idea that whatever you want, as long as they have ingredients and can be booked in the wok, they can make for you. Most commonly these are simple stir fries such as pad kra pao, fried rices and stir-fried noodles.

    Watch The Full Video Tutorial!

    All my recipes come with step-by-step video tutorials with extra tips not mentioned in the blog post, so make sure you watch the video below to ensure success - and if you enjoy the show, please consider subscribing to my YouTube channel. Thank you!

    Print
    clock clock iconcutlery cutlery iconflag flag iconfolder folder iconinstagram instagram iconpinterest pinterest iconfacebook facebook iconprint print iconsquares squares iconheart heart iconheart solid heart solid icon
    A plate of salted fish fried rice

    Salted Fish Fried Rice ข้าวผัดคะน้าปลาเค็ม

    5 Stars 4 Stars 3 Stars 2 Stars 1 Star No reviews
    • Author: Pailin Chongchitnant
    • Prep Time: 20 mins
    • Salmon Curing Time: 2 hours
    • Cook Time: 15 mins
    • Total Time: 2 hours 35 minutes
    • Yield: Serves 2
    Print Recipe
    Pin Recipe

    Description

    A simple Thai fried rice that is surprisingly satisfying. The salt-cured salmon is very simple to make and adds salty, umami punch to this homey dish. Any leftover salmon can be added to salads, pasta, or another dish!


    Ingredients

    Salt-Cured Salmon

    • 3 oz (100 g) piece salmon (this doesn't need to be precise, you will not need all of it) 
    • Sea salt, as needed

    Fried rice

    • 2 oz (60 g) cooked salt-cured salmon (instructions below)
    • 3 cloves garlic, chopped
    • 2 eggs
    • 2-3 stalks (50 g) Chinese broccoli, thinly slice stems, roughly chop leaves
    • 12 oz (350 g) cooked jasmine rice
    • 2 teaspoons (10 ml) fish sauce 
    • 1 ½ teaspoons (7.5 ml) sugar
    • ¼ teaspoon ground white pepper
    • Chopped cilantro (optional)
    • Lime wedges for serving
    • Prik nam pla for serving, optional

    Ingredients and Kitchen Tools I Use

    Want to save this recipe?

    We can email this post to you, so you can come back to it later!


    Instructions

    To make the salt-cured fish:

    Coat salmon on all sides with a layer of salt. You don't need to bury the salmon, but there should be a thick enough layer that the grains don't immediately disappear as you sprinkle them (see video for visual). L it sit in the fridge for 2-3 hours (2 hours for thinner pieces, 3 hours for thicker ones, or adjust the timing according to how salty you want the fish). Once it's done, rinse the fish then pat dry. The longer you let it cure the salty it will be, so don't forget about it!

    To cook the fish, heat a generous amount of oil in a wok or a skillet over medium heat and fry the fish on both sides until golden and fully cooked. Do not be worried about overcooking the fish; we want it really thoroughly cooked.

    Drain the fish on paper towel to absorb excess oil. The fish is now ready to be used. If not using immediately, store in the fridge. The fish will keep in the fridge for at least a week, and the saltier the fish, the longer it keeps. 

    To make the fried rice:

    Chop the salted fish into small pieces. In a wok, add a little bit of oil and fry the salmon bits over medium high heat until well browned and crispy, about 3-4 minutes. Remove the fish and set aside.

    To the same wok over medium high heat, add garlic and saute until it starts to turn golden. Add the eggs, break the yolk and let it set about half way, then scramble briefly. Add the Chinese broccoli and toss quickly just to coat it in oil.

    Turn the heat up to high and add the rice, fish sauce, sugar and white pepper; toss until the rice is hot and all the grains are well separated, then toss in the salmon. Then spread the rice out and let it sit, undisturbed, for about 15-20 seconds so the rice can toast and brown slightly. Toss and repeat the toasting one or two more times. Remove from heat.

    Plate the rice and top with chopped cilantro if desired, and serve with a wedge of lime. If you find it needs a little extra seasoning, sprinkle on a little prik nam pla. Enjoy!

    Join us on Patreon for bonus content and rewards!


    Did you make this recipe?

    Tag @HOTTHAIKITCHEN on Instagram and hashtag it #HotThaiKitchen!

    Spicy Garlic Lime Pork "Moo Manao"

    February 2, 2018 by Pailin Chongchitnant 8 Comments

    a plate of moo manao on red napkin

    Moo Manao means "lime pork," but that name doesn't do it justice because it's really one of Thailand's best kept secrets. A spicy garlic lime dressing is poured over tender and juice pork slices, all of this is on top of crunchy cabbage and garnished with mint. It's one of those things that makes people's eyes light up when they first try it because it the bright and bold flavours are unexpected. It is also super easy!

    a plate of moo manao on red napkin

    Moo manao is a popular Thai drinking food, and I must say it goes so well with beer, but I think it is also great any time, with rice or on its own!

    *If you don't eat pork you can substitute chicken breast or thighs.

    Watch The Full Video Tutorial!

    All my recipes come with step-by-step video tutorials with extra tips not mentioned in the blog post, so make sure you watch the video below to ensure success - and if you enjoy the show, please consider subscribing to my YouTube channel. Thank you!

    Ingredients and Notes

    Here are all the ingredients and important notes about them. For amounts, check out the full recipe card below.

    • Pork shoulder or pork loin. I prefer using pork shoulder because it's more flavourful and juicy, but I try to choose pieces that are on the leaner side as you don't really want too many big pieces of fat on it. Pork shoulder can be a bit tricky to work with because of its irregularity, so pork loin or tenderloin can be used instead though be very careful not to overcook these as they are lean and can become dry. Be sure to slice the pork against the grain for max tenderness.
    • Soy sauce
    • Oil
    • Cornstarch. Cornstarch is added to the marinade, and when blanched, the starch will form a very thin layer of gel around the pork which helps keep the juices inside. This technique is called velveting.
    • Garlic
    • Thai chilies. You can add as many as you want here to customize the spice level.
    • Palm sugar. Palm sugar will yield a dressing with more complex flavour. If you don't have it, substitute light brown sugar. Read more about palm sugar.
    • Lime juice. Only fresh lime juice for this, no bottled!
    • Fish sauce. It's important to use good quality fish sauce as it is a main ingredient. Read about how to choose good fish sauce.
    • Cilantro
    • Shredded cabbage. You can also do a mix of cabbage and shredded carrots, broccoli stems, kohlrabi, basically anything you'd eat in a slaw.
    • Fresh mint leaves.
    • Some crunchy fresh veg of your choice (optional). This is extra, but we typically serve moo manao with some raw Chinese broccoli, and you can use the leaves as a wrap and munch on the stems. But really, this could be any fresh veggies you like. Peeled broccoli stems, cucumber, carrots, kohlrabi, celery, or even serve this with some lettuce leaves if you want to wrap it.

    How to Make Spicy Garlic Lime Pork "Moo Manao"

    Here are all the steps to make this recipe. If this is your first time, I highly recommend watching the video tutorial to ensure success.

    Process shots for making moo manao steps 1-4
    1. Combine pork with soy sauce, water and oil and mix well. Then add the cornstarch and mix well.
    2. Marinade for at least 20 minutes and up to overnight.
    3. For the dressing, in a mortar and pestle, pound garlic and chilies into a paste.
    4. Add the palm sugar and pound until mostly dissolved. Then add fish sauce and lime juice and stir to mix. Stir in chopped cilantro.
    Process shots for making moo manao steps 5-8
    1. Bring a large pot of water to a full boil. Prepare a big bowl of warm water on the side for rinsing the pork. Place the pork in a wire skimmer (no fine mesh) or a spider then blanch pork in the boiling water for 15-30 seconds, stirring the pork a bit to spread them apart.
    2. Remove the pork as soon as it's done—the pork overcooks very quickly in boiling water! Dunk the skimmer into the bowl of warm water and shake it around to remove any bits of velveting and drain well.
    3. Line the serving plate with shredded cabbage and any side veggies.
    4. Place the pork on top of the cabbage in one layer, then spoon the dressing evenly over the pork. Top with mint leaves and enjoy!

    Recipe Card

    Print
    clock clock iconcutlery cutlery iconflag flag iconfolder folder iconinstagram instagram iconpinterest pinterest iconfacebook facebook iconprint print iconsquares squares iconheart heart iconheart solid heart solid icon
    a plate of moo manao on red napkin

    Thai Spicy Garlic Lime Pork "Moo Manao"

    5 Stars 4 Stars 3 Stars 2 Stars 1 Star 4.7 from 3 reviews
    • Author: Pailin Chongchitnant
    • Prep Time: 15 mins
    • Cook Time: 20 mins
    • Total Time: 35 minutes
    • Yield: 2 appetizer servings
    Print Recipe
    Pin Recipe

    Description

    One of Thailand's best-kept secrets: moo manao. Tender juicy sliced pork with a spicy, garlicky lime dressing. It's a classic drinking food, but it's great any time, served with rice as a meal or on its own as an appetizer!


    Ingredients

    • 200g pork loin or pork shoulder, very thinly sliced against the grain (see note)
    • 2 tsp soy sauce
    • 3 Tbsp water
    • 2 tsp oil
    • 1 Tbsp cornstarch
    • 3 cloves garlic
    • 1-2 Thai chilies, to taste
    • 1 ½ Tbsp palm sugar
    • 3 Tbsp lime juice
    • 2 Tbsp fish sauce
    • 4-5 springs cilantro
    • ~ 2 cups shredded cabbage
    • Some crunchy fresh veg of your choice (see note)
    • A few sprigs of mint

    Ingredients and Kitchen Tools I Use

    Want to save this recipe?

    We can email this post to you, so you can come back to it later!


    Instructions

    1. Marinate the pork: Combine pork with soy sauce, water and oil and mix well. Add cornstarch and mix well, and let marinade for at least 20 minutes.
    2. Make the dressing: In a mortar and pestle, pound garlic and chilies into a paste. Add palm sugar and pound until mostly dissolved. Add fish sauce and lime juice and stir to mix. Stir in chopped cilantro.
    3. Prepare the plate & veg: Line the serving plate with shredded cabbage. For your side veggies, if using Chinese broccoli, separate the stems and leaves, then peel the outer skin of the stems. Soak the veg in ice cold water to keep them crisp and cold until ready to serve. If using broccoli stem, peel the skin off first. 
    4. Cook the pork: Bring plenty of water to a full boil. Prepare a big bowl of warm water on the side. Place the pork in a wire mesh skimmer or a spider (see video) then blanch pork in the boiling water for 15-30 seconds, stirring the pork a bit to spread them apart. Remove the pork immediately as soon as it's done—the pork overcooks very quickly in boiling water! If using lean pork such as loin, remove it as soon as the outside looks done; you want the inside to still be medium to prevent it from being dry. Dunk the pork into the bowl of warm water to rinse off any bits of velveting and drain well.
    5. Plate: Place the pork on top of the cabbage in one layer, then spoon the dressing evenly over the pork. Top with mint leaves and serve with a side of veggies.
    6. Enjoy!

    Join us on Patreon for bonus content & rewards!


    Notes

    1. I like to use pork butt (collar butt) because it has more flavour and fat, but it's kind of a hard piece to work with because it's such an irregular shape. You can also use pork loin, which is leaner and easier to work with, but I would suggest buying a loin roast, not chops, so you can easily slice the pork against the grain. And if using loin, be EXTRA careful not to overcook the pork because it is very lean and will be bone dry if overcooked. Aim to cook it to medium doneness if using loin. 
    2. We typically serve moo manao with some raw Chinese broccoli, and you can use the leaves as a wrap and munch on the stems. But really, this could be any fresh veggies you like. I use peeled broccoli stems, but you can do cucumber, carrots, kohlrabi, celery, or even serve this with some lettuce leaves if you want to wrap it.

    Did you make this recipe?

    Tag @HOTTHAIKITCHEN on Instagram and hashtag it #HotThaiKitchen!


    Authentic Thai Laab (Larb) Recipe with Pork

    February 28, 2013 by Pailin Chongchitnant 21 Comments

    A plate of laab moo with a side of vegetables

    Laab ลาบ is one of the most iconic dishes in Thai cuisine that is  popular in many Thai restaurants around the world. To me, it represents one of the best parts about Thai food - spicy, bright flavours loaded with fresh herbs. It is also one of the easiest Thai dishes you can make at home, making it very beginner and weeknight friendly!

    What is laab? Is it the same as larb?

    While most people, and many Thai restaurants, call this dish larb, the correct pronunciation and the way it should be written is laab. The R is not pronounced.

    "Larb" is the most popular way Thai restaurants write out the dish on menus because when Thai people speak Thai-accented English, we don't pronounce the R (we pronounce "car" as "ka," for example).

    Anyway, LAAB is a ground meat salad that hails from the northeast region of Thailand known as Isaan. It is typically made of ground meat and lots of fresh herbs such as mint, cilantro, and green onions. It is dressed with lime juice, fish sauce, dried chili flakes, and most important ingredient of all: toasted rice powder.

    Because laab is mostly meat, it is served with a lot of raw vegetables such as cabbage, lettuce leaves, cucumber and long beans. It is also always served with sticky rice. 

    This recipe is for laab moo, made with ground pork which is the most popular version in Thailand, but you can substitute another kind of ground meat, more details in the ingredients section below.

    Watch The Full Video Tutorial!

    All my recipes come with step-by-step video tutorials, and if it's your first time making laab, recommend watching it to ensure success! If you enjoy the show, please consider subscribing to my YouTube channel. Thank you!

    *This is an old video and I spelled the dish as larb back then. I (and you) know better now 😉.

    Ingredients

    Here are all the ingredients you'll need to make this recipe. For amounts, check out the full recipe card below.

    • White glutinous rice or jasmine rice, uncooked. This is for making the most important ingredient in this whole thing: toasted rice powder or kao kua. It is not laab without kao kua. Glutinous rice is traditional since the northeast of Thailand eats a lot of sticky rice (glutinous rice), but jasmine rice works fine and I even find it to be more fragrant.
    • Ground pork. Lean ground pork is fine, but if you can, get regular ground pork as the fat will keep everything moist, especially since there is no added fat in the dressing. You can sub ground turkey, ground chicken (use chicken thighs for best results), or ground beef, but again, don't go for lean if possible. Here's my chicken laab (laab gai) recipe. For a vegan version, see my corn and tofu laab recipe here
    • Shallots, red onion will also work if shallots are not available
    • Fresh mint leaves, another must-have ingredient without which it is not laab!
    • Cilantro, if you're a cilantro hater, leaving it out is fine.
    • Green onion
    • Sawtooth coriander, also known as culantro. This is harder to find and is optional. You can also add more cilantro or mint.
    • Fish sauce, see my post here about how to choose good fish sauce.
    • Lime juice
    • Chili flakes, you can add as much as you want but laab is supposed to be spicy! In Thailand we toast our chili flakes to get them smokey, which you can do simply by toasting it in a dry skillet over medium heat until it darkens and smells smokey. Chili powder will also work in a pinch. Red pepper flakes in Western grocery stores are usually too mild, so I suggest visiting an Asian market and get some chili flakes with some heat. Or get dried spicy chiles such as chile de arbol, and grind it up yourself. 
    • Sticky rice for serving. Here's a post with 7 different ways to make sticky rice, but my favourite method is this hot soak method. 
    • Fresh raw vegetables for serving such as lettuce, cabbage, long beans and cucumber.

    How to Make Laab

    Here are all the steps to make this recipe. If this is your first time, I highly recommend watching the video tutorial to ensure success!

    Laab being mixed in a pot
    Laab is a one-pot meal. Thai people cook the pork in a pot and then use the pot as the mixing bowl!
    1. Make toasted rice powder: Place the raw rice in a dry skillet pan and cook over medium high heat, moving it constantly, until a deep brown colour develops. Don't stop at golden brown, for the best flavour you want it dark brown! 
    2. Grind the rice with a coffee or spice grinder, or in a mortar and pestle into a coarse powder.
    3. Add 2 tablespoon water to a medium pot over high heat, then add the pork and stir it constantly to break it up. Once it's cooked, remove from heat.
    4. Using the pot as your mixing bowl, add shallots into the pork and stir to break up the rings and lightly cook the shallots.
    5. Add the fish sauce, lime juice, the toasted rice powder, chili flakes, cilantro, sawtooth coriander and green onion into the pot and stir to mix. Taste and adjust seasoning as needed, which may vary because the amount of pork juice that remains in the pot will vary. If you feel like it's a little bit too strong (too tart, too salty) you can add just a pinch of sugar to balance, but do not make it sweet. Remember, there will be sticky rice to balance it all later!
    6. When ready to serve, stir in the fresh mint leaves. (I like to leave the mint out until serving time because they turn black when exposed to heat)
    7. Garnish with some mint leaves and more chili flakes. Serve with some fresh crunchy vegetables and sticky rice!

    How to Eat Laab Like a Thai

    A plate of authentic Thai laab arrives, and it comes with a side of sticky rice and a bunch of raw vegetables...and at this point most first timers stammer a bit because they don't know what to do with it all. Do you put the laab on the rice? Should you eat the laab and the veg together in the same bite? Or separately? Totally understandable! Let me explain.

    Typically laab is served family style, meaning a few people are sharing one plate. But everyone should have their own sticky rice, so start by putting some of that on your personal plate. You then scoop some of the laab and a few pieces of veg onto your own plate as well. Then there are a couple of ways to go about it:

    • I usually take a bit of laab and follow it up with a bite of sticky rice, so both the rice AND the laab are in my mouth at the same time. And I munch on the vegetables in between as sort of a palate cleanser. 
    • I will also sometimes use leafy veg such as lettuce or cabbage as a "spoon" and put the laab on it. Kind of like a lettuce wrap. You can do the same with slices of cucumber. 
    • You can also use sticky rice to sop up the laab juices, which is the best part!
    • Finally, these are just suggestions. Feel free to eat it however you like 🙂

    For more on Thai dining etiquette, check out my video for How To Eat Thai Food Correctly.

    FAQ

    What's the difference between this laab and northern laab?

    This recipe is laab isaan or northeastern Thai laab. But if you've been to northern Thailand, you might have had a dish also called laab that tastes quite different from this one.
    Northern laab, or laab neua or laab kua, is a traditional dish of northern Thailand that also involves ground pork, but instead of being a salad, it is closer to a stir fry. It is loaded with a ton of dry spices, and those spices are the key ingredients of northern laab. I can't get some of those spices here in Canada, which is why I don't yet have a recipe for it!

    Can laab be made vegetarian or vegan?

    I have a delicious recipe for a vegan laab here that uses pressed tofu and sweet corn, and soy sauce instead of fish sauce. Even hardcore meat eaters in your life, such as my husband, will enjoy it!

    Print
    clock clock iconcutlery cutlery iconflag flag iconfolder folder iconinstagram instagram iconpinterest pinterest iconfacebook facebook iconprint print iconsquares squares iconheart heart iconheart solid heart solid icon
    A plate of laab moo with a side of vegetables

    Thai Pork Laab (Larb) Recipe

    5 Stars 4 Stars 3 Stars 2 Stars 1 Star 5 from 13 reviews
    • Author: Pailin Chongchitnant
    • Prep Time: 15 mins
    • Cook Time: 12 mins
    • Total Time: 27 minutes
    • Yield: Serves 2
    Print Recipe
    Pin Recipe

    Description

    An iconic salad of ground meat from northeastern Thailand. The flavours of laab is fresh, bright and spicy. Super Thai food beginner-friendly and very quick and easy to make! 


    Ingredients

    • 1.5 Tbsp white glutinous rice or jasmine rice *
    • 2 Tbsp water
    • 250 g/9 oz ground pork (preferably not lean)
    • 3 Tbsp finely sliced shallot
    • ¼ cup mint leaves, rough chopped if leaves are large
    • 2 Tbsp chopped cilantro
    • 1 small green onion, chopped
    • 2-3  leaves sawtooth coriander, rough chopped
    • 2 Tbsp fish sauce
    • 2  Tbsp lime juice
    • 1-2 teaspoon chili flakes, or to taste

    Serve with sticky rice (see recipe) and fresh crunchy vegetables such as long beans, cabbage and cucumber.

    Recipe Notes:
    * This makes a little bit more than you might need, but it's nice to have extra in case you feel like you want to add more at the end. You can keep any extra for about a week in a tightly sealed container or ziplock bag.
    ** If you cannot find sawtooth coriander (also known as culantro), you can leave it out.

    Ingredients & Kitchen Tools I Use

    Want to save this recipe?

    We can email this post to you, so you can come back to it later!


    Instructions

    Make toasted rice powder: Put glutinous white rice or jasmine rice in a dry sauté pan and cook over medium high heat, moving it constantly, until a deep brown colour develops. Grind with a coffee grinder or in a mortar and pestle into a sand-like texture.

    In a medium pot, add the water and bring to a boil over high heat. Then add the ground pork and stir to break it up until it is fully cooked. Remove from the heat.

    Using the pot as your mixing bowl, add shallots into the pork and stir to break up the rings and lightly wilt the shallots.

    Add the fish sauce, lime juice, 1.5 tablespoon of the toasted ground rice, and the chili flakes and stir to mix. Then add the fresh herb: cilantro, sawtooth coriander (if using), green onions and mint. (Tip: If not serving right away, leave the mint leaves until serving time as they tend to turn black when exposed to warm food for a long time.

    Taste and adjust to your liking with more fish sauce and lime juice as needed. If it feels a little too salty or acidic, you can add a pinch of sugar to help balance the salt and the acid.

    Feel free to garnish with some mint leaves and fried dried chilies. Serve with some fresh crunchy vegetables and sticky rice.

    Join us on Patreon for bonus content & rewards!


    Did you make this recipe?

    Tag @HOTTHAIKITCHEN on Instagram and hashtag it #HotThaiKitchen!

    The Best and Worst Green Curry Paste - A Thai Chef's Review

    May 3, 2024 by Pailin Chongchitnant 28 Comments

    5 brands of Thai curry paste in their packaging

    Green curry is the #1 most popular Thai curry - and while many of us would love to be making the curry paste from scratch, let's face it, most of us are gonna be turning to store bought. No shame though, cuz guess what ... most Thai people buy our curry pastes too, myself included!

    So the real important question is: which is the "best" brand of Thai green curry paste? I did a blind taste test for red curry pastes a while back and found huge differences between brands that could make or break your curry, and now we have to answer the same question for green curry!

    More of a video person? Watch the Curry Paste Tasting Video here, complete with my live reaction!

    How I Chose the Brands for Review

    There are a large variety of brands out there, and it’s impossible for me to taste test them all, so I had to narrow it down to five which is a manageable number. To qualify for my test, the criteria was:

    • The brand is commonly available outside of Thailand. So nothing obscure, local, or specific to a region.
    • The brand has to have been around for a long time and have a good reputation; so they’re all coming in with a certain amount of cred. New brands are popping up all the time, but I wanted ones that have at least passed the test of time.
    • The brand has to have all the expected ingredients for a green curry paste. I also checked that they don't have any chemical additives, because a good curry paste should just be a mix of real food ingredients.

    Our 5 Green Curry Paste Contestants

    5 brands of green curry paste iin 5 glass bowls

    With the above criteria, I arrived at these 5:

    • Maeploy - my current go-to brand and the winner from our red curry paste test. It does contain shrimp paste, which is traditional, but if you’re vegan, this one is out by default.
    • Aroy-D - another brand that I use quite often cuz it’s widely available; and if Mae Ploy isn't available this is the one I get. They also make my go-to coconut milk.
    • Maesri - the only brand that comes in a can, and also the only one with sugar in the ingredient list. It also contains "Chinese ginger" aka fingerroot or grachai, and I could definitely smell it upon opening.
    • Namjai - another one in our lineup that contains shrimp paste, and it did very well in the red curry paste taste test. It's a brand that's become increasingly popular in Thailand.
    • Thai Kitchen - not a brand I see at Asian grocery stores, but by far the most common one available in the “international aisle” at non-Asian grocery stores, so it's safe to say this is marketed to non-Asian customers. It's also probably the one that the largest number of people have access to. (Sidenote: It is a McKormick brand, but is made in Thailand.)

    Where to buy these curry pastes in your city? Your local Asian grocer will surely have at least one of these, check out our map of Asian grocery stores to locate one near you!

    But what is a Thai curry paste anyway?

    Thai curry pastes are basically a mix of ground up fresh herbs and spices. The most common curry paste ingredients are: chiles, garlic, shallots, lemongrass, galangal, cilantro root (coriander root), makrut lime zest (kaffir lime zest), and white peppercorns. Shrimp paste is always added to curry pastes in Thailand, though many exported brands omit this to make it vegan and allergy friendly.

    The above ingredients are included in most curry pastes, and then other ingredients are added depending on the type of curry. Green curry paste is uniquely green because it's the only paste that uses fresh green chiles, while most others use dried red chilies.

    If you want to learn more about curry pastes in general, I highly suggest watching my curry paste 101 video where I go more in depth into what it is, and how to use, store, etc. Also, to explore other ways to use curry paste here are 5 ways to use curry paste beside making a curry.

    Green Curry Paste Tasting Video - Live Reaction!

    The results are written out below, but for the full experience watch the video for my live reaction and detailed review!

    How I Did the Taste Test - The 2 Tests

    Pailin tasting green curry made from 5 brands of curry paste
    I blind tasted the curries. Watch the video of my taste test!

    Our first test involves making my popular green curry chicken recipe. The process is shown in the video above, but I weighed every single ingredient down to the gram and timed each step of the cooking process to control for any differences.

    I first tasted the curry straight up so I can really taste the differences. Then I tasted them all again with rice, which is arguably the most relevant test because Thai curries are not meant to be eaten on their own but are always served with rice.

    Then I picked my top 2 (which were very close) and got 4 of my friends and family to taste the top 2 to find out which was preferred by most!

    And the best Thai green curry paste is...

    Here's the official ranking:

    1. Mae Ploy: Though this wasn't my initial pick when I tasted in-studio, when I later blind-tasted it against Aroy-D at home, this was the one I preferred. It has the strongest flavour, good level of spice, and has the most umami due to the shrimp paste. "There's more going on," was the comment from a taster.
    2. Aroy-D: By far the best of all 3 vegan options. Also a very close runner up and was my initial favourite before I had a change of mind! *The Aroy-D curry paste I get contains no shrimp paste, however, a viewer has commented that he has seen a version that lists "shrimp powder" on the ingredient list. I don't know if that's an old formula, but it's worth double checking before buying if you don't eat shrimp.
    3. Maesri: Maesri green curry paste performed much better than it did as a red curry paste; which is very interesting to me. It had a prominent flavour of grachai (fingerroot) which was nice, but it had a slightly weaker flavour than the top 2. It was also very slightly sweeter, which is not surprising as it's the only brand with added sugar.
    4. Namjai: I was very surprised it didn't do better because its red curry paste performed so well! Overall it was weaker in flavour, and looking back it's not surprising because the paste was also on the moister side. And higher moisture content means less concentrated flavours. It also had a flavour that was the most unique compared to other brands (not in a bad way at all). If using this Namjai, I would use more of it than the 3 above.
    5. Thai Kitchen: The worst! It was the weakest flavour in the group by a long shot. It is not spicy at all (so kid friendly) and the resulting dish didn't even taste like green curry. If this is all you have to work with, I'd use the whole jar for a 4-serving batch of curry. If serving people who cannot tolerate any heat, such as children, this is the one to use.

    My Final Recommendations

    For most people, I recommend going with one of the top 2: Mae Ploy and Aroy-D. Maeploy is preferred if it's available, but Aroy-D was also good. You can also add your own shrimp paste to Aroy-D for that extra umami.

    If you're vegan or allergic to shrimp, then Aroy-D or Maesri would be 2 great options. But always check the ingredient list because it's common for there to be multiple formulas of the same Thai product on the market.

    Important notes on packaging: Over the years I have seen that the same brand would come out with different packaging for the same product. For example, I have seen pictures of Aroy-D in little cans à la Maesri. You should not assume that the product inside is the same if the packaging is different!

    Different types of packaging may also require the food inside to be processed differently, and sometimes moisture content, acidity, and other things have to vary due to the different processing requirement. Companies also sometimes have different formulas for different markets, for example domestic vs export markets.

    The Bigger Takeaway

    The main takeaway is that there is a huge range between brands of store-bought curry paste. When following recipes, unless you are using the brand that was used by the recipe writer, you cannot assume that you will get a result that is even close to what they got. So you have to use your judgment and be prepared to adjust as needed (which is something you should do whenever you cook anything anyway).

    For my recipes, I'm either using Mae Ploy or Aroy-D in my tests, both of which are very similar. But it is always safe to be prepared to adjust and add more paste if needed.

    How to "taste and adjust" when using a brand of curry paste for the first time

    If you're working with a brand of curry paste for the first time, after all the liquid has been added, taste the sauce. At this point it should taste slightly too strong because you have not added the proteins and veggies.

    If you feel like it needs to be stronger, you'll need to saute the extra curry paste for a few minutes in some oil, and then stir it into the curry sauce and allow the curry to simmer for 5 minutes so the additional paste has time to infuse into the liquid.

    Do not wait until the curry is done before you taste, because if you need to simmer the curry longer to infuse the added paste, you will overcook the veg/protein.

    Recipes That Use Green Curry Pastes

    Now that you know which curry paste to use, here are some recipes to try!

    • a black bowl of vegan green curry on an orange napkin
      Vegan Thai Green Curry Meat Eaters Will Love
    • a bowl of thai green curry with basil garnish
      Authentic Thai Green Curry Chicken
    • Green curry spring rolls
      Green Curry Spring Rolls
    • Green Curry Fried Rice
      Green Curry Fried Rice Recipe

    Thai Tamarind Shrimp Recipe (Goong Pad Makaam)

    October 3, 2014 by Pailin Chongchitnant 15 Comments

    A plate of tamarind shrimp with chlies and cilantro garnish

    Tamarind shrimp or goong pad makaam กุ้งผัดมะขาม is a simple dish that truly highlights the brilliant flavour balance Thai cuisine is famous for. Juicy shrimp are tossed in a luscious sauce that is sweet, salty and sour in equal measure, with a little heat if you so desire. Served with jasmine rice, and it's a luxurious dinner in less than 30 minutes.

    A plate of tamarind shrimp with chlies and cilantro garnish

    Watch The Full Video Tutorial!

    All my recipes come with step-by-step video tutorials with extra tips not mentioned in the blog post, so make sure you watch the video below to ensure success - and if you enjoy the show, please consider subscribing to my YouTube channel. Thank you!

    Ingredients and Notes

    Here are all the ingredients you'll need with important notes about them. For amounts, see the recipe card below.

    • Shallots
    • Garlic
    • Cilantro roots or cilantro stems. Cilantro roots are super aromatic and are commonly used in Thai cuisine in steps where heat is applied. We don't use leaves here because they'd turn black in the heat. However, since cilantro in the West typically don't come with roots, you can use stems instead.
    • Thai chilies, to taste. A little heat is nice to balance the sweetness of this dish, but feel free to make it as spicy as you can tolerate.
    • Large shrimp, ideally look for shrimp that are size 21/25 or bigger (means there are 21-25 shrimp in a pound), although 26/30 will work if needed. Small shrimp are not meaty enough to hold up to the sauce.
    • Chicken stock, unsalted. Or water is fine in a pinch
    • Palm sugar gives not only sweetness but also a beautiful caramelly flavour. You can sub light brown sugar if not available. Read more about palm sugar here.
    • Fish sauce. Good quality fish sauce is important here as it is a main seasoning. I use Squid Brand for everyday cooking, but you can read more about choosing good quality fish sauce here.
    • Tamarind paste. You can buy ready-to-use tamarind paste, but make sure it is a product of Thailand and should have a brown colour with a pourable consistency. It is often labelled as "tamarind concentrate." You can also easily make tamarind paste from pulp which will give you the best flavour.
    • Red and green chilies, these are added mostly for colour. You can use any kind of peppers, mild or spicy, depending on your preference. For mild, bell peppers are fine, otherwise jalapenos, serranos and fresnos are all great spicy options.
    • Cilantro leaves for garnish.
    • Fried shallots, optional but recommended. You can buy fried shallots from Asian stores of make fried shallots from scratch. If buying, I recommend re-toasting them to get them crispier either by stirring them in a skillet over medium heat for a few minutes until they darken slightly, or baking them at 300°F (150°C) for just 5 minutes.
    • Optional fried dried chilies for garnish. This is traditionally added for garnish but it is just for looks.
    • Jasmine rice for serving. See how to cook perfect jasmine rice.

    How to Make Tamarind Shrimp

    Here's a bird's eye view of the process. If it's your first time I recommend watching the video tutorial to ensure success. And for the full recipe see the recipe card below.

    Process shots for making tamarind shrimp steps 1-4
    1. Pound garlic, shallots, cilantro roots and Thai chilies in a mortar and pestle into a rough paste. Alternatively, process into a rough paste in a small food processor. 
    2. In a wok or a sauté pan, sear the shrimp in hot oil over high heat until browned. Flip oand sear the other side. Turn off the heat, remove the shrimp from pan.
    3. In the same wok pver medium low heat, add the herb paste and saute until aromatic and slightly browned. 
    4. Add chicken stock, palm sugar, tamarind paste, and fish sauce.
    Process shots for making tamarind shrimp steps 5-8
    1. Turn the heat up to medium high and cook, stirring constantly, until the sugar is dissolved. Let sauce reduce until it is thick enough to coat the shrimp.
    2. Add the shrimp and toss to coat in the sauce; if shrimp are not fully cooked at this point, let them cook until done.
    3. Toss in the red and green chilies, then turn off the heat.
    4. Plate and top generously with fried shallots, and garnish with fried chilies and cilantro, if desired. Serve with jasmine rice and enjoy!

    Recipe Card

    Print
    clock clock iconcutlery cutlery iconflag flag iconfolder folder iconinstagram instagram iconpinterest pinterest iconfacebook facebook iconprint print iconsquares squares iconheart heart iconheart solid heart solid icon
    A plate of tamarind shrimp with chlies and cilantro garnish

    Thai Tamarind Shrimp (goong pad makam)

    5 Stars 4 Stars 3 Stars 2 Stars 1 Star 4.9 from 12 reviews
    • Author: Pailin Chongchitnant
    • Prep Time: 15 mins
    • Cook Time: 15 mins
    • Total Time: 30 minutes
    • Yield: Serves 2
    Print Recipe
    Pin Recipe

    Description

    Tamarind shrimp highlights the flavour balance Thai cuisine is known for. Juicy shrimp are tossed in a sweet-salty-sour sauce, topped with fried shallots and served with rice. It's a quick and simple dish that comes together very quickly!


    Ingredients

    • 2 small shallots, roughly chopped
    • 3 cloves garlic
    • 2 cilantro roots or 5-6 cilantro stems
    • 2 Thai chilies, or to taste
    • 250 g (9 oz) large shrimp, peeled and deveined
    • ½ cup (120 ml) chicken stock or water
    • 3 Tablespoons (35 g) chopped palm sugar 
    • 1½ Tbsp (22.5 ml) fish sauce
    • 3 Tbsp (45 ml) Thai tamarind paste, store bought or homemade (what is tamarind?)
    • ¼ cup red and green chilies, sliced into rounds or julienned (e.g. jalapenos, serranos, fresnos, spur chilies, or red and green bell peppers)
    • Fried shallots, optional but recommended, store bought or homemade
    • Cilantro leaves for garnish
    • Fried dried chilies for garnish (optional)
    • Jasmine rice for serving

    Ingredients and Kitchen Tools I Use

    Want to save this recipe?

    We can email this post to you, so you can come back to it later!


    Instructions

    1. Pound garlic, shallots, cilantro roots and Thai chilies in a mortar and pestle into a rough paste. Alternatively, process into a rough paste in a small food processor.
    2. In a wok or a sauté pan, heat 2 tablespoon vegetable oil over medium high heat (if you’re making fried shallots, you can use the leftover shallot oil). When oil is hot, add shrimp and sear until browned. Flip and sear the other side. Turn off the heat, remove the shrimp from pan and set aside.
    3. If the oil has darkened in colour, start the next step with a fresh wok and fresh vegetable oil, otherwise, you can use the same wok. Over medium low heat, add the herb paste and saute until aromatic and slightly browned.
    4. Add chicken stock, palm sugar, tamarind juice, and fish sauce. Turn the heat up to medium high and cook, stirring constantly, until the sugar is dissolved. Let sauce reduce until it is thick enough to coat the shrimp.
    5. Add the shrimp and toss to coat in the sauce; if shrimp are not fully cooked at this point, let them cook until done.
    6. Toss in the red and green chilies, then turn off the heat. You can just pour the shrimp onto a plate, but for a more elegant presentation, remove the shrimp, leaving the sauce behind, and set them aside. Pour the sauce on to the serving plate, then arrange the shrimp on top of the sauce.
    7. Top generously with fried shallots, and garnish with cilantro and fried chilies, if using. Serve with jasmine rice. Enjoy!

    Join us on Patreon for bonus content and rewards!


    Did you make this recipe?

    Tag @HOTTHAIKITCHEN on Instagram and hashtag it #HotThaiKitchen!

    Authentic Thai Boat Noodles Recipe

    April 18, 2024 by Pailin Chongchitnant 35 Comments

    a bowl of boat noodles on pink napkin

    One of the most iconic dishes in Thailand is boat noodles or guay tiew ruea. Thai people LOVE boat noodles, and every time I have it, I am amazed by how much flavour can be packed into such a small bowl. This recipe will give you boat noodles that taste just like what you get in Thailand, I promise!

    It’s a complex dish with a lot of ingredients (that’s why it’s so good) but it is not that hard to make. The broth takes a bit of time, but it is SO worth it, and this can be made in advance. In fact, once the broth is made, the rest is quick and weeknight friendly!

    a bowl of boat noodles on pink napkin

    What is boat noodles?

    "Boat noodles" is a direct translation from the Thai name, guay tiew ruea. It's so named because originally they were actually sold from boats along Bangkok's canals; though nowadays most vendors have moved on land, and you can find them all over the country.

    This is why boat noodles in Thailand come in little bowls - it wasn't practical to pass around large bowls of hot soup on a wobbly boat. So it's not uncommon for someone to eat 3-5 boat noodle bowls in one meal!

    a boat noodle vendor on a boat in thailand
    Image from: meechai.net

    The heart of boat noodles is the uniquely aromatic and rich broth. The broth is dark thanks to the various soy sauces, and it has a lot of herbs and spices infused into it. The most unique part about boat noodles is that it is extra rich due to the added blood! (Before you get squeamish, it doesn't taste like blood at all, but it's optional.)

    What is guay tiew ruea nam tok?

    You'll often hear boat noodles referred to as guay tiew nam tok. "Nam tok" means waterfall, and it refers specifically to boat noodles with the blood added. Nam tok tends to be the default (unless you're at a touristy place), so when you're ordering boat noodles in Thailand, if you don't want the blood you'll have to say mai tok (no waterfall).

    But why does "waterfall" mean blood? While it is not proven, the most popular story seems to be this: Back in the day vendors would have the raw sliced meats sitting on ice on top of a woven bamboo tray, and over time, the meat juices and ice would melt and "fall" through the tray into a receptacle below. Vendors would then use meat dripping to add back into the bowl. Nowadays fresh blood is used instead of these drippings.

    Ingredients and Notes

    Boat noodles have A LOT of ingredients, but don't let the length of the list deter you. You probably have many of these in your kitchen already, and gathering them is really the hardest part, the rest is super easy!

    Boat noodles broth ingredients on the table

    Broth Ingredients

    • Pork neck bones, are my favourite bones to use for the broth because they have a lot of meat on them which will become tender and delicious when we're done. But you can also use pork back bones, beef bones or veal bones.
    • Cinnamon stick, crush it just until broken into smaller pieces so it'll be easier to toast
    • Star anise
    • Coriander seeds
    • Galangal, sliced into thin rounds. If you don't have it, it's fine to omit or use dried galangal.
    • Cilantro roots or cilantro stems. Smash them gently just to bruise and release the flavour.
    • Daikon, peeled and cut into big chunks. This helps sweeten the broth and make it extra delish. WIthout it, you can add more onion instead. Once done, the daikon will also be super delicious, so don't throw them away! Serve it with the noodles or save it for another meal.
    • Onion, cut into big chunks
    • Garlic, crushed until broken to help release the flavour
    • White pepper, ground. Black pepper is fine too.
    • Pandan leaf, optional. Pandan leaves are used mostly in desserts, but it's commonly added to boat noodles. You won't taste the pandan in the finished product, and it is fine to omit.
    • Soy sauce. I use Thai soy sauce but other kinds are fine. See more about soy sauces here.
    • Golden Mountain Sauce. Golden Mountain is a brand of "Thai seasoning sauce" that is the most popular so the brand has become genericized. It's a type of soy sauce with a different flavour. Healthy Boy Brand also makes a seasoning sauce (green cap), and Maggi Seasoning or Bragg's Liquid Aminos taste very similar and can be used instead. You can also simply use more of the soy sauce.
    • Taojiew, this is Thai fermented soybean paste; basically the Thai version of miso paste. You can sub miso or doenjang instead. If your taojiew looks particularly chunky, mash it with a fork so it distributes better.
    • Thai black soy sauce or dark soy sauce. If using Chinese dark soy sauce it tends to be a bit salty, so I'd hold back on the regular soy sauce and then add more as needed.
    • Fish sauce 
    • White vinegar
    • Rock sugar or granulated sugar. Rock sugar is traditional, but it'll make no difference whatsoever if you use granulated, so use it only if you already have it!
    • Liquid beef or pork blood. You can find blood at some Asian grocery stores, usually frozen. Do not buy cooked blood, which is solid, or fresh blood without the anticoagulant added.

    Noodle Bowl Ingredients

    Toppings for boat noodles on a baking tray.
    Vegetables, herbs and chili vinegar for boat noodles
    • Pork shoulder, (not pictured) for making marinated sliced pork. If you already have the meatballs and meat from the pork neck bones, you can skip this to simplify a bit.
    • Dry rice noodles, (picture below) size small, or another noodle of your choice. This is my favorite noodle for boat noodles, but in Thailand you'll be offered many noodle options, so you can choose one of those that I talk about in the noodle options section below.
    • Asian style pork or beef meatballs. You can buy these at many Asian grocery stores, refrigerated or frozen. If you are in a DIY mood you can also make them from scratch using my Asian meatballs recipe.
    • Water spinach or spinach, cut into 2-inch pieces. Water spinach (aka morning glory) is the classic greens added to boat noodles. Regular spinach or another kind of greens work just fine.
    • Bean sprouts
    • Cilantro and/or green onions, chopped
    • Thai basil or holy basil (optional)

    Optional Condiments

    In Thailand you'll find these condiments on the table at boat noodle restaurants and you can add as much of them as you like, (though you'll have to pay for the pork rind if you add it!); except the fried garlic that is, which the vendor will add to your bowl for you.

    • Chili vinegar. Technically optional but I highly recommend it! You can make chili vinegar from scratch but I sometimes cheat by mixing 1 part sambal oelek with 2 parts white vinegar and it works just fine.
    • Crispy pork rind. They add a lovely crunch to the noodle soup!
    • Roasted chili flakes, but only if you want to make it spicy. Store bought is fine, or you can make your own roasted chili flakes easily!
    • Fried garlic & garlic oil. You can make your own fried garlic easily and it keeps well. I always have it on hand in the fridge! Here's my fried garlic recipe.

    Noodle Options and Cooking Instructions

    When you go to order boat noodles at any vendor, you'll be given the option of several noodles. Here they all are, and how to prep them:

    noodle options for boat noodles on a baking tray
    • Rice vermicelli (sen mee) - The smallest of noodles and the quickest to prep. Simply soak them in room temp water for 5-15 mins (timing varies between brands) until they are completely limp, then drain.
      To cook, you'll need to blanch them in boiling water, one portion at a time, for 5 seconds just like I showed in the video.
    • Small dry rice noodles (sen lek) - The most classic option. These noodles are 1.5 mm wide when dry. Soak in room temp water for 20-30 minutes or until they turn opaque white and are completely limp - they should have lost all of the kinks - and then drain.
      To cook, blanch them in boiling water, one portion at a time, for 5 seconds as shown in the video.
    • Glass noodles (woon sen) - woonsen is thin, delicate, and has a neutral flavour and is delicious in boat noodles. Soak in room temp water for 10 minutes until softened before cooking.
      To cook, boil in hot water for 2 minutes. You can cook all of the glass noodles at once since they take a longer time to cook, then separate into portions immediately after draining.
    • Fresh wide rice noodles (sen yai) - This is the noodles commonly associated with pad see ew. If cold and stuck together, microwave the noodles until they are hot and soft, so they can be peeled apart without breaking. Separate all the noodles before cooking.
      To cook, blanch them one portion at a time for 2 seconds in hot water just to heat them up and wash off the oil that's used to coat them. Do not let them linger in hot water for too long because they're already fully cooked and will quickly turn mushy.
    • Wonton noodles or egg noodles (bamee) - These vary greatly between brands, so you'll have to change the cooking time according to what you've got.
      But if you have thin wonton noodles like the one shown in the pic (fresh and coated in flour), loosen the noodles and boil them in hot water for 1 minute. I find it easier to cook these 1 portion at a time, but if you're making many portions, you can cook them all at once and separate them immediately after draining.
    • Mama Instant Noodles (sen mama) - Mama are the Thai instant noodles and they are super tasty in boat noodles! Buy any flavour of mama since you won't need the seasoning packets, but make sure the noodles are the classic wheat fried noodles as shown in the pic.
      Boil the noodles in water for about 1 minute, and you can cook all portions together and separate them after draining.

    How to Make Boat Noodles

    Here's the bird's eye view of the process so you get an idea of what's involved; the full instructions are in the recipe card below. It's not hard, but there are a lot of moving parts and it can be confusing for first timers, so I highly recommend watching the video tutorial, especially the assembly part, and it'll make much more sense!

    Process shots for making boat noodles steps 1-4
    1. Simmer the pork bones in water for 30 minutes.
    2. Meanwhile, toast the dry spices until slightly charred.
    3. Put the spices in a soup infusion bag of cheesecloth, along with the galangal and cilantro roots/stems.
    4. After 30 mins, skim the scum from the broth.
    Process shots for making boat noodles steps 5-8.
    1. Add the spice bag, daikon, onion, garlic, pepper, pandan leaf (tie it into a knot) and all of the seasonings except salt. Simmer gently for 1 hr 15 mins, topping it up with water as needed to keep the bones completely submerged.
    2. Meanwhile combine pork shoulder slices with soy sauce and sugar and set aside.
    3. When the broth is done, remove the vegetables (can be eaten), spice bag (discard), and pork bones. Pick off any meat from the bones and reserve. Taste and adjust seasoning with salt as needed.
    4. Bring the broth to a simmer and place the pork shoulder in a sieve or wire skimmer and dunk it into the broth, stirring it around until cooked, this should take less than 1 minute. Lift it up from the broth and set aside.
    Process shots for making boat noodles steps 9-12.
    1. Bring the broth back to a boil then gradually add the blood WHILE STIRRING and watch the broth thicken! Add the meatballs and keep the broth hot on low heat and covered, until ready to serve.
    2. Bring a LARGE pot of water to a FULL boil, place 1 portion of the soaked rice noodles, bean sprouts and water spinach in a noodle strainer or sieve, and blanch for 5 seconds (shake it around in the water) then place into serving bowl. (If using other kinds of noodles, see noodle options section for instructions.)
    3. Ladle the broth along with a few meatballs over the noodles.
    4. Top with marinated pork, meat from bones, and all the toppings and condiments as desired. Enjoy!

    Advance Prep and Storage Tips

    Boat noodles takes time to make, but if you prep all the components ahead of time, assembly is super quick and you'll have dinner on the table in 20 minutes!

    Here are all the things you can do ahead of time:

    • Make the broth and cook the meat in advance. This is the most important thing you need to do ahead of time. You can also cook the marinated pork once the broth is done and this will save even more time on the day. The broth will last at least 1 week in the fridge and can be frozen indefinitely. Keep the cooked meat separately in an airtight container and it'll also last up to a week.
    • Soak noodles in advance. If you're using any of the noodles that require soaking, soak them in advance, drain, then keep in a covered container in the fridge and they'll last up to one week. Make sure to rest the noodles on a kitchen towel to absorb excess water before storage; any pooling water in the container will continue to get absorbed by the noodles and make them mushy.
    • Make the condiments. If you're going to have chili vinegar, fried garlic, or the roasted chili flakes, get them done ahead of time and keep them in the fridge. Make sure to keep the fried garlic and garlic oil in separate containers!
    a bowl of boat noodles on pink napkin

    Authetic Thai Boat Noodles (guay tiew reua)

    By: Pailin Chongchitnant
    This iconic street food is my all-time favourite Thai noodle soup and it is an must-try. The rich broth packs a ton of flavour thanks to an abundance of herbs and spices. The broth can be made in advance and also freezes well!
    5 from 1 vote
    Print Recipe Pin Recipe Share
    Prep Time 45 minutes mins
    Cook Time 2 hours hrs 30 minutes mins
    Course Main Course
    Cuisine Thai
    Servings 5 servings

    Equipment

    • noodle strainer or metal sieve

    Ingredients


    Boat Noodle Broth

    • 3.2 quarts water
    • 2 lb pork bones, preferably neck bones (see note 1)
    • 6 inches cinnamon stick
    • 1 pc star anise
    • 1 teaspoon coriander seeds
    • 10 slices galangal
    • 3 cilantro roots or 6 cilantro stems, crushed until bruised
    • 3 inches daikon, peeled and cut into chunks
    • ½ medium onion, cut into chunks
    • 5 cloves garlic, smashed until broken
    • ½ teaspoon white pepper, ground
    • 1 pandan leaf (about 18 inches), optional
    • 3 Tablespoons soy sauce
    • 2 Tablespoons Golden Mountain Sauce
    • 2 Tablespoons Tao jiew (Thai fermented soy bean paste), or sub miso or doenjang
    • 2 Tablespoons white vinegar
    • 1.5 Tablespoons black soy sauce, or dark soy sauce
    • 1 Tablespoon fish sauce
    • 25 g rock sugar , or 2 Tablespoons granulated sugar
    • Salt, as needed
    • ⅓ cup liquid pork or beef blood, or more if you like it thicker (see note 2)

    Marinated Pork

    • 225 g pork shoulder, sliced into ⅛-inch thick pieces
    • 1 tablespoon soy sauce
    • ½ teaspoon sugar

    Noodle Bowl

    • 1 lb dried rice noodles, size small (1.5 mm)
    • ½ lb Asian style meatballs, pork or beef (see note 3)
    • 2 cups water spinach or spinach, cut in 2-inch pieces
    • 2 cups bean sprouts
    • 6 sprigs cilantro, chopped
    • 1 stalk green onion, chopped

    Optional Condiments for Serving

    • Chili vinegar, highly recommended (see note 4)
    • 3 sprigs Thai basil , optional
    • Fried garlic & garlic oil, optional
    • Crispy pork rind, optional
    • Roasted chili flakes, to taste, optional

    Want to save this recipe?

    We can email this post to you, so you can come back to it later!

    Check Out Ingredients and Kitchen Tools I Use

    Notes

    1. I prefer pork neck bones because they have a lot of meat on them, which makes a great addition to the noodle bowl. If you’re using beef bones, you will not have much of this meat.
    2. Beef or pork blood can be found frozen at many Asian grocery stores. Do not get cooked blood which is solid and can’t be used for this recipe. If you cannot find blood, substitute coconut milk.
    3. Asian style meatballs can be found refrigerated or frozen at most Asian markets. If large, half or quarter them.
    4. Chili vinegar, though technically optional, adds a zing to boat noodles that I think MAKES the dish. My cheat is to mix 1 part sambal oelek with 2 parts white vinegar, but you can make it from scratch easily using my chili vinegar recipe (it keeps very well in the fridge).

    FULL VIDEO TUTORIAL

    All my recipes come with step-by-step video tutorials with extra tips not mentioned in the blog post, so make sure you watch the video to ensure success. If you enjoy them, consider subscribing to the YouTube Channel to not miss an episode. Thank you!

    Subscribe to my YouTube Channel

    Instructions
     

    For the Broth:

    • Add pork bones and water to a large stock pot making sure the bones are completely submerged. Simmer for 30 minutes.
      3.2 quarts water, 2 lb pork bones
    • Meanwhile, crush the cinnamon sticks until broken in a mortar and pestle (or smash them with something heavy) and add to a dry skillet or pot. Add star anise and coriander seeds and toast over medium high heat, stirring or shaking constantly until the coriander seeds are slightly charred and start to pop. Remove from heat, then add the spices into a soup infusion bag or tie in a cheese cloth along with galangal and cilantro roots or stems.
      6 inches cinnamon stick, 1 pc star anise, 1 teaspoon coriander seeds, 10 slices galangal, 3 cilantro roots or 6 cilantro stems
    • After 30 mins of simmering, skim the scum off the top of the broth, then add the spice bag, daikon, onion, garlic and white pepper. Fold the pandan leaf in half and tie into a knot (this bruises it and releases the aroma) and add it into the broth as well.
      3 inches daikon, ½ medium onion, 5 cloves garlic, ½ teaspoon white pepper, 1 pandan leaf (about 18 inches)
    • Add all the seasonings except the salt: soy sauce, Golden Mountain Sauce, tao jiew, vinegar, black soy sauce, fish sauce, and sugar; simmer gently for 1 hr 15 mins. If the bones become exposed, top it up with just enough water to keep everything submerged.
      3 Tablespoons soy sauce, 2 Tablespoons Golden Mountain Sauce, 2 Tablespoons Tao jiew (Thai fermented soy bean paste), 2 Tablespoons white vinegar, 1.5 Tablespoons black soy sauce, 1 Tablespoon fish sauce, 25 g rock sugar
    • While the broth is simmering, soak the noodles in room temp water for 25-30 mins for noodles size small (1.5 mm wide). Exact timing will depend on the brand and the temperature of your water, but you want the noodles to be completely pliable and no longer holding their original shape. Drain the noodles and set aside. (If using other kinds of noodles, see blog post above for instructions)
      1 lb dried rice noodles
    • Now is also time to make the marinated pork simply by combining the pork with the soy sauce and sugar and mix well.
      (If you’re making fried garlic and chili vinegar, now is also the time to make them as well.)
      225 g pork shoulder, 1 tablespoon soy sauce, ½ teaspoon sugar
    • When the broth is done, taste and adjust seasoning with more salt or sugar if needed. You want to season the broth strongly as it will be further diluted once we add noodles and veggies to it, so aim for it to be a tiny bit too salty right now. If it is much too salty, it means you have let it reduce too far, so add more water to dilute.
      Salt
    • Remove the spice bag and discard. Use a wire skimmer to remove the daikon, garlic and onion. If you want you can eat the daikon with the noodles or save it for another meal. The garlic and onions will mostly be dissolved by now but any pieces can be discarded, though they are also edible.
      Remove the pork bones from the broth, and use a fork or tongs to remove any meat off the bones and reserve this for the noodle bowl.
    • Cook the marinated pork: Bring the broth to a simmer over high heat, then place the marinated pork in a wire skimmer (you may need to do a half batch if it doesn't fit) and dunk it into the broth, keeping the pork inside the skimmer; stir it around just until the pork is no longer pink (less than 1 minute), then drain and set aside in a bowl. (This is much more easily understood by watching the video)
    • Add the blood: Bring the broth back to a simmer, and gradually add the blood WHILE STIRRING so the blood does not clump up. You'll notice the broth thicken up instantly - this is the boat noodle magic! Add the meatballs, then keep covered on the lowest heat until ready to serve. (The meatballs are already cooked, they just need to be heated.)
      ⅓ cup liquid pork or beef blood, ½ lb Asian style meatballs

    To Assemble (this part is hard to describe via text so I highly recommend watching the video to see the process)

    • Bring a large stock pot of water to a full boil over high heat, filling the pot as high as you can without risking spillage; this is for blanching noodles and vegetables. You want a lot of water to ensure that temperature doesn't drop too much after you add the first batch of noodles, and also to make sure the noodles can be submerged inside the noodle strainer or sieve.
    • While you wait for the water, separate the noodles into portions and place them into their own serving bowls. Also get all the condiments and toppings ready for serving.
    • When the blanching water is rapidly boiling, keep the heat on high and put 1 portion of noodles into a noodle strainer or a metal sieve along with a handful of bean sprouts and a handful of spinach. Dunk the noodle strainer into the water and shake it around for 5-10 seconds (if the pot of water is on the smaller side, keep it in for 10 seconds). Shake off excess water and place the noodles and veg into a serving bowl.
      Check the noodle texture, it should still be chewy but should not feel undercooked. If they still taste undercooked, put it back in for another 5 seconds and increase timing for the next batch. Repeat with the remaining portions.
      (Note: I recommend blanching 1 portion at a time as it is much harder to separate noodles into portions after they're cooked.)
      2 cups water spinach or spinach, 2 cups bean sprouts
    • Stir the broth (as the blood will settle) and ladle the broth over the noodles along with a few meatballs. Top the noodles with the marinated pork, the meat from the bones, fried garlic, garlic oil, chopped cilantro and/or green onions, and Thai basil (if using).
      Serve immediately with roasted chili flakes, chili vinegar, and crispy pork rind. Enjoy!
      6 sprigs cilantro, 1 stalk green onion, Chili vinegar, 3 sprigs Thai basil, Fried garlic & garlic oil, Crispy pork rind, Roasted chili flakes
    Watch my videos AD-FREE and get bonus content on Patreon!
    Tried this recipe? Share a pic!Tag @hotthaikitchen on Instagram and Twitter!

    Authentic Thai Green Curry Chicken

    April 23, 2022 by Pailin Chongchitnant 156 Comments

    a bowl of thai green curry with basil garnish

    Thai green curry chicken is my most popular recipe on the YouTube channel with over 4 million views. If you want a completely authentic recipe, and one that maximizes deliciousness, this is it right here. It is one of the best known dishes of Thai cuisine, and despite its complex flavours, it is actually quite easy to make at home. It's also gluten free, and adaptable for vegans!

    Ingredients and Notes

    Here are ingredients you'll need for an authentic Thai green curry and important notes about them. For amounts, see the full recipe card below. The bamboo shoots are a common vegetable used for green curry, but feel free to change it up. And if you are DIY-minded and have time, here's my homemade green curry paste recipe.

    • Thai basil
    • Bamboo shoots, canned. You can use the strips of sliced version. If you don't like bamboo shoots, you can also substitute Thai eggplant, cut into thin wedges, or winter melon, cut into 1-inch chunks. But you will need to allow more cooking time and adjust accordingly: Thai eggplant needs 3-4 minutes, and wintermelon about 10 minutes. If using chicken breast the eggplant/wintermelon will have to go in before the chicken.
    • Red bell pepper, or any kind of red pepper. This is added just for colour.
    • Green curry paste, store bought or homemade. If using store bought I recommend Maeploy, Aroy-D, or Namjai brands. Do not use Thai Kitchen brand as it is very weak, or if you must, you'll need at last double the amount called for. See my curry paste review for details.
      If using my recipe for the homemade green curry paste, you can put the entire batch of paste into this curry recipe, unless you're afraid it might be too spicy, then you can hold back a bit. Don't use the amount provided for store bought paste because the above-recommended brands tend to be more concentrated than homemade ones.
    • Makrut lime leaves
    • Full fat coconut milk, I recommend Aroy-D in paper carton.
    • Fish sauce
    • Palm sugar, or sub granulated or light brown sugar.
    • Boneless skinless chicken thighs. Chicken thighs do make the best tasting green curry, but if you must use chicken breast, the method is a little different and I've provided the details in the recipe card.
    • Chicken stock, unsalted. Store bought is fine but you can also use my Thai style chicken stock recipe.

    How to Make Thai Green Curry

    Green curry uses our basic curry making methods that you'll see in many different coconut-milk-based curry recipes. Once you know how to make a green curry, for example, you basically know how to make a red curry! Here's a bird's eye view of the process, but to ensure success, I highly recommend watching the video tutorial!

    Steps for making green curry chicken steps 1-4
    1. Optional step: Pound green curry paste and Thai basil leaves for an extra vibrant colour.
    2. Get the paste as fine as possible.
    3. Reduce the coconut milk until very thick
    4. Add the curry paste and saute for a few minutes.
    Steps for making green curry chicken steps 5-8
    1. Toss chicken with the curry paste.
    2. Add coconut milk
    3. Add chicken stock
    4. Add makrut lime leaves.
    Steps for making green curry chicken steps 9-12
    1. Add fish sauce and palm sugar.
    2. Simmer for 10-15 minutes until the chicken is fork tender.
    3. Add bamboo shoots and cook for a minute until the curry comes back to a boil.
    4. Stir in red bell pepper and turn off the heat.
    Steps for making green curry chicken steps 13-14
    1. Add Thai basil and stir just until wilted.
    2. The green curry is now ready to serve with jasmine rice! Note: The makrut lime leaves are for infusion purposes only; they are not meant to be eaten when left in large pieces.

    How to Make Green Curry Vegan

    With a dish so flavourful, making it a vegan is very easy. Here are modifications I suggest below, but I also have a vegan green curry recipe that I have optimized for maximum umami you should check out!

    • Use any vegan protein of your choice, and if using tofu I recommend medium-firm tofu, or fried tofu made for soup which I use in this laksa recipe.
    • You can also do an all-veggie green curry without any protein. I recommend hearty vegetables such as Asian mushrooms and Japanese eggplant. Sauteing or roasting the vegetables first so that they are browne will make it more robust-tasting.
    • Replace fish sauce with soy sauce, salt, or vegan fish sauce.
    • Use vegetable broth instead of chicken stock. Or use dried shiitake soaking water as I do in my vegan red curry recipe.

    Frequently Asked Questions

    Which is hotter, red or green curry?

    This is a difficult question to answer because with any Thai curry you can make a very spicy or a very mild one. It just depends on who made the curry paste and also how much curry paste is used. But if you're using store bought curry paste, usually green curry tends to be hotter than red curry, and both of these tend to be hotter than yellow, panang and massaman curry pastes.

    If you're looking for something mild, try this easy panang curry or my yellow curry!

    What is green curry sauce made of?

    Green curry sauce is quite simple and is made of mainly green curry paste and coconut milk. Water or broth is usually added to lighten the curry, and seasonings are simply fish sauce and sugar. To find out what's in green curry paste, check out my recipe here.

    What does green curry paste taste like?

    If you've never had green curry before, it'll be a flavour experience you've never had. If you're thinking of an Indian curry, it is completely different in every way. The flavours come mostly from fresh herbs rather than dry spices, so it won't have that u0022curry aromau0022 you associate with dishes made with curry powder. Texturally it's also much lighter and brothier, more reminiscent of a soup, rather than a thick stew.

    More Thai Curry Recipes You'll Enjoy

    Once you've made green curry, other Thai curries will be easy because the basic steps are the same. You're just changing up the curry paste, the meat and veggies, and modifying the process slightly to match the different ingredients used.

    Here are some classic Thai curry recipes you should try:

    • Thai Red Curry with Pineapple and Shrimp - Red curry is as classic as the green. This version is super quick and easy, and perfect for pineapple lovers.
    • Vegan Thai Red Curry - With my techniques, this curry is loaded with umami even meat eaters will not miss the meat!
    • Yellow Curry with Chicken and Potato - Richer and thicker than a green curry, this is one that resembles a stew and full of aromatic spices.
    • Massaman Curry with Beef. - This is a world famous dish that is beloved by everyone. Lots of warm spices, rich and luscious. It also reheats well and you can make for the week. Try this version using an Instant Pot.
    • A bowl of pineapple curry with shrimp and a side of rice
      Thai Pineapple Red Curry with Shrimp
    • vegan Thai red curry
      Vegan Red Curry แกงเผ็ดมังสวิรัติ
    • a bowl of yellow curry chicken with cherry tomatoes and potatoes
      Authentic Thai Yellow Curry with Chicken and Potatoes
    • a bowl of massaman curry with beef
      Authentic Thai Beef Massaman Curry

    And here are some lesser known curries for those who want to explore:

    • Hung Lay Curry - Northern Thai pork belly curry. Super rich and satisfying. Perfect for colder months.
    • Sour Curry with Shrimp and Green Papaya - a very different experience as this curry is sour and brothy like a soup, with no coconut milk. This is the epitome of Thai home cooking, and one you won't see much in restaurants overseas.
    • Jungle Curry with Chicken - Another light curry that uses no coconut milk. It's spicy and loaded with veggies...it's like a jungle in a bowl!
    • Jackfruit curry with Pork Ribs - Now if you're really looking for something obscure...this is it. A light northern Thai curry I promise you won't find outside of Thailand!
    • a bowl of gaeng hung lay
      Gaeng Hung Lay - Northern Thai Braised Pork Curry
    • gaeng som
      Sour Curry w/ Shrimp and Green Papaya (Gaeng Som) แกงส้ม
    • A bowl of jungle curry with baby corn, Thai eggplant, long beans, and chicken, with a plate of jasmine rice on the side.
      Thai Jungle Curry with Chicken (Gaeng Pa Gai)
    • A bowl of ribs and jackfruit curry with chilies, tomatoes, and greens.
      Jackfruit Curry with Ribs & Tomatoes - Gaeng Kanoon
    a bowl of thai green curry with basil garnish

    Green Curry Chicken แกงเขียวหวาน (gaeng keow waan)

    By: Pailin Chongchitnant
    Authentic recipe for Thai green curry with chicken and bamboo shoots which is a classic combination. This recipe uses traditional curry making technique with no added cooking oil. You can use store bought curry paste, or make your own. 
    4.88 from 75 votes
    Print Recipe Pin Recipe Share
    Course Main Course
    Cuisine Thai
    Servings 4 servings

    Ingredients


    • 1¾ cups coconut milk, divided
    • 3 ½ Tablespoons green curry paste, store bought or homemade (recipe below, see note 1).
    • 1 cup chicken stock, unsalted
    • 1 lb chicken thigh, boneless, skinless, 1-inch pieces (see note 2)
    • 2 Tablespoons finely chopped palm sugar, or light brown sugar
    • 1 ½ - 2 Tablespoons fish sauce
    • 4 makrut lime leaves, (aka kaffir lime leaves)
    • 1 550-ml can bamboo shoots strips, drained and rinsed (see note 3)
    • 1 cup Thai basil leaves
    • ¼ red bell pepper, or another mild red pepper, julienned
    • Jasmine rice for serving

    Homemade Green Curry Paste

    • 1 teaspoon cumin seeds
    • 2 teaspoons coriander seeds
    • ½ teaspoon white peppercorns
    • 15 green Thai chilies, see note 4
    • 1 teaspoon coarse salt
    • 15 Thai basil leaves, finely julienned
    • 3 Tablespoons thinly sliced lemongrass, from bottom half only
    • 1 Tablespoon finely chopped galangal
    • 2 teaspoons makrut lime zest, finely chopped (or sub lime zest)
    • 2 cilantro roots or 4 big cilantro stems, finely chopped
    • 3 Tablespoons finely chopped shallots
    • 2 Tablespoons finely chopped garlic
    • 1 teaspoon fermented shrimp paste (gapi)

    Want to save this recipe?

    We can email this post to you, so you can come back to it later!

    Check Out Ingredients and Kitchen Tools I Use

    Notes

    1. Adding more curry paste will give you a more flavourful curry, but it will also be spicier. As your first batch, start with 50 g of store bought paste and you can add more next time. As for brands, I recommend Maeploy, Aroy-D and Maesri. Do not use “Thai Kitchen” brand. See: My Green Curry Paste Review. More details in the ingredient section in the blog post above.
    2. If using chicken breasts, cut into ½-inch thick, bite-sized slices, and marinate in 2 teaspoons of fish sauce while you prep other ingredients. Follow instructions specific to chicken breasts.
    3. Instead of bamboo shoots, you can substitute Thai eggplant cut into thin wedges (3 min cooking time), or winter melon, cut into 1-inch chunks (10 min cooking time).
    4. Ideally use Thai green chilies that are about 2 inches long, not the tiny ones. If not available you can also use other types of green chilies such as Korean green chilies or serrano peppers.

    FULL VIDEO TUTORIAL

    All my recipes come with step-by-step video tutorials with extra tips not mentioned in the blog post, so make sure you watch the video to ensure success. If you enjoy them, consider subscribing to the YouTube Channel to not miss an episode. Thank you!

    Subscribe to my YouTube Channel

    Instructions
     

    • Reduce ¾ cup coconut milk until thick and coconut oil starts to separate from the coconut milk (if the oil doesn’t separate after it has reduced until very thick, it's okay, just proceed with the recipe).
      1¾ cups coconut milk
    • Add the curry paste and sauté, stirring constantly over medium heat for about 2 minutes until aromatic. If paste sticks to the bottom of the pan, you can deglaze with a little bit of the remaining coconut milk. 
      3 ½ Tablespoons green curry paste
    • Add chicken thigh and stir to mix with the paste. (Continue with instructions below if using chicken breast).
      1 lb chicken thigh
    • Add the chicken stock, remaining 1 cup of coconut milk, palm sugar and 1 Tablespoon of the fish sauce. Grab the makrut lime leaves and twist them to bruise and release aroma, then tear them into chunks and add them to the pot, discarding the center stems. Bring to a simmer and let simmer gently for 10-15 minutes or until the chicken is fork tender.
      *The lime leaves are for infusion only and not meant to be eaten when left in large pieces. They are traditionally left in the curry, but be sure to inform your guests not to eat them.
      1 cup chicken stock, 2 Tablespoons finely chopped palm sugar, 1 ½ - 2 Tablespoons fish sauce, 4 makrut lime leaves
    • Once the curry is done simmering, add bamboo shoots and bring to a boil. If you prefer your peppers to be more cooked, add them at this stage. Once boiling, remove from heat.
      1 550-ml can bamboo shoots strips, ¼ red bell pepper
    • Taste and add more fish sauce and/or sugar as needed.
      *If you feel that the curry is weak and needs more curry paste, saute the additional curry paste in some oil in a small pot for a few minutes until aromatic, then add about a cup of the curry sauce to dissolve the paste and let it simmer for a few minutes, then stir it back into the curry. 
    • Add Thai basil and spur chilies or bell peppers and stir just until the basil is wilted. Serve with jasmine rice
      1 cup Thai basil leaves, Jasmine rice for serving

    If using chicken breast:

    • After sautéing the curry paste, add makrut lime leaves, coconut milk, chicken stock, palm sugar and 1 tablespoon fish sauce; bring to a simmer and let simmer for about 5 minutes.
      *The lime leaves are for infusion only and not meant to be eaten when left in large pieces. They are traditionally left in the curry, but be sure to inform your guests not to eat them.
    • Bring the curry sauce to a boil, then add the marinated chicken breast and cook until chicken is about 70% done, 1-2 minutes. Add the bamboo shoots and bring to a boil. If you prefer your peppers to be more cooked, add them at this stage. Once boiling, remove from heat.
    • Taste and add more fish sauce and/or sugar as needed.
      *If you feel that the curry is weak and needs more curry paste, saute the additional curry paste in some oil in a small pot for a few minutes until aromatic, then add about a cup of the curry sauce to dissolve the paste and let it simmer for a few minutes, then stir it back into the curry. 
    • Stir in Thai basil and spur chilies or bell peppers. Serve with jasmine rice.

    For the Curry Paste

    • Toast cumin seeds by adding them to a dry sauté pan and stir constantly over medium-high heat until the seeds are aromatic and slightly darkened, about 4 minutes. Cool on a plate. Repeat with the coriander seeds.
      1 teaspoon cumin seeds, 2 teaspoons coriander seeds
    • Using a mortar and pestle, grind toasted coriander seeds, toasted cumin seeds, and white peppercorns into a fine powder. Remove from mortar and set aside.
      ½ teaspoon white peppercorns
    • Cut at least 8 green Thai chilies in half horizontally and, with a paring knife, scrape off and discard the seeds and pith, then finely chop along with the remaining chilies.
      Note: The seeds and pith are removed from some of the chilies to tone down the heat, you can remove seeds from all of the green chilies if you wish to tone it down even more
      15 green Thai chilies
    • Add chopped chilies and salt to a heavy-duty mortar and pestle; pound into a fine paste. If the mixture feels too wet at any point, add some of the ground spices to absorb the liquid.
      1 teaspoon coarse salt
    • Add basil leaves; pound into a fine paste.
      15 Thai basil leaves
    • Add lemongrass, galangal, makrut lime zest, and cilantro roots; pound into a fine paste.
      3 Tablespoons thinly sliced lemongrass, 1 Tablespoon finely chopped galangal, 2 teaspoons makrut lime zest, 2 cilantro roots or 4 big cilantro stems
    • Add shallots, garlic, and any remaining ground spices; pound into a fine paste.
      3 Tablespoons finely chopped shallots, 2 Tablespoons finely chopped garlic
    • Add shrimp paste and pound to mix.
      1 teaspoon fermented shrimp paste (gapi)
    Watch my videos AD-FREE and get bonus content on Patreon!
    Tried this recipe? Share a pic!Tag @hotthaikitchen on Instagram and Twitter!

    Fried Garlic and Garlic Oil - Essential Thai Condiment

    April 18, 2024 by Pailin Chongchitnant 4 Comments

    a bowl of fried garlic

    Fried garlic or gratiem jiew is a quick an easy way to add garlicky goodness to any dish you make. You can sprinkle the crunchy golden garlic bits onto a dish, or drizzle the garlic oil on to anything. It's also an essential condiment for many Thai dishes, especially noodle soups. It's easy to make and will keep indefinitely in the fridge!

    The good news is one you make the fried garlic, you'll end up with garlic oil as a tasty by product. So it's one process to make both things!

    fried garlic in a sieve

    How to Use Fried Garlic

    Sprinkle the crispy fried garlic on top of anything you want! Your breakfast eggs, tacos, really anything. In Thailand, the crispy fried garlic is most commonly used on noodle soups such as boat noodles and chicken noodle soup. We also use it to top stir fried dishes such as Northern laab, garlic pepper chicken or garlic pepper pork.

    The garlic oil can be used as a cooking oil or as a finishing oil and in Thailand we use it in both ways. I usually drizzle it on top of soups along with the fried garlic, but you can also use it to cook veggies, eggs, or use it to finish a salad.

    How to Make Fried Garlic & Garlic Oil

    Here's a bird's eye view of the process so you know what's involved. For ingredients amounts and full instructions, see the recipe card below!

    1. Heat the oil over medium heat and add 1 piece of garlic as a "test" and wait for it to bubble.
    2. Once the test piece bubble, turn the heat down to medium low and add the rest of the garlic. Stir constantly until golden, about 5-8 minutes.
    3. Drain through a metal sieve immediately (don't use plastic or you will melt it!)
    4. It's now ready to use! The garlic will not be crispy when hot, so let it cool first.

    Storage

    I keep the fried garlic and the garlic oil separately otherwise the fried garlic will lose its crispiness. Keep them both in sealed containers in the fridge and they will last many months.

    Depending on the type of oil you use, the oil may solidify in the fridge. If this happens, simply take it out 10 minutes or so before using so it can liquify. In a rush, nuke it for a few seconds in the microwave (like literally 5 seconds, it goes fast!)

    Common Problems When Frying Garlic

    It's a simple thing to make, but you need to understand how it works or issues can occur! Here are some common issues:

    The garlic is bitter.

    Probably the most common problem, and it's because you over fried it! You want the garlic to be GOLDEN, not golden brown. If it's too brown, it might look nice but it'll start to be bitter. The garlic will also continue to darken slightly after you drain it from the oil, so aim to take it out a bit earlier.

    The garlic burnt so quickly!

    The heat is too high! Garlic goes from done to burnt fast, which is why you need to keep the heat medium-low or low throughout the frying process. People often get impatient and turn the heat up, and then it catches them off guard and burns instantly.

    Also, do not walk away! The first few minutes will look like nothing is happening, so often people walk away to do something else. But the rule of the universe states that when you're not watching fried garlic, that is precisely when it will burn!

    The garlic is golden but not crispy.

    This is also from heat being too high. You took it out at the right beautiful colour, but the garlic got to that colour too quickly and not enough moisture had evaporated.

    Crispiness comes from lack of moisture, if something is moist, it will not be crispy. The frying removes moisture, so you need to give it enough time for most of the moisture to evaporate. This is another reason to keep the heat low.

    A sign that the garlic is crispy is that the bubbling has slowed down significantly because bubbling occurs from the water evaporating out of the oil. When the bubbling is weak or has stopped completely, the garlic has lost enough moisture to be crispy.

    Cutting garlic too big will also cause this problem because there is simply too much moisture so the garlic cannot possibly lose it all before it turns golden. Keeping the pieces small enough is important!

    The garlic is oily

    This happens when the garlic is added to the oil when the oil was too cold, or if the heat becomes too low during the frying. When the oil is not hot enough to cause bubbling, there is not enough outward push from the water evaporation, so oil can seep into the garlic.

    This is why I suggest you add a test piece of garlic to the oil and wait for the test piece to bubble before adding the rest of the garlic.

    a bowl of fried garlic

    Fried Garlic and Garlic Oil

    An essential condiment in a Thai kitchen for adding garlicky flavour. Sprinkle the crunchy golden garlic, or drizzle the oil onto any dish. Keeps well in the fridge.
    Print Recipe Pin Recipe Share
    Prep Time 5 minutes mins
    Cook Time 10 minutes mins
    Course Sauces
    Cuisine Thai
    Servings 0.3 cup

    Ingredients
      

    • 1 head garlic
    • ⅓ cup neutral oil

    Want to save this recipe?

    We can email this post to you, so you can come back to it later!

    Check Out Ingredients and Kitchen Tools I Use

    All my recipes come with step-by-step video tutorials with extra tips not mentioned in the blog post, so make sure you watch the video to ensure success. If you enjoy them, consider subscribing to the YouTube Channel to not miss an episode. Thank you!

    Subscribe to my YouTube Channel

    Instructions
     

    • Chop the garlic just until the pieces are no bigger than ⅛ inch (3 mm) but do not mince finely.
      1 head garlic
    • In a small pot, add the oil and turn the heat to medium. Add 1 test piece of garlic, and once the garlic starts bubbling, add the rest of the garlic and turn the heat down to medium low.
      (The oil should just cover the garlic, and you can add more oil if needed.)
      ⅓ cup neutral oil
    • Stir the garlic constantly until golden and the bubbling has mostly subsided, about 5-8 minutes. The more you make the longer it will take. Do not let the garlic brown or it'll become bitter; you're going for golden, not golden brown. It'll continue to darken slightly after you take it out from the oil so take it out a bit early to be safe.
    • Drain the garlic through the metal sieve, catching the oil in a bowl underneath, and it's ready to go!
      Store the fried garlic and the oil separately in a sealed container in the fridge. If the oil solidifies in the fridge, bring it out shortly before using so it can liquefy.
    Watch my videos AD-FREE and get bonus content on Patreon!
    Tried this recipe? Share a pic!Tag @hotthaikitchen on Instagram and Twitter!

    Ginger Shrimp & Glass Noodles กุ้งอบวุ้นเส้น Goong Ob Woonsen

    November 20, 2015 by Pailin Chongchitnant 11 Comments

    glass noodles with shrimp and cilantro on top in an aluminum pot.

    Goong ob woonsen is a super popular Thai seafood dish I always order whenever we go to a seafood restaurant in Thailand. Glass noodles and shrimp are cooked together in a pot with lots of ginger, garlic and pepper, and the noodles soak up all the incredible flavours from the herbs and sauces. It is truly a classic, with a unique flavour that makes it a must-try dish of Thai seafood!

    glass noodles with shrimp and cilantro on top in an aluminum pot.

    Watch The Full Video Tutorial!

    All my recipes come with step-by-step video tutorials with extra tips not mentioned in the blog post, so make sure you watch the video below to ensure success - and if you enjoy the show, please consider subscribing to my YouTube channel. Thank you!

    Print
    clock clock iconcutlery cutlery iconflag flag iconfolder folder iconinstagram instagram iconpinterest pinterest iconfacebook facebook iconprint print iconsquares squares iconheart heart iconheart solid heart solid icon
    glass noodles with shrimp and cilantro on top in an aluminum pot.

    Ginger Shrimp & Glass Noodles กุ้งอบวุ้นเส้น Goong Ob Woonsen

    5 Stars 4 Stars 3 Stars 2 Stars 1 Star 5 from 5 reviews
    • Author: Pailin Chongchitnant
    • Yield: Serves 2
    Print Recipe
    Pin Recipe

    Description

    Goong ob woonsen is a classic Thai seafood dish. Juicy shrimp are cooked with glass noodles, ginger, garlic, all tossed together with an umami-rich sauce. It's one of my all time favourites!


    Ingredients

    Sauce:

    • 2 Tbsp soy sauce
    • 2 Tbsp oyster sauce
    • 1 tsp black soy sauce or dark soy sauce
    • 2 tsp sugar
    • 1 tsp toasted sesame oil
    • 120 mL chicken stock or water

    The Rest

    • 80 g dry glass noodles (sometimes labelled "bean vermicelli" or "bean threads")
    • 8-10 medium shrimp, head on, shell on if possible
    • ½ tsp black peppercorns
    • ½ tsp white peppercorns
    • 6 cloves garlic
    • 15 slices ginger
    • 8 cilantro stems or 3 cilantro roots
    • 2 Tbsp vegetable oil
    • 1 green onion, sliced on a bias, or a handful Chinese celery leaves

    Note: Traditionally, this dish is served right in the pot it is cooked in. So if you have a clay pot or a nice piece of cast iron ware with a lid, it would be perfect for this. Otherwise just use a regular pot and transfer it to a serving bowl after.

    Ingredients and Kitchen Tools I Use

    Want to save this recipe?

    We can email this post to you, so you can come back to it later!


    Instructions

    Soak glass noodles in room temperature water for 10 minutes to soften. Drain. If you want, you can cut the noodles with scissors just a couple of times to shorten them and make them easier to eat.

    Prep shrimp: Trim off the shrimp's long antennae and, if you want, the sharp pointy end on top of the head (I recommend trimming this off if you're serving kids). Using pointy scissors or a small paring knife, cut the back of the shrimp shell open all the way to the tail and remove the vein. Rinse and set aside.

    Mix all sauce ingredients together and stir until the sugar is dissolved. Put the noodles and the shrimp into a wide bowl and pour the sauce over top. Toss the noodles and the shrimp in the sauce then let it sit while you prep the herbs, stirring it half way through.

    In a mortar and pestle, grind the peppercorns until fine. Add the garlic and smash just until broken into pieces. Add cilantro stems or roots and smash them just to bruise. Add the smashed herbs, the ginger, and the oil to a heavy-bottomed pot with a tight fitting lid that is just big enough to hold the noodles and the shrimp.

    Heat the pot over medium heat until the herbs are sizzling. Once you can smell the herbs in the air, add the noodles to the pot along with all the sauce, putting the shrimp on top. Cover and cook over medium high heat just until you can hear the sauce boiling inside. Then lower the heat to medium low and cook for 3 minutes.

    Open the pot and stir the noodles around to redistribute the sauce, then cover and cook for another 2-3 minutes or until the shrimp and the noodles are done and the sauce is no longer pooling at the bottom. Taste, and if the noodles are not fully cooked, add a splash of water or stock, then stir and let it cook a bit longer until done.

    Turn off the heat, transfer to a serving bowl (unless you're serving it right from the pot), top with green onions or Chinese celery leaves. Cover the bowl (you can just use a plate) and let the herb steam for at least one more minute or until ready to serve. Serve with jasmine rice. Enjoy!

    Join us on Patreon for bonus content and rewards!


    Did you make this recipe?

    Tag @HOTTHAIKITCHEN on Instagram and hashtag it #HotThaiKitchen!

    Easier Weeknight Pad Thai (Sen Chan Pad Pu)

    April 5, 2024 by Pailin Chongchitnant 6 Comments

    Making a fully loaded authentic pad thai is no simple task, but if you still want to enjoy the sweet-salty-sour noodle-y goodness on a weeknight without having to resort to takeout, you're in the right place. Sen chan pad pu is one of Thailand's many "pad thai adjacent" dishes, but it uses way fewer ingredients, making it much quicker and easier to prepare. Its relative simplicity actually makes it more similar to an American takeout pad thai...but I promise it is better!

    a plate of sen chan pad pu with a fork lifting up noodles with Cucumber, beansprouts and a lime wedge on the side

    What Is Sen Chan Pad Pu?

    This dish is what I like to call pad thai's easier cousin. It's a rice noodle stir fry with that same sweet-salty-sour flavour profile as pad thai, and it is made typically with crab or shrimp. Sen means noodles, and chan is short for Chanthaburi, a province in Thailand famous for making rice noodles with a chewy texture that are perfect for stir fries. And this dish is Chanthaburi’s local specialty because it features their signature product.

    And not just the noodles! Chanthaburi is a coastal city with abundant seafood, so in Thailand you'll see this dish made with seafood only, most commonly crab. (Pad pu means stir fried with crab.) Since crab isn't as accessible for most people, for this recipe I'll show you how to work with both shrimp and crab.

    Sen Chan Pad Pu vs. Pad Thai

    On the surface the two dishes look similar - sen chan pad pu looks kinda like an orange pad thai. Indeed the two dishes share most of the core ingredients: noodles, tamarind, fish sauce, palm sugar, bean sprouts and garlic chives. But sen chan pad pu is flavoured with chili paste, hence the orange colour, and doesn't have any eggs, tofu, peanuts, preserved radish or dried shrimp.

    Because it's made with fewer ingredients sen chan pad pu is easier than pad thai, and I find it to be totally doable on a weeknight. Side note: you can also make regular pad thai weeknight friendly by making the sauce and doing some prep work up front, and I share how to make that happen in my post on how to make pad thai in 5 minutes!

    PS. On the subject of orange pad thai, unlike in America, most pad thai in Thailand is brown, not orange (with a few exceptions). American takeout pad thai is often orange because restaurants like to add ketchup or paprika to make the colour more vibrant, but this isn't traditional.

    Ingredients and Notes

    Here are all the ingredients you need and important notes about them. For amounts, see the full recipe card below.

    ingredients for sen chan pad pu
    • Dried chilies. This is what gives the iconic orange colour. You can use spicy or mild dried chilies depending on how spicy you want it. I use a combination of 1 small guajillo (mild) and a few smaller spicier dried chilies giving me a nice medium spice level, but feel free to adjust this ratio.
    • Garlic
    • Shallots
    • Palm sugar. Palm sugar adds complexity to the sweetness. See my post all about palm sugar here if you want to learn more about it. You can also sub light brown sugar.
    • Tamarind paste. This is what gives sourness to the noodles. Make sure you buy Thai tamarind paste (aka tamarind concentrate) that is a pourable brown liquid, not Indian tamarind which is much more concentrated. You can also make tamarind paste from pulp quite easily!
    • Fish sauce. It's important to use good quality fish sauce. See more about how to choose good fish sauce here.
    • Shrimp and/or crabmeat. If you have crabmeat, you'll be making the "original" version, but shrimp also work just as well!
    • Rice noodles. I'm using Pine Brand (our sponsor!) which has great chewy texture because of the added tapioca starch. If using other brands, make sure you get one that is 3mm wide (⅛ inch) for the right size!
    • Bean sprouts
    • Garlic chives
    • Cucumber. This is served on the side to help lighten the dish. It's quite important!
    • Lime wedge for serving. This is optional, depends on how sour your tamarind is. I find that if you're using homemade tamarind paste, the acidity is quite strong and the lime isn't necessary, but it's always good to have on hand just in case you want that extra zing.

    How to Make

    Here's a bird's eye view of the process, if this is your first time I highly recommend watching the full video tutorial. For full instructions and ingredient amounts, see the recipe card below.

    Process shots for making sen chan pad pu steps 1-4
    1. Soak noodles in room temp water until completely pliable and then drain. (30 mins - 1 hour depending on the brand, more on this below.)
    2. Remove seeds from the dried chilies and grind into a powder. Alternatively, soak the chilies in hot water for 30 mins until rehydrated, then pound into a paste in a mortar and pestle.
    3. Pound garlic into a paste in a mortar and pestle, then add chopped shallots and the ground chilies and pound into a rough paste.
    4. The paste can be made in advance and kept in the fridge for a few days or frozen.
    Process shots for making sen chan pad pu steps 5-8
    1. Saute the chili paste in oil for about a minute or so over medium heat.
    2. Add the palm sugar and stir until mostly dissolved.
    3. Add the water, tamarind paste and fish sauce and bring the sauce to a boil.
    4. Add the shrimp and cook until done, then off heat and remove the shrimp.
    Process shots for making sen chan pad pu steps 9-12
    1. Bring the sauce back to a boil over medium high heat and add the noodles.
    2. Keep tossing until the noodles absorb all of the sauce, then taste, and if the noodles are too chewy, add a splash of water and keep cooking until done.
    3. Add the shrimp, crabmeat (if using), garlic chives and bean sprouts and toss just until the bean sprouts are wilted.
    4. Plate and serve with chopped cucumber, extra bean sprouts and a wedge of lime. Top with more crabmeat for garnish. Enjoy!

    Tips and Shortcuts for Soaking Noodles

    One of the keys to success in stir frying rice noodles is properly soaking the noodles. Here are some tips:

    • To check if noodles are done soaking, lift the noodles up and they should droop completely and have lost all kinks. I soak my noodles in room temp water because it results in the most even hydration and the lowest risk of over-soaking.
    • The warmer the water temperature, the shorter the soaking time, so as a shortcut, you can use warm or even hot water, but you have to drain the noodles promptly or they will over-soak and become mushy after cooking.
    • It is possible to over-soak noodles in any temperature water, but in room temp water, you have a big buffer, so just check on them once in a while. If using warm or hot water, they will over-soak quickly so keep an eye on them.
    • In the case of absolute emergency, i.e. you forgot to soak the noodles, you can soak them in hot off the boil water for exactly 3 minutes (set a timer!) and drain them immediately. I have only tried this with Erawan brand noodles size M (3mm), and timing may vary if using other brands. I don't do this regularly because the risk of over-soaking is high.

    Advance Prep Tips

    Here are a few things you can do in advance to make this dish even faster to make!

    • Soak the noodles in advance, then drain well and keep in the fridge. I rest the drained noodles on a kitchen towel briefly before storing to absorb excess water because you don't want any pooling liquid in the container or they will over-soak in the fridge. They should last in the fridge for up to a week.
    • Make the paste in advance. You can keep the chili paste for up to a week in the fridge or freeze it indefinitely.
    • Make the sauce in advance. Take it a step further and make the sauce! Saute the paste, then add the palm sugar, tamarind paste, fish sauce and water. Keep this in the fridge and it should last you a couple of weeks. You can make the sauce in bulk, but remember to measure the volume of the sauce once finished and make a note to yourself how much sauce you need per batch.

    Storage and Reheating

    Like pad thai, rice noodles stir fries in general do not reheat well. This is because the noodles continue to absorb moisture in the fridge, so when you reheat, the noodles will be softer than they were when fresh, and after a few days, they might even be mushy.

    This is not a big deal if you have leftovers and you want to eat it the next day. It'll still taste great despite the not-as-chewy texture. But I don't recommend making this as meal prep for your lunch for the week! For that, I suggest trying my glass noodle pad thai which reheats much better.

    To reheat, you can microwave or saute it in a non-stick skillet. Make sure to reheat the rice noodles until steaming hot or they will not be soft and may be a bit crunchy and rather unpleasant.

    Easier Weeknight Pad Thai (Sen Chan Pad Pu)

    By: Pailin Chongchitnant
    Sen chan pad pu is a Thai noodle stir fry that has the same sweet-salty-sour flavour profile that we all love in pad thai, but is much simpler to make!
    5 from 3 votes
    Print Recipe Pin Recipe Share
    Prep Time 30 minutes mins
    Cook Time 5 minutes mins
    Course Main Course
    Cuisine Thai
    Servings 2 servings

    Equipment

    • mortar and pestle
    • wok or large nonstick skillet
    • Coffee grinder optional

    Ingredients


    • 6 oz dry rice noodles, 3 mm wide
    • 0.3 oz dried chilies , (see note 1)
    • 2 cloves garlic
    • 3 Tablespoons finely chopped shallots
    • 2 Tablespoons neutral oil
    • 1.6 oz palm sugar, about 3½ tablespoons packed (or sub brown sugar), finely chopped (~3½ Tbsp)
    • ⅓ cup water
    • 3 Tablespoons Thai tamarind paste , (see note 2)
    • 2½ Tablespoons fish sauce
    • 10-12 medium size shrimp, peeled and deveined
    • 3.5 oz crab meat , optional
    • 1½ cup 85 g beansprouts, plus extra for serving
    • 4 stalks garlic chives, 2-inch pieces, plus extra for garnish
    • 2 baby cucumbers, halved and sliced, or sub English cucumber
    • Lime wedges for serving, (see note 3)

    Want to save this recipe?

    We can email this post to you, so you can come back to it later!

    Check Out Ingredients and Kitchen Tools I Use

    Notes

    1. You can use spicy or mild chilies, or a combination, depending on how spicy you want to make the dish. For mild, I use guajillo or puya, and for spicy I use arbol chilies or the small dried chilies sold at Asian markets. If you want it a little spicy but not sure how much to add, use 1 spicy chili to be safe, and you can always add more to the finished dish.
    2. You can buy premade tamarind paste from Thailand, also labelled as “Tamarind Concentrate.” Make sure it is from Thailand and that it is a brown, pourable paste. You can also make your own tamarind paste from a block of tamarind pulp.
    3. You may or may not need the lime depending on how tart your tamarind paste is. If using homemade tamarind paste made according to my recipe, I find the acidity is strong enough that you don't need additional lime. But store bought paste can be quite weak, so a little squeeze can give you the extra zing needed.
     

    FULL VIDEO TUTORIAL

    All my recipes come with step-by-step video tutorials with extra tips not mentioned in the blog post, so make sure you watch the video to ensure success. If you enjoy them, consider subscribing to the YouTube Channel to not miss an episode. Thank you!

    Subscribe to my YouTube Channel

    Instructions
     

    • Soak the noodles in room temperature (not cold) water for 30 mins - 1 hour. Timing will vary between brands and temperature of your water. Check doneness by lifting the noodles up with your fingers and they should be completely limp, have no resistance to gravity, and no longer retain their old shape. If you’re in a rush, you can use warm water and it’ll shorten the soaking time, but be careful not to over-soak (see more noodle soaking tips in the blog post above).
      6 oz dry rice noodles
    • Remove seeds from the chilies by using scissors to cut them into chunks and allowing the seeds to pour out. No need to remove every last seed, whatever comes out is fine. Grind the chilies in a coffee grinder into a fine powder. If you don’t have a coffee grinder, you can cut and soak the chilies in room temp water until rehydrated (about 30 mins), then pound in a mortar and pestle into a paste.
      0.3 oz dried chilies
    • In a mortar and pestle, pound the garlic into a paste, then add the shallots and the ground chilies and pound into a rough paste.
      2 cloves garlic, 3 Tablespoons finely chopped shallots
    • Combine the tamarind paste with the fish sauce and ⅓ cup (80 ml) of water and stir to combine.
      3 Tablespoons Thai tamarind paste, 2½ Tablespoons fish sauce, ⅓ cup water
    • Before you turn the stove on, keep a cup of water nearby. Heat a wok or a large non-stick skillet over medium heat. Once hot, add the oil and the chili paste and cook for about 1 minute, stirring constantly.
      2 Tablespoons neutral oil
    • Add the palm sugar and cook until mostly dissolved, about 30 seconds. Then add the tamarind sauce mixture and bring to a boil.
      1.6 oz palm sugar, about 3½ tablespoons packed (or sub brown sugar)
    • Add the shrimp (if using) and cook them in sauce for 1 minute, flipping them halfway through, just until they are done. Turn off the heat and remove the shrimp, leaving all the sauce behind.
      10-12 medium size shrimp
    • Turn the heat back on medium high and add the soaked noodles. Keep tossing the noodles with tongs until all the sauce has been absorbed. Turn off the heat and taste the noodles, and if they are still too chewy, add a splash of water, and turn the heat back on and keep cooking until all the additional water has all been absorbed.
      Keep checking and adding water until the noodles are cooked through but still maintain a slight chew. (There are many factors that affect how much water you need to add, so it's okay if you end up adding a lot more or none at all, as long as the noodles are properly cooked.)
    • Once the noodles are cooked, add the beansprouts, garlic chives, cooked shrimp and most of the crab (if using), leaving a bit of crab behind for garnish. Turn off the heat and toss everything until just until the beansprouts are wilted.
      1½ cup 85 g beansprouts, plus extra for serving, 4 stalks garlic chives, 3.5 oz crab meat
    • Plate the noodles, top with more crab (if using), more beansprouts, cucumber, and a lime wedge on the side.
      2 baby cucumbers, Lime wedges for serving
    Watch my videos AD-FREE and get bonus content on Patreon!
    Tried this recipe? Share a pic!Tag @hotthaikitchen on Instagram and Twitter!

    Thai 5-Spice Egg & Pork Belly Stew (Kai Palo) - Instant Pot or Stovetop

    October 25, 2019 by Pailin Chongchitnant 16 Comments

    a bowl of thai five spice pork belly and egg stew on an orange napkin

    Growing up in Thailand, kai palo is one of my favourite dishes. And I would be willing to bet that many Thai people would say that it's their childhood faves too. Hard boiled eggs and tender pork belly are simmered in a sweet-salty five-spice broth...how could any kid not like it! It was a staple at my school cafeteria, and a classic in many cafeterias and food courts around the country.

    a bowl of thai five spice pork belly and egg stew on an orange napkin

    What is Kai Palo?

    Kai means eggs, and palo means five-spice. Kai palo is a stew made from hard boiled eggs, pork belly, and tofu puffs in a rich and aromatic five-spice broth. It is a great example of Chinese influence on Thai cuisine because the key ingredients are ones that Chinese immigrants brought into Thailand: five spice, tofu, and soy sauce. In fact, the Chinese have a very similar dish that's probably the precursor of this dish!

    In Thailand, kai palo is a humble dish so you won't find it in fancy restaurants. People make it at home, or you will find it in cafeterias and food courts. Also, anywhere kids go, you'll find kai palo because kids just love the sweet-salty flavour of this dish!

    Watch The Full Video Tutorial!

    All my recipes come with step-by-step video tutorials with extra tips not mentioned in the blog post, so make sure you watch the video below to ensure success - and if you enjoy the show, please consider subscribing to my YouTube channel. Thank you!

    Ingredients and Notes

    Here are all the ingredients you'll need and some important notes about them. For amounts, check out the full recipe card below.

    Note: It is best to make this stew one day it advance, or aim to finish it at minimum 30 minutes before serving. The eggs will have time to absorb more flavour the longer you let them sit.

    Spice Bag

    • Cinnamon sticks
    • Cloves
    • Star anise
    • Coriander seeds
    • Sichuan peppercorns
    • Cilantro roots or cilantro stems
    • Cheesecloth, or use premade spice infusion bag which you can find at many Chinese grocery stores.

    Note: If you have five spice powder already on hand, you can make a shortcut version by simply adding the powder to the broth. Use 1 ½ tablespoons of five spice powder for this recipe.

    The Stew

    • Pork belly, if you want a leaner dish you can also use pork shoulder.
    • Salt
    • Palm sugar, or sub brown sugar. Dark or light brown sugar will work here.
    • Unsalted pork or chicken stock, storebought is fine, or you can use my homemade pork stock or chicken stock recipes.
    • Soy sauce
    • Golden Mountain Sauce, or sub soy sauce (see Guide to Soy Sauce video)
    • Oyster sauce, see my post on how to choose good oyster sauce here.
    • Black soy sauce or dark soy sauce, this is added to get the rich dark colour iconic of this soup. Thai black soy sauce is less salty than Chinese dark soy sauce, so if using Chinese dark soy, you may want to hold back on the regular soy sauce a bit.
    • White pepper, ground
    • Garlic, crushed
    • Eggs, you can add as many as you like here, but I suggest 1-2 per person.
    • Tofu puffs, halved. You can buy tofu puffs at Chinese grocery stores. They are tofu that have been fried and has an airy interior which absorbs sauce exceptionally well.
    • Jasmine rice for serving

    How to Make Five-Spice Eggs and Pork Belly Stew (Instant Pot or Stovetop)

    Here are all the steps to make this recipe. If this is your first time, I highly recommend watching the video tutorial to ensure success.

    process shots fr making kai palo steps 1-4
    1. Crush cinnamon sticks just until they break into smaller pieces. Toast all the spices in a dry saute pan on medium high heat, stirring constantly, until the coriander seeds start to darken slightly. Remove from heat and place in cheesecloth or spice infusion bag along with cilantro stems/roots.
    2. In a large pot or in the Instant Pot, add palm sugar and melt over medium high heat. Once melted, keep stirring until it turns a dark caramel colour.
    3. Immediately add the stock to stop the sugar from cooking. Then add soy sauce, Golden Mountain sauce, oyster sauce, black/dark soy sauce, and salt.
    4. Add the spice bag, white pepper, and crushed garlic and bring to a boil.
    process shots fr making kai palo steps 5-8
    1. Add the pork belly and simmer gently for 2 - 2.5 hours, loosely covered, until the pork is fork-tender. If using an Instant Pot, cook on high pressure for 20 minutes, then natural release for 15 minutes.
    2. Meanwhile, cook the eggs in boiling water for 8 minutes, then cool and peel. Once the pork is fork tender, add the hard boiled eggs.
    3. Add the tofu puffs and simmer for another 8 minutes. Taste and adjust seasoning if needed.
    4. Let the stew sit for at least 30 minutes before serving, and preferably one day in advance so the eggs can have a chance to absorb the flavour. Enjoy!

    Tip for Extra Flavour: Sear the pork

    Though not traditionally done, searing the pork to get nice browning on the surface can add a lovely robust flavour to the soup. It's a simple step:

    1. Toss pork belly in the ½ teaspoon salt. Heat the pot you're using the make the stew over high heat, then add a little oil just to coat the bottom and sear the pork until browned on at least two sides (sear 4 sides if you've got the patience).
    2. Remove the pork and pour off any excess fat. Then continue with the recipe as usual - so the next step would be to caramelize the sugar which you can do in this pot without washing.

    A Note on Using the Instant Pot

    This is a great dish to make in the Instant Pot because it can save a lot of cooking time without affecting the end result. While you can do the whole thing in the IP, I prefer to start it stovetop and transfer after all the liquids go in because it's much faster to caramelize the sugar on the stove.

    The only modification I made for the IP is to use a bit less stock since the stew will not reduce at all in the IP.

    How to Get Flavourful But Not Overcooked Eggs

    Typical kai palo in Thailand features hard boiled eggs that are simmered in the soup for upwards of 30 minutes. This is to allow the eggs to absorb the flavour of the broth, but it also results in what Westerners would consider "overcooked" eggs—rubbery whites and grey ring around the yolks. For Thai people, there's nothing wrong with this; it is an expected characteristic.

    However, I personally prefer not-overcooked eggs, so my technique is cooking the eggs just until they're done but letting them sit in the stew overnight before serving. If you don't have time to do overnight, give them at least 30 minutes. Any less than that and you're not doing the eggs justice!

    Recipe Card

    Print
    clock clock iconcutlery cutlery iconflag flag iconfolder folder iconinstagram instagram iconpinterest pinterest iconfacebook facebook iconprint print iconsquares squares iconheart heart iconheart solid heart solid icon

    Five-Spice Eggs and Pork Belly Stew (Instant Pot or Stovetop)

    5 Stars 4 Stars 3 Stars 2 Stars 1 Star 5 from 3 reviews
    • Author: Pailin Chongchitnant
    • Yield: 4 servings
    Print Recipe
    Pin Recipe

    Description

    A popular stew in Thailand that is a favourite amongst kids and adults alike. Tender braised pork belly and hard boiled eggs that have absorbed the flavourful five-spice broth. Perfect with jasmine rice.


    Ingredients

    Note: It is best to make this stew one day it advance, or aim to finish it at minimum 30 minutes before serving. The eggs will have time to absorb more flavour the longer you let them sit.

    Spice Bag

    • 2 cinnamon sticks (about 8 inches total)
    • 8 pc cloves
    • 2 pc star anise
    • 1 tsp coriander seeds
    • ½ tsp sichuan peppercorns
    • 3 cilantro roots or 10 cilantro stems
    • A piece of cheesecloth big enough to make a spice bag, or use premade bag as shown in the video

    Note: If you have five spice powder already on hand, you can make a shortcut version by simply adding the powder to the broth. Start with 1 tablespoon of five spice powder and add more to taste.

    The Stew

    • 1½ lb pork belly, 1.5-inch chunks
    • ½-1 teaspoon salt
    • 60g palm sugar (⅓ cup packed)
    • 5 cups unsalted pork or chicken stock, 4 cups if using IP
    • 2 Tbsp soy sauce
    • 1 Tbsp Golden Mountain Sauce, or sub soy sauce (see Guide to Soy Sauce video)
    • 1 Tbsp oyster sauce
    • 2-3 teaspoon black soy sauce or dark soy sauce
    • ½ tsp white pepper, ground
    • 4 cloves garlic, crushed
    • 6-8 eggs (as many as you like, about 1-2 per person)
    • 8 tofu puffs, halved
    • Jasmine rice for serving

    See the Instant Pot I use

    Want to save this recipe?

    We can email this post to you, so you can come back to it later!


    Instructions

    1. Crush cinnamon sticks just until they break into smaller pieces, then add them to a dry saute pan along with star anise, cloves, coriander seed and Sichuan peppercorns.
    2. Toast over medium high heat, stirring constantly until the coriander seeds start to darken slightly. Remove from heat and place on the cheesecloth or spice bag.
    3. Add cilantro stems or roots then tie the cheesecloth to make a bag.  

    Stovetop Method

    1. Optional step for extra flavour if you have time: In a heavy-bottomed pot, add a little oil to coat the bottom then heat on high. Toss pork belly in ½ teaspoon salt, then sear until browned on at least two sides. Remove and set aside. Pour off any excess fat collected in the pot but do not wash the pot.
    2. In the same pot add palm sugar and melt over medium high heat. Once melted, keep stirring until it turns a dark caramel colour. Immediately add stock to stop the cooking; the sugar will harden, this is okay. 
    3. Add soy sauce, Golden Mountain sauce, oyster sauce, black/dark soy sauce, white pepper, garlic and the spice bag. If you didn't sear the pork, add the ½ teaspoon salt at this stage.
    4. Add the pork and simmer gently for 2 - 2.5 hours, loosely covered, until the pork is fork-tender.
    5. Meanwhile, cook the eggs in boiling water for 8 minutes. Once done place in a bowl of cold water to cool. Peel the eggs; be gentle as the yolks are still soft.
    6. Once pork is done, add eggs and tofu puffs and simmer another 8 minutes. Taste and adjust seasoning if needed.
    7. Let the stew sit for at least 30 minutes before serving, and preferably one day in advance so the eggs can have a chance to absorb the flavour.
    8. Serve with jasmine rice. Enjoy!

    Instant Pot Method

    Note: You can do the whole thing in the IP, but I recommend starting stovetop because it will be much faster. But if using IP for the entire process, do the first part on saute mode on high.

    1. Optional step for extra flavour if you have time: In a heavy-bottomed pot, add a little oil to coat the bottom then heat on high. Toss pork belly in ½ teaspoon salt, then sear until browned on at least two sides. Remove and set aside. Pour off any excess fat collected in the pot but do not wash the pot.
    2. In the same pot add palm sugar and melt over medium high heat. Once melted, keep stirring until it turns a dark caramel colour. Immediately add half of the stock to stop the cooking; the sugar will harden, this is okay. 
    3. Add soy sauce, Golden Mountain sauce, oyster sauce, black/dark soy sauce, white pepper, garlic and the spice bag. If you didn't sear the pork, add the ½ teaspoon salt at this stage. Bring to a boil then transfer to the IP. 
    4. Add the pork into the IP and also the remaining stock, then cook on "pressure cook" mode on "high" for 20 minutes. Let it natural release for a minimum of 15 minutes before releasing the remaining pressure. You can place a wet cold towel on the metal part of the lid to help speed up the cooling down process.
    5. Meanwhile, cook eggs in boiling water for 8 minutes. Remove and place in a bowl of cold water. Peel the eggs; be gentle as the yolks are still soft.
    6. Once pork is done, open the IP lid and add eggs and tofu puffs. Turn the IP on "saute" mode on "medium," then simmer the eggs and tofu for another 8 minutes (start timing from when the soup starts to bubble).
    7. Remove the inner pot from the IP, taste and adjust seasoning if needed, and let the stew sit for at least 30 minutes before serving. I remove the inner pot because I found that when I let the soup sit in the IP, even with the machine off the heat retention is too high and the eggs continued to overcook.
    8. Serve with jasmine rice. Enjoy!

    Join us on Patreon for bonus content & rewards!


    Did you make this recipe?

    Tag @HOTTHAIKITCHEN on Instagram and hashtag it #HotThaiKitchen!

    3-Ingredient Crispy Thai Fish Sauce Wings

    May 31, 2018 by Pailin Chongchitnant 9 Comments

    a plate of fish sauce wings

    The thing that shocked me when I first had these popular Thai wings was that they only use one seasoning: fish sauce. Really? Only fish sauce? How can it be THIS good?? I guess that is the magic of fish sauce. It delivers salty umami that, in many situations, is all you need. These are one of the most popular appetizers in Thailand, and it is incredibly easy to make at home, no deep frying required!

    a plate of fish sauce wings with dried chilies garnish and a plant and a beer in the background.

    What Are Thai Fish Sauce Wings?

    Fish sauce wings are called ปีกไก่ทอดน้ำปลา peek gai tod nam pla in Thai, which literally means "wings fried with fish sauce." They're served in many restaurants across Thailand, especially ones popular with the drinking crowds because it's such a great dish to pair with a cold beer.

    In Thailand they are typically deep fried, but for this recipe I've also provided a method that uses shallow frying only, and also an alternative air-fried method (not as crispy, but works).

    Watch The Full Video Tutorial!

    All my recipes come with step-by-step video tutorials with extra tips not mentioned in the blog post, so make sure you watch the video below to ensure success - and if you enjoy the show, please consider subscribing to my YouTube channel. Thank you!

    Ingredients and Notes

    Here's all the ingredients you need and important notes about them. For amounts, see the recipe card below.

    • Chicken wing flats. Thai fish sauce wings use only flats, as I explain more below. This is, as the name suggests, the flat part of the wings. They're sometimes called wingettes. For the drums, you can save them for another recipe such as my turmeric chicken soup, tom yum chicken, or these zingy spicy KFC wings!
    • Fish sauce. Since it is the only seasoning, it's important to use good fish sauce. Read more about how to choose good fish sauce here.
    • Rice flour. Though you CAN make this recipe without any flour, I find the flour helps create a crisper crust. You can also substitute cornstarch instead, but I do prefer the light, crisp texture of rice flour. **Be sure to buy regular rice flour (red bag) not glutinous rice flour (green bag).
    • Ground white or black pepper. This is optional 🙂
    • Optional: Sweet chili sauce for serving. In Thailand these are typically served without any dipping sauce (the beverage is the sauce!), and they don't need it. However, I understand the desire to dip! So if you want, Thai sweet chili sauce would be the perfect pairing, and you can buy it or use my easy homemade Thai sweet chili sauce recipe here.

    How to Make Crispy Thai Fish Sauce Wings

    Here's a bird's eye view of the steps. If this is your first time, I recommend watching the video tutorial to ensure success!

    process shots for making fish sauce wings steps 1-4
    1. Place wings in a dish just big enough to hold them, or a ziptop bag, and add the fish sauce. Toss the wings to coat, and marinate for 20-30 mins, turning them half way though.
    2. Pat the wings dry, and if you want you can pepper them at this point too. Then dust the rice flour over them so they are thoroughly coated.
    3. Flip the wings and dust the rice flour over the other side.
    4. Put the wings into the sieve and shake off excess flour.
    process shots for making fish sauce wings steps 5-8
    1. Add oil into a 12-inch skillet it is about ¼ inch thick. One hot, lay the wings thick-skin side down and let them fry for about 4 minutes until they have a deep golden brown colour.
    2. Flip the wings to fry the other side for another 2 minutes or so until they are cooked through.
    3. When shallow frying, oil tends to jump more than when deep frying, so it's good to have a mesh guard!
    4. Drain on paper towel and enjoy! They don't need a sauce, but if you want, they are great dipped in Thai sweet chili sauce.

    How to Deep-Fry and Air-Fry Fish Sauce Wings

    I love to shallow fry these wings because I get the crispiness of frying without having to deal with a lot of oil, though all the flipping can be a bit fiddly if you need to make multiple batches. You can deep fry and air fry these, with pros and cons below:

    Deep Frying

    How: Bring about 1 inch of oil to 375°F (190°C) over medium high heat. Fry the wings for 4-5 minutes until browned and crispy.

    Pros: Fasting cooking time and not at all fiddly - you drop them in and let them go. This is the best option if you're making a large amount of wings. You can also use drumettes with this method.

    Cons: Uses a lot of oil.

    Air Frying

    How: Place the wings in the basket, thicker-skin side up, and spray or brush the wings with oil. Air fry at 400°F (200°C) for 12-15 minutes or until cooked through. I don't find it necessary to flip them as you want to maximize the crispness of the top side.

    Pros: Convenient, we all love air fryers for a reason! It also allows you to use drumettes.

    Cons: The result is fine, but the skin is not as crispy, so if you want maximum crispiness, stick with oil-frying. It also takes much longer per batch, so not ideal if you need to make multiple batches.

    Advance Prep and Reheating Tips

    You can marinate the wings one day in advance, and then then cook them before serving. If serving a party, you can also cook them in advance and then reheat close to serving time; they reheat very well!

    To reheat: You can air fry them at 350°F(175°C) or bake them at 400°C (200°C) for about 8 minutes. You can also shallow fry or deep fry them again in a skillet, the way you did the first time.

    Only Flats for Fish Sauce Wings!

    The most interesting thing about many Thai wings recipes, this one included, is that they're almost always made ONLY with wing flats. No drumettes. Go to any Thai restaurant in Thailand, order fried wings appetizer, and you'll see for yourself.

    For this recipe, using flats also allow us to get wonderfully crispy skin with shallow frying, no deep frying required! If you want to use drumettes, you'll need to deep fry them if you want them crispy, or air fry them if you don't need the crisp.

    Personally think flats are the better part of the wings anyway, but I have to wonder...where do all the drumettes go?

    One theory I have is that the drumettes all go to Thai KFC which makes these incredible spicy wings that use drumettes only, see my KFC Wingz Zabb recipe here. The drumettes are also often used in soups, such as this turmeric chicken soup, because they make for a super rich broth, and the meat is easier to remove with a spoon than the flats.

    Recipe Card

    Print
    clock clock iconcutlery cutlery iconflag flag iconfolder folder iconinstagram instagram iconpinterest pinterest iconfacebook facebook iconprint print iconsquares squares iconheart heart iconheart solid heart solid icon
    a plate of fish sauce wings

    Crispy Thai Fish Sauce Wings

    5 Stars 4 Stars 3 Stars 2 Stars 1 Star 5 from 5 reviews
    • Author: Pailin Chongchitnant
    • Prep Time: 30 mins
    • Cook Time: 6 mins
    • Total Time: 36 minutes
    • Yield: 2 servings
    Print Recipe
    Pin Recipe

    Description

    Salty, umami, crispy Thai wings are incredibly simple yet amazingly delicious. These are super popular appetizers in Thailand that can be easily made at home!


    Ingredients

    • 1 lb (450 g) chicken wing flats (also known as wingettes)
    • 1 ½ Tbsp (22.5 ml) fish sauce
    • ½ tsp (2.5 ml) ground white or black pepper (optional)
    • ¼ - ⅓ cup (30-40g) regular rice flour
    • Optional: Sweet chili sauce for dipping, store bought or homemade

    Shop Ingredients and Tools I use

    Want to save this recipe?

    We can email this post to you, so you can come back to it later!


    Instructions

    TIP: If shallow frying, I recommend using a mesh splatter guard. I find that shallow frying wings creates more aggressive splattering than deep frying.

    1. In a dish just large enough to hold all the chicken wings in one layer, or in a zip-top bag, toss the chicken wings with the fish sauce well. Let the wings marinade for 20-30 minutes, flipping or stirring them half way through.
    2. Remove the wings from the marinade and pat them dry with paper towel. If using, sprinkle ground pepper all over the wings and press it onto the skin.
    3. Lay the wings in one layer on a plate and sift rice flour evenly over them, then flip the wings and sift the flour over the other side. Transfer the wings into the sieve and shake off any excess flour; you want the wings to be entirely coated with a thin layer of flour. (If making a lot you can just put the wings in a large mixing bowl and toss with rice flour, but for one batch I find this method is easy and uses less flour.)
    4. At this point you can deep fry the wings, or shallow fry them as I did in the video. 
    5.  To shallow fry, fill a 12-inch skillet with just a thin layer of oil, about ¼ inch deep. Once the oil is hot, place the wings, thick skin side down, and fly without moving them for about 4 minutes over medium heat until the skin has a deep golden brown colour.
    6. Once the skin has developed a deep brown colour, flip and fry the other side just until the chicken in cooked, 2-3 more minutes. Don't worry about trying to get this side crispy, you don't want to fry for too long and overcook the chicken. Remove from pan and drain on paper towel.
    7. To deep fry, heat the oil to 375°F and fry for 4-5 minutes or until golden brown and cooked through.
    8. To air-fry (not as crispy): Place the wings in the basket, thicker-skin side up, and spray or brush the wings with oil. Air fry at 400°F (200°C) for 12-15 minutes or until cooked through. I don't find it necessary to flip them as you want to maximize the crispness of the top side.
    9. Serve while still hot with a cold beverage! If you want, you can also serve with sweet chili sauce. 

    Support Hot Thai Kitchen!


    Did you make this recipe?

    Tag @HOTTHAIKITCHEN on Instagram and hashtag it #HotThaiKitchen!

    The Science of Freezing Tofu (And 4 Ways To Cook It)

    March 22, 2024 by Pailin Chongchitnant 4 Comments

    frozen silken tofu held in hand with more tofu in the background.

    The other day I told my husband to put away the groceries and freeze all the protein…by which I meant all the meat. Next thing I know I opened the freezer and there was my tube of soft tofu looking…completely bizarre.

    frozen silken tofu held in hand with more tofu in the background.

    After taking a deep breath and reminding myself that tofu is technically protein, I decided to cook the frozen tofu and then post it on Instagram and YT Shorts where it went viral on BOTH platforms. To my surprise people are very interested in the concept of freezing tofu! And it absolutely IS a fascinating process, so I want to explore freezing tofu further. 

    So for our exploration I froze 2 types of tofu - silken and firm - so you can see the two extremes; and you’ll also see WHY you might want to freeze tofu on purpose, what happens to them when you do, and how to use the results in your cooking.

    [feast_advanced_jump_to]

    Watch The Video

    If you want to get all the cool visuals, (and frozen tofu is very cool), everything I cover in this post is covered in this video as well. Enjoy!

    What Types of Tofu Can You Freeze?

    You can freeze any kind of tofu; anything from silken all the way to extra firm, depending on the texture you want at the end. The soft tofu will remain soft, and the firm tofu will remain firm, but everything will be a little firmer and less fragile than it originally was. 

    How to Freeze Tofu

    a tube of frozen silken tofu

    There is ZERO trick to freezing tofu and don't believe anyone who tries to get you to do any kind of "prep work." The easiest way is the best way - stick them in the freezer in the packaging, just like my husband did. Once frozen, it’s gonna look completely wrong; the colour will become dark yellow and translucent as per the pic above.

    The tofu doesn't need to be frozen for any particular amount of time; you can thaw it as soon as it's completely frozen or leave it there until you want to use it. Let it thaw in its packaging either in the fridge over a few days or in a bowl of room temp water (which will take 3-4 hours) - though of course timing will depend on the size of the tofu. If thawing in water, keep changing the water once it becomes ice cold so it will thaw faster.

    *Once thawed, the tofu will still last at least a week in the fridge (unless it is almost expired) so you can thaw it well in advance.

    How NOT to Freeze Tofu

    Some people will tell you to cut the tofu into pieces, dry them with a towel, then freeze them on a tray as individual pieces. If you just want to store the tofu long term, that's fine, but if you want to reap the benefits of frozen tofu's transformation, this is actually the OPPOSITE of what you want to do!

    Yes, freezing tofu in small pieces make them quicker to thaw and easier to use, but for the most dramatic physical changes, you want as much water in the tofu as possible while it is freezing AND for the freezing to happen slowly (i.e. freeze the whole block of tofu). So just stick it in the freezer as is. I will explain the reason for this further in "the science" section below. 

    What Happens After Tofu is Frozen?

    For the tube silken tofu, you can cut the tube right through, (careful of any water squirting on you), and slide it out. And behold the crazy texture, holes, and layers in the pic below! And BECAUSE of all these holes, you'll also notice a ton of water just pouring right out of the tofu.  

    Previously frozen tofu cross section

    For tofu packed in a tub, you can just take it out as usual after it's thawed. With firmer tofu it is not as obvious that anything has changed, but if you look closely, you can see the little, tiny holes inside that weren’t there before. And if you press down on it (gently please, it's still tofu) you'll see a ton of water gushing out of those tiny holes.

    frozen firm tofu beside regular tofu

    Both soft and firm tofu basically became a sponge. The holes are much smaller in firm tofu because it had much less water to begin with as I will explain in "the science" below. But the takeaway here is: the softer the tofu, the more dramatic the effect.

    The Science Behind Frozen Tofu's Transformation

    Now let me explain why this happened with a rough analogy. Imagine that tofu is made up of millions of tiny water balloons. Each balloon is the soy protein, and each soy balloon is filled with water. This is how the water was able to stay suspended INSIDE the tofu in the first place.

    But as anyone who’s ever forgotten a can of coke in the freezer knows, water expands when it freezes, and if the container is too full, it explodes. That’s what happened to our soy balloons; and the ice crystals are sharp, so they damaged the balloons as well. And once the tofu thaws, the water leaks out from the damaged balloons, leaving a bunch of saggy empty balloons behind, hence all the holes.

    As evidence of this, if you freeze a whole tube of silken tofu, you'll notice that the holes at the ends of the tofu are not nearly as big (see the difference in the pic below). This is because the faster things freeze, the smaller the ice crystals. And smaller ice crystals cause less damage to the protein structure, hence the less pronounced holes. The middle of the tofu will have the largest, most obvious holes because it was the place that took the longest to freeze. And as I mentioned above, this is why you want to freeze the whole block of tofu and not freeze them in small pieces!

    previously frozen silken tofu in a Thai sukiyaki soup in a bowl.
    Tofu on the left comes from the end of the tube, tofu on the right comes from the middle.

    Why would you want to freeze tofu anyway?

    previously frozen silken tofu being sliced

    Other than triggering trypophobia, this holey texture can be a good thing because one of the most challenging parts about cooking with tofu is getting it to absorb any flavour. You can coat the outside with sauce, but the inside usually just tastes like plain tofu. But with all these holes, sauce and broth and now penetrate INSIDE the tofu, making it much more flavourful. 

    The other advantage is that because the tofu now has less water, it is a bit stronger and less likely to fall apart, which is why many people like to use frozen tofu in hot pot where things are constantly being agitated. And for firmer tofu, once we fry them, they’re gonna be chewier as well. 

    Does frozen tofu taste like chicken? 

    This is such a pet peeve of mine. If you go searching on the internet for frozen tofu you’re going to see people claiming that freezing is a "tofu hack" that makes tofu taste like chicken! As a chicken eater, I can tell you with 100% confidence that it does NOT. And if someone actually thinks that it does…well, maybe they haven’t had chicken for a while. 

    Yes, if you freeze firm or extra firm tofu and then fry it, it is gonna develop a chewier texture, but you’re definitely not going to fool anyone that this is a meat product. What I CAN say is that  depending on what you do with it, it can tastes less like tofu because now more of the sauce is able to penetrate the inside, so the tofu flavour is drowned out a little bit more.

    How to Cook With Frozen Tofu

    However you currently cook unfrozen tofu, you can still do the same with frozen tofu. But the difference is that now the holey tofu will be able to absorb flavour and will be firmer. So here are a few suggestions I have that will allow you to take advantage of this new feature.

    For Frozen Soft Tofu

    previously frozen silken tofu in a Thai sukiyaki soup
    1. Cut it into pieces and let it simmer in a soup, stew, or anything saucy to let it soak up the flavour. I used it in this Thai sukiyaki soup recipe and it was delicious. Just add them at the end and let it simmer for just a few minutes so the tofu can heat through and absorb that flavour. 
    2. Hot pots! Frozen tofu is popular in hot pots because they are sturdier and less likely to fall apart with all the people constantly agitating the pot. Try this Thai hot pot recipe here!

    For Frozen Firm or Extra Firm tofu

    You can certainly just throw these into any soups, curries or stews. But if you pan-fry or air-fry them first, you'll also get a lovely chewiness AND this will help prevent them from falling apart when you cook with them, making them much more versatile. Here's how to fry them:

    Process shots for how to fry firm frozen tofu, steps 1-4
    1. Press out as much excess water from the tofu as possible (don't be too aggressive, it is still tofu). Cut it into pieces that are slightly bigger than you want them to be at the end because they will shrink. 
    2. Lay them on a thick kitchen towel, put another towel on top and gently press to dry them out further. The dryer they are the better they will brown. 
    3. Option 1: You can pan fry them in some oil over high heat. Sear them on all 4 sides for a few minutes each side. Be sure not to crowd the pan for best browning.
    4. Option 2: For a less fiddly method, brush them with oil and air-fry them at 400°F (200°C) for about 12 minutes, turning them over half way through. Be sure to place them in a single layer and try not to let them touch.

    *People have asked whether it is okay to deep fry frozen tofu. I have not done this, but my concern is that because of all the holes, the frozen tofu may absorb too much frying oil.

    3 Recipe Ideas for Pan- or Air-Fried Frozen Tofu

    Whether you pan fried the tofu or cooked them in the air fryer, here's what you can do with your golden nuggets of chewy tofu. 

    1. Toss them in a sauce. Here I'm using my Hot Thai Chicken sauce recipe. Simply toss the freshly fried tofu until it is well coated, but don’t overdo it cuz the sauce is intense. In a pinch, you can also just toss them in any store-bought sweet chili sauce.
    frozen firm tofu tossed in sweet chili sauce
    1. Stir fry them. I recommend my pad prik king recipe which is a slightly sweet red curry paste stir fry with makrut lime leaves. Just throw the tofu in towards the end and toss until they're well coated by the sauce; giving them a minute to heat through and absorb the sauce.
    frozen firm tofu stir fried in pad prik king sauce
    1. Simmer them in a stew and take advantage of those holes that can now suck up all that flavour. Try my five spice stew with eggs and pork belly (kai palo) which is a classic. 
    frozen firm tofu in kao palo stew

    And that's it! I hope you have fun experimenting with all kinds of frozen tofu, and let me know if you have a favourite way to use them!

    Thai Chicken Laab Recipe (Larb Gai)

    June 17, 2016 by Pailin Chongchitnant 16 Comments

    a plate of laab gai with green beans and lettuce on the side.

    Laab (aka larb) is a famous dish that is iconic of northeastern Thai food, and this version uses chicken, making it laab gai ลาบไก่. It's spicy, tart, and fresh...few things satisfy the palate the way laab does. It's no wonder it's one of the most popular dishes in Thai restaurants around the world!  It is probably the healthiest chicken salad ever, and one of the easiest Thai dishes to make. You'll have it on the table in less than 30 minutes!

    a plate of laab gai with green beans and lettuce on the side.

    Watch The Full Video Tutorial!

    All my recipes come with step-by-step video tutorials with extra tips not mentioned in the blog post, so make sure you watch the video below to ensure success - and if you enjoy the show, please consider subscribing to my YouTube channel. Thank you!

    What is laab gai? Or is it larb gai?

    Let's settle the second question first, the dish is pronounced "laab" without the R. The reason it is often written with R is because, like the British and Australians, Thai people do not pronounce the R when it follows a vowel. So if you're American or Canadian, please pretend you're British for a brief moment when you see "larb" on a menu! (I explain more about this in my video about the madness of spelling Thai words in English.)

    Laab is a northeastern Thai salad made of ground meat, and in fact "laab" means to mince in the north/northeastern Thai dialect! The dressing is spicy and tart, made primarily of fish sauce, lime juice, and chilies. It's loaded with tons of fresh herbs and served with sticky rice and fresh veggies.

    Gai means chicken, and it's one of the most popular versions served in N. America. In Thailand, however, laab moo or pork laab is the more common one.

    Note: This laab is from the Northeast, but there is another kind of laab from Northern Thailand that is entirely different. That laab is called laab nuea or laab kua and it is made with a ton of aromatic spices. If you love spices, try my northern laab (laab kua) recipe here!

    Ingredients and Notes

    Here are all the ingredients you need to make laab gai and important notes about them. For amounts, see the recipe card below.

    • Ground chicken, preferably not lean so as to not make the salad too dry. If you have a choice, choose dark meat ground chicken. For this recipe I grind my own using 50/50 chicken breast and chicken thighs. Grinding your own meat really is much easier than it seems especially if you have a cleaver. You can see the video @3:20 for how to grind your own chicken. I grew up grinding all our own meat (yes, as a child!) because pre-ground meat wasn't readily available where we lived. I also have a laab recipe made with ground pork here.
    • Water or unsalted chicken stock. Use chicken stock only if you've got some already open/available, otherwise just use water. It's not necessary to buy/make/open chicken stock for this. 
    • Fish sauce. This is the main seasoning for the dish so it's important you use a good one. See this post for how to choose good fish sauce.
    • Shallots. In a pinch, red onion will also work.
    • Fresh lime juice
    • Roasted chili flakes. Roasting chili flakes adds a lovely smoky aroma, and if you like spicy food, it's useful to have a bunch of it on hand and you can add it to anything! I use mine all the time. Here's a detailed tutorial on how to make your own Thai roasted chili flakes.
      You can also buy Thai chili flakes (if you like spicy) from an Asian market, or if you prefer it mild, use "red pepper flakes" available at Western stores. I recommend toasting store bought chili flakes in a dry skillet over low heat until it darkens slightly and smells smoky - it'll take just one minute or less so be careful not to burn it!
    • Toasted rice powder. THIS is the heart of laab. It is not laab without toasted rice powder or kao kua (aka khao khua). It adds a magical nutty flavor that helps mellow out the sharpness of the lime. It's very easy to make, recipe below.
    • Cilantro and/or sawtooth coriander. You can find sawtooth coriander from some Asian markets, and they're also known as culantro. It's very popular added to laab, but if you can't find it, cilantro alone is just fine.
    • Green onion.
    • Mint. Mint is an absolutely key ingredient of laab, don't skip it!
    • Crispy chicken skin, this is optional, and I have a quick microwave crispy chicken skin recipe here. It's just a way to add a little fun crunchy bits on top. You can also use store bought crispy pork rind instead.

    Toasted Rice Powder (kao kua)

    • Uncooked Thai sticky rice or jasmine rice. Sticky rice is typically used in Northeastern Thailand since that is the rice that's most commonly eaten there, but I prefer jasmine rice because it is more aromatic. Both will work fine.
    • Makrut lime leaf (aka kaffir lime leaf, optional, but if you have it I highly recommend adding it cuz it adds such a lovely aroma). More about makrut lime leaves here.

    ​How to Make Laab Gai (larb gai)

    Here's a bird's eye view of the process. If it's your first time I recommend watching the video tutorial first to ensure success.

    Process shots for making laab gai steps 1-4
    1. To make toasted rice powder: In a small pot or skillet, add the rice and the makrut lime leaf and toast, stirring constantly, over high heat until the rice has a deep brown colour. Not golden brown, you want it DARK brown. 
    2. Transfer into a mortar and pestle or a spice grinder. Grind until fine (yes, grind the lime leaf too), but if using a coffee grinder, be careful not to over-grind—you don't want it to look like flour, you want it to be like a coarse powder.
    3. To make the laab : In a wide pot or medium size skillet, add the water or stock and bring to a simmer over high heat. Then add ground chicken and 1 teaspoon of the fish sauce. Cook, stirring constantly to break up any big lumps, just until it is done. 
    4. Remove from heat, then add the shallots and stir to wilt slightly and to make sure all the shallot layers are separated. 
    Process shots for making laab gai steps 5-7
    1. Add fish sauce, lime juice, chili flakes, and toasted rice powder; stir to mix well.
    2. Add all the fresh herbs except mint: green onions, sawtooth coriander and/or cilantro and stir to mix. Taste and adjust seasoning. If you find the acidity a bit too intense, you can add just a half a teaspoon of sugar to balance, though this is not traditionally added. 
    3. Plate and sprinkle the mint on top (the mint is not added into the salad as it turns black in the heat). If you want, garnish with a couple of dried chilies and some crispy chicken skin (which you can make in minutes!). Serve warm or room temperature with sticky rice and fresh, crunchy vegetables such as  lettuce leaves, cucumber, long beans, or cabbage.

    How to Serve and Eat Laab like a Thai

    Laab is always served with sticky rice and lots of fresh crunchy veggies. If you've got some lettuce leaves, you can make little lettuce cups with the laab. You can also ball up the sticky rice in your hands and use it to sop up the dressing. Here is the easiest and best way to make sticky rice.

    If you're looking to make a meal of it, here are a few other classic northeastern thai recipes that we often serve with laab:

    • A plate of Thai grilled steak salad with sticky rice - nam tok neua
      Thai Grilled Steak Salad - Neua Yang Nam Tok
    • a plate of grilled chicken thighs with lime wedges on the side and a bowl of dipping sauce.
      Ultimate Thai BBQ Chicken (Gai Yang)
    • a plate of green papaya salad with a wedge of lime and chilies on the side.
      Thai Green Papaya Salad ส้มตำไทย (som tum)
    • sticky rice in bamboo steamer
      The BEST Way to Cook Sticky Rice - Hot Soak Method

    ​Advance Prep Tips

    Though laab is super easy and quick to make, there are a few things you can make in advance to make it even quicker:

    • Toast the rice advance and store in an airtight container in the fridge. I recommend not grinding it until you're ready to cook in order to preserve the aroma as much as possible.
    • Toast the chili flakes ahead of time.
    • The salad can be made ahead of time, but don't add the toasted rice and fresh herbs until just before serving, otherwise the toasted rice powder will absorb all the dressing and make the salad seem dry, and the fresh herbs will wilt. 

    Recipe Card

    Print
    clock clock iconcutlery cutlery iconflag flag iconfolder folder iconinstagram instagram iconpinterest pinterest iconfacebook facebook iconprint print iconsquares squares iconheart heart iconheart solid heart solid icon
    a plate of laab gai with green beans and lettuce on the side.

    Laab Gai (larb gai) Spicy Thai Chicken Salad

    5 Stars 4 Stars 3 Stars 2 Stars 1 Star 5 from 8 reviews
    • Author: Pailin Chongchitnant
    • Prep Time: 15 mins
    • Cook Time: 15 mins
    • Total Time: 30 minutes
    • Yield: Serves 2
    Print Recipe
    Pin Recipe

    Description

    Laab gai (aka larb gai) is a spicy and tart chicken salad iconic of northeastern Thai cuisine. It's one of the easiest Thai dishes to make, and so tasty it's no wonder it's one of the most popular Thai dishes around the world!


    Ingredients

    • 300 g (11 oz) ground chicken, preferably not lean (if you have the choice, go with dark meat)
    • 2 Tbsp (30  ml) water or unsalted chicken stock (don't buy stock for this, use stock only if you already have some)
    • 1 Tbsp + 2 teaspoon (25 ml) fish sauce
    • 1 small shallot, thinly sliced, about ¼ cup 
    • 2 Tbsp (30 ml) fresh lime juice
    • 1-2 teaspoon (5-10 ml) roasted chili flakes or whatever spicy chili powder you have, to taste 
    • 2-3 tablespoon (30-45 ml) toasted rice powder (recipe follows)
    • 6-8 sprigs cilantro
    • 2-3 leaves sawtooth coriander (optional, or sub a little more cilantro)
    • 1 green onion, chopped
    • ⅓ cup mint leaves, roughly torn if large
    • Sticky rice for serving, here's my favourite way to make sticky rice.
    • Fresh veggies for serving, this can be cabbage, long beans, cucumber, romaine lettuce, carrots, or whatever crunchy veg you enjoy eating raw.
    • Crispy chicken skin for garnish (optional, see recipe here)

    Toasted Rice Powder

    • 3 Tbsp uncooked Thai sticky rice or jasmine rice
    • 1 makrut lime leaf (aka kaffir lime leaf, optional)

    Ingredients and Kitchen Tools I Use

    Want to save this recipe?

    We can email this post to you, so you can come back to it later!


    Instructions

    To make toasted rice powder:

    1. In a dry saute pan, add the rice and the kaffir lime leaf and toast, stirring constantly, over high heat until the rice has a deep brown colour. Remove from heat immediately and transfer into a mortar and pestle or a coffee grinder.
    2. Grind until fine (yes, grind the lime leaf too), but if using a coffee grinder, be careful not to over-grind—you don't want it to look like flour, you still want a bit of grittiness to it.

    To make the laab :

    1. In a wide pot or saute pan, add the water or stock and bring to a simmer. Add ground chicken and 1 teaspoon of the fish sauce, then cook, stirring constantly to break up any big lumps, just until it is done.
    2. Remove from heat, then, using the pot as  your salad bowl, add the shallots and stir to wilt slightly and to make sure all the shallot layers are separated.
    3. Then add fish sauce, lime juice, chili flakes, and 2 tablespoon of the toasted rice powder; stir to mix well. Then add green onions and sawtooth coriander and/or cilantro and stir to mix. Tip: If you're not serving right away, hold the toasted rice powder and stir it in just before serving, otherwise the toasted rice powder will absorb all the dressing and make the salad seem dry, and the toasted rice powder will become slightly mushy. 
    4. Taste and adjust seasoning, if the acidity is a bit too intense you can add ½-1 teaspoon sugar or a little more rice powder to help balance the acidity. 
    5. Plate and sprinkle the mint on top. Garnish with a couple of dried chilies if you want, and sprinkle with some crispy chicken skin, if using (here's my crispy chicken skin in minutes recipe!).
    6. Serve warm or room temp with sticky rice and fresh, crunchy vegetables such as iceberg lettuce, cucumber, long beans, Belgian endive.

    Join us on Patreon for bonus content and rewards!


    Did you make this recipe?

    Tag @HOTTHAIKITCHEN on Instagram and hashtag it #HotThaiKitchen!

    Crispy Garlic Chive Dumplings (Gui Chai Tod)

    September 29, 2017 by Pailin Chongchitnant 38 Comments

    a plate of crispy garlic chives dumplings with dipping sauce

    Don't let the amount of vegetables in this popular street food throw you off. I didn't love vegetables as a kid and I would devour these every time. Garlic chives become so tender they almost melt in your mouth, and with the soft & chewy dough that is crispy on the outside...and the sweet & sour dipping sauce...oh man...these are a MUST try.

    crispy garlic chive dumplings lined up in a row with sauce on the side

    What is Kanom Gui Chai?

    There are two types of kanom guichai ขนมกุ๊ยช่าย in Thailand. The classic version is the stuffed version, which is much harder because you have to make a dough and wrap the garlic chives inside. These are the ones I grew up eating, but after watching my grandmothers (both of them!) painstakingly make the dough (which is not easy) and wrap each dumpling (even more not-easy)...I had zero desire to go through the same ordeal, lol.

    a plate of crispy garlic chives dumplings with dipping sauce

    Then there are these fried ones, which I only discovered later in life and fell in love with them immediately. They are a thousand times easier, but deliver the same flavours that I love in the classic ones. Instead of stuffing, the chives are mixed right into the batter, so no fiddly wrapping required! And IMO they're just as delicious if not more because they are crispy! Oh yeah, and it happens to be gluten-free and vegan and all that good stuff 🙂

    Still have some leftover garlic chives from this recipe? Then it's time to make an authentic pad thai, or my best pork dumplings (gyoza)!

    Watch The Full Video Tutorial!

    All my recipes come with step-by-step video tutorials with extra tips not mentioned in the blog post, so make sure you watch the video below to ensure success - and if you enjoy the show, please consider subscribing to my YouTube channel. Thank you!

    Ingredients and Notes

    Here are all the ingredients and important notes about them. Amounts and full instructions are in the recipe card below!

    Dumplings

    • Garlic chives, also known as Chinese chives or nira (in Japanese), are available at most Asian grocery stores. Some garlic chives can harbour a lot of dirt at the bottom of the plant where the leaves are joined, so you need to cut off about 1.5 inch off the bottom and then shake them in a bowl of cold water to remove the dirt before using. IMPORTANT: After washing dry off the chives as best you can! If there is a lot of water left in the chives it will make the dough too soft. I shake off the water as much as possible, then lay them on a tea towel, cover them with another, and roll them gently between the two towels.
    • Sugar
    • Soy sauce
    • Salt
    • Baking soda (optional). Baking soda is added to maintain a more vibrant green colour.
    • Neutral oil
    • Garlic, finely grated or minced, or you can substitute with garlic powder. If you have some garlic oil handy you can use garlic oil instead of the neutral oil and omit the garlic altogether.
    • White pepper
    • Rice flour. If you're buying rice flour from Thailand, be sure to get the one in the red bag which is regular rice flour. DO NOT GET glutinous rice flour in the green bag.
    • Tapioca starch. While rice flour provide tenderness, tapioca starch will add a bit of bounce and chew.
    • Water

    Dipping sauce

    • Sugar
    • Water
    • White vinegar, or rice vinegar
    • Sweet soy sauce, I use ABC kecap manis or Thai Healthy Boy Brand sweet soy sauce. You can also substitute dark brown sugar.
    • Soy sauce
    • Sambal oelek or minced Thai chilies. Can be omitted if you want to make this not spicy

    How to Make Crispy Garlic Chives Dumplings

    Here's a bird's eye view of the process. If this is your first time I recommend watching the video tutorial, especially so you can see the texture of the dough. Full instructions are in the recipe card below!

    process shot for making garlic chive dumplings steps 1-4
    1. Place the chives in a mixing bowl, and add salt, sugar, soy sauce, baking soda, oil, white pepper and garlic, and mix until combined. Let sit for at least 20 minutes until the chives are wilted.
    2. Meanwhile, make the dipping sauce by combining all ingredients and stirring until sugar is dissolved. This sauce will keep in the fridge for weeks!
    3. Make the batter: Combine water, rice flour and tapioca starch in a pot and stir until there are no more lumps. Turn the heat on LOW and stir the mixture constantly with a spatula.
    4. As the flour starts to cook and congeal into lumps, pull the pot off heat occasionally to smush any flour lumps against the sides to break them up. Continue stirring CONSTANTLY just until the mixture is thick enough that the chives can be evenly suspended in the batter (it can be thinner than in the pic). Remove from heat and continue stirring to break up any lumps of flour to make sure the consistency of the batter is even throughout.
    process shot for making garlic chive dumplings steps 5-8
    1. Off heat, add the garlic chives into the batter until well combined.
    2. Grease a 7-inch round cake pan with oil (or use any heatproof container). Line the bottom of the pan with parchment paper. Pour the batter into the pan and smooth off the top.
    3. Preheat a steamer with boiling water. If you're not using a bamboo steamer lid, wrap a towel around the lid of the steamer to prevent water from dripping onto the surface of the dumplings. Alternatively cover the dumplings with foil. Steam the dumplings for 15 - 20 minutes if using a 7-inch round pan, but this can be longer if you're using a smaller container (and therefore the batter is thicker). If you have an instant-read thermometer, the internal temperature of the middle should reach 190°F.
    4. Let the dumpling cool completely then you can keep them in the fridge for up to a week until ready to eat.
    process shot for making garlic chive dumplings steps 9-12
    1. When ready to eat, use an oiled knife to cut the dumplings into bite-sized cubes. If there is a lot of dough sticking to the blade between cuts, wipe it off and re-oil the blade.
    2. To fry: In a non-stick pan, add just enough oil so it comes up just below half the height of the dumplings. Heat until hot and fry them until well browned and crispy, making sure to not let them touch while in the pan or they will stick together.
    3. Flip and fry them on the other side until well browned.
    4. Drain excess oil on a paper towel-lined plate and serve while they're hot and crispy with the dipping sauce!

    Advance Prep Tips

    These are the perfect make-ahead appetizers. You can steam the batter and keep it in the fridge. When ready to eat, cut and fry them up (or you can cut them in advance so all you need to do is fry!). The dipping sauce will also last you a long time in the fridge as well.

    Can these be made in the air fryer?

    The raw batter has to be steamed in a steamer, but you might wonder if the frying part can be done in an air fryer. I have tried this, and while it "works" it's really not as good because the dumplings came out not nearly as well browned and quite a bit drier.

    But were they "fine"? They were fine. And if you're really not in the mood to pan-fry things and are willing to compromise on deliciousness, then here's what you do:

    1. Toss the cut dumplings in a generous amount of oil.
    2. Place them in an air fryer basket without letting them touch, then air fry at 400°F (200°F) for 4-5 minutes or until well heated through and slightly browned on the exterior. Don't try to cook them longer to get them more browned because they will dry out too much.

    Recipe Card

    Print
    clock clock iconcutlery cutlery iconflag flag iconfolder folder iconinstagram instagram iconpinterest pinterest iconfacebook facebook iconprint print iconsquares squares iconheart heart iconheart solid heart solid icon
    crispy garlic chive dumplings lined up in a row with sauce on the side

    Crispy Garlic Chive Dumplings (Guichai Tod)

    5 Stars 4 Stars 3 Stars 2 Stars 1 Star 5 from 7 reviews
    • Author: Pailin Chongchitnant
    • Prep Time: 15 mins
    • Cook Time: 45 mins
    • Total Time: 1 hour
    • Yield: Serves 4-5
    Print Recipe
    Pin Recipe

    Description

    A popular Thai street food, these garlic chive dumplings are chewy in the middle and crispy on the outside, and the chives just melt in your mouth. Easy to make, and can be done ahead of time as well!


    Ingredients

    Dumplings

    • 230 g (½ pound) garlic chives
    • 2 tsp sugar
    • ½ Tbsp soy sauce
    • ½ tsp salt
    • ¼ tsp baking soda (optional)
    • 2 tsp neutral oil
    • 1 clove garlic, finely grated or minced (can also sub a ¼ tsp garlic powder)
    • ¼ tsp white pepper
    • 100g rice flour
    • 100g tapioca starch
    • 1 cup (240 ml) water

    Dipping sauce

    • 1 Tbsp sugar
    • 1 Tbsp water
    • 1 Tbsp vinegar
    • 1 ½ Tbsp sweet soy sauce (I use ABC kecap manis)
    • 1 Tbsp soy sauce
    • 2-3 teaspoon sambal oelek or pounded or minced Thai chilies to taste

    Ingredients and Kitchen Tools I Use

    Want to save this recipe?

    We can email this post to you, so you can come back to it later!


    Instructions

    1. Cut about 1.5 inch off the bottom of garlic chives and discard. Some garlic chives can harbour a lot of dirt at the bottom between the leaves, if this is the case, shake them in a bowl of cold water to remove the dirt before using.
    2. After washing dry off the chives as best you can! If there is a lot of water left in the chives it will make the dough mushy. I shake off the water as much as possible, (use a salad spinner if you have it), then lay them on a tea towel, cover them with another, and roll them gently between the two towels. 
    3. After washing and drying the chives (see important note) cut the chives into small pieces, a little shy of 1 cm, and place in a mixing bowl. Add salt, sugar, soy sauce, baking soda, white pepper, oil and garlic and mix until combined. Let sit for at least 20 minutes or until the chives look wilted, and liquid has been drawn out of them.
    4. Meanwhile, make the dipping sauce by combining vinegar, water and sugar and stir until the sugar is dissolved. Add all remaining ingredients are stir to combine. This sauce will keep in the fridge for weeks!
    5. Make the batter: Combine water, rice flour and tapioca starch in a pot and stir until there are no more lumps. Turn the heat on LOW and stir the mixture constantly with a spatula. As the flour starts to cook and congeal into lumps, pull the pot off heat occasionally to smush any flour lumps against the sides to break them up. Continue stirring CONSTANTLY just until the mixture is thick enough that the chives can be evenly suspended in the batter (think Greek yogurt consistency), then remove from heat and continue stirring to break up any lumps of flour. Be careful not to cook the batter too much or you will have a hard time incorporating the chives into it.
    6. Off heat, stir the chives into the batter until well combined.
    7. Grease a 7-inch round cake pan with oil (or use any heat proof container of your choice, but smaller containers will increase cooking time). Line the bottom of the pan with parchment paper. Pour the batter into the pan and smooth off the top.
    8. Preheat a steamer with boiling water. If you're not using a bamboo steamer lid, wrap a towel around the lid of the steamer to prevent water from dripping onto the surface of the dumplings. Alternatively you can cover the pan with foil. Steam the dumplings for 15-20 minutes over rapidly boiling water, or until fully cooked. Timing will change depending on the container you're using and how thick the batter is. If you have a thermometer, the internal temp of the centre of the batter should reach a minimum of 190°F.
    9. Let the dumpling completely cool, or chill until ready to eat (it'll be easier to cut when cold). You can keep it at this stage for up to 1 week. When ready to eat, run a knife along the sides and flip it out. Use a sharp knife, grease it with oil, and cut the dumplings into bite-sized pieces. If there is a lot of dough sticking to the blade between cuts, wipe it off and re-oil the blade.
    10. Fry the dumplings: In a non-stick pan, add just enough oil so it comes up just below half the height of the dumplings. Heat until hot and fry them on both sides until well browned and crispy, making sure to not let them touch while in the pan or they will stick together. Drain excess oil on a paper towel-lined plate.
    11. Serve while they're hot and crispy with the dipping sauce!

    Join us on Patreon for bonus content & rewards!


    Did you make this recipe?

    Tag @HOTTHAIKITCHEN on Instagram and hashtag it #HotThaiKitchen!

    Homemade Roasted Chili Flakes

    March 11, 2024 by Pailin Chongchitnant Leave a Comment

    a pile of roasted chili flakes

    "I want to make this dish spicier, what can I add?" I get this question often for those who love heat. In Thailand, we have a couple of options, but by far the easiest, quickest, and most versatile option is to make roasted chili flakes, or prik pohn พริกป่น in Thai.

    In Thailand you'll find roasted chili flakes as a tableside condiment offered at many restaurants, and at home everyone has a stash in their fridge or pantry. Not only does it add heat, the toasting adds a slight smokiness that gives food a little extra je ne sais quoi. It's very simple to make (and much cleaner, as I will explain later), and you only need to make it once and it'll last you the whole year or longer.

    a pile of roasted chili flakes

    Ingredients and Notes

    • Spicy dried chilies. You can use any kind of spicy dried chilies that have the right amount of heat for you. If you can get dried Thai bird's eye chilies, that's great, but where I live, I usually use arbol chilies which can be found anywhere Latin American groceries are sold.
    • Makrut lime leaves, optional. To make your roasted chili flakes extra aromatic, I like to add a makrut lime leaf (aka kaffir lime leaf) and grind it up altogether with the chilies. You can also change this to lemongrass is you wish. You do not need to be specific with amounts here, add as many as you want, but generally I add 1 leaf to about 1½ cups of dried chilies.

    How to Make Roasted Chili Flakes

    I've made roasted chili flakes in many of my youtube videos, and you can see me make it here in nam jim jeaw video.

    *Note: You can make as much or as little as you want, the method doesn't change. But the more you make, the longer it will take to roast.

    1. Wash the chilies (optional). Some dried chilies are not clean; it really depends on the brand. If the dried chilies you have feel dusty, you need to wash them (wash the whole bag so you only need to do it once.) Dunk them into a bowl of cold water and swish them around for literally 5 seconds, then lift them out of the water and lay them out on a kitchen towel. Don't let them linger in water of they'll rehydrate. Towel them dry as much as possible, then let them dry completely overnight, (I use a fan to make them dry faster), before storing them.
    chilies being deseeded
    1. Deseed the chilies (optional). If the chilies you have are too spicy for your liking and you want to tone the heat down a bit, cut the chilies with scissors and pour the seeds out.
    chilies being toasted
    1. Option 1: Toast the chilies on the stovetop. Add the chilies (and makrut lime leaves, if using) to a dry pot, wok or skillet and stir them constantly over medium heat until a few charred spots form on the chilies (see pic below), then remove from heat. This should only take a few minutes especially for small amounts. If making a large amount you can increase the heat to medium high, but be careful as the chilies burn fast.

      Option 2: Toast chilies in the oven. If making a large amount you can use an oven. Preheat to 300°F (150°C) and bake the chilies for 5-7 minutes, or until they darken slightly and smell smokey. Chilies will not have charred spots like the stovetop method, but they should overall look a bit darker.
    2 pictures of toasted chilies
    1. Transfer the chilies to a coffee grinder or spice grinder (for large amounts a food processor will also work) and grind them into small flakes or a coarse powder.

      Safety note: Do not immediately open the grinder lid after you stop the blade. Give the chili dust time to settle down before opening, 15-20 seconds at least, otherwise you will inhale chili dust and that is NOT FUN. Also when you deem it safe to open the lid, do not put your face directly on top of it; and make sure there isn't a fan or anything blowing nearby. This all seems obvious until you forget about it, folks.
    roasted chili flakes being poured from grinder

    How to Store Chili Flakes

    Store in an airtight container in the fridge or freezer, because chilies do get moldy overtime. I usually only make one small jar at a time and keep it in the fridge, but if you have more than you can use within 6 months, keep a small amount in the fridge and the extra in the freezer.

    Shortcut: Toasting Store Bought Chili Flakes

    If you can find chili flakes already ground at the store, you can also just toast these in the skillet over medium heat until they darken slightly. BUT because the flakes are tiny this will take a very short time (less than a minute) and will burn quickly, so you have to watch it carefully!

    However, I have a two concerns about this:

    • If you're thinking of "Red Pepper Flakes" you can find at most Western grocery stores...they are usually too mild to be an effective way to add real heat to food. I wouldn't bother with them unless you're looking to make mild chili flakes.
    • Some Asian grocery stores will sell chili flakes from Thailand, and this stuff is SPICY. However, old chili flakes stored at room temp, especially in humid conditions, can develop mold. And because these are already ground it's impossible to tell whether there is any mold in them. So if you trust the quality of your chilies, that's great, but I prefer to grind my own from whole chilies so I can make sure the chilies are clean and mold-free.

    Northern Thai Laab (Larb) Recipe

    March 1, 2024 by Pailin Chongchitnant 5 Comments

    a plate of laab kua with a side of fresh veggies and more fresh veggies in the background

    If you frequent Thai restaurants you probably know of a dish called larb or laab - a salad made of ground meat so popular that is was even mentioned in a Spider Man movie! But the laab I'm sharing in this post is something entirely different...it's not even a salad.

    It hails from the North, so it is specifically called laab nuea (nuea = north) or laab kua (more on this below). If you've been to Chiang Mai, you might have tried it, but outside of northern Thailand it's very hard to find - a truly hidden gem! It's made from ground meat mixed with a unique blend of spices, giving it a flavour unlike any other dish in Thai cuisine.

    a plate of laab kua with a side of fresh veggies and more fresh veggies in the background

    What is Laab Kua?

    Let's get the names straight because it is a dish that goes by a few different names. Laab kua ลาบคั่ว is also called laab nuea ลาบเหนือ or laab mueang ลาบเมือง. Sometimes it's referred to as the laab of the province in which it is made - so if you're in Chiang Mai they might call it laab chiang mai, for example. And laab found in different northern provinces can have slight variations, as with most regional foods.

    Whatever the name, it refers to a dish made from minced meat - typically but not exclusively pork or beef - and the meat is flavoured with a special spice blend. This spice blend is called prik laab. It is served with fresh herbs, fresh vegetables, and sticky rice is a must.

    Laab was originally a dish made for large gatherings. Villagers would butcher a whole animal specifically to make laab for whatever the occasion might be, and it would be a communal effort to make this dish. This is why traditional laab kua uses a lot of offal -and by a lot I mean ALL of the offal - because they wanted to use the whole animal! (But do not worry, for my recipe I've made it homecook-friendly, using only meat and, if you like, liver.)

    In Northern Thailand laab is sometimes served raw (called laab dib, dib = raw). Think beef tartare, but with Thai spices! While I don't suggest you do this at home because of the obvious food safety risk (unless you're using sashimi-grade fish), it's an important thing to be aware of when you go to Thailand! And this is why the cooked version that we're making is called laab kua, because kua means to stir in a hot pan.

    Ingredients and Notes

    Here are all the ingredients you need and important notes about them. It looks like a lot, but you probably have many of the spices at home already! For amounts, see the recipe card below.

    ingredients for laab kua

    The Spice Blend: Prik Laab

    Gathering spices for laab kua is really the hardest part, but if you're missing a thing or two, it's fine to skip them. There are many recipes for prik laab; some use more spices, while others use less, so this is by no means the golden standard!

    *To save time, you can buy pre-made prik laab here (US only) made by my good friend Chef Hong Thaimee. You can also buy prik laab at most markets in Northern Thailand. If you see other brands, please check first that it is a spice blend for NORTHERN laab, and not just a "laab seasoning mix" which is for the other kind of laab.

    • Cumin seeds
    • Sichuan peppercorns, I'm adding these as a substitute for a Thai herb called makwaen which is a relative of Sichuan peppercorns. They have similar tingly heat!
    • Coriander seeds, do not use ground coriander for this as I find ground coriander doesn't have half the aroma whole seeds do.
    • Fennel seeds
    • Cinnamon sticks, or ground cinnamon is fine.
    • Bay leaves
    • Black peppercorns
    • Cloves
    • Nutmeg, I'm using ground nutmeg here, but you can also grate fresh nutmeg.
    • White cardamom, or substitute green cardamom.
    • Long pepper, also known as Indian long pepper, has a super unique aroma that is hard to describe, but I get a zingy citrus plus a deep woodsy aroma. You won't find this in most stores, and I bought this online, but it is okay to skip it.
    • Star anise
    • Dried chilies or chili flakes. In Thailand the chilies are ground up into the spice blend, but for me I like to keep the chilies separate so I can adjust the heat each time depending on who I'm making it for. This means that if you already have roasted chili flakes handy (perhaps from my other recipes!) you can just use that!
    Indian long pepper on a plate
    Indian long pepper, also known simply as long pepper.

    The Laab Kua

    • Fish sauce. See how to choose good fish sauce here.
    • Ground pork or ground beef, I'm using pork. Preferably not too lean.
    • Pork liver (optional).
    • Garlic, for making fried garlic.
    • Shallots, traditionally we fry the shallots crispy and then top the dish with it, using the same oil you used to fry the garlic. I simplify this step by simply just sauteing the shallots into the dish and then topping it with store bought fried shallots (there is enough to do already!). But if you want to make your own, here's my guide to making perfect crispy fried shallots!
    • Lemongrass, bottom half only.
    • Galangal (optional).
    • Cilantro
    • Green onion
    • Vietnamese coriander. This is called pak preaw in Thai but usually labelled in Asian stores as rau ram, which is the Vietnamese name. If you can't find it, it's okay to omit.
    • Sticky rice for serving. Please trust me on this: laab kua is not nearly as good served with regular/jasmine rice. The chewy, dense sticky rice really makes the dish. Here's my favourite method for making sticky rice, if that doesn't work for you, also check out 7 other ways to make sticky rice!
    • Accompaniments: fresh crunchy veg such as Asian green cabbage (this is the squat cabbage you find at Asian stores, which is sweeter and crunchier than the ball-shaped ones in Western stores), cucumber, carrots, long beans. It's also very common to serve crispy pork rind alongside laab (we really do use the whole animal!)
    accompaniments for laab kua
    Accompaniments to laab kua includes fresh crunchy vegetables and crispy pork rind. Don't forget sticky rice for serving!

    How to Make Northern Laab Kua

    Here's a bird's eye view of all the steps. If this is your first time I recommend watching the video tutorial to ensure success. For the full instructions see the recipe card below.

    process shots for making laab kua steps 1-4
    1. Toast the cumin seeds over medium heat until the darken and start to pop. Remove.
    2. Toast the rest of the spices until the coriander seeds darken and start to pop.
    3. Toast spicy dried chilies over medium heat until charred spots form. You can also toast chili flakes until they darken slightly.
    4. Grind all the spices except the chilies into a powder. Grind the chilies separately into a powder.
    process shots for making laab kua step 5-8
    1. Combine spices, chili powder, water and fish sauce and stir to dissolve the spices.
    2. Pour the spice mixture into the ground pork.
    3. Knead the pork with your hands until the spices are evenly distributed.
    4. Stir in chopped liver just to mix.
    process shots for making laab kua step 9-12
    1. Fry garlic in oil over medium low heat until golden and the bubbling has subsided. About 5 minutes.
    2. Drain and keep the garlic oil separate from the fried garlic.
    3. In a wok, add the garlic oil, shallots, lemongrass and galangal and sauté until the herbs start to turn golden.
    4. Add the pork/liver mixture and cook until the pork is fully cooked; making sure to break up the pork so there are no chunks.
    process shots for making laab kua step 13-16
    1. Off heat, then add cilantro, mint and rau ram (pak preaw) and stir to mix.
    2. Plate and top with mint.
    3. Sprinkle fried garlic, fried shallots and serve with extra fresh herbs, fresh veggies and sticky rice.
    4. If you want to eat laab like a Thai, eat it by hand! Ball the sticky rice up into a dense, small ball, and use your fingers to pinch the laab onto the rice and enjoy!

    Tips for Advance Prep

    This is a lot of things to do if you do it all in one go, but there are things you can do to make this weeknight-friendly:

    1. Make the spice blend in advance. This is the biggest thing to get out of the way as the rest is pretty easy. And once you make it one time, you'll have it for the next several batches.
    2. Make fried garlic and garlic oil in advance. I usually have garlic oil and fried garlic in my fridge already cuz I make it in bulk and use it for a lot of things (and you'll want to use it on a lot of things once you have it trust me!). So if you're gonna do it ahead, I recommend making a whole bunch - at least use a whole head of garlic.
    3. Make the roasted chili flakes in advance. I also usually have this in the fridge in bulk, and it's so useful for adding heat to anything that needs it!

    FAQ: Can You Make Laab Kua with Other Kinds of Protein?

    Pork and beef are the most popular options for making laab kua in Thailand, but you absolutely can use any other kinds of ground meat. Lamb would work beautifully with all of the spices in this dish, though ground chicken and ground turkey instead as well, and I would recommend dark meat for both of those.

    You can also make laab with fish! Any kind of fish will work. If using fish, you will need to mince the fish yourself as they don't sell ground fish, last I checked :). Simply chop the fish into small pieces and then use a cleaver or a sturdy chef's knife to mince. You can see my laab chicken recipe video for how to hand-mince meats, starting at around minute 3:20.

    Worth noting: if you're using sashimi grade fish, you can actually eat it raw! Mince the fish and then mix with the spices, seasonings, and fresh herbs as per the recipe.

    To make it vegan, you can use TVP, or crumbled pressed tofu, like the one I used in my Vegan Laab Recipe. I'd recommend mixing it with finely chopped mushrooms for some extra umami and chew, then use soy sauce instead of fish sauce.

    More Northern Thai Recipes You'll Love!

    • a bowl of gaeng hung lay
      Gaeng Hung Lay - Northern Thai Braised Pork Curry
    • a bowl of khao soi with chicken drumsticks with condiments on the side.
      Khao Soi: Thai Curry Noodle Soup
    • slices of sai ua with two whole ones on the side.
      "Sai Ua" Northern Thai Sausage ไส้อั่ว
    • A bowl of glass noodle stir fry with curry paste
      Northern Curry Glass Noodle Stir Fry
    a plate of laab kua with a side of fresh veggies and more fresh veggies in the background

    Laab Kua - Northern Thai Laab (Larb)

    By: Pailin Chongchitnant
    Not the laab you know! This laab hails from the north, and it's made from ground pork or ground beef mixed with a ton of aromatic spices. Topped with fried garlic, fried shallots, and served with sticky rice, it is unlike any other dish in Thai cuisine!
    5 from 1 vote
    Print Recipe Pin Recipe Share
    Prep Time 30 minutes mins
    Cook Time 30 minutes mins
    Course Main Course
    Cuisine Thai
    Servings 4 servings

    Ingredients


    Prik Laab (laab spice blend, see note 5)

    • 1 Tablespoon cumin seeds
    • 1 Tablespoon Sichuan peppercorns, see note 1
    • 1 Tablespoon coriander seeds
    • 1 Tablespoon fennel seeds
    • 0.5 oz crushed cinnamon sticks, or 2 Tablespoons ground cinnamon
    • 2 bay leaves
    • 2 teaspoons black peppercorns
    • 1 teaspoon whole cloves
    • 1 teaspoon ground nutmeg
    • 5 pods white cardamom
    • 3 pieces long pepper, see note 2
    • 1 piece star anise

    For Laab Neua

    • 1½ Tablespoons laab spice mix
    • 2 teaspoons roasted chili flakes, or to taste (see note 3)
    • 1½ Tablespoons fish sauce
    • 1 ½ Tablespoons water
    • 1 lb ground pork
    • 4 oz pork liver , chopped into small pieces (optional)
    • 3-4 Tablespoons neutral oil
    • 5 cloves garlic, chopped
    • ¼ cup shallots, thinly sliced
    • 1 stalk lemongrass, bottom half only, finely chopped
    • 5 thin slices galangal, optional, finely chopped
    • 5 springs cilantro, chopped
    • 1 green onion, chopped
    • 10-15 leaves Vietnamese coriander (rau ram), see note 5
    • ½ cup mint leaves

    Garnishes and Serving

    • Sticky rice
    • Fresh crunchy vegetables such as Asian cabbage, carrot, cucumber and long benas
    • Crispy pork rind, optional

    Want to save this recipe?

    We can email this post to you, so you can come back to it later!

    Check Out Ingredients and Kitchen Tools I Use

    Notes

    1. Sichuan peppercorns are a substitute for a Thai herb called makwaen which is a relative of Sichuan peppercorns.
    2. Long pepper, aka Indian long pepper, can be found online, but it is not necessary and can be omitted.
    3. You can toast whole dried chilies (such as arbol or Thai chilies) until charred and then grind into flakes as shown in the video. Or simply toast chili flakes in a dry skillet over low heat until it darkens and smells smokey. 
    4. Rau ram, aka Vietnamese coriander or pak preaw in Thai, is typically added to laab but if you can’t find it or don’t like it, simply add more of the other fresh herbs.
    5. To save time, my good friend sells pre-made laab spice blend here. If you see other brands check that it is for northern laab, and NOT for the other laab. 

    FULL VIDEO TUTORIAL

    All my recipes come with step-by-step video tutorials with extra tips not mentioned in the blog post, so make sure you watch the video to ensure success. If you enjoy them, consider subscribing to the YouTube Channel to not miss an episode. Thank you!

    Subscribe to my YouTube Channel

    Instructions
     

    For the Laab Spice Mix

    • Place the cumin seeds in a small skillet and toast them over medium to medium-high heat, stirring constantly until they start to pop and darken slightly. Immediately pour them onto a plate to cool.
      1 Tablespoon cumin seeds
    • Place all of the remaining whole spices into the pan and toast over medium to medium-high heat, stirring constantly until the coriander seeds start to pop and darken slightly. Pour onto the same plate to cool.
      1 Tablespoon Sichuan peppercorns, 1 Tablespoon coriander seeds, 1 Tablespoon fennel seeds, 0.5 oz crushed cinnamon sticks, 2 bay leaves, 2 teaspoons black peppercorns, 1 teaspoon whole cloves, 5 pods white cardamom, 3 pieces long pepper, 1 piece star anise
    • Place all of the whole spices and any ground spices you’re using into a spice grinder and grind into a fine powder. Store in a cool dark place, in an airtight container, for up to 6 months.
      1 teaspoon ground nutmeg

    For the Laab

    • In a small bowl, combine the laab spice mix, chili flakes, fish sauce and water and stir to dissolve the spices.
      1½ Tablespoons laab spice mix, 2 teaspoons roasted chili flakes, 1½ Tablespoons fish sauce, 1 ½ Tablespoons water
    • In a medium mixing bowl, insert the ground pork and flatten it in the bowl, then pour the spice mixture over the pork and knead it with your hands until well combined. Add the chopped liver (if using) and knead gently just until mixed.
      1 lb ground pork, 4 oz pork liver
    • Make fried garlic and garlic oil. In a small pot, add 3 tablespoon of the oil and one small bit of chopped garlic and set it over medium high heat. Once the garlic starts to bubble, add the rest of the garlic and turn the heat down to medium low, adding more oil as needed to keep the garlic barely submerged. Keep frying, stirring frequently, until the garlic is golden (not brown) and the bubbling subsides, about 5 minutes. Drain the garlic with a metal sieve, reserving the garlic oil.
      3-4 Tablespoons neutral oil, 5 cloves garlic
    • In a wok over medium high heat, add about 2 tablespoon of garlic oil (keep leftover oil in the fridge, it’s good on everything), then add the shallots, lemongrass, and galangal, and fry until the lemongrass starts to brown.
      ¼ cup shallots, 1 stalk lemongrass, 5 thin slices galangal
    • Turn the heat up to high and add the pork and keep stirring and smashing it to break up the lumps. Keep going until fully cooked; there should be a little bit of liquid left in the pan but not a ton. Taste and adjust more seasoning with fish sauce as needed.
    • Turn off the heat, then stir in cilantro, green onions,and rau ram.
      5 springs cilantro, 1 green onion, 10-15 leaves Vietnamese coriander (rau ram)
    • Plate, top with fried garlic, fried shallots, and mint, and place extra fresh herbs on the side. Serve with sticky rice, fresh veggies, and crispy pork rind.
      Sticky rice, Fresh crunchy vegetables such as Asian cabbage, carrot, cucumber and long benas, Crispy pork rind, ½ cup mint leaves
    • How to eat: this dish is typically eaten by hand, and I recommend watching the video tutorial at the end to see how it's done! But basically you take a small amount of sticky rice and ball it up into a tight ball. Then “dip” the rice ball into the laab and use your fingers to “pinch” the laab onto the sticky rice - then into your mouth. Follow it up with veg and/or crispy pork rind!
    Watch my videos AD-FREE and get bonus content on Patreon!
    Tried this recipe? Share a pic!Tag @hotthaikitchen on Instagram and Twitter!

    Hot Thai Chicken - Fried Chicken in Sweet Chili Lime Sauce

    April 15, 2016 by Pailin Chongchitnant 23 Comments

    a plate of fried chicken in sweet chili lime sauce and a wedge of lime and makrut lime leaves

    I have finally developed the dish deserving of the name "Hot Thai Chicken"! This fried chicken recipe has been simmering in my mind for a long time, and when I finally tested it out, it absolutely blew me away. The perfect mix of sweet, tart, spicy, sticky, crispy and tender...this sweet chili lime sauce would be good even on fried tofu or fish. This one is a must-try!

    a plate of fried chicken in sweet chili lime sauce and a wedge of lime and makrut lime leaves

    The Cool Story Behind "Hot Thai Chicken"

    Many times, when I try to say "Hot Thai Kitchen" on camera, it comes out as Hot Thai Chicken, which always makes me laugh. And this isn't just me, I've had many other people make the same mistake when they're talking to me about my site. So I thought, wouldn't it be cool if Hot Thai Chicken was actually a dish?

    I thought long and hard about what that dish would be, because whatever it is, it has to DESERVE this "hot thai" designation. And let me tell you, this one totally does.

    The inspiration came from when I worked at a Thai restaurant many years ago. Their most popular item was pieces of boneless chicken breast, fried and tossed in a red sweet-and-sour sauce. It was their attempt to copy the popular Chinese Orange Chicken or General Tsao Chicken. It's not a traditional Thai dish at all, but the American customers loved it.

    I liked the dish fine but always found it too sweet (as most Americanized Thai food tends to be) and lacking in complexity. But I knew the idea was solid, and that it had the potential to be awesome.

    So I got to work making a sauce that would have a well-balanced sweetness, adding aromatics to amp up the complexity, and brightening it with fresh lime juice for that all-important zing. It worked, and the chicken was crowned Hot Thai Chicken, and it has since gotten over a 1.4 million views on YouTube.

    Watch The Full Video Tutorial!

    All my recipes come with video tutorials, I highly recommend you watch it to ensure success, especially if it's your first time!

    Ingredients and Notes

    Here are all the ingredients you need and important notes about them. For amounts, see the full recipe card below.

    Fried Chicken

    • Chicken thighs, boneless, skinless, cut each thigh into 6-7 pieces. You can also substitute chicken breast if you really want to, but thighs are more resilient to overcooking so you can fry them until crispy without worrying about the chicken becoming dry like chicken breast can.
    • Egg
    • Salt
    • All-purpose flour
    • Cornstarch, if needed you can use flour only, but cornstarch reduces the gluten and makes the coating crunchier and lighter.
    • Oil for frying

    Hot Thai Chicken Sauce (Sweet Chili Lime Sauce) 

    • Thai chili paste, called nam prik pao in Thai. You can find it at many Asian grocery stores. I used Pantai Brand but Maepranom brand is also great. You can also make your own using my homemade nam prik pao recipe here.
    • Dried chilies. This is where you determine how hot your Hot Thai Chicken is. If you want it mild, use mild dried chilies such as guajillo peppers. If you want it spicy, you can use spicy dried chilies such as Arbol. You can use a mix of the two for something in between. Alternatively, you can also use a combination of paprika (mild) and cayenne pepper (hot) to achieve the right heat level for you.
    • White vinegar, or any kind of mild flavoured vinegar you have such as rice vinegar or even white wine vinegar.
    • Sugar
    • Oyster sauce, see my post about choosing good quality oyster sauce here.
    • Garlic, finely grated or minced. In a pinch garlic powder will also do.
    • Fish sauce, see my post about choosing good fish sauce here.
    • Water
    • Lime juice
    • Makrut lime leaves (aka kaffir lime leaves) center rib removed, finely julienned then minced into small pieces (see video for technique). If you don't have it, you can also use more of the lime zest.
    • Lime zest, finely grated

    How to Make Hot Thai Chicken

    Here's a bird's eye view of the process. I highly recommend watching the video tutorial first to ensure success. For full instructions, see the recipe card below.

    Process shots for making hot thai chicken steps 1-4
    1. Place chicken in a bowl, add the egg, 2 tablespoon of the cornstarch, and salt. Stir until well mixed and let sit while you prepare the sauce.
    2. Cut the dried chilies into chunks. If you want to lessen the heat, remove the seeds. Grind the chilies into a powder in a coffee/spice grinder.
    3. In a small pot, add the Thai chili paste, ground chilies, vinegar, sugar, oyster sauce, garlic, fish sauce, and water. Stir to mix and bring to a simmer over medium heat. Let simmer for 4-5 minutes until thickened, stirring frequently (it should look too thick right now as we will thin it out later).
    4. Turn off the heat and immediately add the minced makrut lime leaves, grated lime zest and stir to mix; the heat of the sauce will help infuse the lime. Once mixed, stir in lime juice. Keep covered while you fry the chicken.
    Process shots for making hot thai chicken steps 5-8
    1. Whisk together all-purpose flour and ¼ cup of cornstarch in a large mixing bowl. Add the chicken all at once, then toss the chicken in the flour until all pieces are well coated, making sure that no pieces are stuck together. If you want a thicker crust, drizzle a little water over the chicken and toss one more time, and the water will help the chicken pick up a little more flour.
    2. Heat about 2 inches of frying oil to 375°F (190°C) in a pot or a wok. Grab a piece of chicken and gently shake off loose flour, then place it gently into the hot oil. Fry in batches, making sure not to crowd the pot. After 2 ½ - 3 minutes, the chicken should be golden brown and crispy—remove and drain on paper towel. Repeat until all chicken is fried.
    3. Pour the sauce into a large mixing bowl, add the chicken and with a large spoon, quickly toss the chicken until all the pieces are coated in the sauce. If you start to feel like there isn't enough sauce to coat all pieces thoroughly, scrape the sauce off the sides of the bowl and your spoon, and this will stretch the sauce a bit further.
    4. Serve immediately, on its own or with jasmine rice or sticky rice. Enjoy it, I know you will!

    Tip for Extra Crunch: Double Fry!

    If you have the time and are so inclined, you can double fry the chicken and they will be crunchier. Here's what you do:

    After frying them the first time, remove the chicken from the oil and allow to cool completely. Then heat the oil again to 375°F (190°C), and fry the chicken one more time for 1.5-2 minutes, just until the chicken develops a richer brown colour. Drain and toss with the sauce as per the recipe.

    Advance Prep Tips

    Hot Thai Chicken is a crowd pleaser and it's the perfect thing to serve at a party, so here are all the things you can do ahead of time:

    • Make the sauce in advance but do not add the lime juice, this will keep in the fridge for up to a week! Reheat the sauce close to serving time, then add the lime juice off heat.
    • On the day of serving, fry the chicken ahead of time and keep the oil on the stove. Then close to serving time fry them again at 375°F (190°C) for 1.5-2 minutes and toss in the sauce. This way you'll get the benefit of the extra crunch because you're double frying! You can fry chicken and leave them at room temp up to 4 hours in advance, of if it'll be more time, you can fridge the chicken until ready to serve.

    Can You Air-Fry Hot Thai Chicken?

    Yes! The chicken isn't going to be as crunchy as deep fried (obviously), but it can work and will still taste great. There IS a major downside which I will discuss below, but first, here's how you do it:

    1. Use a little less flour to coat the chicken, you want the chicken coating to look moist, and not powdery when it goes into the air fryer. So start by tossing the chicken with half the flour/cornstarch mixture, then add more little by little until the chicken is well coated but there is very little excess dry flour in the bowl.
    2. Place the chicken into the air fryer basket, making sure there is room between all the pieces (you may need to do this in two batches). Spray or brush the top of the chicken with oil, then air fry at 400°F for about 12 minutes or until the chicken is golden brown. At the halfway point, turn the chicken and brushing/spraying with a little more oil.
    3. Toss the chicken in the sauce as per usual.

    The downside of using the air fryer: Air-frying is great if your air fryer can hold all the chicken in one batch (my Instant Vortex cannot). If you have to do 2 batches, this ends up taking a very long time to cook because your total cooking time will be close to 30 minutes, where as you can finish deep frying all the chicken in 5-6 minutes.

    Not to mention, the first batch of chicken will have to wait at least 12 mins before getting tossed, so it will have cooled down a lot. If you've got an eater who's picky about food being hot, you might need to pop the first batch into the air fryer to reheat for a few minutes!

    What else can you use instead of chicken?

    I have made this dish with great success using fried tofu! Use firm tofu, fry until golden and chewy, and toss in the sauce.

    You can also use it on calamari or fried fish or even shrimp. Just make sure the pieces are big enough because the sauce is quite strong, and you don't want teeny tiny shrimp or skinny calamari rings that will be overwhelmed by the sauce.

    Recipe Card

    Print
    clock clock iconcutlery cutlery iconflag flag iconfolder folder iconinstagram instagram iconpinterest pinterest iconfacebook facebook iconprint print iconsquares squares iconheart heart iconheart solid heart solid icon
    Hot Thai Chicken

    Hot Thai Chicken! Fried Chicken in Sweet Chili Lime Sauce

    5 Stars 4 Stars 3 Stars 2 Stars 1 Star 4.8 from 12 reviews
    • Author: Pailin Chongchitnant
    • Yield: Serves 2-3
    Print Recipe
    Pin Recipe

    Ingredients

    Fried Chicken

    • 4 chicken thighs, boneless, skinless, cut each thigh into 6-7 pieces
    • 1 egg
    • 2 Tbsp + ¼ cup cornstarch
    • ¼ tsp salt
    • ¾ cup all-purpose flour
    • Oil for frying

    Sweet Chili Lime Sauce 

    • 2 Tbsp Thai chili paste (nam prik pao, store bought or make your own)
    • 4 large Thai dried chilies (see note)
    • 1 ½ Tbsp vinegar
    • 3 Tbsp sugar
    • 3 Tbsp oyster sauce
    • 3 cloves garlic, finely grated or minced
    • 1 Tbsp fish sauce
    • 2 Tbsp water
    • 1 ½ Tbsp lime juice
    • 3 kaffir lime leaves, center rib removed, finely julienned then minced into small pieces (see video for technique)
    • Zest of ½ a lime (if you don't have kaffir lime leaves, use zest of 1 whole lime)

    Note: You can substitute any other kind of dried red chilies, keeping in mind that the smaller they are, the hotter they tend to be. If you don't want to make it spicy, you can also use 2 teaspoon paprika powder instead. 

    Ingredients and Kitchen Tools I Use

    Want to save this recipe?

    We can email this post to you, so you can come back to it later!


    Instructions

    Place chicken in a bowl, add the egg, 2 tablespoon of the cornstarch, and salt. Stir until well mixed and let sit while you prepare the sauce.

    Cut the dried chilies into chunks. If you want to lessen the heat, remove the seeds by sticking something thin (tip of your scissors or a chopstick) into the cavity of the chilies to loosen the seeds. Grind the chilies into a powder in a coffee/spice grinder or a mortar and pestle.

    In a small pot, add all sauce ingredients EXCEPT lime juice, kaffir lime leaves, and lime zest. Stir to mix and bring to a simmer over medium heat. Let simmer for 4-5 minutes until thickened, stirring frequently (it should look too thick right now as we will thin it out later).

    Turn off the heat and add the kaffir lime leaves, lime zest and stir to mix; the heat of the sauce will help infuse the lime. Once mixed, stir in lime juice. Keep covered while you fry the chicken.

    Heat about 2 inches of frying oil to 375°F (190°C).

    While the oil is heating, whisk together all-purpose flour and ¼ cup of cornstarch in a large mixing bowl. Add the chicken all at once, then toss the chicken in the flour until all pieces are well coated, making sure that no pieces are stuck together. If you want a thicker crust, drizzle a little water over the chicken and toss one more time, and the water will help the chicken pick up a little more flour.

    To fry: using tongs, grab a piece of chicken and gently shake off loose flour, then place it gently into the hot oil. Fry in batches, making sure not to crowd the pot. After 2 ½ - 3 minutes, the chicken should be golden brown and crispy—remove and drain on paper towel. Repeat until all chicken is fried.

    Pour the sauce into a large mixing bowl, add the chicken and with a large spoon, quickly toss the chicken until all the pieces are coated in the sauce. If you start to feel like there isn't enough sauce to coat all pieces thoroughly, scrape the sauce off the sides of the bowl and your spoon, and this will stretch the sauce a bit further.

    Serve immediately, on its own or with jasmine rice! Enjoy it, I know you will!

    Join us on Patreon for bonus content and rewards!


    Did you make this recipe?

    Tag @HOTTHAIKITCHEN on Instagram and hashtag it #HotThaiKitchen!

    Pad Prik King: Thai Red Curry Stir-Fry with Chicken

    February 19, 2016 by Pailin Chongchitnant 16 Comments

    A plate of chicken and long bean stir-fry

    You can think of pad prik king as a kind of a "dry curry". It's a dish that concentrates the iconic flavours of Thai food into one quick and easy stir-fry. Chicken and crunchy long beans tossed in salty-sweet red curry paste, and served with creamy salted duck egg. It can easily be modified to work with other proteins as well.

    A plate of chicken and long bean stir-fry

    What is Pad Prik King

    Pad prik king is a stir fry of protein with red curry paste and makrut lime leaves (aka kaffir lime leaves). The flavour profile is salty and sweet, and it's usually medium to mild when it comes to heat. It's a dry stir fry, so all of the flavours are concentrated and coating all of the meat and vegetables, delivering an explosion of flavour with every bite. It really is one of my faves!

    In Thai, pad means to stir fry, prik means chilies, and king means ginger, which is kind of odd because there is no ginger in this recipe! From what I could find, the most likely story behind this dish name is that it's supposed to be about as spicy as ginger, so not super hot like some other Thai dishes can be.

    Ingredients and Notes

    Here are all the ingredients you need and important notes about them. For amounts, see the recipe card below.

    • Chicken breast or thigh, boneless skinless, cut into bite-sized pieces. I always prefer thighs, but in the video I did show you how to use chicken breast because it's important not to cut them too thin to prevent them from drying out too fast.
    • Fish sauce, you'll need some for marinating chicken and another amount for the stir fry. How much you need for the stir fry will depend on how salty the curry paste is to start, so be sure to add just a teaspoon, then taste and add more as needed.
    • Cooked salted duck egg, this is optional but it is often added to pad prik king and I think it works so well. The creamy saltiness contrasts the slightly sweet stir fry beautifully. You can buy salted duck eggs at any Chinese supermarket, but be sure to buy COOKED ones, not raw.
    • Neutral flavored oil
    • Red curry paste. Store bought is totally fine, but you can also make your own curry paste using my red curry paste recipe. Brands of Thai curry paste vary greatly, so I recommend Maeploy, Aroy-D, or Namjai for best flavours. If using Maesri in little tins or Thai Kitchen, they are much weaker and you will need to double the amount of paste to get the same flavour. 
    • Palm sugar, finely chopped, packed, or sub light brown sugar
    • Unsalted chicken stock or water
    • Long beans, also known as string beans of Chinese long beans have a nuttier and firmer crunch than green beans, but if you cannot find them, you can use French green beans instead (the smaller, skinnier ones).
    • Makrut lime leaves, this is a key ingredient for pad prik king, if you can't find fresh, check the frozen section as frozen ones work just as well!
    • Jasmine rice, for serving.

    How to Make Pad Prik King

    Here's a bird's eye view of the steps involved, if it's your first time I highly recommend watching the video tutorial first to ensure success. Detailed steps are in the recipe card below.

    process shots for how to make pad prik king steps 1-4
    1. Toss the chicken with fish sauce and let marinate while you prep other ingredients.
    2. If using, cut the salted duck eggs right through the shell in half, then use a spoon to scoop the halves out. At this point you can either cut each half into chunks and toss them into the stir-fry, or serve it on the side.
    3. Heat the oil over high heat until very hot and sear half the chicken without stirring until browned, about 1 minute. Once browned, stir the chicken briefly just to cook the surface of the other side, and then remove from the pan. Repeat with the remaining chicken.
    4. With the heat OFF, add a little more oil and add stir in the curry paste until it's loosened, then turn the heat on to medium and cook for about 2 minutes until aromatic. Then stir in the palm sugar, fish sauce, and deglaze with a little chicken stock or water and stir until sugar is dissolved.
    process shots for how to make pad prik king steps 5-8
    1. Add the torn makrut lime leaves and let them infuse into the sauce for about 30 seconds, stirring constantly. If the sauce looks thick by this point, add a little more stock or water to get it into an pourable consistency.
    2. Add the chicken back in and toss just to coat in the sauce.
    3. Add the long beans and cook until the chicken is fully cooked and the sauce is no longer pooling and the curry paste is coating the chicken and the beans. If you want to add the salted duck egg chunks into the stir-fry, toss them in at this point and toss just to mix.
    4. Remove from heat and transfer to a plate. Garnish with finely julienned makrut lime leaves and if you didn't mix the duck eggs in, place the eggs on the side. Serve with jasmine rice. and enjoy!

    Variations of Pad Prik King in Thailand

    In Thailand, the most common version of pad prik king is actually made with deep fried catfish. Thai catfish are sliced into steaks, the bone-in steaks are then deep fried until the outside is crunchy, and then that gets stir fried with the curry paste.

    This is typically done in restaurants because prepping and frying the catfish in this manner is pretty involved. For home cooking, we tend to use easier protein options such as chicken and pork (pork belly is very popular). A vegetarian version that use TVP (texturized vegetable protein) or deep fried tofu is also quite common during the vegan festival (chay festival) in Thailand.

    Similar Recipes You Might Like

    If you love pad prik king, there are a few other dishes you might also enjoy.

    • Pad ped is also a red curry stir fry, but it is saucier, less sweet, and this version uses coconut milk.
    • Cauliflower Yellow Curry Stir Fry. Once you get a hang of stir frying with curry paste, try this recipe as your next veggies for the meal!
    • a plate of pad ped
      Red Curry Stir Fry with Chicken (pad ped gai)
    • a plate of cauliflower curry with tomatoes and fried shallots
      Quick Cauliflower Curry Stir Fry
    A plate of chicken and long bean stir-fry

    Pad Prik King - Thai Red Curry Stir Fry with Chicken

    By: Pailin Chongchitnant
    This authentic recipe for pad prik king is quick and easy, but delivers an explosion of flavours. Spicy red curry paste is stir fried with tender juicy chicken and crunchy long beans, this dish truly represents the essence of Thai cuisine.
    5 from 11 votes
    Print Recipe Pin Recipe Share
    Prep Time 15 minutes mins
    Cook Time 15 minutes mins
    Course Main Course
    Cuisine Thai
    Servings 3

    Ingredients


    • 1 lb chicken breast or thigh, cut into bite-sized pieces (if using breast, make sure it's at least 1 cm thick)
    • 2 teaspoon fish sauce, for marinating chicken
    • 1 cooked salted duck egg, optional, but recommended (see note 3)
    • 3 tablespoon Neutral flavored oil
    • 3 tablespoon red curry paste, or more if you like it spicier (see note 1)
    • 2 tablespoon palm sugar, finely chopped, packed, or sub light brown sugar
    • 1-3 teaspoon fish sauce, for the stir fry (see note 2)
    • ½ cup unsalted chicken stock or water
    • 1 ½ cup long beans, cut into 1.5” pieces
    • 7 makrut lime leaves, 5 torn into chunks, 2 finely julienned
    • Jasmine rice , for serving

    Want to save this recipe?

    We can email this post to you, so you can come back to it later!

    Check Out Ingredients and Kitchen Tools I Use

    Notes

    1. Brands of Thai curry paste vary greatly. I recommend Maeploy, Aroy-D, or Namjai for best flavours. If using Maesri in little tins or Thai Kitchen, they are much weaker and you will need to double the amount of paste to get the same flavour. 
    2. Some brands of curry pastes are saltier than others, so start with 1 teaspoon of fish sauce and add more as needed.
    3. You can buy cooked salted duck eggs at any Chinese/Asian supermarket. Make sure you buy the one that is cooked, not raw.

    FULL VIDEO TUTORIAL

    All my recipes come with step-by-step video tutorials with extra tips not mentioned in the blog post, so make sure you watch the video to ensure success. If you enjoy them, consider subscribing to the YouTube Channel to not miss an episode. Thank you!

    Subscribe to my YouTube Channel

    Instructions
     

    • Toss the chicken with 2 teaspoon of fish sauce. Let chicken marinate while you prep other ingredients, about 15 minutes.
      1 lb chicken breast or thigh, 2 teaspoon fish sauce
    • If using, cut the salted duck eggs right through the shell in half, then use a spoon to scoop the halves out. From here you have two options: you can cut each half into chunks and toss them into the stir-fry, or cut the halves into wedges and serve on the side and let people take as much as they want.
      1 cooked salted duck egg
    • In a wok or a large skillet, add just enough of the oil to coat the bottom and heat over high heat until the pan is very hot. Add about half of the chicken and spread it into a single layer, being sure not to crowd the pan. Let the chicken sear without stirring until browned, about 1 minute.
      Once browned, stir the chicken briefly just to cook the surface of the other side, and then remove from the pan, leaving any excess oil behind—the chicken is not supposed to be fully cooked at this point. Repeat with the remaining chicken.
      3 tablespoon Neutral flavored oil
    • Let the pan cool a bit, then with the heat OFF, add a little more oil as needed just so you have at least a tablespoon of oil in the pan. Add the curry paste and stir the curry paste in the oil until it's loosened, then turn the heat on to medium. Cook the curry paste, stirring constantly, for about 2 minutes until aromatic.
      3 tablespoon red curry paste
    • Stir in the palm sugar, fish sauce, and deglaze with ¼ cup of the chicken stock or water. Keep stirring until the sugar is mostly dissolved, deglazing with more stock/water as needed if it starts to stick to the pan.
      2 tablespoon palm sugar, 1-3 teaspoon fish sauce, ½ cup unsalted chicken stock or water
    • Add the torn makrut lime leaves and let them infuse into the sauce for about 30 seconds, stirring constantly.
      7 makrut lime leaves
    • If the sauce looks thick, add a little more stock or water to get it into an pourable consistency. Add the chicken back in and toss just to coat in the sauce. Add the long beans and cook until the chicken is fully cooked and the sauce is no longer pooling and the curry paste is coating the chicken and the beans. If you want to add the salted duck egg chunks into the stir-fry, toss them in at this point and stir just to mix.
      1 ½ cup long beans
    • Remove from heat and transfer to a plate. Garnish with finely julienned makrut lime leaves and if you didn't mix the duck eggs in, place the eggs wedges on the side. Serve with jasmine rice. and enjoy!
      Jasmine rice
    Watch my videos AD-FREE and get bonus content on Patreon!
    Tried this recipe? Share a pic!Tag @hotthaikitchen on Instagram and Twitter!

    Thai Corn & Cucumber Pounded Salad (tum tang kao poad)

    September 5, 2014 by Pailin Chongchitnant 8 Comments

    a plate of corn and cucumber salad

    You might be familiar with som tum or green papaya salad, but did you know we make so many other kinds of "tum," or pounded salads, that's don't have any green papaya in them? This corn and cucumber version is one of my favourite variations, but the takeaway is the technique, and you can then change up the vegetables as you wish!

    a plate of corn and cucumber salad

    Watch The Full Video Tutorial!

    All my recipes come with step-by-step video tutorials with extra tips not mentioned in the blog post, so make sure you watch the video below to ensure success - and if you enjoy the show, please consider subscribing to my YouTube channel. Thank you!

    Ingredients and Notes

    Here are all the ingredients you'll need and important notes about them. For amounts and full instructions, check out the full recipe card below.

    • Sweet corn, I prefer corn on the cob because I like for the corn to be in big pieces and it is sweeter that way, but in a pinch, frozen or canned will be fine.
    • Garlic
    • Thai chilies, add as many as you want here, but start with 1 or even half if your heat tolerance is low.
    • Palm sugar, finely chopped. Read more about palm sugar here.
    • Dried shrimp, roughly chopped if large
    • Long beans, this is commonly added to Thai pounded salads but you can totally skip it and add more cucumber if you can't find them. You can also substitute green beans, but be sure to blanch them first in boiling water for 30 seconds; you can eat long beans raw but green beans need to be cooked.
    • Tomato, cut into wedges on a bias, or use halved cherry tomatoes.
    • Fish sauce, it's important to use good fish sauce here, and if you like a bit of funk, you can also do a combination of fish sauce and pla ra (aka padaek in Lao) which is an unfiltered fish sauce.
    • Lime juice, another option is to do a combination of lime juice and tamarind paste for a slightly richer dressing.
    • Julienned cucumber. Cut them thin if you like the cucumber to wilt and soften slightly, or keep it thick if you prefer that fresh crunch.
    • Salted duck egg, cooked. This is optional but I love the creamy, salty bits of salted duck eggs in pounded salads. You can buy them at Chinese supermarkets alongside all the eggs. Make sure you buy COOKED ones.

    How to Make Corn Cucumber Salad

    Here are all the steps to make this recipe. If this is your first time, I highly recommend watching the video tutorial to ensure success.

    Note:This recipe uses a large mortar and pestle made specifically for pounded salads. See my post here for a mortar & pestle guide. If you do not have it, you can still make this salad in a mixing bowl using instructions below. If you have a small stone mortar & pestle, you can do everything up until adding the long beans, then transfer to a mixing bowl for the rest.

    1. Bring a large pot of water to a full boil. Add corn and boil for 6-7 minutes. Remove from water, sprinkle the corn with salt on all sides and let cool completely.
    2. Once cooled, lay the corn on its side and slice the kernels off the cob, trying your best to keep the kernels together in big pieces; set aside. You will need roughly 165 g of corn kernels, so depending on the size of the ear, you may not need all of it.
    3. Cut the salted duck egg, if using, in half right through the shell and scoop out the egg in one piece with a spoon. Cut one half of the egg into chunks (for tossing into the salad), then cut the other half as nicely as you can into wedges (for putting on top of the salad).
    4. In a mortar and pestle, pound garlic and chilies until there are no more chunks. Add palm sugar and pound until mostly dissolved.
    5. Add dried shrimp and long beans, and pound briefly just to crush the long beans. Add tomatoes, fish sauce and lime juice, adding also a few pieces of the lime rind after juicing.
    6. Pound GENTLY to mix and crush the tomato slightly, using a large spoon to help fold the mixture as you pound (best to see video for technique here)
    7. Add cucumber, corn and the chunks of the salted duck egg, toss to mix with a spoon.
    8. Plate and arrange the wedges of salted duck eggs on top.

    How to Make the Salad without a Mortar and Pestle

    If you do not have a mortar and pestle, you can still make this salad in a mixing bowl using instructions below. If you DO have a mortar and pestle but it's too small, you can still make the dressing in it, and maybe even add the dried shrimp and long beans, and then transfer to a mixing bowl.

    1. Mince the garlic or grate with a microplant, and mince the chilies. Add to a mixing bowl.
    2. Finely grate the sugar and add to the mixing bowl, then add the fish sauce and lime juice and stir until the sugar is dissolved.
    3. Roughly chop the dried shrimp and add to the mixing bowl along with the long beans.
    4. Add tomatoes and crush gently with a wooden spoon or spatula to release their juices into the salad. Add the cucumber and salted duck egg chunks, if using, and toss to mix.

    Recipe Card

    Print
    clock clock iconcutlery cutlery iconflag flag iconfolder folder iconinstagram instagram iconpinterest pinterest iconfacebook facebook iconprint print iconsquares squares iconheart heart iconheart solid heart solid icon
    a plate of corn and cucumber salad

    Thai Corn Cucumber Salad (tum tang kao poad)

    5 Stars 4 Stars 3 Stars 2 Stars 1 Star 4.7 from 6 reviews
    • Author: Pailin Chongchitnant
    • Prep Time: 15 mins
    • Cook Time: 15 mins
    • Total Time: 30 minutes
    • Yield: Serves 2
    Print Recipe
    Pin Recipe

    Description

    You may know green papaya salad, and this salad is its sweeter cousin that uses easy to find ingredients. Serve it alongside any meal as a salad, Thai or otherwise!


    Ingredients

    • 1 ear sweet corn (you will need about 165 g kernels, which may not be the whole ear)
    • A pinch of salt
    • 1 salted duck egg (optional but recommended)
    • 2 cloves garlic
    • 1-3 Thai chilies, to taste
    • 1.5 Tbsp palm sugar, finely chopped
    • 1 heaping tablespoon dried shrimp, roughly chopped if large
    • ⅓ cup long beans, cut into 2-inch pieces
    • 1 small tomato, cut into wedges on a bias (see video for technique)
    • 1.5 Tbsp fish sauce (see note 1)
    • 3 Tbsp lime juice (see note 2)
    • 1 cup julienned cucumber

    Ingredients and Kitchen Tools I Use

    Want to save this recipe?

    We can email this post to you, so you can come back to it later!


    Instructions

    Note:This recipe uses a large mortar and pestle made specifically for pounded salads. If you do not have it, you can still make this salad in a mixing bowl. See blog post above for instructions. If you only have a small mortar & pestle, you can do everything up until adding the long beans, then transfer to a mixing bowl for the rest.

    Bring a large pot of water to a full boil. Add corn and boil for 6-7 minutes. Remove from water, sprinkle the corn with salt on all sides and let cool completely. Once cooled, lay the corn on its side and slice the kernels off the cob, trying your best to keep the kernels together in big pieces; set aside. You will need roughly 165 g of corn kernels, so depending on the size of the ear, you may not need all of it.

    Cut the salted duck egg in half right through the shell and scoop out the egg in one piece with a spoon. Cut one half of the egg into chunks (for tossing into the salad), then cut the other half as nicely as you can into wedges (for putting on top of the salad).

    In a large salad mortar and pestle, pound garlic and chilies until there are no more chunks.

    Add palm sugar and pound until mostly dissolved.

    Add dried shrimp and long beans, and pound briefly just to crush the long beans.

    Add tomatoes, fish sauce and lime juice, adding also a few pieces of the lime rind after juicing. Pound gently to mix and crush the tomato slightly, using a large spoon to help fold the mixture.

    Add cucumber, corn and the chunks of the salted duck egg, toss to mix with a spoon. Plate and arrange the wedges of salted duck eggs on top.

    Join us on Patreon for bonus content and rewards!


    Notes

    1. If you like a funk and are feeling adventurous, you can also do a combination of fish sauce and plara (aka padaek in Lao) which is an unfiltered fish sauce you can find at many souteast asian grocery stores.
    2. For a richer dressing, you can also do a combination of lime juice and tamarind paste. You can buy ready-to-use Thai tamarind paste (aka tamarind concentrate) in liquid form, or make your own from tamarind pulp with this tutorial. Make sure you buy THAI tamarind, not Indian as they are different.

    Did you make this recipe?

    Tag @HOTTHAIKITCHEN on Instagram and hashtag it #HotThaiKitchen!

    Authentic Thai Pork Satay & Peanut Sauce

    February 20, 2015 by Pailin Chongchitnant 27 Comments

    a plate of pork satay with peanut sauce and pickles

    Grilled satay skewers served with peanut sauce can be found all over the streets of Thailand. And even though I know chicken satay gets all the love in N. America, 99% of the satay you'll find in Thailand is made from pork!

    The peanut sauce in this recipe is the real deal, no peanut butter, no soy sauce, it's the real stuff I grew up eating. It's so good that you can put it on anything you like, but FYI, in Thailand, this peanut sauce is only used on satays. No, Thai people do not put peanut sauce on everything despite what you might have been led to believe!

    Watch The Full Video Tutorial!

    All my recipes come with step-by-step video tutorials with extra tips not mentioned in the blog post, so make sure you watch the video below to ensure success - and if you enjoy the show, please consider subscribing to my YouTube channel. Thank you!

    Ingredients & Notes

    Here are all the ingredients you'll need and important notes about them. For amounts, check out the full recipe card below.

    • Pork loin, cut into 2-cm thick chops. Pork loin is common in Thailand but you can also use pork shoulder for a fattier cut, or pork tenderloin for something more tender. If you're using other kinds of meats, see my chicken satay recipe and my beef satay recipe. (see note)
    • Coconut milk, for basting
    • Bamboo skewers, soaked in water for at least 2-3 hours. If you forget to do this, it's not a big deal, just make sure you place a strip of folded foil under the skewer handles to protect them from heat (see video tutorial), and make sure the tip is not exposed.
    • White bread, for serving, yes! You might be surprised but in Thailand it is very common for satay to come with toasted white bread. You dip the bread in the peanut sauce and eat alongside the satay, and if there's any sauce left after the satays are gone, use the bread to sop up the rest!

    Satay Marinade

    • Coriander seeds, toasted
    • Cumin seeds, toasted
    • White peppercorns
    • Lemongrass, finely chopped
    • Galangal, minced (optional)
    • Chopped fresh turmeric or turmeric powder
    • Ground cinnamon
    • Ground clove
    • Brown sugar, or white sugar
    • Salt
    • White vinegar
    • Coconut milk

    Real Thai Peanut Sauce

    • Red curry paste, store bought is just fine. I recommend Maeploy, Aroy-D or Namjai. See this post for my review of different Thai curry pastes. You can also try using panang curry paste or massaman curry paste for a sauce with aroma of dry spices.
    • Coconut milk, see my post for how to choose the best coconut milk.
    • Roasted peanuts. I highly recommend buying raw peanuts and roasting them yourself for the best flavour. You can roast them in a 350°F (175°C) oven for 15-20 minutes, depending on the size, and stirring halfway in between. Check them early and often to prevent burning.
    • Toasted white sesame seeds, this is optional for added aroma, you can also substitute more peanuts.
    • Fish sauce
    • Finely chopped palm sugar, learn more about palm sugar here.
    • Tamarind paste, store bought in a tub or homemade using this recipe. If buying, make sure it is tamarind from Thailand, which may be labeled as "concentrate". Learn more about tamarind here.

    Quick Cucumber Pickle (Ajaad)

    Ajaad is a quick pickle that is served alongside satay as a palate cleanser to cut the richness of the satay. If you're feeling lazy you can also serve Western cucumber pickle or gherkins instead.

    • Cucumber
    • Shallots
    • Slices of Thai chilies, jalapenos, serranos, or fresno chilies, any kind of peppers will work here, and you can choose spicy or mild ones.
    • White vinegar
    • Granulated sugar
    • Salt

    How to Make Thai Satay & Peanut Sauce

    Here are all the steps to make this recipe. If this is your first time, I highly recommend watching the video tutorial to ensure success. The full recipe is in the recipe card below.

    process shots for how to make pork satay stepes 1-4
    1. Cut the pork chops in half along the length of the fatty rind.
    2. Then slice each piece along the short side into ¼-inch thick pieces.
    3. Grind coriander, cumin seeds, and white peppercorns in a mortar and pestle until very fine, then add galangal, lemongrass and fresh turmeric (if using); pound until fine.
    4. Add turmeric powder (if using), cinnamon, clove, brown sugar, salt, vinegar, coconut milk, and water; stir to mix well.
    process shots for how to make pork satay steps 5-8
    1. Pour the satay marinade over the meat, massage with your hands, making sure that no pieces of meat are stuck together. Cover and refrigerate for 2 hours and up to overnight. (If you're in a rush, a 20 minute marinade will also be fine).
    2. Meanwhile, make the peanut sauce by grinding the peanuts and sesame seeds (if using) into a fine meal in a food processor (do not let it become peanut butter).
    3. Reduce ¼ cup of the coconut milk by about half, until it is quite thick.
    4. A curry paste to the coconut milk and cook, stirring constantly, for about 2 minutes until it is very thick.
    process shots for how to make pork satay steps 9-12
    1. Stir in the rest of the coconut milk, ground peanuts and sesame seeds, fish sauce, palm sugar and tamarind paste.
    2. Simmer for a few more minutes until it has thickened into a dip consistency, stirring frequently to prevent the bottom from scorching. You might even see red oil floating on top, that is a good sign. Taste and adjust seasoning as needed.
      *If you want to make the cucumber pickle, make the pickling liquid now by combining all ingredients and cook just until the sugar is dissolved. Let cool.
    3. Skewer the meat onto bamboo skewers, about 3 pieces to each skewer, and lay them flat on a tray and brush the top side of the skewers with coconut milk.
    4. Place the skewers on the grill, coconut-nut-milk-side-down, and brush the top side with coconut milk. Placing aluminum foil under the skewer handles will prevent the skewers from burning.
    process shots for how to make pork satay steps 13-14
    1. Flip the skewers and grill the other side just until done. These are small and thin skewers and should only take a couple of minutes to grill, so watch them carefully and do not overcook them!
    2. If making ajaad, place the cucumber, shallots, and chilies into a small serving bowl and pour the cooled vinegar mixture over it.

    Recipe Card

    Print
    clock clock iconcutlery cutlery iconflag flag iconfolder folder iconinstagram instagram iconpinterest pinterest iconfacebook facebook iconprint print iconsquares squares iconheart heart iconheart solid heart solid icon
    a plate of pork satay with peanut sauce and pickles

    Pork Satay and Authentic Thai Peanut Sauce

    5 Stars 4 Stars 3 Stars 2 Stars 1 Star 5 from 12 reviews
    • Author: Pailin Chongchitnant
    • Prep Time: 20 mins
    • Marinating time: 20 mins minimum
    • Cook Time: 1 hr 15 mins
    • Total Time: 1 hr 55 mins
    • Yield: 4-6 Servings
    • Cuisine: Thai
    Print Recipe
    Pin Recipe

    Description

    99% of satays in Thailand are made from pork, and this easy recipe will get you the real taste of Thai street food in your own home! The peanut sauce is made with freshly ground peanuts, no peanut butter (not a thing in Thailand) and the flavour will blow you away!


    Ingredients

    • 1 lb (454 g) pork loin, cut into 2-cm thick chops, chicken, or beef (see note)
    • ¼ cup (60 ml) coconut milk for basting
    • Small 6-inch bamboo skewers, soaked in water for at least 2-3 hours
    • 4 slices white bread, optional for serving

    Satay Marinade

    • 1 ½ tsp coriander seeds, toasted
    • ½ tsp cumin seeds, toasted
    • ¼ tsp white peppercorns
    • 1 Tbsp lemongrass, from the bottom half, finely chopped
    • 1 tsp minced galangal (optional)
    • 1 tsp chopped fresh turmeric or ½ tsp turmeric powder
    • ⅛ tsp ground cinnamon
    • ⅛ tsp ground clove
    • 2 tsp brown sugar
    • ½ tsp salt
    • ½ Tbsp white vinegar or rice wine vinegar
    • ⅓ cup coconut milk
    • ¼ cup water

    Peanut Sauce

    • 2 Tbsp (30 ml) Thai red curry paste, store bought or homemade (see note 1)
    • 1¼ cup (300 ml) coconut milk
    • ½ cup (70 g) roasted peanuts
    • 2 Tbsp (30 ml) toasted white sesame seeds (or substitute 2 tablespoon more peanuts)
    • 1-2 teaspoon (5-10 ml) fish sauce
    • 2 Tbsp (30 ml) finely chopped palm sugar
    • 2-3 tablespoon (30-45 ml) tamarind paste, store bought or homemade (see note 2)

    Quick Cucumber Pickle (Ajaad)

    • ½ cup quartered and sliced cucumber
    • 1 Tbsp thinly sliced shallots
    • 8-10 slices of spur chilies, jalapenos, serranos, or fresno chilies,
    • ½ cup white vinegar
    • ¼ cup granulated sugar
    • a pinch of salt

    Ingredients and Kitchen Tools I Use

    Want to save this recipe?

    We can email this post to you, so you can come back to it later!


    Instructions

    Cut the pork chops in half along the length of the fatty rind. Then slice each piece, along the short side, into ¼-inch thick pieces so you end up with small rectangles. (If this is confusing, see video for a visual.) 

    For the satay marinade:

    Grind coriander, cumin seeds, and white peppercorns in a mortar and pestle until very fine, then add galangal, lemongrass and fresh turmeric (if using); pound until fine. Add turmeric powder (if using), cinnamon, clove, brown sugar, salt, vinegar, coconut milk, and water; stir to mix well.

    Pour the marinade over the meat, massage with your hands, making sure that no pieces of meat are stuck together. Cover and marinate for at least 20 minutes, longer is better, and up to overnight. If marinating for longer than 1 hour, refrigerate.

    For the peanut sauce:

    In a food processor, grind the peanuts into a fine meal. If using sesame seeds, grind them into a fine meal using a spice/coffee grinder or a mortar and pestle, being careful not to over grind them into sesame butter.

    In a small pot over medium heat, reduce ¼ cup of the coconut milk by about half. Add curry paste and cook over medium low heat, stirring constantly, for about 2 minutes until it is very thick. If it thickens too quickly, add a splash of coconut milk to help loosen it up.

    Stir in the rest of the coconut milk, ground peanuts, ground sesame seeds (if using), fish sauce, palm sugar and tamarind juice. Simmer for a few more minutes until it has thickened into a dip consistency, stirring frequently to prevent the bottom from scorching.

    Taste and adjust seasoning with more sugar, fish sauce, and tamarind juice as needed.

    For the Quick Cucumber Pickle (Ajaad):

    In a small pot, combine vinegar, sugar and salt; bring to a boil and cook just until the sugar is completely dissolved. Let cool completely.

    Place the cucumber, shallots, and chilies into a small serving bowl and pour the cooled vinegar mixture over it. Keep covered and refrigerated until ready to serve.

    To Grill:

    (Note: You do not have to grill these; I sometimes just sear the skewers on a skillet on both sides to get a nice browning on the meat.)

    Preheat the grill to medium.

    Skewer the meat onto bamboo skewers, about 3 pieces to each skewer, and lay them flat on a tray. Brush the top  side of the skewers with coconut milk, then place on the grill, coconut-nut-milk-side-down.

    Brush the other side with coconut milk and grill for a minute or so just until it is halfway cooked.

    Flip the skewers and grill the other side just until done. These are small and thin skewers and should only take a couple of minutes to grill, so watch them carefully and do not overcook them!

    When ready to serve:

    Finish the ajaad by pouring the cooled vinegar mixture over the vegetables. Place bread on the grill to toast (you can also just toast the bread in the toaster) and cut each piece of toast into 9 squares. Serve the grilled satay skewers on a platter alongside peanut sauce, ajaad, and toast.

    Note: The toast is typically dipped into the peanut sauce, and the ajaad can be eaten in between bites as a palate cleanser or together with the satay.

    Join us on Patreon for bonus content and rewards!


    Notes

    1. If using store bought curry paste, I recommend Maeploy, Aroy-D or Namjai brands. If using Maesri in little tins, increase the amount to 4 tablespoons.
    2. If buying tamarind paste, make sure it is a product of Thailand or Vietnam, NOT INDIA. It should be a runny, brown paste. It is often labelled as "tamarind concentrate".

    Did you make this recipe?

    Tag @HOTTHAIKITCHEN on Instagram and hashtag it #HotThaiKitchen!

    15 Thai Street Food Recipes You Can Make At Home

    February 13, 2024 by Pailin Chongchitnant 6 Comments

    a grid of 4 images of thai street food: pad see ew, kanom krok, fried chicken, and beef satay

    Getting a taste of the amazing food from the streets of Thailand doesn't require a plane ticket, vacation days, or a language barrier. Get it right here with my 15 Thai street food recipes that you can make right at home!

    Many people go to Thailand, fall in love with the amazing street food, and then come home craving those flavours. While many Thai street food dishes are not easy to replicate at home as they require unusual tools, hard-to-find ingredients, or special skills, so many others absolutely doable!

    All you need are the right instructions, and that's what I'm here for. Enjoy!

    1. Thai Fried Chicken - Hat Yai Style

    Golden brown Hat Yai fried chicken wings are placed in a delicious pile on a ceramic plat with crispy fried onions and garnished with a sprig of herbs. It is placed on a grey stone background.

    In Thailand, fried chicken is street food, not something you order in a restaurant. The best ones comes from unassuming carts. My goal for this recipe is to prove to you that Thai fried chicken is the best in the world, no exaggeration 😉. Specifically, Hat Yai style fried chicken; Hat Yai being my hometown in southern Thailand.

    I’ve had fried chicken from all over the world, and I still haven't experienced one better than ours. Read on, then try the recipe (it's really quite easy) and see if you agree!

    Get the Thai fried chicken recipe here

    2. Authentic Thai Drunken Noodles - Pad Kee Mao

    Pad kee mao is placed in a heaping pile on a white and blue ornate plate. The succulent shrimps are placed on the top left side of the pile while the vegetables are a beautiful contrast to the rich and flavourful noodles. A pair of chopsticks are placed on the left side. Herbs are placed on a red background beside the plate.

    Pad kee mao ผัดขี้เมา or drunken noodles is stir fried noodles with holy basil and lots of chilies. It's a cult-favourite Thai street food. The combination of chewy fresh rice noodles, the epic savoury sauce, and the fragrance of holy basil ... there is nothing quite like it and it never gets old.

    Get the Pad Kee Mao recipe here

    3. Easy Hainanese Chicken Rice - Khao Mun Gai

    Beautiful succulent pieces of chicken are placed on a steaming bed of rice. THe kao mun gai's sauce is drizzling over the chicken as the hand is gently lit with soft lighting. The dish is placed on a square piece of banana leaves. It is accompanied with slices of cucumber and a bowl of the same sauce being drizzled over. The spoon and fork are delicalately placed on the left side on on the plate as a bowl of soup and a large serving bowl of chicken are gracing the background.

    Khao mun gai is a serious contender for a last meat for me. This street food is ubiquitous in Thailand, and you can find it at just about any food court in any mall.

    For this at-home recipe, I use chicken pieces instead of whole chickens that street food vendors use, so cooking time is greatly reduced without compromising the flavour at all. After discovering this weeknight-friendly method, I have not gone back to the whole-chicken method yet!

    Get the Khao Mun Gai recipe here

    4. Easier & Healthier Pad Thai with Glass Noodles

    A fork full of golden glass noodles are being pulled out of a pile of pad thai woonsen. Its vegetables and ingredients glow and glisten in contrast to the refreshing garnishes of lime and beansprouts. The chili powder and peanuts give a wonderful splash of colour.

    Classic pad thai with rice noodles is not an easy dish - definitely not something that I would recommend beginners start with. First timers often end up with mushy, clumpy, broken, or undercooked noodles. But here's a variation of pad thai that uses a noodle that is easier to work with and healthier: glass noodles. It's a different texture, but I promise the taste is just like the classic pad thai!

    Get the Pad Thai with glass noodles recipe here

    5. Authentic Thai Pork Satay & Peanut Sauce

    Skewers of pork Satay perfectly grilled and placed in a uniform pile on a white plate. It is paired with a rich peanut sauce and veggie side.

    Thai satays can be found all over the streets of Thailand, and they're almost always made from pork. The peanut sauce in this recipe is so good you can put it on anything you like, however, few people know that in Thailand, this peanut sauce is only used on satays, and we do NOT put peanut butter in it (or in anything else for that matter!)

    If you don't eat pork, I also have a recipe for beef satay, and for a weeknight friendly version, try my no-skewer chicken satay.

    Get the Thai pork satay & peanut sauce recipe here

    6. Authentic Thai Pad See Ew

    Pad See Ew noodles lay in a georgeous pile on a blue and whote plate surrounded by two bottles of sauce and a red floral white place with wide plain rice noodles. A pair of chopsticks are placed at the top of the blue plate and the background is a grey stone countertop.

    Pad thai may have all the fame, but Thai food lovers know that pad see ew is where real noodle bliss is at. This pad see ew recipe is tried and true, and I promise it'll rival anything you've had at Thai restaurants! It's a quick and simple dish, but you need to know some tricks to achieve perfectly seasoned, not-broken rice noodles with that smokey wok char.

    Get the Pad See Ew recipe here

    7. Thai Chicken Noodle Soup

    A bowl of Thai chicken noodle soup

    The ultimate love child of street food and comfort food. If you like pho, this is very close to it but with Thai flavours! Well balanced flavours with lots of textures going on...topped with crispy garlic...this ain't your mama's chicken noodle soup! Haha, that is definitely true for my mama, although my GRANDmama would make something like this often. This is probably the easiest noodle soup you could make at home, especially once you've mastered the art of Thai style chicken stock.

    Get the Thai chicken noodle soup here

    8: Tom Yum Noodle Soup

    A golden steaming bowl of tom yum noodles in a white bowl. Topped with vilantro and beansprouts.

    When you go to Thailand, sitting at a noodle shop on the street somewhere, please order yourself a tom yum noodle soup if they have it. This is not the famous "tom yum soup" that you might know…the one with lemongrass, galangal, and shrimp. Nope, this is something else that's equally delicious.

    Get the Tom Yum Noodle Soup Recipe Here

    9. Holy Basil Chicken Stir-Fry - Pad Gaprao (Pad Kra Pao)

    A heaping serving of pad gaprao lay on a bed of rice and topped with a beautiful over-easy fried egg. Garnished with a sprig of herb, the dish is decorated with splashes of green and red from the pad gaprao's veggie mix. The plate is placed on a wooden mat with a metal spoon and fork set to the side.

    This popular Thai dish has many English spellings: Pad Kra Pao, Pad Ka Prao, Pad Ka Pow, Pad Krapow...etc. No matter how you spell it, they all point to this same delicious, rustic, spicy stir-fry featuring the aroma of holy basil. For a truly classic way to serve this dish, pour it over rice and top with a fried egg!

    If you want to make pad gaprao using different kinds of protein, check out my formula for turning anything into pad gaprao!

    Get the Pad Gaprao recipe here

    10. Sukiyaki Stir Fry - Suki Hang

    A generous portion of Suki Hang is placed on a white square plate. The celery brings a bright green composition to the over all look as the red sauce glistens on top of the delicious slices of chicken.

    Sukiyaki is obviously a Japanese dish, but this particular recipe is very much unique to Thai cuisine. Here's the story. Sukiyaki is a Japanese hot pot, and Thai people took the inspiration and started making our own sukiyaki hot pot served with a spicy, flavourful red sauce that's more suited to the Thai palate.

    Over the years, people realized that the sauce for the hot pot would also make a great stir fry, and suki hang or "dry suki" was born!

    Get the Suki Hang recipe here

    11. Khao Soi: Thai Curry Noodle Soup

    A steaming bowl of kao soi is beautifully topped with crispy noodles, bright and fragran chili crisps, contrasted with the bright red onion slices, lime wedge, and sprig of cilantro.

    Regional Thai food isn't very well known, but khao soi, egg noodles in aromatic curry broth, is an exception. Because Northern Thailand is such a popular tourist destination, this Northern Thai curry noodle soup has become popular amongst foreigners.

    Some might even say if you visit the North of Thailand and didn't eat khao soi, you didn't really make it there! It's a truly unique dish, and with this recipe you can recreate the experience of Northern Thailand at home.

    Get the Khao Soi recipe here

    12. Chinese BBQ Pork Rice - Kao Moo Dang

    A plate of Chinese BBQ pork on rice with gravy on top. With a side of medium boiled egg and cucumber slices and a bowl of soy chili vinegar dippins sauce.

    This dish is the epitome of "Thai street food". If you wanted kao moo dang you can walk into any food court and you're guaranteed to find a vendor. At the basic level it's just Chinese BBQ pork (char siu) on rice, but what makes this dish unique to Thailand is the savoury-sweet gravy studded with roasted sesame seeds.

    Get the Kao Moo Dang recipe here

    13. Thai Banana Pancakes (Banana Roti)

    Placed on a black square plate, a crispy Banana roti is perfectly cut into 12 pieces. Sweetened condensed milk is drizzled on top with a light powdering of icing sugar.

    Thai roti is one of THE most popular snacks/desserts amongst visitors to Thailand! You can see roti carts at many tourist attractions around the country, and nowadays, vendors offer so many different filling options like bananas, chocolate sauce, nutella, apples, etc. which, by the way, were not available when I was a kid. If you go to non-touristy parts of Thailand you may still see some old-school roti vendors that still don't offer many fancy fillings.

    With this recipe, you can recreate this popular snack at home. It does require some technique, so I highly recommend you watching the video tutorial to ensure success!

    Get the Banana Roti recipe here

    14. Thai Coconut Pancakes - Kanom Krok

    Various kanom krok halves are placed cut open side up or down on a wire rack. The fillings of corn, taro cubes, or spring onions peak through the cooked batter. The are two clear bowls filled with corn or spring onions.

    These famous little Thai coconut pancakes are one of the most popular street foods in Thailand. So much so that even Trader Joe's now sells frozen kanom krok, and Thai people all over the US are going crazy over them!!

    They're so incredibly tasty that I seek them out every single time I go to Thailand...it's an absolute must-have for me. You do need to get a special pan for it, but it's not expensice, and the treat will be well worth it, I promise!

    Get the Kanom Krok recipe here

    15. Thai Iced Tea

    Two glasses of Thai tea, one with half and half being poured into it.

    Thailand has one famous (non-alcoholic) drink, and this is it: Thai iced tea. The orange coloured sweet concoction is so good it feels like it should be dessert. A lot of times I find restaurants make it too sweet, so I actually prefer making my own so I can make it exactly how I want it. If you love Thai tea and you're a coffee drinker, you're also going to love this easy Thai iced coffee!

    Get the Thai iced tea recipe here

    Hidden Gem of Thai Street Food: Stir Fried Turnip Cakes

    March 1, 2019 by Pailin Chongchitnant Leave a Comment

    a plate of kanom pakkad with a lime wedge and beansprouts on the side

    When people go to Thailand, they often make sure they get to try Pad Thai. But many may not realize that at some of those Pad Thai vendors, there is another dish that is a hidden gem ordered only by locals: Kanom Pakkaad ขนมผักกาด, or stir fried turnip cakes. If you're not enticed by the sound of it, do read on because it didn't sound great to me initially either, but now it is one of my absolute fave.

    a plate of kanom pakkad with a lime wedge and beansprouts on the side

    What Exactly is Stir Fried Turnip Cake?

    This is an immensely satisfying dish, loaded with umami. The "turnip cakes" refer to cubes of lo bak go, Chinese turnip cakes you often find at dim sum and during the Lunar New Year.

    While you can find stir fried turnip cake (lo bak go) at most dim sum restaurants, the Thai style is a little bit different. Ours are stir fried with eggs, garlic chives, and beansprouts, the 3 ingredients that are also used in pad thai, this is why these two dishes are often sold by the same vendor.

    *"Turnip cake" actually doesn't use turnip, but it uses daikon radish. It is also known as lo bak go, radish cake, daikon cake, or even Chinese carrot cake (but no, there is no carrot in it)!

    But first, we gotta make the turnip cake

    While you can use any turnip cake (lo bak go) for this recipe, even store bought ones, if you have time I recommend my mother-in-law's famous turnip cake recipe, because it is the best I've had anywhere.

    After you've made the turnip cake, the stir frying part is a breeze. I must caveat it with the fact that MOST places that sell kanom pakkaad in Thailand will use turnip cakes that are relatively plain in comparison to my MIL's pimped out version which has dried scallops, dried shrimp, Chinese sausage and shiitake mushrooms.

    On the street, the turnip cakes used may be plainly made with just daikon, or they may have a little bit of dried shrimp and/or shiitake mushrooms. I've seen some vendors add boiled peanuts, but there's definitely not gonna be any dried scallops involved!

    So what I'm really saying is…my recipe is unlike anything you will find on the street, and in a good way!

    a plate of kanom pakkad with a lime wedge and beansprouts on the side

    Stir Fried Turnip Cake (lo bak go) - Thai Style

    By: Pailin Chongchitnant
    This Thai-Chinese street food is an absolute hidden gem. Immensely satisfying, loaded with umami. You'll need to make the turnip cake (lo bak go) first, but once you have it, this recipe comes together super fast. The perfect way to use up any leftover turnip cake you might have from Lunar New Year or dim sum!
    Print Recipe Pin Recipe Share
    Prep Time 10 minutes mins
    Cook Time 20 minutes mins
    Course Main Course
    Cuisine Chinese, Thai
    Servings 2 Servings

    Equipment

    • Well seasoned wok or a nonstick pan

    Ingredients


    • 12.5 oz turnip cake (lo bak go)
    • 2 tablespoons neutral oil
    • 2.5 teaspoons soy sauce
    • 2 teaspoons sweet soy sauce, (see note 1)
    • 2 large eggs
    • 2 cups bean sprouts
    • 6 stems garlic chives, cut in 2-inch pieces
    • Sriracha hot sauce, for serving (optional)
    • Lime wedges, for serving

    Want to save this recipe?

    We can email this post to you, so you can come back to it later!

    Check Out Ingredients and Kitchen Tools I Use

    FULL VIDEO TUTORIAL

    All my recipes come with step-by-step video tutorials with extra tips not mentioned in the blog post, so make sure you watch the video to ensure success. If you enjoy them, consider subscribing to the YouTube Channel to not miss an episode. Thank you!

    Subscribe to my YouTube Channel

    Instructions
     

    • Slice the turnip cake into ¾-inch thick slices, then cut each slice into ¾-inch thick pieces.
      12.5 oz turnip cake (lo bak go)
    • Combine the soy sauce and the sweet soy sauce together in a small bowl and stir to combine.
      2.5 teaspoons soy sauce, 2 teaspoons sweet soy sauce
    • Heat a well-seasoned carbon steel wok or a nonstick pan over medium high heat, then add the oil. Once the oil is hot, place the turnip cakes cube on the pan in one layer and allow to sear without stirring until the underside is well browned, 2-3 minutes.
      2 tablespoons neutral oil
    • Flip the turnip cake pieces and brown the other side, another 2-3 minutes.
    • Once browned on both sides, crack the eggs into the pan (it can go right in between the turnip cake pieces) then break the yolks with your spatula. Use tongs or chopsticks and pickup the turnip cake pieces around the edges and put them on top of the eggs - we're trying to get some of the eggs to stick to the turnip cakes. (See video if you're confused by this) Turn the heat up to high and allow the eggs to cook without stirring until they are about halfway cooked.
      2 large eggs
    • Using two spatulas, toss the eggs and the turnip cakes together until the eggs are fully cooked. Then add the beansprouts, garlic chives, then drizzle the sauce mixture over the veggies and give everything a toss for 30 seconds just until the bean sprouts are wilted, then off the heat.
      2 cups bean sprouts, 6 stems garlic chives
    • Plate, and if you want, drizzle some sriracha hot sauce over the turnip cakes or serve the hot sauce on the side. Squeeze some fresh lime juice over and enjoy!
      Sriracha hot sauce, Lime wedges
    Watch my videos AD-FREE and get bonus content on Patreon!
    Tried this recipe? Share a pic!Tag @hotthaikitchen on Instagram and Twitter!

    30-Minute Crispy Pork Belly

    February 2, 2024 by Pailin Chongchitnant 43 Comments

    a plate of Thai crispy pork belly with dried chilies and thai basil garnish

    I LOVE me some crispy pork belly, I mean, who doesn’t? But if you’ve ever tried to make the Chinese style crispy pork belly with the bubbly skin, you know it’s not a quick and easy thing. Even with my recipe, which is one of the simplest out there, it's a 2-day process.

    So THIS recipe, is much simpler. It's a Thai style fried pork belly that is unbelievably good, and it's only going to take you 30 minutes. I made this for a Thai friend, and after one bite and he said, "You need to sell this!" It was THAT good!

    a plate of Thai crispy pork belly with dried chilies and thai basil garnish

    What is Thai Style Crispy Pork Belly?

    Most people are familiar with the Cantonese style crispy pork belly or siu yuk, where the crispy part is the skin. The whole piece of pork is meticulously prepped and roasted; and when done well you get puffy, bubbly crispy skin.

    This Thai style is called moo saam chun tod nam pla, which means "fish sauce fried pork belly." People do it in many different ways in Thailand, but the secret to deliciousness here is the fish sauce which goes incredibly well with pork.

    It's coated lightly with flour, and even though it has no skin, there is a light crispness from the flour that gets double fried. It is 100x easier and faster than the crispy skin one, and though not as impressive looking, is no less delicious. In fact, some would even prefer this one!

    In Thailand this would be considered a gub glam or "drinking food." Something munchy that goes very well with a cold drink, such as a beer! You might also find it sold by street vendors with sticky rice, and it makes a great breakfast for folks to grab on their way to work.

    Ingredients

    Here are all the ingredients you'll need with important notes. As you can see you don't need much at all! For amounts, see the full recipe card below.

    ingredients for Thai crispy pork belly
    • Pork belly. We don't need the skin for this recipe, so if your pork has skin, buy a little extra to account for the lost weight of the skin that will be removed. Look for center cut pork belly which has a more even layer of meat throughout. I try to look for pieces with more meat and less fat, but that's up to your preference.
    • Fish sauce. The main seasoning for this and the reason why it is SO good! Here's my post all about fish sauce and how to choose a good one.
    • Sugar. A little to balance the saltiness, and it will also help with the browning.
    • Ground white pepper. Black pepper is also fine.
    • Cornstarch. For the crisp coating.
    • All-purpose flour. If you need this to be gluten free you can use all cornstarch, but the flour does help with the browning as well.
    close up of pork belly from the side
    Tip: Choose pork belly with an even layer of meat throughout so you don't get some pieces that have too much fat. The center cut will be more even than the pieces at the edges. Be picky at the butcher as some pieces have a ton of fat on them!

    How to Make Crispy Pork Belly

    Here's a bird's eye view of the process, for the full instructions see the recipe card below. I also recommend watching the video tutorial before you start in order to ensure success!

    1. Pat the pork dry and remove the skin from the pork belly (if any).
    2. Cut the pork into 1-inch wide strips, then cut each strip into ¾ inch thick pieces.
    3. Add the fish sauce, sugar and pepper to the pork pieces and massage for a minute or so until there is no more liquid pooling in the bowl.
    4. Combine the cornstarch and flour and sprinkle over the pork.
    Process shots for making Thai crispy pork belly steps 5-8
    1. Toss until all the pieces are evenly coated in the flour. Carefully check that none of the pieces are sticking together! Let it sit while you heat up the oil.
    2. Heat 1 inch of frying oil to 350°F (175°C) and fry half of the pork for 2 minutes then remove from the oil - the pork will not be done at this point. Allow to cool on a tray while you fry the second batch.
    3. Once the pork is no hotter than lukewarm, bring the oil temp up to 385°F (196°C) and fry the pork again for about 90 seconds or until the pork is well browned.
    4. Remove and drain on a paper towel; repeat with the second batch. Allow to cool slightly before eating because the fatty part is VERY HOT!

    Tips for Success

    There are a couple of things that are important to your success:

    • Don't fry the pork immediately after dredging. The flour needs at least 5 minutes to absorb the moisture on the pork which will help it adhere. If you fry as soon as you dredge, a lot of the flour will fall off the pork as soon as it hits the oil. Your pork won't have as nice of a crust, and you'll have a ton of flour in your frying oil. I recommend dredging before you heat the oil, or immediately after the oil starts heating, so the pork can sit while you wait for the oil.
    • Let the pork cool before the second fry. If you don't let the pork cool enough, the pork will overcook during the second fry. The cooler the pork, the larger the window you have for the second fry before the pork overcooks. Room temp is ideal, but lukewarm is fine.
    • Don't make the pieces too big or too small. If you cut the pork too big, you won't have as high of a crust to meat ratio. If you make the pork too small you'll overcook it in the time that it takes the crust to crisp. I found that 1 inch x ¾ inch (and whatever height of each pork piece) is ideal.

    Advance Prep Tips

    This is a crowd pleaser and something I encourage you to make for a party! It's also very easy to make in advance, and there are a number of things you can do:

    • Marinate the pork up to 1 day in advance.
    • Do the first frying a few hours before serving, and let the pork sit at room temp. Fry them the second time right before serving.
    • If you don't want to have the oil sitting around, do both rounds of frying, let them sit at room temp, then when ready to serve reheat them for a few minutes in the air-fryer. This re-crisps them back up nicely too.

    FAQ

    Can these be done in the air-fryer?

    The air fryer won't get the crust quite as nice and crisp, however, they reheat really well in the air fryer. I recommend oil frying them to cook them initially, but any leftovers can be reheated for just a few minutes in the air fryer at 350°F.

    What to serve with crispy pork belly?

    If you're in Thailand, you'd 100% be given nam jim jeaw along with your pork belly. It is the sauce that we serve with all meats, especially fatty meats, because the acid and heat cuts the grease super well. But if you're serving these with a cold fizzy beverage, it doesn't really need a sauce at all!
    If you want to make a meal of it, sticky rice is the best and classic pairing!

    Can these be refrigerated or frozen and then reheated?

    I've kept leftovers for up to 1 week in the fridge, and reheat them in the air fryer for roughly 5 minutes at 350°F and they turn out very well.
    Though I have not done it myself, I don't see why you wouldn't be able to freeze them, and then reheat them in the air fryer at 350°F, probably for 8-10 minutes.
    Without an air fryer, you can bake them to reheat though it may not be as crispy, 375°F/190°C (convection if possible) for about 5-7 minutes from the fridge.

    a plate of Thai crispy pork belly with dried chilies and thai basil garnish

    30-Min Crispy Pork Belly Thai-Style

    By: Pailin Chongchitnant
    No more tedious hours of prep, this crispy pork belly needs just 30 minutes, and the result is freakishly good. Double fried for a crisp crust, and fish sauce adds umami magic. As my friend said after one bite, "you need to sell this."
    4.96 from 24 votes
    Print Recipe Pin Recipe Share
    Prep Time 5 minutes mins
    Cook Time 25 minutes mins
    Course Breakfast, Main Course
    Cuisine Thai
    Servings 4 servings

    Ingredients


    • 1 lb pork belly, skinless , see note 1
    • 1 ½ tablespoon fish sauce
    • 1 teaspoon sugar
    • ½ teaspoon ground white pepper
    • 2 tablespoon all-purpose flour, see note 2
    • 2 tablespoon cornstarch
    • Frying oil, as needed
    • Nam Jim Jeaw, optional dipping sauce

    Want to save this recipe?

    We can email this post to you, so you can come back to it later!

    Check Out Ingredients and Kitchen Tools I Use

    Notes

    1. The weight given is for skinless pork belly. So if the pork you buy has skin, buy at least 1.2 lb/550g (add 20%) to allow for the weight of the skin. Also, choose pork belly with an even amount of meat throughout the piece (center cut).
    2. To make this gluten free, sub the all-purpose flour with the same amount of cornstarch. 

    FULL VIDEO TUTORIAL

    All my recipes come with step-by-step video tutorials with extra tips not mentioned in the blog post, so make sure you watch the video to ensure success. If you enjoy them, consider subscribing to the YouTube Channel to not miss an episode. Thank you!

    Subscribe to my YouTube Channel

    Instructions
     

    • Pat the pork belly dry as much as possible with a paper towel, then remove the skin with a sharp knife, leaving as much of the fat on it as possible (unless you want to remove some of the fat).
      1 lb pork belly, skinless
    • Cut the pork into 1-inch wide strips, and then cut each strip into pieces about ¾-inch thick. (The pork will shrink after frying so the final pieces will be smaller).
    • Place the pork into a large mixing bowl and add the fish sauce, sugar, and white pepper. Use your hand to massage the pork and mix all the seasonings. Keep massaging for a minute or so until you no longer feel the grains of sugar, and there is no more fish sauce pooling at the bottom of the bowl.
      1 ½ tablespoon fish sauce, 1 teaspoon sugar, ½ teaspoon ground white pepper
    • In a small bowl, combine the all-purpose flour and the cornstarch and mix well. Sprinkle the flour mixture over the pork and mix well, making sure none of the pieces are sticking together. You want a light and even coating on all the pieces. Let it sit for 5 mins or so while you heat up the oil.
      2 tablespoon all-purpose flour, 2 tablespoon cornstarch
    • Add at least 1 inch of frying oil to a wok or a medium pot and heat it to 350°F (175°C) for the first fry.
    • First Fry: Add half of the pork, placing it in the hot oil one piece at a time to ensure they are not sticking together. Fry for 2 minutes (time this). Maintain the heat of the oil between 300-350°F during the frying; on my electric stove I keep it on medium high, but it will vary from stove to stove.
    • Remove the pork promptly and place on a plate to cool until it’s no more than lukewarm before frying them a second time. Repeat with the second batch, being sure to bring the oil temp back up to 350°F before frying.
    • Second Fry: Once the pork is cool, bring the oil temp up to 385°F(196°C) over high heat. Add the pork all at once and fry for 70-90 seconds, or until the exterior is a deep golden brown. You can fry them for a maximum of 2 minutes; beyond this the pork will become too dry. Remove and place on a paper towel-lined plate to drain. Be sure to bring the temp back up to 385°F before frying the second batch.
    • Allow the pork to cool for a few minutes before digging in as the fatty part of the pork is VERY hot out of the fryer!!
    Watch my videos AD-FREE and get bonus content on Patreon!
    Tried this recipe? Share a pic!Tag @hotthaikitchen on Instagram and Twitter!

    10 No-Fail Recipes for Chinese New Year

    January 31, 2024 by Pailin Chongchitnant 1 Comment

    A grid of 6 images of Chinese new year recipes with text in the middle that says: 10 no fail recipes for Chinese New Year

    Some people know that even though I was born and raised in Thailand, I am a 4th generation Chinese-Thai. There are millions of Chinese-Thais and Chinese food has become so deeply intertwined with Thai cuisine that you cannot really speak of one without the other.

    Because of this, Chinese New Year is an important celebration in Thailand, and of course food is at the centre of this celebration! So here are some recipes that I have that could be part of your Chinese New Year table!

    Lo Bak Go - Turnip Cake

    An absolute classic when it comes to the Lunar New Year. If you make one thing this season, let it be this one. This recipe is my mother-in-law's famous recipe and it's the best I've ever had.

    Lo Bak Go Recipe

    Crispy Spring Rolls (Egg Rolls)

    The filling of these is so good I can just sit with a bowl of it and have it for my whole meal. I got this recipe from my restaurant days and these are still the best spring rolls I've had anywhere.

    A plate of spring rolls, with 3 pieces cut open served in a glass. Cilantro garnish.
    Crispy Spring Rolls Recipe

    Steamed Fish with Ginger Soy Sauce

    Steamed fish is an integral part of a Chinese feast, and this is my most popular steamed fish recipe with over 1.5 million views on YouTube! And for good reasons, it is incredibly delicious and works with any white-fleshed fish. If using whole fish, the same technique applies, just scale up the sauce amount according to how big your fish is.

    Steamed Fish with Ginger Soy Sauce Recipe

    Aunty Jenny's Braised Chicken Wings

    This recipe is perfect if you don't want a complicated meal for Chinese New Year. It's an easy and simple dish that tastes like you spent hours on it. The first time I had this dish at my mother-in-law's place, I knew I needed a recipe!

    Aunty Jenny's Braised Chicken Wings Recipe

    Char Siu - Chinese BBQ Pork

    This char siu recipe is one of my most popular one with over 1.5 million views on YouTube! I promise you it will be better than anything you can buy, especially when you can cook it to juicy perfection and serve it still-warm from the oven. It takes some advanced planning, but the process itself is really straight forward.

    Chinese BBQ pork sliced on a cutting board.
    Char Siu Recipe


    Siu Yok - Crispy Pork Belly (no fry, no boil, no salt crust)

    I don't know about you, but in my world, if you have the sweet char siu, you also gotta have the salty crispy siu yok (aka siu yuk or siu yoke) to complete the pork extravaganza. This recipe is the simplest one you'll fine, with guaranteed bubbly, crispy skin if you follow the instructions.

    A plate of crispy pork belly, one big piece and a few cut pieces
    Siu Yok Recipe

    Gai Lan Oyster Sauce Stir Fry

    A Chinese New Year feast can be a bit rich and heavy, and this super popular recipe is the perfect vegetable side dish to balance it all. You'll never want to cook gai lan any other way again!

    A plate of chinese broccoli stir fry with garlic pieces on top
    Gai Lan Oyster Sauce Stir-Fry Recipe

    Steamed Spare Ribs in Black Bean Sauce

    This is my husband's go-to dish at dim sum, so I decided to try to make it at home, and it turned out to be super easy and even more delicious!

    A bowl of steamed spare ribs with green onions and bell pepper garnish
    Steamed Spare Ribs in Black Bean Sauce Recipe

    Grandma's Hainanese Glass Noodle Stir-Fry

    You GOTTA HAVE NOODLES for Chinese New Year, am I right?? This is my grandmother's signature dish, done Hainanese style, which is where she's from. I'm so happy to be able to share our family's beloved recipe with you!

    A bowl of glass noodle stir fry with dried shrimp, shiitake mushrooms and green onions on top.
    Grandma's Hainanese Glass Noodle Stir-Fry Recipe

    Tang Yuan - Black Sesame Rice Balls

    In the world of Chinese desserts, this is easily my favourite. The chewy mochi-like rice balls are filled with aromatic roasted black sesame seeds. The best part is the soothing, warm ginger broth that they come in.

    Tang Yuan Recipe

    Want some more recipe ideas?

    Check out this page to browse my recipes by categories.

    If you've made something with my recipes, be sure to tag me on Instagram, Twitter, or post it to my Facebook page!


    Ultimate Veggie Spring Rolls

    March 26, 2021 by Pailin Chongchitnant 17 Comments

    Crispy spring rolls cut in half in a steamer basket

    Whether you're a vegetarian, vegan or neither, this is going to be one of the best spring rolls you've ever had. Bold claim, I know; but with the perfect seasoning, and a generous amount of flavourful ingredients (plus one special one!), you won't even need a dipping sauce. They can also be made in advance and frozen, just fry them up when you're ready to eat!

    This post is sponsored by Pine Brand Glass Noodles.

    Crispy spring rolls cut in half in a steamer basket

    Why These Are 100x Better Than Takeout

    • Actually flavourful filling. Too many takeout spring rolls are filled with bland noodles and measly shreds of carrots and cabbage. Not these. The filling is packed with tons of veggies and are so perfectly seasoned I sometimes just eat the filling straight up. This is a vegan filling that super tasty, but if you eat meat also check out these classic pork spring rolls and green curry spring rolls as well!
    • Dipping sauce not necessary. Most takeout spring rolls are nothing without the sauce. Not these. The sweet-tart sweet chili sauce recipe adds a nice contrast, but these are so flavourful that you can do without.
    • Secret ingredient: Taro root! Taro and deep fried foods are a match made in heaven. It adds a unique aroma and a slight creaminess that makes these feel substantial even without any meat.
    • Umami and texture. Two types of mushrooms add umami and lots of texture to keep things interesting.

    Ingredients for Veggie Spring Rolls + Important Notes

    • Glass noodles. The best quality glass noodles are made from 100% mung bean starch, such as Pine Brand (our sponsor!). The noodles have a nicer chewy texture, and are more resistant to overcooking and tearing than ones made with a mixture of starches. Here are some of my other glass noodles recipes.
    • Dried shiitake mushrooms. Use dried, not fresh, as they have more umami and are chewier. Not to mention the soaking water is very flavourful and is used as part of the recipe.
    • Dried black fungus mushrooms. Also known as wood ear or cloud ear mushrooms, they provide a lovely crunchy texture. You can get them julienned or whole at most Asian grocery stores, but they can be omitted if not available. Also try using them in this ginger chicken stir-fry recipe!
    • Taro root. Taro is a root vegetable that cooks up creamy similar to russet potato, but with a unique flavour and aroma that work in both savoury and sweet dishes. If you can, choose the larger taro root, which are creamier, rather than the small hairy ones. Asian stores often sell them pre-cut into chunks. Make sure you wear gloves when peeling taro btw as they can irritate your skin. If you've got taro leftover, use it in this Filipino sour soup recipe (sinigang) or Thai black sticky rice pudding.
    • Neutral oil for cooking the filling
    • Garlic
    • White or black pepper
    • Julienned cabbage
    • Julienned carrots
    • Soy sauce
    • Sugar
    • Salt
    • Cilantro stems
    • Green onions
    • 8-inch spring roll wrappers for standard size, or 6-inch wrappers for mini spring rolls
    • All-purpose flour or an egg for sealing the wrapper
    • Vegetable oil for frying
    • Sweet chili sauce, for dipping, store bought or homemade (it's very easy to make!)
    Taro root sold precut in a big chunk. I slice a bit off of the cut surface since it was exposed at the store, then use a knife to peel of the skin. Make sure to wear gloves as raw taro can irritate your skin.

    How to Make Vegetable Spring Rolls

    Check out detailed recipes in the recipe card below, but here's a bird's eye view of what you'll need to do.

    1. Saute garlic and pepper in oil until golden and aromatic.
    2. Add carrots, cabbage and taro.
    3. Add rehydrated shiitake mushroom and cook until veggies are done.
    4. Add the glass noodles, cilantro stems and seasonings.
    1. Stir fry the filling until the noodles are fully cooked. Let cool to lukewarm.
    2. Wrap the spring rolls using a little more than ¼ cup of filling per an 8-inch wrapper (see the video tutorial for a demo on how to wrap spring rolls).
    3. Use a flour slurry or a beaten egg as the glue to seal the wrapper.
    4. Ready to fry or freeze!
    1. Fry spring rolls at 350°F (175°C) for about 5 mins, or 7-8 minutes if frying from frozen.
    2. They should be a deep golden brown and the bubbles should only be coming out the ends, not from the surface of the spring rolls
    3. Drain on paper towel or a rack and let cool for a few minutes before cutting and eating.
    4. Cut them on a diagonal for a pro look!

    Storing Leftovers

    You can freeze uncooked spring rolls in a freezer bag for a few months, and fry them directly from frozen whenever you're ready to eat for fresh-like-new crispiness. They will take just a few minutes longer to fry.

    If you have leftover cooked spring rolls, just keep them in the fridge and they will last up to a week. To reheat, you can bake them in a 350°F (180°F) oven for 8-10 minutes until the outside is crispy and the inside is heated through. They can also be reheated in toaster ovens and the air fryer.

    Frequently Asked Questions About Spring Rolls

    Can they be made in advance and frozen?

    Yes! That's what most restaurants do. Make a whole bunch and freeze in a freezer bag for up to a few months. Fry them from frozen and they will take a few minutes longer, about 7-8 minutes.

    Can they be baked?

    Yes, you can also bake these. Brush them generously with oil then bake them on a rack in a 425°F (220 °C) oven, convection if possible, for 20-25 minutes or until golden brown. They won't brown nearly as much as deep fried or even air fried ones, so they may look a bit underdone, but they will still be crispy.

    Can they be done in an air-fryer?

    Yes, they won't brown as much and will be a bit dryer, but they'll still be great. First brush them with oil and air fry them at 400°F (200°C) turning halfway through, for about 12-15 minutes or until golden brown. Exact timing will depend on your particular air fryer, so I would check them at 10 minutes to see where they're at, and go from there. Do not crowd the air fryer to allow plenty of air flow around each spring roll.

    Can I make these without the taro?

    Yes, if you don't have access to taro or don't like them, you can omit them and add a little more of each of the other veggies to make up for the volume. You can also substitute kabocha squash or another type of squash for a similar creamy texture.

    Can I make these with meat?

    Yes. Check out my original crispy spring rolls with pork recipe for the best version of the classic Thai spring rolls. Or if you want something more interesting, try these amazing green curry spring rolls which are guaranteed to surprise and delight!

    Crispy spring rolls cut in half in a steamer basket

    Ultimate Crispy Veggie Spring Rolls

    By: Pailin Chongchitnant
    These vegan spring rolls are made special with the addition of taro. They're so flavourful no sauce is required, but to take it to the next level serve with Thai sweet chili sauce! 
    4.80 from 5 votes
    Print Recipe Pin Recipe Share
    Prep Time 30 minutes mins
    Cook Time 1 hour hr
    Total Time 1 hour hr 30 minutes mins
    Course Appetizer
    Cuisine Thai
    Servings 12 large spring rolls

    Ingredients


    • 0.5 oz (about 4 medium pc) dried shiitake mushrooms, rehydrated , see note
    • 0.25 oz dried black fungus mushrooms, rehydrated, see note
    • 1.4 oz dry glass noodles (1 small pack)
    • 2 tablespoon neutral oil
    • 4 cloves garlic, minced
    • ½-1 teaspoon ground white or black pepper, see note
    • 5.3 oz (2 cups) finely julienned taro root
    • 5.3 oz (1¾ cups) finely julienned cabbage
    • 4.3 oz (1 cup) packed julienned carrots
    • 2 tablespoon soy sauce
    • 1 tablespoon sugar
    • ¼ teaspoon table salt
    • 8-10 cilantro stems, finely chopped
    • 2 green onions, chopped
    • 12-14 pieces large 8-inch spring roll wrappers or 24 pieces 6-inch ones.
    • 1 tablespoon all-purpose flour or 1 egg for sealing the wrapper
    • Vegetable oil for frying
    • Sweet Chili Sauce, for dipping, store bought or homemade

    Notes: 

    • You can soak the shiitake and black fungus together in hot off-the-boil water for about 15 minutes. If you have at least 2 hours you can soak them in room temp water. Wash mushrooms before soaking.
    • If you’re serving kids 1 teaspoon of pepper might be a bit much so I'd use only ½ tsp.

    Want to save this recipe?

    We can email this post to you, so you can come back to it later!

    Check Out Ingredients and Kitchen Tools I Use

    FULL VIDEO TUTORIAL

    All my recipes come with step-by-step video tutorials with extra tips not mentioned in the blog post, so make sure you watch the video to ensure success. If you enjoy them, consider subscribing to the YouTube Channel to not miss an episode. Thank you!

    Subscribe to my YouTube Channel

    Instructions
     

    • Remove mushrooms from the soaking water squeezing out excess water from the shiitake mushrooms (and do not throw away the soaking water). 
    • Soak glass noodles in the mushroom water, adding more tap water as needed to submerge the noodles. Soak for 7-10 minutes until softened.
    • While the noodles soak, remove the stems from the shiitake mushrooms and finely chop the caps. Finely dice the black fungus; if you find any hard parts (that's the root end) cut around them and discard. Place the mushrooms in a large bowl together with the taro, cabbage and carrots. 
    • Once noodles are done, drain the water but do not throw it away (yes, we're STILL going to use this!). Don't toss the noodles so that the strands remain in alignment for easy cutting. Use scissors to cut the noodles into 2-inch pieces.
    • In a wok or a large non-stick saute pan, add the oil, garlic, pepper and saute for about 2 minutes over medium heat or until the garlic starts to turn golden.
    • Turn the heat up to medium high and add the mushrooms, taro, cabbage, carrot and 1 tablespoon of the soy sauce; cook for 3-4 minutes until the taro is done. You can tell that the taro is getting close to done when some of the pieces start to break; you can then taste to see if they're cooked through.
    • Add the glass noodles, cilantro stems, the remaining soy sauce, sugar, and about ¼ cup of the mushroom soaking water. Toss until the noodles are fully cooked, adding a splash more of the mushroom water if needed.
    • Toss in the green onions and remove from heat. Taste the filling and add the salt if it needs it. (I find it usually does need the extra salt, but it’s always good to taste first).
    • Transfer the filling into a large, shallow bowl and spread it out so it can cool quickly. 
    • While the filling is cooling, peel the wrappers apart so it will be easier when you wrap. (Spring roll wrappers tend to stick together a bit right out of the package.)
    • For the spring roll wrapper glue, you can use a beaten egg, or for a vegan glue, mix the all-purpose flour with an equal amount of water so you have a thick but spreadable paste.
    • To wrap, follow the instructions in the video. Use a little more than ¼ cup of filling per roll if using a large (8-inch) wrapper. At this point you can freeze the spring rolls and fry them directly from frozen.
    • Heat 2-3 inches of oil in a wok or a pot to 350 F. Add the spring rolls, a few at a time so as to not crowd the pot. Fry on medium heat for about 5-6 minutes until golden brown and crispy. You can tell that the surface are crispy when the bubbles are only coming out of the ends, not the surface (more on this in the video). If they are frozen they may take 7-8 minutes.
    • You can also bake them: Brush them generously with oil all over and bake (better if you have a rack) at 425°F (convection if you have it) for about 25 minutes or until they’re golden and crispy. If you don’t have a rack, flip them over half way through so they brown evenly. If after 25 minutes you still want them to be more brown, you can put them under the broiler for a minute or so per side; watch them carefully!  (They will be lighter in colour than the deep fried ones but will still be crispy.)
    • For air-frying: I have not done this personally, but other sources say to brush them with oil and air fry them for 7-8 minutes at 350°F. 
    Watch my videos AD-FREE and get bonus content on Patreon!
    Tried this recipe? Share a pic!Tag @hotthaikitchen on Instagram and Twitter!

    Also check out...

    • a plate of spring rolls with one cut in half and a bowl of sweet chili sauce on the side and some mint and pansy garnish.
      Best Crispy Spring Rolls I've Ever Had
    • a jar of sweet chili sauce
      Homemade Thai Sweet Chili Sauce น้ำจิ้มไก่

    The Only PAD KRA PAO Recipe You Need - Holy Basil Stir Fry

    January 19, 2024 by Pailin Chongchitnant 26 Comments

    a plate of pad kra pao beef with rice and a fried egg. A side of fish sauce condiment and holy basil sprigs

    This is one of the most useful recipes I've ever shared. It's an all-purpose formula you can use to turn any protein you have into delicious pad kra pao - Thai holy basil stir fry. Any meat, seafood, or any leftover cooked meats you might have lingering in the fridge. It's the only recipe you need to make any kind of pad kra pao you want! With this recipe, you'll have one of the most popular Thai dishes on the table in less than 30 minutes!

    a plate of pad kra pao beef with rice and a fried egg. A side of fish sauce condiment and holy basil sprigs

    What is Pad Kra Pao, Pad Gaprao, or Pad Krapow?

    Pad means to stir fry, and gaprao means holy basil. It is a spicy stir fry with holy basil that can be made with any kind of meat or seafood, and always served with rice. You'll see various English spellings of this dish, including pad kra pao, pad krapow, and pad gaprao, or perhaps something else, but rest assured they are all referring to the same dish.

    If you're curious, I address the reason behind all these different spellings in the FAQ of my traditional beef pad kra pao recipe post. (For the record "pad gaprao" is, I think, the most phonetically correct way to spell it, but because pad kra pao is the most popular and recognizable, I've chosen to use that spelling here.)

    I know many Thai people would agree with me that if Thailand were to have a national dish, it should not be pad thai, it should be pad kra pao. It is universally loved, frequently consumed by the rich and poor alike. It's something people buy on the street, in restaurants, and make at home. It is just a big part of the Thai food culture.

    Ingredients

    Here are the ingredients with all the important notes you'll need before you start. Remember that this is supposed to be a formula that you can adapt to any kind of protein you have that you want to use, even leftover cooked meat! The amounts are in the recipe card below.

    ingredients for pad kra pao
    • Any kind of protein, raw or cooked. This is a great recipe for using up any meat, including leftover cooked meats like that Thanksgiving turkey, roast beef, or anything else you've got on hand. You can also use tofu, but pleasr see my tips for tofu below.
    • Spicy red chilies, such as Thai or bird's eye chilies. Pad kra pao is supposed to be a spicy dish so put as many chilies as you can tolerate here! If you're unsure, and you're tolerance isn't super high, start with 1 Thai chili to be safe.
    • Mild red chilies, such as spur chilies. Traditionally we use spur chilies of prik chee fa, but this can be any kind of mild red peppers you have. Red bell pepper is a bit too watery than idea, but it'll work if that's all you have. If you're making this super hot and are already adding tons of spicy chilies (like at least 5 Thai chilies) you do not have to add any mild ones.
    • Garlic.
    • Onion, small dice. This is optional, and you can substitute it with any other crunchy vegetables you've got in the fridge. My other favorite veg to add is long beans.
    • Holy basil, Italian basil or Thai basil leaves. Holy basil (pictured) is the namesake of this dish, but it is super hard to find, and when you do find it, it's often not very aromatic. Italian basil is my preferred substitute because it is a closer flavour match than Thai basil, but Thai basil will also work if you love that flavour.
    • Oyster sauce. See my post on choosing good oyster sauce here.
    • Soy sauce. I use Healthy Boy Thai soy sauce, but any regular soy sauce you have is fine. More on soy sauces here.
    • Fish sauce. See my post on how to choose good fish sauce here.
    • Thai black soy sauce or dark soy sauce, optional. This is to add colour and a richer flavour, but it is not necessary.
    • Water
    • Sugar
    • Vegetable oil, as needed
    • Eggs for frying, optional. Pad kra pao is often serve with fried eggs and they go super well together, but it is not necessary if you're looking for a quick simple meal! But if you're serving fried eggs, you're gonna want to make this simple prik nam pla condiment for it too 😉
    • Jasmine rice for serving, of course!

    A Note on Using Tofu for Pad Kra Pao

    If you want to use tofu for pad kra pao, I have a few tips:

    • The firmer the tofu the better. It will be less likely to fall apart and has a better texture for stir fries. If you can get a hold of pressed tofu (sometimes labeled as bean curd) that is the one I prefer. It is super firm and it is the kind of tofu we use for pad thai. Crumble it with your hands to make small irregular pieces, and it makes a perfect meat substitute for pad kra pao. Firm or extra firm tofu would also work.
    • Pan-frying tofu first will create a chewy exterior that will improve the texture of the dish. Cut the tofu into small pieces, or crumble it into irregular pieces, then pan fry them over high heat in a nonstick skillet or wok until golden brown.
    • You can also buy pre-fried tofu. Asian grocery stores will sell fried tofu that are perfect for this recipe. The exterior will already be nice and chewy! (Note: Fried tofu is not the same as tofu puffs which are also fried but are hollow inside.)

    How to Make Pad Kra Pao with Anything You Have

    Here's a bird's eye view of the recipe. The full instructions are in the recipe card below. I also highly recommend you watching the video tutorial first to ensure success!

    Process shots for making pad kra pao steps 1-4
    1. Make the sauce by combining oyster sauce, soy sauce, fish sauce, black or dark soy sauce, sugar, and water. Stir until the sugar is completely dissolved.
    2. Pound the Thai chilies into a fine paste in a mortar and pestle, then add the garlic and the mild chilies and pound into a rough paste, just until there are no more big chunks.
    3. If using raw meat, but it into small, bite-sized pieces; make them smaller than your average stir fry as pad kra pao is not good with big chunky pieces. If using lean protein such as chicken breast, don’t slice them thinner than ½ an inch so they don’t overcook too quickly.
    4. If using raw meat, add fish sauce and mix.
    Process shots for making pad kra pao steps 5-8
    1. If using cooked protein, cut into small bite-sized pieces - here I am using a cold steak, but this can by any leftover cooked meat you have, even rotisserie chicken, roast beef, or leftover thanksgiving turkey.
    2. If using raw protein, sear it off in a very hot wok on high heat to brown the protein. Be sure to let it sit on the hot wok undisturbed until the browning develops before stirring.
    3. Remove from the pan. No need to clean the wok unless there are burnt bits stuck on it.
    4. On medium-high heat, add the chili garlic mixture and stir until the garlic starts to turn golden, about 2 minutes.
    Process shots for making pad kra pao steps 9-12
    1. Add the onions and cook it for 30 seconds to a minute to soften slightly.
    2. Turn the heat up to high and add the protein and the sauce. Toss everything together just for 30 seconds or so, until the meat is well coated and heated through.
    3. Turn off the heat and add the holy basil, or whatever basil you're using.
    4. Toss just to wilt and that's it! Now you can make some fried eggs if you wish, and serve it with the pad kra pao on top of jasmine rice.

    FAQ

    What's the difference between Thai basil and holy basil the same thing?

    No. If you want to see the difference, in the video tutorial I show the two side by side, and you can see that they are unmistakably different from each other. They are both used in Thai cuisine but they have very different aromas. Thai basil is called horapa โหระพา in Thai. It has an anise-y aroma and it's what you find in many Thai curries, and also served alongside Vietnamese pho. It has dark green, pointy leaves, and often has purple stems.
    Holy basil is called gaprao กะเพรา or kra pao in Thai, and it's also known as tulsi in India. The leaves are lighter green, more rounded, and more delicate than Thai basil. It has a slightly peppery aroma that is not as strong as Thai basil.

    What kinds of proteins can I use in pad kra pao?

    The classic version of pad kra pao uses ground or finely chopped meat, but you can make pad kra pao with any kind of protein including chicken (dark meat preferred), pork, beef, shrimp, squid or even clams. You can also make vegetarian versions using firm fried tofu. This recipe will give you a formula that works with any kind of protein, raw or cooked.

    a plate of pad kra pao beef with rice and a fried egg. A side of fish sauce condiment and holy basil sprigs

    Thai Holy Basil Stir Fry Recipe for Any Meat (Pad Kra Pao)

    By: Pailin Chongchitnant
    One formula, endless possibilities. This pad kra pao recipe can be adapted to any kind of protein, including cooked leftover meats!
    4.73 from 11 votes
    Print Recipe Pin Recipe Share
    Prep Time 20 minutes mins
    Cook Time 10 minutes mins
    Course Main Course
    Cuisine Thai
    Servings 2 servings

    Equipment

    • mortar and pestle

    Ingredients


    • 10.5 oz protein of your choice, raw or cooked
    • 1 teaspoon fish sauce, only if using raw protein
    • 1 tablespoon oyster sauce
    • 1 tablespoon soy sauce
    • 2 teaspoon fish sauce
    • ½ teaspoon Thai black soy sauce, or dark soy sauce, optional
    • 2 tablespoon water
    • 1 ½ teaspoon sugar
    • 1-3 Thai chilies, or as many as you can tolerate
    • 5 cloves garlic
    • ¼ cup chopped mild red chilies, see note 1
    • ¼ medium onion, small diced
    • 1 ½ cup holy basil leaves or sub Italian or Thai basil leaves, loosely packed
    • Vegetable oil, as needed
    • 2 eggs for frying, optional (1 egg per person)
    • Prik nam pla, condiment if serving fried eggs, optional
    • Jasmine rice, for serving

    Want to save this recipe?

    We can email this post to you, so you can come back to it later!

    Check Out Ingredients and Kitchen Tools I Use

    Notes

    1. Any kind of mild red peppers will work here. Traditionally we use spur chilies, but you can use whatever you have access to, preferably with thinner flesh, such as red anaheim peppers. Red bell pepper will also work in a pinch. (If you're adding at least 5 Thai chilies, which would make it very hot, you can skip the mild peppers.)

    FULL VIDEO TUTORIAL

    All my recipes come with step-by-step video tutorials with extra tips not mentioned in the blog post, so make sure you watch the video to ensure success. If you enjoy them, consider subscribing to the YouTube Channel to not miss an episode. Thank you!

    Subscribe to my YouTube Channel

    Instructions
     

    • Cut the protein into small bite-sized pieces - make them smaller than your average stir fry as pad gaprao is not good with chunky pieces. If using lean protein such as chicken breast, don’t slice them thinner than ½ an inch so they don’t overcook too quickly.
      10.5 oz protein of your choice
    • If using raw meat, add 1 teaspoon of fish sauce and mix well.
      1 teaspoon fish sauce
    • Make the sauce by combining oyster sauce, soy sauce, fish sauce, black or dark soy sauce, sugar, and water. Stir until the sugar is completely dissolved.
      1 tablespoon oyster sauce, 1 tablespoon soy sauce, 2 teaspoon fish sauce, ½ teaspoon Thai black soy sauce, 2 tablespoon water, 1 ½ teaspoon sugar
    • Pound the Thai chilies into a fine paste in a mortar and pestle, then add the garlic and the mild chilies and pound into a rough paste, just until there are no more big chunks.
      1-3 Thai chilies, 5 cloves garlic, ¼ cup chopped mild red chilies
    • If using raw protein, heat a wok or a skillet until very hot on high heat, add just enough oil to coat the bottom and add the protein, spreading the pieces out into one layer. Let them sear until browned on the underside, then give it a toss and stir until it’s done. This should only take a few minutes in total. Remove from the pan. Note: You can skip searing the protein and just add it to the wok raw, but the browning does add a nice flavour.
      Vegetable oil
    • In a wok on medium-high heat, add the chili garlic mixture and stir until the garlic starts to turn golden, about 2 minutes. Add the onions and cook it for 30 seconds to a minute to soften slightly.
      ¼ medium onion
    • Turn the heat up to high and add the protein and the sauce, and toss everything together just for 30 seconds or so, until the meat is well coated and heated through. If you didn’t pre-cook the protein, take your time and keep tossing until it’s cooked through.
    • Turn off the heat, add the basil, and toss just to wilt.
      1 ½ cup holy basil leaves or sub Italian or Thai basil leaves
    • Make the fried eggs if you wish, and serve the stir fry with jasmine rice and topped with a fried egg and some prik nam pla!
      2 eggs for frying, Prik nam pla, Jasmine rice
    Watch my videos AD-FREE and get bonus content on Patreon!
    Tried this recipe? Share a pic!Tag @hotthaikitchen on Instagram and Twitter!

    Best & Worst Thai Dishes at a Restaurant: A Tier List!

    December 29, 2023 by Pailin Chongchitnant 7 Comments

    Pailin in front of a tier list chart

    "Can you order for us? I don't know what's good." This is the same thing I hear every time I go to a Thai restaurant with a friend, regardless of whether I've been to the place before or not. So I thought I'd make a tier list of common Thai dishes available in a typical North American Thai restaurant, ranked according to their likelihood of being satisfactory!

    A tier list is simply a fun way of ranking items that's been popular on YouTube. Now, to be clear, I'm not ranking Thai dishes based on how good they are, because that's not possible. Every dish has the potential to be great and every dish has the potential to suck, just depends on who is making them.

    So instead I'm ranking them based on something much more useful: their likelihood of being good at an average Thai restaurant in North America. So, if you walk into a random Thai place in...say...Saskatchewan, which dishes are most likely going to be satisfactory, and which dishes are most likely going to disappoint according to my standard, which I think is on par with most Thai people.

    My hope is that this list will help you maximize your chances of having a good Thai meal wherever you go!

    Video: Watch Me Rank Thai Dishes!

    If you prefer to watch and see my reaction, you can watch me rank all the dishes in this video! Or if you prefer to read, the info is all in this article below.

    The Tiers

    Let's first define our tiers. Typically tier list goes in the order of S-A-B-C-D.... but what each one means can be individually defined, as I have done.

    Thai food tier list chart

    S tier - Super Choice. If I see these items on the menu I am going to order them because they're unusual for a Thai restaurant to have them, they're harder to prepare, requires a lot of prep, so if a restaurant decides to commit to one of these, it probably means someone in there is committed and skilled. So it's probably a good dish to try.

    A tier - Almost Always Good. These are dishes that are easy to execute well, so you've got a good 70% to 80% chance of it being satisfactory.

    B tier - Bold Choice. Maybe it's good, maybe it's not, you're definitely taking a risk on that one.

    C tier - Come Home. Come home and make it yourself! Now these are not necessarily worse than a B tier but they're so easy to make well that you probably do a better job of it at home.

    D tier - Do Not Order! These are almost always going to be disappointing, and unless you know otherwise don't even go there.

    Caveat

    Before I rank I just want to be clear that of course there are excellent Thai places that make good everything, especially this new wave of hip, fine dining, and artisanal Thai restaurants. We're not talking about those for this ranking. I am talking about your cheap and cheerful Tuesday night takeout places, I think you know what I mean!

    Also, this ranking is based on my standards and experience, which may be different from yours 😉

    1. Curries - C Tier

    a bowl of thai green curry with basil garnish

    What I mean by "curries" is actually coconut based curries as those are the most common ones in Thai restaurants. All the common ones: green curry, red curry, yellow curry, massaman curry, and panang curry.

    Curries get a "come home" because they are so easy to make! The ingredients are very easy to find, and IF you're using a good brand of store-bought curry paste (and I have a post all about that) you're almost guaranteed a good result.

    When you're at a restaurant, it's a B. A lot of times they make it too mild because curries can't be made to order. A restaurant has to make the curry sauce all at once in a big batch so they can't make it any spicier than they think most people can handle. And the thing with curries is if you use if you make it less spicy, you're automatically making it less flavorful because the spiciness is tied with all the herbs and spices in the curry paste.

    2. Tom Yum Soup - A Tier

    A bowl of tom yum goong soup

    A spicy and sour soup with lemongrass, galangal, lime leaves usually with shrimp (tom yum goong) but most restaurants will also have like a chicken version (tom yam gai). It's an A-tier because it is so easy to do well and most restaurants do a decent job of it. It might not blow your mind, but it will at the very least be pleasant.

    3. Meat & Veggie Stir Fries - B Tier

    a plate of cashew chicken

    This is not a specific dish but a category of dishes. Thai restaurants will have a bunch of these - some combination of meat and vegetables stir fried in some type of brown sauce or slightly red sauce. It could be beef and broccoli, cashew chicken, sweet and sour stir fry, or a chicken ginger stir fry.

    These are bold choices. Sometimes it's really good and sometimes it's just some dry chicken with chunky broccoli with a sauce that doesn't really do anything for you.

    4. Rad Na - D Tier

    a blue bowl of rad na with chili vinegar and chili flakes on the side

    Rad na is one of the most underrated noodle dishes. It is made with wide rice noodles with a gravy on top, but I think the reason it is underrated is because it is so hard to do well. This is why in Thailand most places that make rad na are specialists.

    So most of the time when you order rad na in a non-specialist Thai restaurant here, it is always disappointing. It has simple flavors, which means you have to have good ingredients, the ratios have to be right, the consistency of the gravy has to be right...a lot to ask of a restaurant who doesn't specialize in it.

    5. Pad See Ew - B/C Tier

    a plate of pad see ew

    Pad see ew is a cult favorite. People who love it are so passionate about it and I'm definitely one of them. If done well it is so good, however at a restaurant it's kind of a toss up, so a B-Tier. Sometimes it's so sweet, sometimes the noodles are mushy, sometimes it's not even the right noodles, or they put carrots and all sorts of weird things in there. But sometimes it's great! You just you just never know with this one.

    However, if you can get the fresh rice noodles, it's definitely a C-Tier. Come home and make it using my recipe. I don't know about anyone else's recipes, but I've heard from countless number of people who say that my recipe is better than any restaurant version they'd had. Even my brother makes my recipe constantly. It's very easy to make with a simple ingredient list!

    6. Green Papaya Salad (Som Tum) - B Tier

    A plate of Thai green papaya salad

    I debated whether this should be an A or a B, but I think I'm going with B because though it's not hard to make a good papaya salad, it often misses the mark for a Thai person's taste. A good papaya salad for a Thai person needs to be strongly flavoured. Sour, salty, spicy...everything has to come at you strong.

    But a lot of times in your average Thai place they make it quite mild, as though it's a side salad. It might be enjoyable, but it's definitely not having the effect that it should.

    7. Hat Yai Fried Chicken - S Tier

    Hat Yai Fried Chicken is marinated in this wonderful mixture of soy sauce, garlic, and white pepper with a light crisp coating. It is served with fried shallots and sticky rice. It is one of the best fried chicken in the world in my opinion and if a restaurant does choose to have it, they probably do a good job. I have yet to be disappointed by it.

    Note that it might not be called Hat Yai Fried Chicken on the menu, it might just be called Thai fried chicken or simply fried chicken. But I think in general if you see fried chicken in a Thai restaurant, it's probably a solid choice.

    8. Tom Kha Gai - A Tier

    A bowl of tom kha gai soup

    Tom kha gai is a popular soup made with coconut milk, chicken and gangal. It is wonderfully delicious and soothing, and not too spicy. It's very easy to make, with flavours that loved by most people, and most restaurants do a decent job of it. If it doesn't blow your mind it will at least be a pleasant experience.

    It's a great soup to order if you love to have something to sip on alongside your meal!

    9. Pad Kee Mao (Drunken Noodles) - B/C Tier

    A plate of drunken noodles with shrimp on red placemat

    Pad kee mao or "drunken noodles" is the spicy sister of pad see ew. It's a spicy wok fried fresh wide rice noodles with holy basil. I would put it on the same tier as pad see ew, and that is C - come home and make it if you can get the ingredients, but if you're in a restaurant it's a B.

    In a restaurant you just never really know what you'll get, but just like pad see ew, it's easy to make and I have a solid recipe that, if you follow it, it is guaranteed to satisfy.

    10. Boat Noodles - S Tier

    Thai boat noodles with condiments and side vegetables

    Boat noodles, if you've not heard of it, it's because it's not a very common dish. So the places that do make it usually do a very good job of it. It is a kind of noodle soup with a rich aromatic broth full of spices. It's thickened with blood and has an intense, complex flavour, which is why we often have only small bowls of it at a time.

    When done well, it is one of the best things you can eat. Someone once described it as "pho on steroids" which I think is quite accurate!

    But it it requires a ton of prep. The ingredient list is long, as you can see in my boat noodles recipe here. So a restaurant who chooses to make has to be committed. Now, I have seen ONE not-great boat noodles before but I think that was an anomaly, most of the time I'd say it is a solid S-tier.

    11. Chicken Satay - B Tier

    A plate of chicken satay with a bowl peanut sauce and a bowl cucumber pickle.

    Most of the time chicken satay is going to be fine, but for a Thai person this is a B. The chicken itself is usually tasty, but it's the sauce that's the issue. Half the time you get a sauce that's made from goopy peanut butter, and that is not what a Thai satay sauce should be. It should be made with ground roasted peanuts, with TEXTURE, so for Thai person, a smooth peanut buttery sauce completely ruins a satay.

    As a side note, chicken satay is not very common at all in Thailand. You only find it in places that serve a lot of tourists and in Muslim communities. But the vast majority of satay that Thai people eat is pork satay. And I guess that's the first disappointment for a Thai person...it's not pork!

    12. Yum Pladuk Foo (Crispy Fluffy Fish with Green Mango Salad) - S Tier

    It's a truly unique dish, and you gotta check out the video of how it's made if you've never seen it, and you can't imagine how fish can be "crispy and fluffy". The fish gets pounded into shreds, and the shreds are deep fried. The result is a raft of crispy fish bits that is then served with a sour green mango salad. It is TO. DIE. FOR.

    The crispy fish is not easy to pull off. It does require work and skills, which is why if a restaurant has it, chances are there is someone skillful in the kitchen and it'll probably be great. And once you can successfully make the fish, the rest is really easy to make tasty.

    13. Mango Sticky Rice - A Tier

    a plate of mango and sticky rice with mung beans on top of the rice

    Mango sticky rice is our only dessert of the whole list because it's the only common dessert that there is in Thai restaurants in North America. Which is sad, because we have so many great Thai desserts.

    But, mango sticky rice is almost always great IF the mango is good. That's the only caveat. So if you are in a time and place where good, sweet mangoes are available, go ahead and order it, but if not...maybe hold off.

    The rice part of this dessert is very easy to make tasty, it all hangs in the mango quality.

    14. Pad Gaprao (Pad Kra Pao) - A Tier

    a plate of pad gaprao beef with rice and a fried egg on top, with a bowl of fish sauce on the side.

    Holy basil stir fry, or a lot of places will list this as a Thai Basil stir fry because holy basil is very hard to find and they will use Thai Basil instead. I feel like most places do a decent job of this, even though it often doesn't taste like the way it does in Thailand, it tends to manage to be a tasty dish.

    The combination of chilies, garlic and basil, whatever kind of basil they end up using, is so good and it does most of the heavy lifting.

    15. Laab - A Tier

    A plate of laab moo with a side of vegetables

    Laab is a northeastern Thai salad made of ground meat and lots of fresh herbs. It's almost always good because it's so easy to make. There's really not that much to it and it's just hard to screw up!

    16. Pad Thai - D Tier

    A plate of pad thai with shrimp and a side of lime and bean sprouts

    Pad Thai was the whole reason why I wanted to do a tier list to begin with. I wanted to tell the world that pad thai is most definitely a D - do not order! When I first came to North America I would order pad thai at every place I visited aa a test for whether or not this place is a good place.

    I quickly realized that that is a terrible test because most places do a terrible job of it BUT it doesn't necessarily mean that the rest of the menu is bad. It's a hard dish to do well, but most places feel that they NEED to offer it on the menu so they make it anyway.

    The biggest issue is that it is often FAR. TOO. SWEET. At one Thai restaurant I worked at, seeing how pad thai sauce was made was astounding. A 25-pound bag of sugar poured into a giant pot. Yes, it is a giant pot, but also....it's 25 pounds of sugar. It turned into a syrup, which explains why the pad thai ends up so sickly sweet and sticky, and definitely NOT the way it is supposed to be.

    Not to mention the ketchup, the paprika, and all sorts of cheaper substitutes people make for the real stuff.

    It's also often just...too much noodles. Pad thai is supposed to have a lot of bits in it or what we call "kreuang" The garlic, shallots, dried shrimp, a LOT of bean sprouts, garlic chives, etc. Most of the time here it's 90% noodles and a pinch of tofu and bean sprouts.

    Final Takeaway

    I hope you found that enjoyable and perhaps even useful! Again this list is based on my opinion and experience, and judged against my standards, which is may be be different from yours. You're going to find exceptions to the above, but statistically, I think this is probably reflective of the "average" place 🙂

    What would YOUR tier list look like based on places you've been to?

    • « Previous Page
    • 1
    • 2
    • 3
    • 4
    • …
    • 13
    • Next Page »

    Sawaddee ka!

    I'm Pai, a chef, author, and YouTuber. I'm here to demystify Thai cuisine and help you cook great Thai food at home. Want to learn more about me?

    Here's my story

    My Latest Cookbook

    Popular Classics

    • a plate of cashew chicken
      Thai Cashew Chicken Recipe
    • A plate of Thai grilled steak salad with sticky rice - nam tok neua
      Thai Grilled Steak Salad - Neua Yang Nam Tok
    • A plate of pad thai with shrimp and a side of lime and bean sprouts
      Authentic Pad Thai Recipe ผัดไทย
    • a bowl of tom yum soup with shrimp, mushrooms, lemongrass and chilies
      Tom Yum Goong Recipe (Creamy Version)

    Footer

    Subscribe to my newsletter!

    Subscribe for free!
    • Privacy Policy
    • Accessibility Statement
    • Merch
    • All Recipes
    • Contact
    • My Cookbook
    • Patreon
    ↑ back to top

    As an Amazon Associate I earn from qualifying purchases.

    Copyright © Pailin's Kitchen Inc. 2025