Description
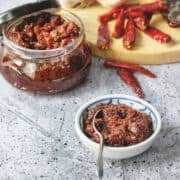
Thai chili paste or nam prik pao is a staple in any Thai kitchen. This savoury, sweet paste can be used in various dishes including many of the most popular Thai dishes!
Ingredients
- 1.7 oz (50 g) mild dried chilies such as guajillo or puya
- 3.5 oz (100 g) garlic, about 2 heads, cloves separated and peeled (see note 1)
- 7 oz (200 g) shallots, peeled and cut into 1-inch chunks
- ¼ cup (30 g) dried shrimp, medium size
- ¼ cup (60 ml) tamarind paste, store bought or homemade (see note 2)
- 3 Tbsp + 1 tsp (50 ml) fish sauce
- ⅓ cup + 1 Tbsp (80 g) palm sugar, finely chopped, packed
- 1 tsp (5 ml) fermented shrimp paste, optional
- ¾ cup (180 ml) neutral oil (see note 3)
Want to save this recipe?
Instructions
- If dried chilies feel dusty, dunk them for just a few seconds in cold water and dry them off on paper towel. Cut them into large chunks with scissors and remove the seeds and pith to reduce spiciness. If you want a spicier chili paste, you can leave some of the seeds in.
- Stovetop Method: Toast the dried chilies in a dry skillet or wok over medium heat, stirring constantly, until they are charred in some spots and smell smoky. Remove from the pan. In the same pan, add the garlic and shallots and stir constantly over high heat until charred spots form. Remove from pan and skip to step 4.
- Broiler Method:
Place the dried chilies on a foil-lined baking sheet, and place them under the broiler about 6-8 inches away from the element. Watch them constantly, and pull them out once charred spots form and they smell smokey - this can take less than 1 minute on some broilers.
On the same baking sheet you used for the chilies, place whole garlic cloves with the skin on on one side of the pan, and the shallots on the other. Broil them on the top rack, as close the element as possible, until some charred spots form on the shallots, about 5 minutes. Flip and broil the other side until more charred spots form, about 3 more minutes. Remove and peel the garlic.
- In a coffee grinder, grind the dried chilies into a powder, then add the dried shrimp and grind until fine.
- In a food processor, add all ingredients except the oil and grind into a fine paste, adding the oil gradually as needed for the food processor to grind more effectively. Scrape the sides down occasionally. Grind until you have paste that's mostly fine but it does not need to be smooth.
- Transfer the chili paste into a wok or skillet along with any remaining oil. Cook over low heat, stirring constantly, for about 20 minutes to cook the herbs and to thicken the paste to a consistency of a spread. If you are making a large batch, it will take more time to cook.
- Store in a glass jar, and it'll keep in the fridge for a few months or in the freezer indefinitely. Use as a spread on crackers, toast, burgers and sandwiches, or use in any of these recipes: Cashew Chicken, Tom Yum Goong, Shrimp & Chili Paste Stir-Fry, Roast Pork Salad, Thai Tuna Salad, Wing Bean Salad
Notes
- If using broiler method to toast garlic, there is no need to peel them as the peel will come off easily after broiling.
- When buying tamarind paste, it can sometimes be labelled as "tamarind concentrate," but make sure it is a product of Thailand which should come as a brown liquid. Indian "tamarind concentrates" are much more concentrated and the same amount cannot be used for this recipe.
- In commercial versions of this paste, more oil is typically used to the point where there is always a thick layer of oil that it on top of the paste. I don't like to add that much, but if you want to replicate the "traditional" style feel free to add more oil.