Hot Thai Kitchen

  • Recipes by Categories
  • Kitchen Tips & Ingredients
  • Thailand Vlogs
  • My Cookbooks
  • Newsletter
  • Patreon
  • Shop Ingredients & Tools
  • Find an Asian Grocer
  • Merch
  • About
  • Contact
menu icon
go to homepage
subscribe
search icon
Homepage link
  • Recipes by Categories
  • Kitchen Tips & Ingredients
  • Thailand Vlogs
  • My Cookbooks
  • Newsletter
  • Patreon
  • Shop Ingredients & Tools
  • Find an Asian Grocer
  • Merch
  • About
  • Contact
    • Facebook
    • Instagram
    • Pinterest
    • Twitter
    • YouTube
  • ×
    Home

    Homemade Asian Meatballs Recipe

    November 22, 2019 by Pailin Chongchitnant 8 Comments

    A Classic Street Food

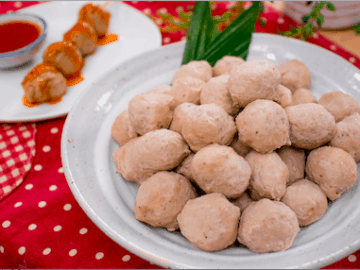
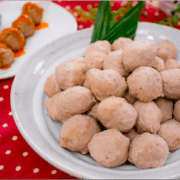
    These meatballs are what you would find in Asian noodle soups, hot pot, or grilled on a stick. In Thailand, this is not something most people make at home, but rather something you buy. Kind of like sausages in the West; some people do make them at home, but for the most part it's something one buys from the store.

    However, it's not hard to make at all, and definitely easier than making sausages because there is no casing to fuss with! You do need a good food processor to get the meat super fine, and a bit of patience in getting the hang of forming the meatballs.

    Forming Meatballs by Hand

    Commercial meatballs are made by machine, but back in the day they used to be made by hand. In this video I show you how to do the classic hand squeezing technique, but if you don't care much about how smooth and round they look, you can simply form them into lumps with two spoons. You can also use a smaller disher (one of those spring-loaded scoopers).

    Watch this 7-min video of me just forming the meatballs by hand! I made this video for those who want to see the technique several times over, so you don't have to keep rewinding the video. You can have it playing in the kitchen while you make the meatballs, and it'll be like we're doing it together 🙂

    YouTube video

    Substituting Other Meats

    In Thailand pork is the most popular kind of look chin, hence this recipe. But you can use the same recipe and make beef or chicken meatballs instead. For the pork ones I'm using lean ground pork because fatty ground pork yields meatballs that are too soft. But if using beef, do not use lean or the balls will be too firm as I discovered myself. Beef is a chewier meat so it needs a bit more fat to help tenderize. I have never made them with chicken, but I suspect that you would need to use lean chicken because chicken is a tender meat.

    What to Use Look Chin For?

    These are SO versatile! Here are some ideas:

    • You can put them into noodle soups. You can even use the cooking liquid as the base for your broth.
    • Skewer and grill them. You can find these skewered look chin at many open air markets in Thailand. See recipe for the dipping sauce.
    • Eat them straight up like appetizers (think cocktail wieners), you can use the dipping sauce in the recipe provided.
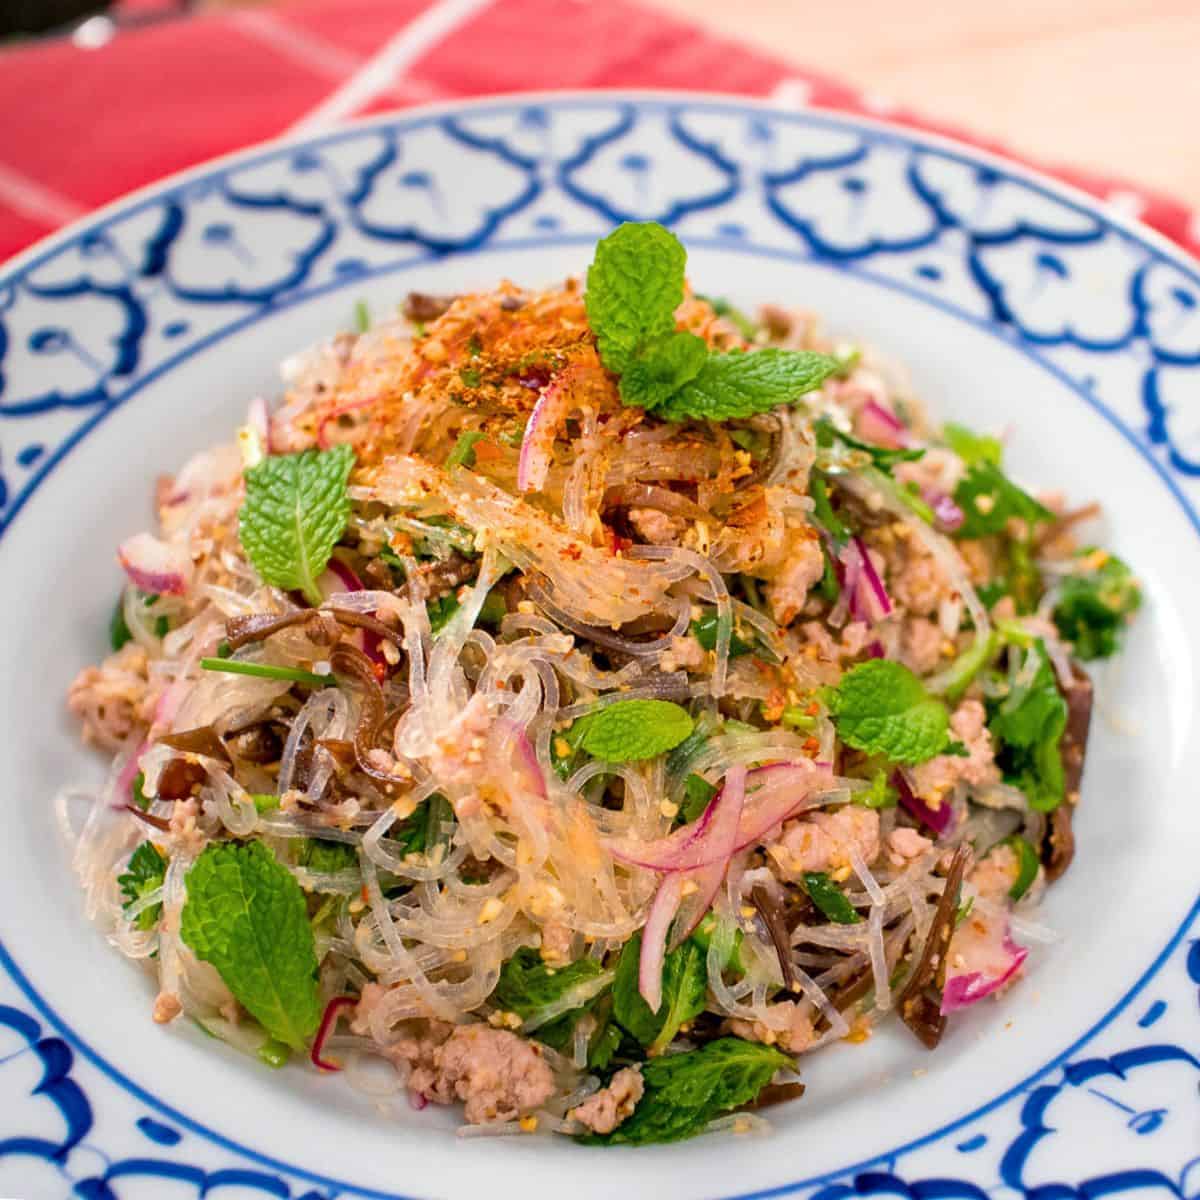
    • Add them into any soups, stews, or curries.
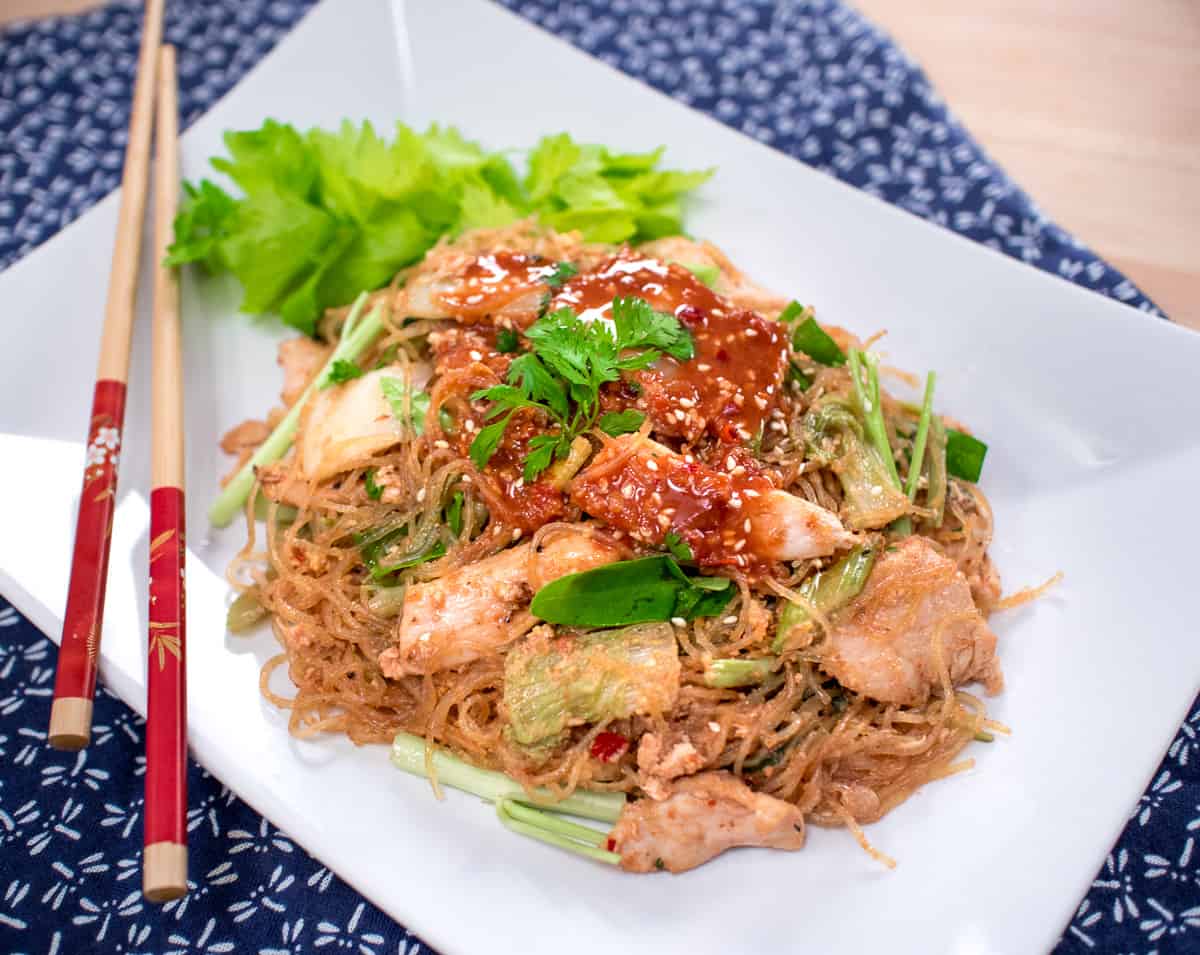
    • Use them in stir-fries.
    • Put them in a hot dog bun and dress it like you would a regular hot dog. I have tried this, it's awesome!
    • Can't use them up? Freeze them!

    Watch The Full Video Tutorial!

    All my recipes come with step-by-step video tutorials with extra tips not mentioned in the blog post, so make sure you watch the video below to ensure success - and if you enjoy the show, please consider subscribing to my YouTube channel. Thank you!

    Print
    clock clock iconcutlery cutlery iconflag flag iconfolder folder iconinstagram instagram iconpinterest pinterest iconfacebook facebook iconprint print iconsquares squares iconheart heart iconheart solid heart solid icon

    Homemade Asian Pork Meatballs (look chin moo)

    5 Stars 4 Stars 3 Stars 2 Stars 1 Star 5 from 6 reviews
    • Author: Pailin Chongchitnant
    Print Recipe
    Pin Recipe

    Ingredients

    Look Chin

    • 1 tsp black peppercorns
    • 5 cloves garlic
    • 500g lean ground pork
    • ½ tsp salt
    • 2 Tbsp soy sauce
    • 1 Tbsp + 1 tsp sugar
    • 2 Tbsp tapioca starch
    • ½  teaspoon baking powder 
    • 100g ice cubes

    Dipping Sauce for Look Chin (Nam Jim Look Chin)

    • Sweet chili sauce (store bought or homemade)
    • Sriracha (store bought or homemade)

    Ingredients and Kitchen Tools I Use

    Want to save this recipe?

    We can email this post to you, so you can come back to it later!


    Instructions

    1. Grind peppercorns in a mortar and pestle into a powder, then add garlic and pound into a fine paste.
    2. Add the garlic paste and all remaining ingredients, except the ice cubes, into a food processor.
    3. Process the pork until very smooth, adding ice cubes gradually as the machine grinds. Stop to scrape 2-3 times to make sure everything is evenly ground.
    4. Once the pork looks very fine (about 5 minutes on my machine) transfer into a bowl.
    5. In a large pot, add water so that it's about half full. Heat the water on high just until there is steam coming off the top but there is no bubbling in the water. Once this is reached, turn heat down to low to maintain the temperature.
    6. Using the technique shown in the video, form the meatballs and place them into the hot water one at a time until you have finished. If you want to see the technique over and over again without having to rewind, watch this 7-min video of me just squeezing meatballs! Keep an eye on the temperature to make sure the water isn't bubbling. If you don't need them to be round, you can just use two spoons to form a lump and plop them into the water, or you can also use a small disher.
    7. Once all the meatballs are in the water, let them cook for another 10-15 minutes until the last meatballs are cooked through. TIP: Make the last few meatballs a bit misshapen so you can easily identify them and use them to check doneness.
    8. Once done, remove them with a slotted spoon. They're now ready to use!
    9. Save the cooking water to make soup because it's now very flavourful. I usually just season it more and use it to make noodle soup which I serve with the meatballs I've just made.

    To make grilled, skewered meatballs (look chin ping)

    1. Soak the skewers in water for at least a few hours, preferably overnight.
    2. Skewer the meatballs.
    3. Grill on medium heat, flipping them as needed, until browned on both sides. Alternatively, place them under the oven broiler (high setting) until browned, then flip to brown the other side. To prevent the skewers from burning under the broiler you can cover the exposed part of the skewers with foil; if grilling you and place a sheet of foil under the exposed skewers.
    4. Serve with look chin dipping sauce.
    5. For the dipping sauce: Combine sweet chili sauce and sriracha, starting with the ratio of 2 parts sweet chili sauce and 1 part sriracha. Taste and adjust to your taste.

    Join us on Patreon for Bonus Content!


    Did you make this recipe?

    Tag @HOTTHAIKITCHEN on Instagram and hashtag it #HotThaiKitchen!

    $200 vs $30 Rice Cooker Review & Taste Test

    June 5, 2020 by Pailin Chongchitnant 4 Comments

    Do Rice Cookers Really Make a Difference?

    If you talked to me years ago, I would've told to just get the cheapest rice cooker - they're all the same, you don't even really need one! But times have changed and so has my mind, haha! Turns out, the rice cooker really makes a difference, and if not in the rice itself, then in the user experience. But is that difference worth the money you pay? Watch the video to find out!

    In Thailand, people don't really put much thought into their rice cookers, and as I've discovered in my taste test, it turns out that it's because white jasmine rice, the rice most Thais eat most of the time, is very forgiving. You can cook it in anything, and as long as you used the right amount of water, it'll turn out fluffy and soft and delicious.

    But not all rice is like that. There is a reason why the Japanese put so much thought into their rice cookers...because Japanese short grain rice is a lot more finicky.

    How I'm Testing

    As you'll see in the video I do two different tests: one for jastmine rice, the other for Japanese short grain rice. And for each type of rice, I cook it in the fancy Zojirushi Micom Neuro Fuzzy rice cooker, my old red Sunbeam ($30 when I bought it), and simply in a pot on the stove. Then I do a blind taste test to see which one I like best!

    Watch the video above to see the verdict!

    PS. I still need to do a test on brown and other whole grain rice!

    Buy The Recommended Rice Cookers Online

    You can check out my "Kit" where I list all my kitchen tools and appliances, including the rice cookers I recommend. These are affiliate Amazon links, so if you buy something on Amazon through my link I will get a little bit of commission.

    Watch The Full Review!

    Vegan Laab with Tofu & Corn

    January 10, 2020 by Pailin Chongchitnant 10 Comments

    I really surprised myself how well this dish turned out! I made a vegan version of laab, a northeastern Thai salad normally made with ground meat, using leftover pressed tofu and corn, and it turned out so well I had to share it!

    It's perfect as an appetizer, served with some lettuce leaves and eaten as a lettuce wrap. Or for a more traditional accompaniment you can serve it with sticky rice or jasmine rice. It's also low carb and super healthy for those of you who might be on an "eat healthy" new year resolution!

    What is Laab?

    Laab is a quintessential dish of northeastern Thailand, a region known as Isaan. It's a homey salad made typically from ground meat, seasoned with lime juice, fish sauce, lots of herbs, and the defining ingredient, toasted rice powder. I always say "you can laab anything" and it's true! It's a flavour that amazingly works with all sorts of ingredients.

    If you search the website for laab you will see many, many varieties - the classic Laab Gai (chicken), Laab Woonsen (glass noodles), Laab Salmon, Laab Kai Jiew (omelette salad), Laab Tod (meatballs), Laab Moo (pork), and of course the Epic Laab Burger - however, this is the first vegan version that I have created a video for.

    Is it Laab? Or is it Larb?

    Laab is sometimes written as "larb" in English, but in Thai you don't pronounce the R so I prefer to spell it with a double A. For those of you who speak with American or Canadian accent, please do not pronounce it as if it were an English word; in other words it is not laRRRRb. It actually drives me a bit crazy when I hear it. In the movie Spiderman Homecoming, there is a scene where Peter Parker and Aunt May are eating Thai food, and they said laRRRb repeatedly and I just about died in the theatre in frustration, lol!! Of course you're not at fault if that's how your local Thai restaurant spells it. But now you know better.

    Watch The Full Video Tutorial!

    All my recipes come with step-by-step video tutorials with extra tips not mentioned in the blog post, so make sure you watch the video below to ensure success - and if you enjoy the show, please consider subscribing to my YouTube channel. Thank you!

    Ingredients

    Here are all the ingredients you'll need to make this recipe. For amounts, check out the full recipe card below.

    • Uncooked jasmine rice or sticky rice (for toasted rice powder)
    • Kaffir lime leave (optional, for toasted rice powder)
    • Pressed tofu
    • Cooked corn kernels (see note)
    • Soy sauce
    • Golden Mountain Sauce
    • Lime juice
    • Roasted chili flakes, to taste, or use any chili flakes you have
    • Thinly sliced shallots
    • Lemongrass, very thinly sliced (optional)
    • Kaffir lime leaves (optional)
    • Mint leaves, torn into small pieces if large
    • Cilantro, chopped 
    • Lettuce or cabbage leaves for serving, optional
    • Jasmine rice or sticky rice for serving, optional

    Note: In the video I used waxy corn which is less sweet and chewier and denser than regular sweet corn. If you're also using waxy corn they take a lot longer to cook, about 45 minutes.

    How to Make Tofu & Corn Laab (Vegan)

    Here are all the steps to make this recipe. If this is your first time, I highly recommend watching the video tutorial to ensure success.

    1. To make toasted rice powder: In a dry saute pan, add the rice and the kaffir lime leaf, if using, and stir constantly over high heat until the rice has a deep brown colour (see video for colour). Remove from heat immediately and transfer into a mortar and pestle or a coffee grinder. Grind until fine (yes, grind the lime leaf too), but if using a coffee grinder, be careful not to over-grind—you don't want it to look like flour, you still want a bit of grittiness to it.
    2. Crumble the tofu into small pieces with your hands.
    3. In a medium pot, add about 2 tablespoon of water then turn the heat on high. Add tofu and corn and stir until hot.
    4. Turn off the heat then add shallots, lemongrass, kaffir lime leaves, and chilies; stir to mix well.
    5. Add soy sauce, Golden Mountain Sauce and lime juice.
    6. When ready to serve stir in toasted rice powder, mint and cilantro. (Don't add these too far in advance as the rice will absorb the liquid and make it dry, and the herbs will wilt.)
    7. Serve with lettuce leaves and eat like a bite-sized lettuce wrap, or serve with jasmine or sticky rice as part of a meal.

    Recipe Card

    Print
    clock clock iconcutlery cutlery iconflag flag iconfolder folder iconinstagram instagram iconpinterest pinterest iconfacebook facebook iconprint print iconsquares squares iconheart heart iconheart solid heart solid icon

    Tofu & Corn Laab (Vegan)

    5 Stars 4 Stars 3 Stars 2 Stars 1 Star 5 from 3 reviews
    • Author: Pailin Chongchitnant
    • Yield: 2-3 servings
    Print Recipe
    Pin Recipe

    Ingredients

    • 2 Tbsp uncooked jasmine rice or sticky rice (for toasted rice powder)
    • 1 kaffir lime leave (optional, for toasted rice powder)
    • 2 pc pressed tofu (170g)
    • ½ cup cooked corn kernels (see note)
    • 1½  tablespoon soy sauce
    • ½ Tbsp Golden Mountain Sauce
    • 3 Tbsp lime juice
    • Roasted chili flakes, to taste, or use any chili flakes you have
    • 3 Tbsp thinly sliced shallots
    • 2-inch piece lemongrass, very thinly sliced (optional)
    • 3 Kaffir lime leaves (optional)
    • ¼ cup mint leaves, torn into small pieces if large
    • 6-7 sprigs cilantro, chopped 
    • Lettuce or cabbage leaves for serving, optional
    • Jasmine rice or sticky rice for serving, optional

    Note: In the video I used waxy corn which is less sweet and chewier and denser than regular sweet corn. If you're also using waxy corn they take a lot longer to cook, about 45 minutes.

    Shop Ingredients & Kitchen Tools I Use

    Want to save this recipe?

    We can email this post to you, so you can come back to it later!


    Instructions

    1. To make toasted rice powder: In a dry saute pan, add the rice and the kaffir lime leaf, if using, and stir constantly over high heat until the rice has a deep brown colour (see video for colour). Remove from heat immediately and transfer into a mortar and pestle or a coffee grinder. Grind until fine (yes, grind the lime leaf too), but if using a coffee grinder, be careful not to over-grind—you don't want it to look like flour, you still want a bit of grittiness to it.
    2. Crumble the tofu into small pieces with your hands.
    3. In a medium pot, add about 2 tablespoon of water then turn the heat on high. Add tofu and corn and stir until hot.
    4. Turn off the heat then add shallots, lemongrass, kaffir lime leaves, and chilies; stir to mix well.
    5. Add soy sauce, Golden Mountain Sauce and lime juice.
    6. When ready to serve stir in toasted rice powder, mint and cilantro. (Don't add these too far in advance as the rice will absorb the liquid and make it dry, and the herbs will wilt.)
    7. Serve with lettuce leaves and eat like a bite-sized lettuce wrap, or serve with jasmine or sticky rice as part of a meal.

    Join us on Patreon for bonus content & rewards!


    Did you make this recipe?

    Tag @HOTTHAIKITCHEN on Instagram and hashtag it #HotThaiKitchen!

    Classic Thai salad made vegan! Made from pressed tofu, corn, and a refreshing tart dressing. #thairecipe #vegan #hotthaikitchen

    Tom Yum Pizza พิซซ่าต้มยำกุ้ง

    February 8, 2019 by Pailin Chongchitnant 9 Comments

    Add some Thai flavours to your pizza with this Tom Yum Pizza recipe. Tart, bold flavours of lemongrass and lime, on an easy, flavourful homemade dough. And it only takes 5 minutes to cook this pizza! #hotthaikitchen #thaipizza #homemadepizza #tomyum

    Jump to video!


    This is my favourite pizza ever. I was first introduced to the concept of tom yum pizza when I was a teen by none other than Pizza Hut Thailand! They put "tom yum goong pizza" on the menu and I loved it! I loved the bold, bright flavours of lime and lemongrass on an otherwise rich and cheesy pizza.

    Changing up the toppings:

    The most important thing about this recipe is the Tom Yum Pizza Sauce. In fact, if you already make pizza at home, you just need the sauce recipe and apply it to your pizza making regimen, and put whatever toppings you like on it. (Although you might want to check out my brilliant pizza cooking method as well!)

    I'm using classic Tom Yum toppings here: shrimp and oyster mushrooms, through straw mushrooms would be more traditional but I can't get those here. You can change the shrimp to chicken (make sure the chicken is precooked), or add calamari (which is what a big pizza restaurant chain does in Thailand), or keep it meat free and load up on a couple of types of mushrooms. Hey it's pizza, top it with whatever you want!

    I love using fresh mozzarella cheese on pizza, but the regular block type that you need to grate would be fine.

    Storing Leftover Sauce

    The sauce recipe uses up one whole can of tomatoes, but it'll make more than you need if you're only making 2-3 pizzas. You can make about 6-8 10-inch pizzas with this amount of sauce. You can make only half the sauce recipe if you don't want to have much leftover, however, the sauce freezes really well so you can keep it and have it for future pizza cravings! It'll also last about a week in the fridge. You can also thin out the sauce a bit and use it as a pasta sauce as well.

    My Pizza Cooking Method

    The coolest part of this recipe might be the way the pizza is cooked. I use a broiler-skillet method which I got from Serious Eats and I think it's brilliant. Saves so much time and yields better results than baking in the oven. I love that I only need to preheat the broiler, which takes only a few minutes, as opposed to preheating the whole oven to 450°F or 500°F which would take nearly an hour. No pizza stone needed, and the bottom crust still gets a nice crisp, slightly charred bottom. And it's done cooking in 5 minutes!

    Oven Broiler Safety Note:

    I've had one person report to me that when he put his pizza under the broiler, the baking sheet buckled, putting the pizza in direct contact with the broiler element which caught it on fire! Though this has never happened to me personally, and I've made this in 3 different ovens, please watch your pizza carefully if this is your first time using this method. A few things to keep in mind:

    1. When I put my pizza on the highest rack, it is 3 inches away from the element. On your oven, the "highest rack" may put your pizza closer to the element, so if it seems precariously close, use the second highest rack instead and it may just take another minute to cook.
    2. Your baking sheet will warp under the heat; mine does too, but it should return back to its original shape once it comes out of the broiler (you can see in the video that the baking sheet comes out flat, but it did buckle in the oven).
    3. To minimize pan warping, use thicker, sturdier baking sheet rather than thinner ones.
    4. Because the broiler is extremely hot, don't put any liner on the baking sheet (no parchment paper, no silicone mat, etc.). And don't use a non-stick, teflon-coated baking sheet which are not meant to be placed under high heat.

    Watch The Full Video Tutorial!

    All my recipes come with step-by-step video tutorials with extra tips not mentioned in the blog post, so make sure you watch the video below to ensure success - and if you enjoy the show, please consider subscribing to my YouTube channel. Thank you!

    Print
    clock clock iconcutlery cutlery iconflag flag iconfolder folder iconinstagram instagram iconpinterest pinterest iconfacebook facebook iconprint print iconsquares squares iconheart heart iconheart solid heart solid icon
    Add some Thai flavours to your pizza with this Tom Yum Pizza recipe. Tart, bold flavours of lemongrass and lime, on an easy, flavourful homemade dough. And it only takes 5 minutes to cook this pizza! #hotthaikitchen #thaipizza #homemadepizza #tomyum

    Tom Yum Pizza พิซซ่าต้มยำกุ้ง

    5 Stars 4 Stars 3 Stars 2 Stars 1 Star 5 from 6 reviews
    • Author: Pailin Chongchitnant
    • Yield: 2 10-inch pizzas
    Print Recipe
    Pin Recipe

    Description

    Please see broiler safety notes above before making!


    Ingredients

    Dough (make 1 day in advance if possible)

    Makes 2 10-inch pizzas

    • 240g bread flour (see note)
    • 1 tsp salt
    • 1 tsp sugar, granulated
    • ¾ tsp instant yeast
    • ⅔ cup water, room temp
    • 1 Tbsp olive oil (*in the video it says 2 tablespoon which is incorrect, sorry!)
    • 2 tsp vegetable oil

    Tom Yum Pizza Sauce (can be made in advance)

    Makes about 2 cups (see storage notes above)

    • 8 slices galangal
    • 1 stalk lemongrass, bottom half only, thinly sliced
    • 5 Kaffir lime leaves, finely julienned then roughly chopped to shorten
    • 1–3 Thai chilies, or to taste
    • 4 Tbsp olive oil
    • 4 cloves garlic, roughly chopped
    • 1 28-oz (796 mL) can whole peeled tomatoes, unsalted
    • 3 Tbsp Thai chili paste (nam prik pao), store bought or homemade
    • 2–3 tablespoon fish sauce
    • 3–4 tablespoon Lime juice

    Toppings

    For 2 10-inch pizzas

    • 1 head shallot or red onion, thinly sliced, optional
    • 4 oz (120g)  fresh mozzarella, sliced
    • 3.5 oz (100g) oyster mushrooms, bite-sized pieces, tossed lightly in oil
    • 3.5 oz (100g) small shrimp, or is using larger shrimp half them horizontally (see note)
    • ⅓ cup chopped cilantro, optional

    Note: Shrimp cook very quickly so you can use them raw, but it's also okay to start with cooked shrimp. If using other kinds of protein, such as chicken, pre-cook it first so you don't have to worry about whether they're cooked on the pizza.

    Tools: If using my cooking method, you will need a 12-inch flat skillet that can withstand high heat. If you only have a 10-inch skillet, make the pizza a bit smaller so it'll fit into your skillet.

    Kitchen Tools and Ingredients I Use

    Want to save this recipe?

    We can email this post to you, so you can come back to it later!


    Instructions

    For the dough

    1. In a large mixing bowl, whisk together flour, salt, and sugar until combined, then whisk in yeast. Make a well in the centre and add water and olive oil.
    2. Use your hands to gradually incorporate flour into water and knead until moisture is evenly distributed throughout the dough; the dough will look a little rough and not smooth, but that is okay.
    3. Cut dough into 2 equal portions. Place each one in a well-oiled bowl or container large enough to contain double the volume of the dough. Flip dough and move it around so it is coated in oil. Cover and let dough rise in the fridge for at least 1 day and up to 3 days. If in a rush, you can let it rise at room temp for 1 ½ – 2 hours and bake it right away, but the flavour will not be as good this way.
    4. Bring out dough 2 hours from fridge before shaping and baking.

    For the Sauce:

    1. In a medium pot, add olive oil and garlic and cook over low heat for about 3 minutes so garlic is gently bubbling, and smallest bits start to turn golden.
    2. Meanwhile, blitz tomatoes in a blender for a few seconds just until there are no more big pieces—you don't want a smooth puree here.
    3. Add blended tomatoes, Thai chili paste, and 2 tablespoon of fish sauce into garlic pot; stir to mix. Simmer gently for about 1 hour, stirring occasionally, until tomato sauce is thick and luscious.
    4. Meanwhile, in a mortar and pestle, pound lemongrass until fine. Then add galangal, kaffir lime leaves, and Thai chilies and pound until there are no more big pieces of galangal left (lime leaves won't break down completely, that's okay). Alternatively, process herbs in a coffee/spice grinder until fine.
    5. Once sauce is done simmering, add herb mixture and simmer for another 3-5 minutes (it should look a bit too thick right now). Turn off heat and stir in 3 tablespoon of lime juice, which should thin it out to the right consistency.
    6. Taste and adjust seasoning with remaining fish sauce and lime juice as needed. The sauce should have a bold tom yum flavour that leads with tartness, balanced by sweetness from chili paste.

    Assembly:

    1. Bring dough out from fridge 2 hours before baking so it comes to room temp.
    2. Get your toppings ready; toss mushrooms in a bit of oil to prevent them from drying out in the oven.
    3. Preheat broiler to high while you shape the pizza, and set rack to its highest position. Note: When I put my pizza on the highest rack, it is 3 inches away from the element. If your highest rack puts your pizza closer than that, see safely notes above.
    4. On a baking sheet that can be used under the broiler (so no non-stick sheets), sprinkle a generous amount of flour on it. Note: Do not line the sheet with any parchment, silicone mat, or anything else.
    5. Place one piece of dough on baking sheet and press it down into a flat disk with your fingers. 
    6. Generously flour the top of dough, then flip it upside down. Then stretch or roll pizza out to 10 inches. You can stretch it upto 12 inches if you like really thin crust, but make sure it will still fit in the skillet if you're using my method of cooking. As you stretch dough, keep moving it to check that it slides freely; if not, add extra flour to the bottom to ensure that it will not stick.
    7. Spread sauce onto dough (you'll need about ¼ cup). Then top with shallots, shrimp, cheese and mushrooms.
    8. Broil the top of pizza for 2 – 2 ½  minutes or until the crust is well browned. Watch the pizza in the first minute and rotate the pan if browning is uneven. Baking sheet will buckle a bit under high heat, this is okay, as long as the pizza is not touching the element.
    9. While pizza is broiling, preheat a dry 12-inch skillet on the stove over high heat.
    10. Once pizza edges are puffed and browned, remove from broiler and use a spatula to quickly slide pizza onto preheated skillet to cook the bottom for another 2 minutes, or until bottom is well browned.
    11. Slide pizza onto a serving plate and sprinkle with chopped cilantro. Serve immediately!

    Join us on Patreon for bonus content & rewards!


    Did you make this recipe?

    Tag @HOTTHAIKITCHEN on Instagram and hashtag it #HotThaiKitchen!

    Add some Thai flavours to your pizza with this Tom Yum Pizza recipe. Tart, bold flavours of lemongrass and lime, on an easy, flavourful homemade dough. And it only takes 5 minutes to cook this pizza! #hotthaikitchen #thaipizza #homemadepizza #tomyum

    Thai Sukiyaki Stir-Fry (suki hang)

    August 2, 2019 by Pailin Chongchitnant 2 Comments

    a plate of suki hang with chopsticks

    Sukiyaki might sound like a Japanese dish, and it is, but trust me, this dish is very Thai. Here's the story. Sukiyaki is a Japanese hot pot, and Thai people took the inspiration and started making our own Thai hot pot served with a spicy, flavourful red sauce that's more suited to the Thai palate. We still call this hot pot sukiyaki, or more commonly just "suki" for short.

    Then the hot pot evolved into a noodle soup, using that same sauce to flavour the broth, and we call that "suki nam", the word "nam" referring to the broth (get suki nam recipe here). And THEN suki nam evolved into this dish, "suki hang" สุกี้แห้ง or "dry suki" which is the stir-fried version. The common thread among these versions is the luscious red sauce that is uniquely delicious.

    Key Ingredient: Red Bean Curd

    The red in the sauce comes from this important ingredient that you'll need to get: Red bean curd. Red bean curd is called "taohu yee" in Thai, but it is originally a Chinese ingredient. You can think of it as a type of fermented tofu, and the red colour comes from the specific fungus that's responsible for the fermentation. It's got a very unique, funky flavour unlike any other ingredients.

    It's widely available at most Chinese supermarkets. Once you've bought it, here are a couple other dishes you can make using the rest of your red bean curd: Yen Ta Fo, pink noodle soup and Mee Gati, pink noodles with coconut gravy.

    Advanced Prep Tip

    The sauce can be made in advance, and once this is done, the meal comes together very quickly, making it very weeknight-friendly. You can keep the sauce in the fridge for a few weeks. For longer term storage, cook the sauce first and bring it to a boil, then store it in a well-sealed jar in the fridge. This should last at least a few months.

    Watch The Full Video Tutorial!

    Ingredients and Notes

    Here are all the ingredients you'll need to make this recipe with important notes. For amounts, check out the full recipe card below.

    • Marinated chicken (recipe below), or another protein of your choice. Other typical protein options are thinly sliced pork, shrimp, and squid. A seafood mix is also popular. You can use thinly sliced beef although it isn't commonly done. 
    • Napa cabbage, cut into bite-sized pieces
    • Water spinach or another leafy greens such as spinach. This is to add some nice colour to the dish, julienned carrot works too.
    • Chinese celery or regular celery. Cut Chinese celery into 2-inch pieces, if using regular celery thinly slice them.
    • Glass noodles, soaked in room temp water for 10 minutes and cut a couple of times to shorten. Make sure you buy Thai glass noodles made from mung bean starch, not Korean ones.
    • Suki sauce (recipe below)
    • Eggs
    • Green onions and/or cilantro for garnish

    Marinated Chicken

    • Chicken thigh or breast, boneless, skinless, cut into bite-sized pieces
    • Soy sauce
    • Oyster sauce
    • Sesame oil

    Suki Sauce "Nam Jim Suki"

    You can make suki sauce in advance and store in the fridge for a few weeks. If you want to keep it longer, cook the sauce first and it should last in the fridge for a few months.

    • Thai chilies, to taste, I put 2 for a medium heat. When in doubt, add only 1.
    • Garlic
    • Granulated sugar
    • White sesame seeds, toasted
    • Red bean curd, see above for picture and description.
    • White vinegar
    • Toasted sesame oil
    • Soy sauce

    How to Make Sukiyaki Stir-Fry (suki hang)

    Here are all the steps to make this recipe. If this is your first time, I highly recommend watching the video tutorial to ensure success.

    For Suki Sauce:

    1. In a mortar and pestle, pound garlic and chilies into a rough paste, then add the sugar and grind until fine.
    2. Add sesame seeds and crush briefly just to break them up and release aroma.
    3. Add bean curd cubes and mash with pestle until there are no more lumps.
    4. Add all remaining liquid ingredients and stir to mix.

    For the Suki Hang

    1. Combine chicken with all marinade ingredients and mix well; marinate for at least 20 minutes.
    2. In a wok heat just enough oil to coat the bottom over medium high heat. Once hot add chicken and sear without stirring until about halfway done. Flip the chicken then toss until completely done. Remove and set aside.
    3. Add a little more oil to wok if needed. On medium high heat add napa cabbage, water spinach, and celery and toss a couple of times just to coat in oil.
    4. Add noodles and sauce and keep tossing until noodles are cooked and all the sauce has been absorbed. If noodles dry out before it is cooked, add a splash of water.
    5. Add chicken back into the wok and toss to mix, then push noodles to one side to make room for eggs. Add a little more oil to the empty space, add eggs, then break the yolks. Put the noodles over the eggs and let sit for about 30 seconds so the eggs can cook. 
    6. Toss everything to mix the eggs, then turn off the heat.
    7. Stir in green onions and/or cilantro.
    8. Serve immediately with extra sauce if desired. Enjoy!

    Recipe Card

    Print
    clock clock iconcutlery cutlery iconflag flag iconfolder folder iconinstagram instagram iconpinterest pinterest iconfacebook facebook iconprint print iconsquares squares iconheart heart iconheart solid heart solid icon

    Sukiyaki Stir-Fry (suki hang) สุกี้แห้ง

    5 Stars 4 Stars 3 Stars 2 Stars 1 Star 5 from 2 reviews
    • Author: Pailin Chongchitnant
    • Prep Time: 30 mins
    • Cook Time: 5 mins
    • Total Time: 35 minutes
    • Yield: 2 servings
    Print Recipe
    Pin Recipe

    Description

    Suki hang is a must-try Thai street food that is uniquely delicious. Glass noodles and veggies are stir fried in a luscious red sauce, with juicy marinated chicken. It's as easy as it is flavourful!


    Ingredients

    • 250g marinated chicken (recipe below), or another protein of your choice (see note)
    • 2 cups napa cabbage, bite-sized pieces
    • 1 cups water spinach or another leafy greens, 2-inch pieces
    • 2 stalks Chinese celery or 1 stalk regular celery, cut into thin sticks
    • 40g glass noodles, soaked in room temp water for 10 minutes and cut a couple of times to shorten
    • 4 Tbsp suki sauce (recipe below)
    • 2 eggs
    • Green onions and/or cilantro for garnish

    Marinated Chicken

    • 250g chicken thigh or breast, boneless, skinless, bite-sized pieces
    • 1½ tsp soy sauce
    • 1½ tsp oyster sauce
    • 1 tsp sesame oil

    Suki Sauce "Nam Jim Suki"

    This makes 1 cup, enough for about 4 servings. Any leftovers will keep for a few weeks in the fridge, and longer if you bring the sauce to a boil before storing. If possible, make it a day in advance for best flavour. 

    • Thai chilies, to taste (I put 2)
    • 5 cloves garlic
    • 2 Tbsp granulated sugar
    • 1 Tbsp white sesame seeds, toasted
    • 4 Red bean curd cubes (see video for more info on this item)
    • 2 Tbsp red bean curd juice
    • ¼ cup white vinegar (*In the video I made a mistake and said 1 tablespoon vinegar; ¼ cup is the correct amount)
    • 1 Tbsp toasted sesame oil
    • 1 Tbsp soy sauce

    Note: Other typical protein options are pork, shrimp, and squid. A seafood mix is also popular. You can use beef although it isn't commonly done. 

    Ingredients & Kitchen Tools I Use

    Want to save this recipe?

    We can email this post to you, so you can come back to it later!


    Instructions

    For the Chicken:

    1. Combine all ingredients and mix well; marinate for at least 20 minutes. Meanwhile, make the sauce.

    For Suki Sauce:

    1. In a mortar and pestle, pound garlic and chilies into a rough paste.
    2. Add sugar and grind until fine.
    3. Add sesame seeds and crush briefly just to break them up and release aroma.
    4. Add bean curd cubes and mash with pestle until there are no more lumps.
    5. Add all remaining liquid ingredients and stir to mix.

    To Make the Stir-Fry:

    1. In a wok heat just enough oil to coat the bottom over medium high heat. Once hot add chicken and sear without stirring until about halfway done. Flip the chicken then toss until completely done. Remove and set aside.
    2. Add a little more oil to wok if needed. On medium high heat add napa cabbage, water spinach, and celery and toss a couple of times just to coat in oil. Add noodles and sauce and keep tossing until noodles are cooked and all the sauce has been absorbed. If noodles dry out before it is cooked, add a splash of water.
    3. Add chicken back into the wok and toss to mix, then push noodles to one side to make room for eggs. Add a little more oil to the empty space, add eggs, then break the yolks. Put the noodles over the eggs and let sit for about 30 seconds so the eggs can cook. 
    4. Toss everything to mix the eggs, then turn off the heat.
    5. Stir in green onions and/or cilantro.
    6. Serve immediately with extra sauce if desired. Enjoy!

    Join us on Patreon for bonus content & rewards!


    Did you make this recipe?

    Tag @HOTTHAIKITCHEN on Instagram and hashtag it #HotThaiKitchen!

    Stuffed Chicken Wings Recipe ปีกไก่ยัดไส้

    December 13, 2019 by Pailin Chongchitnant 15 Comments

    A plate of stuffed chicken wings, sliced up, with sweet chili sauce

    This recipe is sponsored by Pine Brand glass noodles.

    A Unique Appetizer for the Holiday Season

    If you're looking for a unique appetizer that will impress your guests, or a dish that can be a conversation starter, look no further! These stuffed chicken wings are SO delicious, can be prepped well in advance, and will likely be something new for your party guests!

    Stuffing chicken wings is a technique that I've only seen done in Asia (do let me know if you've seen it elsewhere!). In Thailand it is done, but it's not the most common of dishes because it does require some skill and time to debone the wings, which I will give you complete guidance for. The result is totally worth the effort, especially for a special occasion that calls for special food!

    Deboning the Wings

    For this recipe I'm starting with the whole wing because I want the wing tips, but I'm removing the drumettes and using just the flat + tip. Some people debone the whole wing, which you can totally do, but if you've never deboned wings before I'd stick to doing just the half because it's much simpler. Also, this makes the wings servable as is, no need to slice, with the wing tip serving conveniently as the stick for people to grab. If you do the whole wing, you'll need to slice them up first otherwise it's too large of a portion for an appetizer. Stuffed whole wings also look kinda funny, so definitely prettier to slice them!

    And because you'll likely need to see the deboning technique more than once, I've made a separate video of me deboning the wings for 9 minutes so you can keep watching without having to rewind the main video. You can also leave it to play while you're doing yours so it's like we're doing it "together" :).

    YouTube video

    What are Glass Noodles Exactly?

    Glass noodles are widely available, but few people actually know what they're made from! They are made from mung bean starch which has a special property where they turn clear when cooked. This is why some brands will label them "bean vermicelli". Good quality glass noodles are made from 100% mung bean starch, and Pine Brand is one them. Some less expensive brands (not that glass noodles are expensive to begin with) have other starches such as pea or potato starches mixed in. Why is this important? 100% mung bean starch makes the noodles more resistant to overcooking and I think they have a better texture as well.

    Advance Prep Tips

    The great thing about this recipe is you can split up the work in a number of ways. The day before serving you can debone and marinate the wings, and/or make the filling, then the day of you can stuff and bake. Or you can stuff them the day before and just take them out and bake on party day. If you want to spread the work even more, you can also make the filling 2 days in advance, debone and stuff the next day, and bake on party day. As always, if you're prepping raw meats more than just one day in advance, make sure your meats are fresh and kept cold as much as possible.

    Watch The Full Video Tutorial!

    All my recipes come with step-by-step video tutorials with extra tips not mentioned in the blog post, so make sure you watch the video below to ensure success - and if you enjoy the show, please consider subscribing to my YouTube channel. Thank you!

    Print
    clock clock iconcutlery cutlery iconflag flag iconfolder folder iconinstagram instagram iconpinterest pinterest iconfacebook facebook iconprint print iconsquares squares iconheart heart iconheart solid heart solid icon
    Thai Stuffed Chicken Wings Recipe

    Stuffed Chicken Wings Recipe ปีกไก่ยัดไส้

    5 Stars 4 Stars 3 Stars 2 Stars 1 Star 4.2 from 5 reviews
    • Author: Pailin Chongchitnant
    Print Recipe
    Pin Recipe

    Ingredients

    Wings

    • 12 pc whole chicken wings with wing tips attached (see note)
    • 2 tsp soy sauce
    • 1-2 teaspoon black/dark soy sauce
    • ½ tsp sugar

    Filling

    • 2 medium sized dried shiitake mushrooms (10g), soaked in hot water until soft
    • 20 g glass noodles (half a small Pine Brand package)
    • 3 cloves garlic
    • 6 cilantro stems, chopped
    • ¼ tsp black peppercorns
    • ½ tsp white peppercorns
    • 150g ground pork, not lean
    • ⅓ cup grated carrot
    • 1 green onion, chopped
    • 2 tsp oyster sauce
    • 2 tsp soy sauce
    • 1 ½ tsp fish sauce
    • 1 ½ tsp sugar
    • Sweet chili dipping sauce, store bought or use this easy homemade recipe

    Note: I'm starting with whole wings because I want the wing tips, but I will not be using the drumettes. Save the drumettes for another recipe such as this turmeric chicken soup or chicken potato soup.

    Ingredients and Kitchen Tools I use

    Want to save this recipe?

    We can email this post to you, so you can come back to it later!


    Instructions

    1. Before you start make sure you soak the mushrooms first cuz that can take quite a while (30 mins - 2 hrs) especially if they are thick.
    2. If baking right away preheat the oven to 450°F (220 °C).
    3. Soak glass noodles in room temp water for 10 minutes. Drain, keeping the noodles in straight rows as much as possible (this will make cutting them easy).
    4. While noodles are soaking, prep the chicken by first removing the drumettes, and then deboning the flats, keeping the tips attached. See the video for technique.
    5. Marinate the deboned wings in soy sauce, 1 teaspoon black/dark soy sauce and sugar. If the colour doesn't look dark enough you can add a bit more of the black/dark soy sauce. Let it sit while you make the filling. You can also do this part 1 day in advance.

    To make the filling:

    1. Cut soaked noodles with scissors into ¾-inch pieces.
    2. Remove mushrooms from soaking water (you can save the water for cooking if you want), squeeze out excess water, remove stems, and finely dice.
    3. Grind peppercorns in a mortar and pestle until fine, add garlic and cilantro stems and pound into a paste.
    4. In a mixing bowl combine the garlic paste, ground pork, glass noodles, grated carrot, green onions, shiitake mushrooms, oyster sauce, fish sauce, soy sauce and sugar. Knead together with your hands until well mixed.
    5. Line a baking sheet with parchment paper or oiled aluminum foil.
    6. Stuff the wings, make sure to push the filling in tightly so there are no air pockets. Keep the filling flush with the edge of the wings, and no more, because the wings will shrink when cooked.
    7. Place wings on the baking sheet and bake bake for 20-25 mins or until nicely  browned.
    8. You can slice them or leave them whole for serving. Serve with sweet chili dipping sauce.

    Join us on Patreon for bonus content & rewards!


    Did you make this recipe?

    Tag @HOTTHAIKITCHEN on Instagram and hashtag it #HotThaiKitchen!

    Thai Glass Noodle Salad (laab woonsen)

    March 22, 2019 by Pailin Chongchitnant 3 Comments

    Laab woonsen Thai glass noodle salad

    When most people think about Thai glass noodle salad, they are often thinking of yum woon sen, but this one laab woonsen is another iteration that is just as tasty. It's easy, healthy, spicy, and full of fresh herbs. If you're familiar with the classic laab which is quite meaty, you can think of this as the lighter noodley version!

    a plate of laab woonsen

    What is laab?

    In its classic form, laab is a spicy and tart northeastern Thai salad made from ground meat, toasted rice powder, and lots of fresh herbs. Traditionally laab is meat-based, but because it's got such a delicious flavour, nowadays people make laab out of just about anything.

    So laab woonsen is more of a modern variation of traditional laab, but it has become quite popular so you can find it at many restaurants in Thailand that serve Northeastern or Isaan food.

    If you want to check out other kinds of "non-traditional laab" see my recipes for Laab Omelette, Laab Salmon, Laab Burger and Laab Meatballs. As I said, laab is a really great flavour that you can turn into so many delicious things!

    Is it a Laab? Or larb? Or laap?

    This popular dish goes by many English spellings: laab, larb, or laap are a few common ones you see on Thai restaurant menus. Spell it how you want, but for the love of god do NOT pronounce the "r" (I'm looking at us North American English speakers here). It is not "laRRRRb". It should be pronounced quite simply: laab.

    Writing out Thai words in English is a challenge because English has such limited consonants and vowels compared to Thai, this is why people will be looking for a dish on my website and they can't find it because they spell it differently!

    Watch The Full Video Tutorial!

    All my recipes come with step-by-step video tutorials with extra tips not mentioned in the blog post, so make sure you watch the video below to ensure success - and if you enjoy the show, please consider subscribing to my YouTube channel. Thank you!

    Print
    clock clock iconcutlery cutlery iconflag flag iconfolder folder iconinstagram instagram iconpinterest pinterest iconfacebook facebook iconprint print iconsquares squares iconheart heart iconheart solid heart solid icon
    Laab woonsen Thai glass noodle salad

    Spicy Thai Glass Noodle Salad (laab woonsen)

    5 Stars 4 Stars 3 Stars 2 Stars 1 Star 5 from 3 reviews
    • Author: Pailin Chongchitnant
    • Prep Time: 15 mins
    • Cook Time: 15 mins
    • Total Time: 30 minutes
    • Yield: 3 servings
    Print Recipe
    Pin Recipe

    Description

    A lesser known version of the classic laab salad. Glass noodles and ground meat are tossed with a spicy lime dressing with aromatic toasted rice powder. It's also loaded with fresh herbs. It's easy, healthy, and is very quick to make for a weeknight meal! 


    Ingredients

    • 40 g dry glass noodles (see note)
    • 15 g dried black fungus mushroom, aka wood ear or cloud ear mushrooms
    • 3 Tbsp uncooked jasmine or sticky rice
    • 200g ground pork or chicken, preferably not lean
    • 1 head shallots, thinly sliced
    • 1 ½ Tbsp fish sauce
    • 2 Tbsp fresh lime Juice
    • Roasted chili flakes, to taste (see note)
    • ½ cup chopped cilantro
    • 1 green onion, chopped
    • ½ cup mint leaves, roughly chop large leaves

    Ingredients & Kitchen Tools I Use

    Want to save this recipe?

    We can email this post to you, so you can come back to it later!


    Instructions

    1. Soak dried mushrooms in hot water for 10-15 minutes until the soften.
    2. In a separate bowl, soak glass noodles in room temp water for 10 minutes.
    3. Meanwhile, make toasted rice powder: In a dry skillet, toast uncooked rice over high heat, stirring constantly, until it has a deep golden brown colour. Remove from pan, then pound in a mortar and pestle or grind in a coffee grinder into a powder. Be sure not to grind it so fine that it's like flour, you want a bit of grittiness.
    4. Once noodles are done soaking, drain and use scissors to cut into shorter, easier to eat pieces (I make about 3-4 cuts).
    5. Once mushrooms are done soaking, drain and cut into thin ribbons, removing any hard “core” pieces you find.
    6. Bring 2-inches of water to a boil in a small pot, add noodles and mushrooms and cook 2-3 minutes until noodles are done. 
    7. Place the drained noodles in a mixing bowl and put the pot you used to cook the noodles back on the stove.
    8. Add about 1 tablespoon of water to the pot and turn the heat on medium high. Add the ground pork and cook, stirring constantly, until done. Add cooked pork to noodles along with all the juices.
    9. While noodles are still hot, toss in shallots so the heat can help wilt the shallots slightly. Then add fish sauce, lime juice, chili flakes and toss well.
    10. Add toasted rice powder and all fresh herbs, toss well, then taste and adjust seasoning as needed.
    11. Serve immediately.

    Join us on Patreon for Bonus Content and Rewards!


    Notes

    1. Glass noodles are often labeled "bean threads" or "bean vermicelli" because they're made from mung bean starch. Best quality ones are made from 100% mung bean starch (like one I used in the video), though it is not necessary if you can't find them.
    2. Roasted chili flakes give smokiness in addition to spiciness, though you can just use regular chili flakes as well. To make roasted chili flakes, toast some Thai dried chilies in a dry saute pan, stirring constantly, until the darken slightly and develop a smokey flavour. Grind with a coffee grinder.
    3. I use some of the noodle cooking water to cook the pork, but this is done simply for convenience since the water is already hot. You can also just add a little fresh water to the pot if you forget to do this, because unlike pasta cooking water, the cooking water from glass noodles are tasteless and starchless, so it really doesn't add anything in terms of flavour.

    Did you make this recipe?

    Tag @HOTTHAIKITCHEN on Instagram and hashtag it #HotThaiKitchen!

    How to Freeze a Thai Curry

    April 5, 2019 by Pailin Chongchitnant 2 Comments

    How to Make Space-Saving Freezer Thai Curry

    Jump to video!


    As my pregnancy came to its last weeks, freezer meals were on top of my mind in preparation for this baby! But with an always-packed freezer, I have to be conscious of how much space things take.

    Here's how I make Thai curries for the freezer that will reheat well AND will not take up unnecessary space. This video isn't so much as recipe, but more of a tips and tricks video. You can apply this method to any of my coconut-based Thai curry recipes. And now you will have a meal that's ready to be served in just a few minutes!

    Tricks & Tips for Making Freezer Curries that Reheat Well and Saves Space

    1. Concentrate the sauce. When making a freezer curry I reduce the amount of sauce down to only what's necessary to cook the meat. Then I simply add more water when I reheat it! If you're working with a recipe that calls for stock or water in addition to coconut milk, be sure to omit it and and add it when you reheat. You will still reduce the coconut milk as shown in the video.
    2. Use overcook-resistant meats. Because you need to reheat the curry, the chances of you overcooking the meat is high. So don't freeze protein that is not something you want to eat if it's overcooked. For example, I really dislike overcooked chicken breast, so I opt for thighs instead. Apart from chicken, any stewed and braised meats are perfect as they are essentially overcooked-proof.
    3. Consider adding vegetables when you reheat. If you are particular about veggie texture, please note that thawed vegetables will be completely soft, so if you like that "al dente" or firm vegetables, I recommend adding them at the end when you reheat. Most veggies only take a couple of minutes to cook anyway, and this way you save even more space!
    4. If freezing veggies, choose them wisely. Of course you CAN add in veggies if you want to make it a microwave-ready meal. Here's the rule of thumb: Choose vegetables with low water content. Water turns into ice crystals in the freezer, and those ice crystals are sharp and they puncture the cells of the vegetables causing them to be soft when thawed (which is why thawed berries "bleed" out their juices). Broccoli, cauliflower, potato, bell peppers, peas are some vegetables that will be intact when thawed. Bamboo shoots in particular will come out almost exactly the way it went in!
    5. If possible, add delicate herbs when reheating. Delicate herbs such as Thai basil will look and taste much better if you add them at the end. This is not to say that you cannot freeze the curry with Thai basil, but just so you are aware that the Thai basil will be dark and mushy when thawed.

    Which curry freezes the best?

    Any kind of curry sauce will freeze equally well, however, there is one curry that lends itself particularly well to freezing and that is panang curry. This is because panang has a very small amount of sauce naturally, and doesn't have any vegetables or delicate herbs, so you don't have to make any modification to the recipe and just freeze it as is!

    Bonus content for Patreon members: For this episode I share what other foods I regularly freeze which makes my cooking much easier. Click here to learn more about becoming a Patreon member!

    Watch The Full Video Tutorial!

    All my recipes come with step-by-step video tutorials with extra tips not mentioned in the blog post, so make sure you watch the video below to ensure success - and if you enjoy the show, please consider subscribing to my YouTube channel. Thank you!

    Print
    clock clock iconcutlery cutlery iconflag flag iconfolder folder iconinstagram instagram iconpinterest pinterest iconfacebook facebook iconprint print iconsquares squares iconheart heart iconheart solid heart solid icon
    Freezer red Thai curry

    Freezer Red Curry with Chicken

    5 Stars 4 Stars 3 Stars 2 Stars 1 Star No reviews
    • Author: Pailin Chongchitnant
    • Yield: 4 servings
    Print Recipe
    Pin Recipe

    Description

    This video isn't so much a "recipe", as you can apply this method to any of my curry recipes. Having said that, this recipe below is a what I made in the video


    Ingredients

    • 50g (3-4 Tbsp) red curry paste (or another paste of your choice)
    • 1 ¾ cups (420 ml) coconut milk
    • 1 lb (450g) chicken thighs, boneless, skinless, 1.5-inch pieces
    • 1-2 tablespoon fish sauce (this depends on the saltiness of your curry paste, if not sure, start with 1 and you can add more when you reheat) 
    • 1 ½ Tbsp palm sugar, chopped

    Optional:

    • 5 kaffir lime leaves, recommended if making red, green or panang curry
    • 1 ½ cups (approx.) vegetables of your choice (see notes above regarding freezing vegetables)

    For Reheating:

    • 1 cup unsalted chicken stock or water
    • 1 ½ cups vegetable of your choice (if you didn't add it prior to freezing)
    • A big handful of Thai basil, optional
    • Cooked jasmine rice for serving (which you can also freeze!)

    Want to save this recipe?

    We can email this post to you, so you can come back to it later!


    Instructions

    Make the curry:

    1. Reduce ¾ cup coconut milk in a pot until thick, then add curry paste and saute with the coconut milk for a few minutes until coconut oil separates from the paste, or until the paste is very thick. 
    2. Add the remaining coconut milk , 1 tablespoon fish sauce and 1 tablespoon palm sugar, and simmer for 7-10 mins to reduce liquid volume by about half. Note: I keep the seasoning on the light side for now so I have room to adjust when I reheat and add fresh veggies to it. 
    3. Add chicken (or whatever meat you're using) and kaffir lime leaves, if using, and cook another 15-20 mins until chicken is fork tender. If using another meat, adjust cooking time accordingly.
    4. I stop and freeze the curry at this point, and I will add vegetables, fresh herbs, and more water/stock when I reheat. But if you want, you can add in some vegetables now (see note above).

    To freeze:

    1. Put the curry into freezer bags, dividing it into portions that you will most likely eat at a time. So for me, I divide it into 2 servings per bag. 
    2. Removing as much air from it as you can before closing, and place in a large bowl of cold water to cool it down quickly.
    3. Once cool, dry and label the bags, you might also indicate that it’s concentrated and needs diluting in case you forget! 
    4. Lay the bags flat to freeze, pressing it down so it has even thickness. This will make is fast to thaw.

    To reheat: 

    1. Bring out frozen curry and soak the bag in a bowl of hot tap water for a few minutes just until it can slide out of the bag. Meanwhile, bring water or stock to a full boil in a pot (if you divided the curry into portions, make sure you divide the water accordingly.)
    2. Slide the curry out into the pot. Cook over medium heat until everything is melted. Bring to a simmer then add whatever vegetables you want and cook till they're done.
    3. Stir in any fresh herbs, such as Thai basil. 
    4. Taste and adjust seasoning.

    If you don’t need to add any veggies you can microwave it:

    1. Place the curry bags in a bowl of hot tap water just until it can slide out.
    2. Break the curry into chunks and add to a microwave-safe bowl.
    3. Add only half of the water or stock called for, then microwave until hot, stirring a few times in between.
    4. Stir in fresh herbs at the end if desired.
    5. Taste and adjust seasoning, adding more of the remaining water/stock as needed to adjust consistency and flavour. 

    Did you make this recipe?

    Tag @HOTTHAIKITCHEN on Instagram and hashtag it #HotThaiKitchen!

    Tricks & tips for making a Thai curry for the freezer so that it will reheat well AND saves you some freezer space. Try it and I promise you wouldn’t know it was ever frozen! #freezermeal #freezercurry #thaifood #hotthaikitchen

    Red Rubies Dessert (Tub Tim Grob)ทับทิมกรอบ

    December 27, 2019 by Pailin Chongchitnant 18 Comments

    Jump to video!


    This is a beautiful, yummy, classic Thai dessert that's super easy! It's so easy you barely need a recipe. Once you understand what it's made from, and how it's done, most people can just wing it. Water chestnuts are coated in a soft and chewy tapioca gel, served in a pandan-scented coconut syrup and ice. Ah....so refreshing!

    Watch The Full Video Tutorial!

    All my recipes come with step-by-step video tutorials with extra tips not mentioned in the blog post, so make sure you watch the video below to ensure success - and if you enjoy the show, please consider subscribing to my YouTube channel. Thank you!

    Beautiful and easy traditional Thai dessert that's vegan and gluten free! Crunchy water chestnuts in soft and chewy tapioca gel in scented coconut broth. #thaidessert #vegandessert #glutenfree
    Print
    clock clock iconcutlery cutlery iconflag flag iconfolder folder iconinstagram instagram iconpinterest pinterest iconfacebook facebook iconprint print iconsquares squares iconheart heart iconheart solid heart solid icon

    Red Rubies Dessert (Tub Tim Grob)ทับทิมกรอบ

    5 Stars 4 Stars 3 Stars 2 Stars 1 Star 4.8 from 4 reviews
    • Author: Pailin Chongchitnant
    • Yield: 4 servings
    Print Recipe
    Pin Recipe

    Ingredients

    The Rubies

    • 1 8oz-can whole water chestnuts (you can also use fresh)
    • Red food colouring or beet juice
    • ¼ - ½  cup tapioca starch

    Syrup

    • ½ cup sugar
    • 1½ cup water (or fresh jasmine water, see note)
    • 1 pandan leaf
    • Optional: a dash of rose water or orange blossom water.

    Coconut Milk

    • ¾ cup coconut milk
    • ¼ cup water
    • 1 pandan leaves
    • ⅛  tsp salt

    For serving

    • Crushed ice
    • Ripe jackfruit (fresh or canned in syrup), optional
    • Young coconut meat, optional

    In Thailand we make jasmine water by floating fresh jasmine flowers on water in a covered container overnight, and then we use that water to make the syrup. For a different, but still floral, flavour, you can use a little bit of rose water or orange blossom water instead. Commercially available rose water and orange blossom water are very strong, so add just a tiny little bit at a time (¼ or ½ tsp) until the desired strength is reached.

    Ingredients and Kitchen Tools I Use

    Want to save this recipe?

    We can email this post to you, so you can come back to it later!


    Instructions

    1. Cut water chestnuts into about 1cm cubes.
    2. Add just enough water to cover chestnuts, then add red food colouring until the water is bright red (about 10-15 drops). Or add less for lighter colour.
    3. Meanwhile, make syrup: boil pandan leaves in water for 10 minutes. Then add sugar and stir to dissolve. Chill completely.
    4. Make coconut milk: Boil coconut milk, salt, water and pandan leaves for 5 minutes. Chill.
    5. Bring a big pot of water to a boil. Meanwhile, drain the chestnuts and place in a mixing bowl.
    6. Sprinkle about 2 tablespoon of the tapioca starch and toss to coat. Then add another 2 tablespoon and toss again to coat. Keep adding until all pieces are completely coated in starch (they look white) and are not sticking together. For a thin coating, you'll need about ¼ cup total. For thicker coating you may need up to ½ cup. I like just a little more more than ¼ cup.
    7. Once done, put them in a strainer and shake off excess starch.
    8. Prep an ice water bowl for chilling the rubies after cooking.
    9. To cook the rubies, sprinkle half of the rubies into rapidly boiling water, then stir briefly. Boil them for about 2-3 minutes (once they float, let them boil for another minute or so).
    10. Scoop out a small amount (tester amount) with a slotted skimmer then dunk them into the cold water bowl, keeping them in the skimmer for a few seconds just until the coating "settles" into a clear gel. Look to see if there are lot of white, uncooked starch spots on the rubies, if so, put them back into the pot and boil for another minute. If you only see white spots on a few of them, this is okay. Once done, fish out the remaining rubies and place them into cold water.
    11. Repeat #9 and #10 for the other half.
    12. Once cool, drain them. It's best for the texture to not refrigerate these but they will last all day at room temp so you can make them the night before and keep in a cool place until serving time.
    13. To serve, put a scoop of the rubies into a serving bowl, add jackfruit and/or young coconut meat if using. Spoon the syrup over, just until it almost covers the rubies. Top with a couple of tablespoons of coconut milk, but this amount is flexible - I typically do about 2 parts syrup to 1 part coconut milk. Add ice, stir it around so it's really cold, then enjoy!
    Join us on Patreon for bonus content and rewards!

    Did you make this recipe?

    Tag @HOTTHAIKITCHEN on Instagram and hashtag it #HotThaiKitchen!

    Quick & Easy Congee with Meatballs

    April 19, 2019 by Pailin Chongchitnant 6 Comments

    Quick congee

    Breakfast in Thailand

    There are not many dishes in Thailand that are considered specifically "breakfast food". Our breakfast often looks like lunch, snacks, or even dinner foods. Growing up in Thailand my breakfast was often just leftover dinner!

    Congee is the one exception. Congee, or what we call "jok" in Thai, is one of the few dishes considered "breakfast" and you can easily find it on the streets of Thailand in the morning (although you can buy jok at all times of the day, even night time, too.)

    Slow VS Quick Method for Making Congee

    I have a video that shows you the traditional way of making congee from scratch, starting with raw rice, just like street vendors do. This takes a long time stirring broken rice in a pot until thick and creamy.

    This version is much quicker and takes only 30 minutes. It still comes out equally delicious if you ask me, and is the reason why I never go back to the from-scratch method anymore! It does require that you have some rice already cooked (perfect for leftover rice), and you also need some good pork stock or chicken stock on hand as well.

    Watch The Full Video Tutorial!

    All my recipes come with step-by-step video tutorials with extra tips not mentioned in the blog post, so make sure you watch the video below to ensure success - and if you enjoy the show, please consider subscribing to my YouTube channel. Thank you!

    Ingredients

    Here are all the ingredients you'll need to make this recipe. For amounts, check out the full recipe card below.

    Congee:

    • Cooked jasmine rice, can be leftover
    • Pork or chicken stock, unsalted (or if salted, reduce seasoning)
    • Soy sauce
    • Fish sauce
    • Ground white pepper, to taste
    • Green onion, chopped
    • Ginger, julienned, or more to taste

    Meatballs:

    • Ground pork or chicken, preferably not lean
    • Cloves garlic, finely grated
    • Ground white pepper
    • Soy sauce
    • Fish sauce
    • Sugar
    • Sesame oil (optional)

    How to Make Quick and Easy Congee with Meatballs

    Here are all the steps to make this recipe. If this is your first time, I highly recommend watching the video tutorial to ensure success.

    1. If the rice is chilled, microwave it for a minute so it’s hot, which will help it absorb liquid more readily.
    2.  Add rice to blender along with just enough of the stock to blend. Blend the rice briefly (several seconds) until you have your desired consistency—this could be coarser or finer depending on your preference, but make sure not to over-blend it cuz you do not want a smooth puree! (Tip: You do not actually have to blend the rice at all, but if you use whole rice it'll take longer to break down in the pot.)
    3. Pour blended rice into a heavy-bottomed pot, then use the remaining stock to rinse out the blender so you get everything out and add to the pot.
    4. Add soy sauce and fish sauce and bring rice to a simmer.
    5. Simmer for at least 10 minutes, or up to 20 minutes. The longer you simmer, the softer and smoother the texture will be, but for a “quick” version, I find that 10 minutes will do just fine. Once the rice starts to thicken up, stir frequently with a rubber spatula to prevent the bottom from sticking to the pot.
    6. While the rice is cooking, make meatballs simply by combining all ingredients in a mixing bowl and knead everything together with your hands until smooth (wear gloves if you have them).
    7. When rice is done, add meatballs in chunks directly into the rice using 2 teaspoons. Cook the meatballs for about 3 minutes until done.
    8. Taste and adjust seasoning.
    9. Stir in julienned ginger if you want, or you can leave it for each person to add to their own bowl when serving.
    10. Serve with green onions and extra white pepper if desired. Enjoy!

    If you want to add eggs, you can poach eggs separately and add it to the congee when serving. Or if you want the eggs mixed in, you can crack the eggs right into the congee, let them poach submerged in the congee for 3-4 minutes to firm up the whites slightly, then stir it up to mix into the congee.

    Recipe Card

    Print
    clock clock iconcutlery cutlery iconflag flag iconfolder folder iconinstagram instagram iconpinterest pinterest iconfacebook facebook iconprint print iconsquares squares iconheart heart iconheart solid heart solid icon
    Quick congee

    Quick and Easy Congee with Meatballs

    5 Stars 4 Stars 3 Stars 2 Stars 1 Star No reviews
    • Author: Pailin Chongchitnant
    • Prep Time: 10 mins
    • Cook Time: 20 mins
    • Total Time: 30 minutes
    • Yield: 4 Servings
    Print Recipe
    Pin Recipe

    Description

    This Thai style congee recipe is so quick and easy you can make it on a weekend morning! All you need is some leftover rice 


    Ingredients

    Congee

    • 3 cups cooked jasmine rice, can be leftover
    • 4 cups pork or chicken stock, unsalted (or if salted, reduce seasoning)
    • 1 Tbsp + 1 tsp soy sauce
    • 2 tsp fish sauce
    • Ground white pepper, to taste
    • 1 green onion, chopped
    • 1 inch piece ginger, julienned, or more to taste

    Meatballs:

    • 250 g ground pork or chicken, preferably not lean
    • 2 cloves garlic, finely grated
    • ¼ tsp ground white pepper
    • 1 Tbsp soy sauce
    • 1 tsp fish sauce
    • 1 ½  tsp sugar
    • ½  tsp sesame oil (optional)

    Check Out Ingredients & Kitchen Tools I Use

    Want to save this recipe?

    We can email this post to you, so you can come back to it later!


    Instructions

    1. If the rice is chilled, microwave it for a minute so it’s hot, which will help it absorb liquid more readily.
    2.  Add rice to blender along with just enough of the stock to blend. Blend the rice briefly (several seconds) until you have your desired consistency—this could be coarser or finer depending on your preference, but make sure not to over-blend it cuz you do not want a smooth puree! (Tip: You do not actually have to blend the rice at all, but if you use whole rice it'll take longer to break down in the pot.)
    3. Pour blended rice into a heavy-bottomed pot, then use the remaining stock to rinse out the blender so you get everything out and add to the pot.
    4. Add soy sauce and fish sauce and bring rice to a simmer.
    5. Simmer for at least 10 minutes, or up to 20 minutes. The longer you simmer, the softer and smoother the texture will be, but for a “quick” version, I find that 10 minutes will do just fine. Once the rice starts to thicken up, stir frequently with a rubber spatula to prevent the bottom from sticking to the pot.
    6. While the rice is cooking, make meatballs simply by combining all ingredients in a mixing bowl and knead everything together with your hands until smooth (wear gloves if you have them).
    7. When rice is done, add meatballs in chunks directly into the rice using 2 teaspoons. Cook the meatballs for about 3 minutes until done.
    8. Taste and adjust seasoning.
    9. Stir in julienned ginger if you want, or you can leave it for each person to add to their own bowl when serving.
    10. Serve with green onions and extra white pepper if desired. Enjoy!

    Join us on Patreon for bonus content & rewards!


    Notes

    If you want to add eggs, you can poach eggs separately and add it to the congee when serving. Or if you want the eggs mixed in, you can crack the eggs right into the congee, let them poach submerged in the congee for 3-4 minutes to firm up the whites slightly, then stir it up to mix into the congee.

    Did you make this recipe?

    Tag @HOTTHAIKITCHEN on Instagram and hashtag it #HotThaiKitchen!

    Congee is a traditional, classic Asian breakfast dish. With this method you can make this delicious comfort food in less than 20 minutes using leftover rice! #congee #thaifood #chinesefood #asianbreakfast

    Pandan Coconut Cookies with Cashews

    June 14, 2019 by Pailin Chongchitnant 7 Comments

    Sponsored by the makers of Becel.

    Many of you who have been following the show for a long time probably know that I love adding Thai twists to non-Thai food. So when the makers of Becel asked me to partner with them to take their customizable cookie recipe and add my own spin on it, I was excited by the challenge! This cookie recipe is called "Plant-Based Anything Goes Cookie Dough", and it's a versatile soft and chewy cookie dough recipe that you can use as a base and customize by adding your choice of flavours and mix-ins. The recipe uses Becel Original which is a non-hydrogenated, trans-fat free margarine that can replace butter 1:1 in baking. As a busy mom, I also love that it's soft when refrigerated, so I can use it right away without having to wait for it to soften!

    Pandan and Coconut: Quintessential Thai Dessert Flavours

    When it comes to Thai dessert flavour, there is nothing else more classic than the flavour of pandan leaves and coconut. So it wasn't hard for me to come up with this recipe using these two flavours. I added cashews for texture and nuttiness, and fun fact: cashews are one of the only 2 nuts we use in Thai cuisine! The other being peanuts, of course.

    What are Pandan Leaves?

    Pandan is basically our vanilla. Pandan leaves are long, thin, dark green leaves that have a floral aroma that goes incredibly well with coconut. It's commonly used in Southeast Asian desserts, and in Thailand, it's added to almost all of our sweets. It is even used in some savoury dishes, such as the broth of boat noodles. 

    You can buy pandan leaves fresh or frozen at Asian grocery stores that carry a lot of Southeast Asian products. If you buy them fresh, you can store any leftovers in the freezer. Make sure you wash and dry them first and store them in a heavy-duty freezer bag and they'll last you several months.

    Print

    clock clock iconcutlery cutlery iconflag flag iconfolder folder iconinstagram instagram iconpinterest pinterest iconfacebook facebook iconprint print iconsquares squares iconheart heart iconheart solid heart solid icon

    Pandan Coconut Cookies with Cashews

    5 Stars 4 Stars 3 Stars 2 Stars 1 Star No reviews
    • Author: Pailin Chongchitnant
    • Yield: 30-40 cookies
    Print Recipe
    Pin Recipe

    Description

    This recipe is adapted from Becel Plant-Based Anything Goes Cookies Dough Recipe


    Ingredients

    • 1 ¾ cups (425 mL) all-purpose flour
    • ⅓ cup shredded coconut, unsweetened, plus extra for garnish
    • 1 ½ tsp (7 mL) cornstarch
    • 1 tsp (5 mL) baking powder
    • ½ tsp (2 mL) baking soda
    • ¼ tsp salt
    • ½ cup (125 mL) Becel® Original margarine
    • ¾ cup (180 mL) granulated sugar
    • ¼ cup (60 mL) unsweetened applesauce
    • 3 Tbsp concentrated pandan juice (recipe follows, see note)
    • 2-3 drops green food colouring (optional)
    • ⅓ cups roasted chopped cashews
    • 30 whole roasted cashews for garnish, optional

    Concentrated Pandan Juice

    • 8 pandan leaves, washed and chopped
    • ½ cup water

    Note: Pandan leaves are long, thin aromatic leaves that can be found frozen or fresh. Look for them at Asian grocery stores that carry a lot of Southeast Asian products. If you cannot find it, you can substitute 1 teaspoon coconut or vanilla extract plus 3 tablespoon of water.

    Ingredients and Kitchen Tools I Use

    Want to save this recipe?

    We can email this post to you, so you can come back to it later!


    Instructions

    For the pandan juice:

    1. Blend half of the pandan leaves with the water until fine. Strain, then put the juice back into the blender.
    2. Add the other half of the pandan leaves in the blender and blend until fine and strain.

    Notes:

    • I’m blending half of the leaves at a time because the blender cannot process all the leaves at once with this amount of water.
    • This makes more than you need in the recipe, but I find that the blender needs at least this much volume in order to blend effectively. You can make pandan tea with the leftover juice—simply add water and sweetener of your choice and enjoy it hot or iced.

    For the cookies:

    1. Whisk together flour, shredded coconut, cornstarch, baking powder, baking soda and salt in medium bowl; set aside.
    2. Beat Becel® Original margarine and granulated sugar using electric mixer until light and creamy. Beat in applesauce, pandan juice and green food colouring until blended.
    3. Gradually add in flour mixture and beat on low speed, scraping down sides of bowl occasionally, stopping just as the flour is almost completely blended, but not quite.
    4. Add cashews, and use a wooden spoon or rubber spatula to fold them in until they are evenly distributed and the dough is well blended (do not overmix).
    5. Refrigerate dough at least 30 minutes or until chilled. You can make the dough up to 2 days in advance, keeping it well covered in the fridge.
    6. While cookie dough is chilling, preheat oven to 350°F (180°C) and set the rack in the middle of the oven. Line baking sheet with parchment paper.
    7. Drop cookies by tablespoonfuls on prepared baking sheet 2 inches apart.
    8. Optional cashew garnish: place a whole roasted cashew on top of each dough ball, pressing them in so that the bottom half is buried into the dough. Optional coconut garnish: Roll the top side of each dough ball into shredded coconut. If you want to garnish the cookies with both cashews and coconut, make sure you put the cashews in first before rolling them in the coconut.
    9. Bake 10-12 minutes or until edges are golden. (Shorter baking time yields softer cookies.)
    10. Let cookies cool for 5 minutes, then transfer them onto a wire rack to cool completely.

    Join us on Patreon for bonus content and rewards!


    Did you make this recipe?

    Tag @HOTTHAIKITCHEN on Instagram and hashtag it #HotThaiKitchen!

    My Best Fluffy Pancake Recipe

    April 17, 2020 by Pailin Chongchitnant 17 Comments

    Jump to video!


    Well, since we're all social distancing and/or on lockdown due to covid19, filming for HTK has had to be postponed. So I'm home...as we all are. But since the cooking continues, I thought I would share with you anyway what I am cooking! It's not the slick video that you're all used to seeing on my channel, but it's what we can manage right now given the circumstances. Hope this finds everyone well, safe, and sane, and I hope I can provide some entertainment and inspiration while you're all stuck a home!

    For many of you, there's no longer a need to get up early to go to work or school because of lockdown/social distancing, so you might have more time to make a pancake breakfast! I am not one of them unfortunately...with a baby at home and no more childcare help...I'm busier than ever before!

    But for those who do, I wanted to share my best pancake recipe for this occasion. These are the best pancakes I've ever had, honest. So good I've been making it for over 10 years and still haven't had any better ones! So light, super fluffy, just perfect.

    There are a few reasons why these are extra good. The cake flour for extra tenderness, the yogurt for the wonderful flavour, just the right amount of salt and sugar, and most importantly the whipped egg whites for that light fluffiness!

    Enjoy!

    Watch The Full Video Tutorial!

    All my recipes come with step-by-step video tutorials with extra tips not mentioned in the blog post, so make sure you watch the video below to ensure success - and if you enjoy the show, please consider subscribing to my YouTube channel. Thank you!

    Print
    clock clock iconcutlery cutlery iconflag flag iconfolder folder iconinstagram instagram iconpinterest pinterest iconfacebook facebook iconprint print iconsquares squares iconheart heart iconheart solid heart solid icon

    My Best Fluffy Pancake Recipe

    5 Stars 4 Stars 3 Stars 2 Stars 1 Star 5 from 7 reviews
    • Author: Pailin Chongchitnant
    • Yield: About 12 pancakes
    Print Recipe
    Pin Recipe

    Ingredients

    • 1 cup All purpose flour
    • 1 cup cake flour (or use another cup of AP flour, but cake flour will yield more tender pancakes. You can also do 1 cup whole wheat flour for something healthier.)
    • 1 tsp baking soda
    • 1 tsp baking powder
    • ½ tsp salt (fine table salt)
    • 1 cup full-fat or 2% plain yogurt (or use 2 cups buttermilk and omit the milk)
    • 1 cup milk
    • 1 tsp vanilla
    • 2 eggs, white and yolks separated
    • 3 Tbsp butter
    • 3 Tbsp sugar
    • Whatever toppings and syrups you like!

    Ingredients and Kitchen Tools I Use

    Want to save this recipe?

    We can email this post to you, so you can come back to it later!


    Instructions

    1. Sift together both flours, baking soda, baking powder and salt into a large mixing bowl. (If using all-purpose only you can just whisk everything together, but if using cake flour you have to sift.)
    2. Separate the eggs, putting the whites in a mixing bowl you will use to beat up a meringue, and the yolks in a medium mixing bowl.
    3. To the yolks, add yogurt, milk, and vanilla; whisk until well combined.
    4. Melt the butter in the microwave, then whisk it into the milk mixture (pour as you whisk).
    5. Make a well in the centre of the dry ingredients and pour the milk mixture into it. Use a rubber spatula and mix just until you no longer see any dry flour, lumps are okay.
    6. With a hand held mixer, beat the egg whites until frothy. Then gradually add the sugar while continuing to beat until you get a meringue with soft peaks.
    7. Using the rubber spatula, fold in ⅓ of the meringue to lighten up the batter. Then gently fold in the rest of the meringue just until combined and you no longer see any streaks of meringue.
    8. Cook the pancakes in a non-stick skillet over medium-low to medium heat, using about about ⅓ cup of batter per pancake. I butter the pan lightly once in the beginning but don't butter in between batches.
    9. After a few minutes, once the edges start to look drier, take a peek at the bottom; if it has that nice deep golden brown colour, it's ready to be flipped. Flip carefully as the top part of the pancake will still be quite liquid. (Note: If you normally flip your pancakes after lots of bubbles form on the surface of the pancake, this batter is so thick and fluffy that you won't get those bubbles.)
    10. Once flipped, quickly use your spatula to push in any batter that splashes around the pancake. Cook for another 3-4 minutes or until fully cooked. Because these are super thick and airy, they will take longer than most pancakes to cook through. So to check doneness, you can use a pointy knife and pry open the centre to see if it is cooked.
    11.  Enjoy with whatever toppings you like!!

    Join us on Patreon for bonus content and rewards!


    Did you make this recipe?

    Tag @HOTTHAIKITCHEN on Instagram and hashtag it #HotThaiKitchen!

    Super fluffy pancake recipe for the perfect morning. A few secret ingredients make these light, tender, and perfect for any toppings. #breakfastrecipe #pancakes
    Super fluffy pancake recipe for the perfect morning. A few secret ingredients make these light, tender, and perfect for any toppings. #breakfastrecipe #pancakes

    My BEST Granola Recipe!

    March 30, 2020 by Pailin Chongchitnant 6 Comments

    Jump to video!


    Well, since we're all social distancing and/or on lockdown due to covid19, filming for HTK has had to be postponed. So I'm home...as we all are. But since the cooking continues, I thought I would share with you anyway what I am cooking! It's not the slick video that you're all used to seeing on my channel, but it's what we can manage right now given the circumstances. Hope this finds everyone well, safe, and sane, and I hope I can provide some entertainment and inspiration while you're all stuck a home!

    We just ran out of granola so it's a great opportunity for me to share my recipe with you because this is an AWESOME granola recipe. It's one that I have been making for years and years because it is so good, and hubby loves granola and yogurt for breakfast! Granola is a great thing to make during this time as it uses only pantry, shelf-stable ingredients. You can change up the dried fruit and nuts to whatever you have, change up the spices, and you can even change the honey to maple syrup for a different flavour or for a vegan version as well!

    Watch The Full Video Tutorial!

    All my recipes come with step-by-step video tutorials with extra tips not mentioned in the blog post, so make sure you watch the video below to ensure success - and if you enjoy the show, please consider subscribing to my YouTube channel. Thank you!

    Print
    clock clock iconcutlery cutlery iconflag flag iconfolder folder iconinstagram instagram iconpinterest pinterest iconfacebook facebook iconprint print iconsquares squares iconheart heart iconheart solid heart solid icon

    My BEST Granola Recipe!

    5 Stars 4 Stars 3 Stars 2 Stars 1 Star 5 from 3 reviews
    • Author: Pailin Chongchitnant
    Print Recipe
    Pin Recipe

    Ingredients

    • 5 ½ cup rolled oats (use quick oats for lighter, crispier granola)
    • ½ tsp salt
    • ⅓ cup brown sugar
    • ½ cup honey or maple syrup (I use honey)
    • ½ cup vegetable oil
    • ¾ tsp cinnamon
    • ¾ tsp vanilla
    • 3 cups nuts and dried fruit mix of your choice

    Ingredients and Kitchen Tools I Use

    Want to save this recipe?

    We can email this post to you, so you can come back to it later!


    Instructions

    1. Preheat oven to 325 F (165 C). Line 2 baking pans with parchment paper.
    2. Place oats in a large mixing bowl.
    3. To a small pot, add oil, honey, sugar, salt, cinnamon, and vanilla. Bring to boil over medium heat, just until the sugar is dissolved.
    4. Pour the honey mixture over oats and stir to coat well.
    5. Spread evenly onto baking sheets, keep the center of the baking pan empty to make for more even baking.
    6. Bake for 10 mins, then take the pans out to stir the granola, then bake for another 10.
    7. The oats should be a little darker in colour when done, you may need to bake for a few more minutes if it's not quite browned yet. Once cooled, it should be crispy.
    8. Stir in trail mix when cooled.
    9. Store in airtight container. If you made a lot, consider keeping some in the fridge to prevent the nuts from going rancid. Enjoy!

    Join us on Patreon for bonus content and rewards!


    Did you make this recipe?

    Tag @HOTTHAIKITCHEN on Instagram and hashtag it #HotThaiKitchen!

    My BEST granola recipe I've been making for years! Perfect during lockdown, or any time! #granola #lockdownrecipe

    Meet Baby & Ask Me Anything!

    June 7, 2019 by Pailin Chongchitnant Leave a Comment


    In this video I introduce my brand new baby to you! Also I took this opportunity to do an AMA (Ask Me Anything). I asked for questions submissions on Facebook and Instagram and boy were there lots of really good questions! If you want more AMA, there are some more questions answered on my Instagram Stories (click on the AMA highlight circle).

    Also, many people asked about my story. I've done a video dedicated to that questions before, so check this out: MY STORY: Who Am I and How I Got Here?

    Watch The Full Video!

    Malaysian/Indonesian Beef Rendang

    July 20, 2018 by Pailin Chongchitnant 21 Comments

    Voted the most delicious food in the world, this Indonesian/Malaysian beef rendang is one of the most complex flavoured dishes I've ever made. Herbs, spices and coconut milk are slowly cooked and reduced into a thick flavourful sauce that coats the fork tender beef.

    It's a dish that takes patience, but it's quite easy and is well worth every minute spent. Beef is my favourite but you can also try making chicken rendang, using bone-in dark meat chicken.

    PS. Don't have a few hours to make rendang quite yet? Try this bo luc lac recipe which is a Vietnamese favourite, also known as shaking beef. It's much faster and easier, but will satisfy your beef cravings!

    Watch The Full Video Tutorial!

    All my recipes come with step-by-step video tutorials with extra tips not mentioned in the blog post, so make sure you watch the video below to ensure success - and if you enjoy the show, please consider subscribing to my YouTube channel. Thank you!

    Print
    clock clock iconcutlery cutlery iconflag flag iconfolder folder iconinstagram instagram iconpinterest pinterest iconfacebook facebook iconprint print iconsquares squares iconheart heart iconheart solid heart solid icon

    Malaysian/Indonesian Beef Rendang

    5 Stars 4 Stars 3 Stars 2 Stars 1 Star 5 from 10 reviews
    • Author: Pailin Chongchitnant
    • Yield: Serves 4
    Print Recipe
    Pin Recipe

    Ingredients

    Paste

    • 10g dried mild chilies (I'm using guajillo)
    • 6 cloves garlic
    • ½ cup shallots, chopped
    • 1 stalk lemongrass, finely chopped
    • 2-inch pc galangal, chopped
    • 2-inch pc ginger, chopped
    • 8 pc cloves
    • 5 pc green cardamom
    • 2 tsp ground cinnamon
    • 1 pc star anise
    • 4 candlenuts

    Curry

    • 1½ lb (700g) stew beef such as chuck or boneless short ribs
    • 2 cups coconut milk
    • 2 Tbsp tamarind concentrate
    • 1 tsp salt
    • ¼ cup dried shredded coconut (for making kerisik, see note)
    • 6 kaffir lime leaves, torn into chunks
    • Optional: Fish sauce for seasoning adjustment

    Note: Kerisik is toasted coconut paste for adding and rich, toasty aroma.

    Ingredients and Kitchen Tools I Use

    Want to save this recipe?

    We can email this post to you, so you can come back to it later!


    Instructions

    To make the kerisik: (You can make this in advance or while the beef cooks.) Toast the coconut in a dry saute pan over medium heat, stirring constantly, until dark brown. Grind in a mortar and pestle or a coffee grinder until it becomes and oily paste.

    To make the paste: Grind dry chilies and spices in a coffee grinder until fine, then add candlenuts and grind until fine. In a blender, add galangal, ginger, lemongrass, shallots and garlic and blend until smooth, adding water as needed. Once fine, add the ground dry spices and blend to mix.

    For the curry: Bring ½ cup of coconut milk to a boil in a large heavy-bottomed pot. Add the curry paste and cook over medium heat, stirring constantly, until the paste is thick, and the coconut oil is starting to sizzle away from the paste.

    Add the beef and toss to mix with the paste, add the remaining coconut milk and scrape off any bits of curry paste that might be stuck to the bottom of the pot.

    Add salt and tamarind, then keep the pot loosely covered, let it simmer on low heat for 2.5-3 hours or until beef is fork tender. In the beginning, stir it every 20 minutes or so, but as the sauce gets thicker, you need to stir more frequently to make sure the curry paste doesn't stick and burn to the bottom of the pot. Towards the end I stir it every 5 minutes. You should have a very thick, not runny sauce, and you can add more water if it gets too dry as it cooks. If the beef is done, but there is too much liquid, just open the pot and stir for a few more minutes to let it reduce.

    In the last few minutes of cooking stir in 1 tablespoon of kerisik, and roughly tear kaffir lime leaves into chunks and stir them in, letting them cook for a few more minutes to infuse. Taste and adjust seasoning as needed.

    Serve with rice, enjoy!

    Join us on Patreon for bonus content & rewards!


    Did you make this recipe?

    Tag @HOTTHAIKITCHEN on Instagram and hashtag it #HotThaiKitchen!

    Thai Peppery Shrimp & Veggie Soup - Gaeng Liang

    January 25, 2019 by Pailin Chongchitnant 3 Comments

    Kaeng liang - Breast milk boosting soup

    When I became pregnant, many people have asked whether there is a dish in Thai culture that pregnant and new mothers are encouraged to eat. And this is it!

    Gaeng Liang is a peppery, light, yummy vegetable soup (or sometimes called a curry) believed to help boost breast milk supply in Thai culture. Whether or not it actually does, who knows, I don't think there's been a real study on it. But hey, it's comforting, healthy, and keeps well in the fridge, perfect for new moms so why not!

    a bowl of gaeng liang with shrimp and veggies with a chayote squash and thai basil on the side.

    Now, if you're not having a baby, you can still enjoy it! This is not something that is reserved only for new moms—people do have it at home regularly, but new moms are especially encouraged to eat more of it. This is a dish I grew up seeing a lot at home, and my grandmother makes it quite often because my mom loves it. It's also popular amongst the health conscious because it's light and full of nutritious vegetables!

    Gaeng Liang - A Unique Flavour in Thai Cuisine

    I have to say that the flavour of this dish is unlike any other dish in Thai cuisine. The combination of dried shrimp, shrimp paste and grachai (fingerroot) in the curry paste creates an aroma that is truly unique.

    It's a bit funky, thanks to the shrimp paste, and when I was a kid I didn't love it and didn't understand why my mom loved it so much. But now as an adult I do and finally get it! So if you're up for a culinary adventure and want to try a dish that's unlike anything the average Thai restaurant offers, this is the perfect thing!

    So Many Vegetables! 

    As you can see, gaeng liang uses a ton of different kinds of vegetables, especially squashes. You don't have to have everything I used, as it can be a bit much and you'll have so much leftover veg, but I recommend having at least the following 3 vegetables:

    • Kabocha squash - This will give a sweet, rich, creamy element which you will need to balance all the other lighter vegetables. If you don't have kabocha, any other sweet, creamy winter squash (like acorn) will do.
    • One type of light summer squash  - We traditionally use angled luffa or angled gourd (sing gua), but you can use zucchini, patty pans, cousa squash (shown in the video), chayote, or whatever lighter squash you have access to.
    • One type of Asian mushroom - Oyster mushroom is my favourite, but you can do straw mushrooms, king oyster mushrooms, beech/shimeji mushrooms, or enoki mushrooms. Do not use dried mushrooms as they have a strong earthy flavour that will interfere with the soup.

    Is it a Curry or a Soup?

    To Thai people, this dish is actually a curry (gaeng or kaeng means curry), but I understand that it's light and brothy, and eats more like a soup in the Western sense of the word.

    This is because Thai people define curries differently from people in the western world. To us, a curry or a gaeng is any soupy dish that uses a "curry paste"—a ground up mixture of herbs and spices—as the flavour base. So that's why this is classified as a curry, even though to you it might look like a soup. To us, the richness or consistency of the liquid has nothing to do with whether it's a curry or not.

    Another "soupy curry" that's really popular in Thai cuisine is gaeng som, or a sour curry that is an absolute classic. You should try it out!

    Watch The Full Video Tutorial!

    All my recipes come with step-by-step video tutorials with extra tips not mentioned in the blog post, so make sure you watch the video below to ensure success - and if you enjoy the show, please consider subscribing to my YouTube channel. Thank you!

    Print
    clock clock iconcutlery cutlery iconflag flag iconfolder folder iconinstagram instagram iconpinterest pinterest iconfacebook facebook iconprint print iconsquares squares iconheart heart iconheart solid heart solid icon
    Kaeng liang - Breast milk boosting soup

    Thai Peppery Shrimp and Veggie Soup - Gaeng Liang

    5 Stars 4 Stars 3 Stars 2 Stars 1 Star 5 from 3 reviews
    • Author: Pailin Chongchitnant
    • Yield: 4 servings
    Print Recipe
    Pin Recipe

    Description

    This healthy, herbaceous soup is loaded with veggies and juicy shrimp. In Thai culture, new moms are encouraged to eat gaeng liang because it's believed to increase milk production. Whether or not it really does, it's still a comforting delicious soup anyone can enjoy! 


    Ingredients

    • 3 cups chicken stock or shrimp stock, unsalted, preferably homemade
    • 1 recipe gaeng liang curry paste (recipe follows)
    • 2-3 tablespoon fish sauce
    • 2 cups kabocha squash, unpeeled, bite-sized pieces
    • Half an angled luffa (sing gua) or half a large zucchini
    • Half a chayote squash, peeled and cut into sticks (or sub more angled luffa or zucchini)
    • 150g oyster mushrooms, or another Asian mushroom, torn into bite-sized pieces
    • 6 ears baby corn, quartered (optional)
    • 150g shrimp or chicken (if using chicken, cut into cubes and marinate in a bit of fish sauce)
    • 1 cup Thai lemon basil or Thai basil (see note 1)
    • Jasmine rice for serving

    Gaeng Liang Curry Paste

    • 1½ Tbsp dried shrimp
    • ½ - ¾ teaspoon white peppercorns (see note 2)
    • Heaping ¼ cup shallots, thinly sliced
    • 2 Tbsp grachai (fingerroot), finely chopped (see note 3)
    • 1-2 Thai chilies (optional, to taste)
    • ½ tsp fermented shrimp paste (gapi)

    Ingredients & Kitchen Tools I Use

    Want to save this recipe?

    We can email this post to you, so you can come back to it later!


    Instructions

    For the Curry Paste:

    Note: I make the paste in a mortar and pestle old-school, but you can also blend everything in the blender with a little bit of the stock. 

    1. In a coffee grinder, grind the dried shrimp until shredded and fluffy; set aside.
    2. In the mortar and pestle, grind white peppercorns until fine.
    3. Add grachai and Thai chilies, and pound until fine, then add shallots and pound until fine. If at any point the mixture becomes too wet and slippery and is difficult to grind, you can add some of the shredded dried shrimp to help absorb the moisture and add friction.
    4. Add the shrimp paste and any remaining dried shrimp and pound to mix.

    For the Curry:

    1. In a medium pot, bring stock to a boil, then add curry paste and simmer for 2-3 minutes.
    2. Add 2 tablespoon of fish sauce, then add kabocha squash and simmer for 2 minutes.
    3. Add all remaining vegetables and simmer for 3-4 more minutes or until the kabocha squash can be pierced easily with a fork. (Timing depends on thickness of your kabocha.)
    4. Add shrimp or chicken and cook just until they’re done, about 30 seconds only.
    5. Turn off the heat and stir in Thai of lemon basil.
    6. Taste and adjust the seasoning with more fish sauce or salt as needed. If you want it to be spicier, you can add more ground white pepper at this point.
    7. Serve with jasmine rice. I like to put a bit of rice into a bowl of kaeng liang to make a rice soup out of it!

    Join us on Patreon for Bonus Content & Rewards!


    Notes

    1. Thai lemon basil is called bai mangluck in Thai. You may be able to find it at a Thai grocery store that stocks fresh produce. Otherwise Thai basil works well as a substitute.
    2. This soup is supposed to be quite peppery, but if you're not used to it it maybe overwhelming, so start out with ½ tsp, and you can always add more after.
    3. Grachai or Krachai is an aromatic rhizome what is used often in Thai cuisine. If you can't find fresh, not to worry, a brined version sold in glass jars (shown in video) works perfectly. You can find it at many stores that stock a lot of Southeast Asian products. Note that the label may say it is "pickled," but it's not, it's just brined in a salt solution (can't always trust the translation on Asian product labels!).

    Did you make this recipe?

    Tag @HOTTHAIKITCHEN on Instagram and hashtag it #HotThaiKitchen!

    Thai Spicy Chicken & Cucumber Stir-Fry

    February 1, 2019 by Pailin Chongchitnant 4 Comments

    A plate of cucumber stir fry with chicken

    It’s one of my life’s purpose to spread the word that COOKED cucumber is delicious. They’re just like any other veg, so let's stop confining them to the land of salads and pickles! 😂

    This spicy chicken and cucumber stir fry recipe was part of my “Ingredient Challenge” video, where I took an ingredient (cucumber in this case) and cooked with it on the fly … and it turned out amazing! Spicy, crunchy, healthy, and the whole thing was done in 20 mins from start to finish.

    A plate of cucumber stir  fry with chicken

    Cucumber is an underappreciated vegetable, so my challenge was to actually COOK the cucumber and make it quick and delicious 🙂 Perfect for dinner, pack it for lunch or anytime you want!

    Watch The Full Video Tutorial!

    All my recipes come with step-by-step video tutorials with extra tips not mentioned in the blog post, so make sure you watch the video below to ensure success - and if you enjoy the show, please consider subscribing to my YouTube channel. Thank you!

    Print
    clock clock iconcutlery cutlery iconflag flag iconfolder folder iconinstagram instagram iconpinterest pinterest iconfacebook facebook iconprint print iconsquares squares iconheart heart iconheart solid heart solid icon
    Cucumber challenge

    Cucumber Challenge! Spicy Chicken & Cucumber Stir-Fry

    5 Stars 4 Stars 3 Stars 2 Stars 1 Star 5 from 2 reviews
    • Author: Pailin Chongchitnant
    • Yield: 3-4 servings
    Print Recipe
    Pin Recipe

    Description

    Please note that this is a recipe from my "Ingredient Challenge" where I cook on the fly with no recipe, so the amounts below are my best estimates of how much of each ingredient I added. Make sure you watch the video so you have a visual estimate, and taste and adjust as you cook!


    Ingredients

    • 1 English cucumber
    • 4-5 cloves garlic, chopped
    • 4 pc chicken thigh, boneless, skinless
    • 2 Tbsp Sriracha hot sauce (I used the rooster brand for this)
    • 2 tsp brown sugar
    • 1 Tbsp + 2 tsp soy sauce
    • 1 tsp sesame oil
    • 1 red bell pepper

    (What I would also add if I had no limitations: Toss in some roasted cashews at the end.)

    Want to save this recipe?

    We can email this post to you, so you can come back to it later!


    Instructions

    1. Cut chicken into bite-sized cubes and toss in 2 teaspoon soy sauce.
    2. Cut cucumber in half horizontally, then slice each half into ⅓-inch thick pieces on a bias.
    3. Cut bell pepper into 1-inch cubes.
    4. Mix together sriracha, brown sugar, remaining soy sauce and sesame oil. Taste and adjust the balance of the sauce.
    5. In a wok, add a little bit of oil and heat until hot. Add chicken and sear until browned on both sides. Remove form wok. The chicken may not be fully cooked at this point, that is okay.
    6. Remove the chicken from the wok.
    7. In the same wok, add more oil and saute garlic in it until golden.
    8. Add cucumber, about ¼ cup water, and about 2 tablespoon of the sauce. Cook until the cucumber is almost done to your liking, adding more water if it becomes too dry.
    9. Add chicken, bell peppers and the remaining sauce and keep tossing for another minute or so until the chicken is fully cooked. (If you like the bell peppers soft, add them earlier so they have more time to cook.)
    10. Serve with jasmine rice. Enjoy!

    Did you make this recipe?

    Tag @HOTTHAIKITCHEN on Instagram and hashtag it #HotThaiKitchen!

    How to Clean and Prepare a Whole Squid

    July 5, 2019 by Pailin Chongchitnant Leave a Comment

    Jump to video!


    A Whole Squid is Easily Deconstructed

    If you like to eat squid but have not cooked much with it because the idea of breaking down a whole squid seems intimidating, well this video is all you need! It's really not hard...and in fact, once you see it, it's almost as if squids were made for simple disassembly. Each part comes apart distinctly, easily, and intuitively. Nothing like filleting a fish, trust me.

    Want a delicious Thai recipe that uses squid? Check out my Dry Tom Yum recipe here. This recipe uses a mix of seafood, but you can totally do all squid if you like.

    P.S. I buy my whole squid from the seafood counter at an Asian grocery store.

    Watch The Full Video!

    Like squid but don't know how to break down a whole squid? It's super easy, this video is all you need! #squid

    Dry Tom Yum Seafood ต้มยำแห้ง

    July 5, 2019 by Pailin Chongchitnant 1 Comment

    Dry Tom Yum is on Netflix

    This is a luxurious recipe that is incredibly simple and delicious. I was reminded of it because it was talked about in a Netflix documentary "Street Food" in the Bangkok episode. The episode featured Jay Fai, a street food vendor who started incorporating expensive seafood into otherwise common everyday dishes, and she became globally known after she earned a Michelin Star for her humble establishment. Dry tom yum is one of the dishes that she makes.

    The documentary implied that she invented the dish...but I actually don't know if that is true. This is a dish that has been around for a long time, made by many people, and I am not aware of any evidence that she was the one who invented it. It's not even a dish associated with her, or anyone in particular. Perhaps she was the one who popularized it? Note, however, that Jay Fai did not claim that she invented it; it was implied by one of the people interviewed.

    What is a "dry" dish?

    In Thailand there are many dishes that has "dry" in its name, or in Thai, hang. These dishes are typically derived from a normally soupy dish, and have been modified so that the soup part is gone. A classic example is a "dry noodle soup" which sounds like an oxymoron, but basically you can order most types of noodle soups in Thailand without the broth, and the noodles are instead tossed in the seasoning. It actually makes it much easier to make at home, check out this "dry wonton noodles" recipe here.

    So as you probably know, Tom Yum is originally a soup, and a dry tom yum is basically the stir-fried version of it. Plain and simple. It uses all of the same herbs and seasonings, minus the broth. So what you end up with is a tom yum flavoured sauce that is light and herbaceous and just delightful to pour over some jasmine rice.

    Watch The Full Video Tutorial!

    All my recipes come with step-by-step video tutorials with extra tips not mentioned in the blog post, so make sure you watch the video below to ensure success - and if you enjoy the show, please consider subscribing to my YouTube channel. Thank you!

    Print
    clock clock iconcutlery cutlery iconflag flag iconfolder folder iconinstagram instagram iconpinterest pinterest iconfacebook facebook iconprint print iconsquares squares iconheart heart iconheart solid heart solid icon

    Dry Tom Yum Seafood ต้มยำทะเลแห้ง

    5 Stars 4 Stars 3 Stars 2 Stars 1 Star 5 from 1 review
    • Author: Pailin Chongchitnant
    • Yield: 2-3 Servings
    Print Recipe
    Pin Recipe

    Ingredients

    • 350 g mixed seafood of your choice (I use shrimp, scallops, and squid, see note)
    • 1 stalk lemongrass, bottom half only, very thinly sliced
    • 5 thin slices galangal, finely julienned
    • 5 kaffir lime leaves, torn into chunks
    • 1 large head shallot, julienned
    • 3-5 Thai chilies, finely chopped (remove seeds for less heat)
    • 2 Tbsp water or stock
    • 2 Tbsp fish sauce
    • 1 Tbsp finely chopped palm sugar or 1 Tbsp Thai chili paste (see note)
    • 100 g shimeji, oyster or straw mushrooms
    • 1 cup cherry tomato halves
    • 2 Tbsp lime juice
    • A handful chopped cilantro

    Shop Ingredients & Kitchen Tools I Use

    Notes:

    1. Check out this video for how to clean and prep a whole squid.
    2. Using Thai chili paste will make a dish that has a more robust flavour, while using palm sugar will give you a lighter, more refreshing dish. Either is delicious. I prefer to use palm sugar because I want the subtle, sweet flavours of the scallops to come through. But if you're looking to replicate the flavour or tom yum goong soup that usually has chili paste, then I would add it. 

    Want to save this recipe?

    We can email this post to you, so you can come back to it later!


    Instructions

    1. Pre-cook the seafood first by sauteing or searing in the wok with a little oil just until done, then remove from wok and set aside. Tips: Cook each type of seafood separately. If using scallops, cook only until medium doneness rather than well-done for best texture. If using squid, cook them last as they can release a lot of water when cooked, And be careful not to overcook squid; they should take no more than 1 minute.
    2. In the same wok you cooked the seafood, add a little extra oil, then add lemongrass, galangal, lime leaves, chilies and shallots. Saute over medium heat for about 1 minute.
    3. Deglaze with a splash of water, then add fish sauce and palm sugar or chili paste. Stir briefly to dissolve the sugar.
    4. Turn heat to high, then add mushrooms and toss briefly.
    5. Add the cooked seafood back in the pan along with tomatoes and toss just to mix then turn off the heat.
    6. Add lime juice and cilantro, and stir to mix. 
    7. Serve with jasmine rice, enjoy!

    Join us on Patreon for bonus content & rewards!


    Did you make this recipe?

    Tag @HOTTHAIKITCHEN on Instagram and hashtag it #HotThaiKitchen!

    A stir-fried version of the popular Thai Tom Yum soup. The same bold flavours of lemongrass, galangal, and lime leaves, but much faster to make! #thairecipe #tomyum #thaifood #seafoodrecipe

    Hong Kong Mango Pancake - Dim Sum

    August 28, 2020 by Pailin Chongchitnant 5 Comments


    Pinterest friendly image of Hong Kong mango pancakes and mango cubes on a white plate. With hot-thai-kitchen.com text on the bottom.Improving Upon the Classic

    Mango crepes are a classic dessert at dim sum, and while I enjoy them, I always thought they had more potential. I always wished they were more...mangoey...more flavourful, more fruity. The pancakes are simple, a delicate crepe filled with fresh mango and whipped cream. But there lies the problem...the whole thing depends on how good the mango is, and let's face it, more often than not the mango isn't as sweet, ripe, and juicy as it could be.

    Fixing Less-Than-Perfect Mango

    So to fix that, I turned the mango trims that you will inevitably have from prep into a luscious mango sauce. You can make this sauce as sweet or tart as needed in order to compensate for the flavour (or lack of flavour) of the mango. Mango a little tart and not super sweet? Make your sauce sweeter. Super sweet mango but not a lot of acidity? Make a mango sauce that's a little more tart to up the 'brightness'. This simple trick here adds juiciness and extra mangoey-ness that makes ALL the difference!

    Watch The Full Video Tutorial!

    All my recipes come with step-by-step video tutorials with extra tips not mentioned in the blog post, so make sure you watch the video below to ensure success - and if you enjoy the show, please consider subscribing to my YouTube channel. Thank you!

    Print
    clock clock iconcutlery cutlery iconflag flag iconfolder folder iconinstagram instagram iconpinterest pinterest iconfacebook facebook iconprint print iconsquares squares iconheart heart iconheart solid heart solid icon

    Hong Kong Mango Pancake (Dim Sum Dessert Recipe)

    5 Stars 4 Stars 3 Stars 2 Stars 1 Star 5 from 3 reviews
    • Author: Pailin Chongchitnant
    • Yield: About 12 pancakes
    Print Recipe
    Pin Recipe

    Ingredients

    Crepe:

    • 25g (3 Tbsp) cornstarch
    • 2-3 tablespoon sugar (if mango isn’t very sweet use more)
    • 50g (⅓ cup) AP flour
    • ¼ tsp salt
    • 1 cup Milk
    • 3 eggs
    • 1 tsp vanilla
    • A few drops yellow food colouring (optional)
    • 2 Tbsp unsalted butter, melted

    Whipped Cream:

    • 1 cup whipping cream
    • 4 Tbsp icing sugar

    The Rest:

    • 3 Mangoes
    • Sugar as needed
    • Lime or lemon juice as needed

    Want to save this recipe?

    We can email this post to you, so you can come back to it later!


    Instructions

    For the crepes, mixing bowl method:

    1. In a mixing bowl whisk together cornstarch and sugar to break up the lumps. Then whisk in flour and salt.
    2. In a spouted container like a glass liquid measuring cup, add the milk and microwave until lukewarm. (This is just to prevent the butter from hardening into little pieces when you add it, don’t make it so hot that it will cook the eggs!)
    3. Add eggs, vanilla, and yellow food colouring (optional) and beat well with a fork or a whisk to combine.
    4. Pour about a quarter of the milk mixture into the flour and whisk until smooth. Once smooth, pour in the remaining milk and whisk until well-combined.
    5. Strain the batter back into the spouted container, pushing any big lumps of flour through the sieve.
    6. If using right away, you can add the butter gradually while whisking the batter quickly. If you're going to refrigerate the batter, leave the butter out for now.

    For the crepes, blender method:

    1. Microwave milk until lukewarm, (just to prevent the butter from hardening into little pieces when you add it, so don’t make it so hot that it will cook the eggs!), then add milk to the blender.
    2. Add all remaining ingredients except butter into the blender and blend just for a few seconds on low until smooth. DON'T blend any longer than necessary or it'll become too foamy.
    3. Strain the batter into a spouted container such as a large liquid measuring cup.
    4. If using right away, you can add the butter gradually while whisking the batter quickly. If you're going to refrigerate the batter, leave the butter out for now.

    Prep the mango:

    1. Peel mangoes and trim each cheek into a rectangle 2.5-3 inches long, then cut the rectangle into ¾ inch thick batons.  You may get 2-3 depending on size of mango. Save the trims for mango sauce.

    For the mango sauce:

    1. Blend all the mango trims until smooth in a blender or food processor. Tip: I find that because you're not making a lot of sauce an immersion blender is the perfect tool for this because it can blend a small amount. 
    2. Taste and add sugar and lime juice as needed. The amount will depend entirely on the flavour of the mango. If the mango is sweet, you'll likely need to add lime juice to add some tartness which will boost the fruitiness of the sauce. If the mango is already quite sour, lime juice may not be necessary, but you may need to add quite a bit of sugar. If your mango isn’t very sweet or is a little bit bland, make your sauce stronger tasting (more sugar/lime) so that it can help compensate. This is your chance to help make it better!  

    Cooking the crepes:

    1. If your batter is refrigerated, pull it out at least an hour in advance so it can come to room temp. If you don't have time for this, pour batter into a metal container and sit it in a hot water bath and stir frequently. A cold batter will cause butter to seize into chunks. Once batter is at about room temp, gradually pour in the melted butter while whisking quickly.
    2. Heat a non stick 10-inch pan over low heat. Whisk the batter briefly to mix right before pouring - you want to do this before every pour - then pour into a ¼ measuring cup so it’s about ¾ full (3 tablespoon equivalent). Pour batter into the pan and swirl to evenly spread the batter, and then let cook for a minute on low heat. Tip: There should be just a very gentle sizzle when you pour batter into pan—that's a sign of the perfect level of heat. If there is no sizzle, pan is too cool. If it's a loud sizzle, the pan is too hot. 
    3. You know it's done when the top is dry and you start to see it puff up in several spots. There should be no colour on the bottom, but if there is a little bit, it is okay.
    4. Loosen the edge with a spatula and remove from pan onto a paper-towel-lined plate. Repeat with remaining batter (you can stack the finished crepes). Let cool completely before using.

    Make the whipped cream:

    1. Add cold whipping cream and icing sugar into a mixing bowl and beat with an electric beater or a whisk on high heat. Once it starts to thicken up and the beater starts leaving a trail, lower the speed down so you are less likely to overbeat it.
    2. Once you start to see clear beater trails, check the consistency frequently; you want the cream to be stiff enough to hold its shape completely when plopped onto the crepe. But be careful not to overbeat or it will turn into butter!

    Assembly:

    1. Lay down crepe, smooth side out, then put down a 3-inch strip of cream in the centre. Spoon a little mango sauce over the creme, put mango on top of the sauce, then add a little more sauce on top of mango. Top with a little more cream. You want the mango to be surrounded by cream and sauce, it may take you a couple of pieces before you figure out the right amount of stuff to put in, but watch the video for a visual guide.
    2. Wrap like a spring roll—fold the sides towards the centre then gently roll forward—and you can use a knife to trim off the end of the crepe if it's sticking out.
    3. You can serve immediately or refrigerate for at least 30 minutes to help them firm up a bit. You can let them sit in the fridge for a few hours if needed, but too long and the crepe will not be as soft.


    Did you make this recipe?

    Tag @HOTTHAIKITCHEN on Instagram and hashtag it #HotThaiKitchen!

    Unbelievably delicious Thai-inspired tacos filled with ground meat flavoured with red curry paste, topped with a crunchy Thai cabbage slaw and coconut crema. #thairecipe

    Epic Thai Red Curry Tacos!

    August 21, 2020 by Pailin Chongchitnant 14 Comments

    Jump to video!


    This video is sponsored by the Thai Trade Centre Vancouver

    Can You Cook Delicious Thai Food Without an Asian Grocery Store?

    Turns out not only is it possible, but this was one of the best things I've ever made on the show! Our good friends at the Thai Trade Centre Vancouver asked if I could make a recipe that uses only ingredients people can buy at their regular non-Asian grocery stores. No problem! Especially because nowadays most grocery stores stock at least a few basic Thai products. I was sure I would find coconut milk, at least one type of curry paste and fish sauce. Indeed those were what I found, but not much more!

    You Don't Need to Make a Traditional Dish to Enjoy Authentic Thai Flavours

    I decided to make a Thai taco with what I was able to find because I wanted to show you that can enjoy REAL Thai flavours by integrating Thai ingredients into dishes you're already familiar with. Making a full-on traditional dish is great, but it's certainly not necessary if you just want to enjoy the flavours of Thai food that you love. The key is in using real Thai ingredients!

    Don't Want to do Tacos? Here are some modification ideas

    Tortillas are great, but this recipe can be easily modified to many other dishes, such as...

    • Lettuce wrap - Use crisp lettuce leaves instead of tortillas.
    • Pita - Use pita bread instead of tortillas.
    • Over rice - Simply serve the pork filling over rice and serve the cabbage slaw as a side dish.
    • Shepherd's Pie - Use the pork filling as a base, maybe add a little more coconut milk to make a moist filling, and perhaps extra veggies. Top with mashed potatoes and bake. Slaw on the side.
    • Fill anything with it! What kind of "filled pastry" do you have in your culture? Filo? Puff pastry? Empanadas? Samosas? Dumplings? Buns? Use the pork filling for any of them!

    Watch The Full Video Tutorial!

    All my recipes come with step-by-step video tutorials with extra tips not mentioned in the blog post, so make sure you watch the video below to ensure success - and if you enjoy the show, please consider subscribing to my YouTube channel. Thank you!

    Print
    clock clock iconcutlery cutlery iconflag flag iconfolder folder iconinstagram instagram iconpinterest pinterest iconfacebook facebook iconprint print iconsquares squares iconheart heart iconheart solid heart solid icon

    Thai Red Curry Taco with Cabbage Slaw

    5 Stars 4 Stars 3 Stars 2 Stars 1 Star 5 from 11 reviews
    • Author: Pailin Chongchitnant
    • Yield: About 8 tacos
    Print Recipe
    Pin Recipe

    Description

    Note: Because this was an "on the fly" recipe challenge, some of the amounts given are estimated only. You can watch the video for a visual guide of how much I used.


    Ingredients

    ~8 soft taco shells, or hard if you prefer

    Filling

    • 1 lb lean ground pork (or ground beef)
    • 1 smal jar "Thai Kitchen" brand red curry paste (112g, 4oz), if using other brands you'll likely need about 3-4 Tbsp
    • ½ cup coconut milk
    • Fish sauce, to taste
    • 1 tsp sugar
    • ⅓ cup diced water chestnuts

    Coconut “Crema”

    • ⅓ cup coconut milk
    • 1 ½ tsp cornstarch
    • 2 Tbsp water
    • ~ 1 teaspoon lime juice
    • A pinch of salt

    Thai Cabbage Slaw

    • 2-3 Thai chilies, or to taste
    • 1 tsp sugar (use palm sugar if you have it)
    • 2 Tbsp Fish sauce
    • 2 Tbsp Lime juice
    • 2 tomatoes, diced
    • 2 Tbsp thinly sliced shallot
    • ~ 3 cups shredded red cabbage
    • 1 green onion, chopped
    • A few sprigs cilantro, chopped, plus extra for garnish

    Want to save this recipe?

    We can email this post to you, so you can come back to it later!


    Instructions

    For the Filling:

    1. Add coconut milk to a wok and bring to a boil over medium heat. Add red curry paste and stir to mix with the coconut milk, then keep cooking and stirring until very thick and the coconut oil will start to separate from the paste.
    2. Add the ground pork and toss to mix with the curry paste, turning the heat up to medium high. Keep stirring until fully cooked.
    3. Add sugar and water chestnuts and toss to mix. Then taste and add fish sauce as needed.

     For the Coconut "Crema"

    1. Put coconut milk in a small pot.
    2. Dissolve the cornstarch in the water. Then add about half of the dissolved cornstarch to the coconut milk. Turn the heat on high and stir CONSTANTLY until it comes to a boil.
    3. Once boiling, look to see if it needs to be thickened further (it will thicken a bit more once it cools down). If so, add more of the the cornstarch slurry. You want it to still be easily pourable but thick enough that it won't run all over the place once you drizzle it on the taco. If you've added too much cornstarch, just add more coconut milk to thin it out.
    4. Add salt and lime juice, then taste and adjust as needed. You want it to be just a bit tart (no more than sour cream or yogurt-level).

    For the Thai Slaw:

    1. To make the dressing, in a mortar pound chilies until fine (or you can finely mince).
    2. Add the sugar and swirl with the pestle to help break down the chili skins even more.
    3. Add fish sauce, lime juice, and stir to dissolve the sugar.
    4. Add shallots and tomatoes and stir to allow some of the tomato juices to mix in with the dressing. Set this aside until close to serving, don't toss it with the cabbage too far in advance.
    5. When ready to use, pour the dressing over the cabbage and add chopped green onions and cilantro to taste. Taste and adjust seasoning as needed.

    Assembly:

    If using soft tacos, heat the tortillas on a dry frying pan until hot. Place filling on the shell, top with the slaw and drizzle with the coconut crema. Enjoy!


    Did you make this recipe?

    Tag @HOTTHAIKITCHEN on Instagram and hashtag it #HotThaiKitchen!

    Unbelievably delicious Thai-inspired tacos filled with ground meat flavoured with red curry paste, topped with a crunchy Thai cabbage slaw and coconut crema. #thairecipe

    Egg Noodle Pad See Ew หมี่เหลืองผัดซีอิ้ว

    January 20, 2017 by Pailin Chongchitnant 1 Comment

    mee leuang pad see ew

    Pad See Ew is our famous stir-fried rice noodle dish (yes, I have a recipe), but this egg noodle version is something I've only ever seen in southern Thailand where I grew up! These chubby fresh egg noodles have the most perfect chewiness, and with the salty-sweet-smoky flavour, it's one of the hardest dishes to stop eating!!

    These egg noodles are also much easier to find and much easier to work with than the fresh wide rice noodles, which makes this a very doable weeknight dinner. If you have noodles left after making pad see ew, try them in my easy garlic noodles!

    Watch The Full Video Tutorial!

    All my recipes come with step-by-step video tutorials with extra tips not mentioned in the blog post, so make sure you watch the video below to ensure success - and if you enjoy the show, please consider subscribing to my YouTube channel. Thank you!

    Print
    clock clock iconcutlery cutlery iconflag flag iconfolder folder iconinstagram instagram iconpinterest pinterest iconfacebook facebook iconprint print iconsquares squares iconheart heart iconheart solid heart solid icon
    mee leuang pad see ew

    Egg Noodle Pad See Ew หมี่เหลืองผัดซีอิ้ว

    5 Stars 4 Stars 3 Stars 2 Stars 1 Star No reviews
    • Author: Pailin Chongchitnant
    • Yield: Serves 2
    Print Recipe
    Pin Recipe

    Ingredients

    Marinated Pork

    • 200 g pork butt, cut into thin, bite-sized slices (you can substitute other protein of your choice)
    • 1 Tbsp soy sauce
    • 1 Tbsp water

    Sauce

    • 1 Tbsp oyster sauce
    • 2 tsp soy sauce
    • 2 tsp fish sauce
    • 1 tsp Golden Mountain Sauce
    • 1 ½ tsp black soy sauce

    The Rest

    • Vegetable oil for sauteing
    • 4 cloves Garlic
    • 2 eggs
    • 200 g Chinese broccoli
    • 400 g fresh egg noodles, large size, pre-cooked
    • 2 tsp sugar
    • A dash White pepper

    Chili Vinegar

    • Spicy chili peppers of your choice, you can use Thai chilies, serranos, or habaneros.
    • 2 cloves garlic
    • White vinegar, ¼-½ cup as needed to blend

    Ingredients and Kitchen Tools I Use

    Want to save this recipe?

    We can email this post to you, so you can come back to it later!


    Instructions

    Combine the pork, 1 tablespoon soy sauce, and 1 tablespoon water and stir to mix well. Let marinade for at least 15 minutes.

    Meanwhile, make the chili vinegar: Cut the chilies in half lengthwise and if you want to reduce the heat, remove the seeds and pith. Place the chilies on a foil-lined baking sheet, cut-side down, along with the garlic cloves and broil under high heat until the chilies are charred and the garlic cloves are browned. This only takes a few minutes so keep an eye on them, and you may need to remove the garlic first. Transfer the chilies and garlic to the blender, add ¼ cup of vinegar and blend until there are no more chunks, adding more vinegar as needed to get a thin, runny sauce. You can store the chili vinegar in the fridge for up to 6 months.

    Combine all sauce ingredients together in a small bowl.

    In a wok, heat just enough oil to cover the bottom until hot. Add the pork and spread them out into one layer, then let the pieces sear until browned on one side. Once browned, stir the pork and continue to saute over high heat until the pork is fully cooked. (If you have the patience, you can flip all the pork pieces and let them brown on the other side...I just never have that much patience with them!). Remove and set aside in a bowl. 

    Wipe the wok with paper towel to get rid of any liquid left over from cooking the pork, then add a little more oil to the wok. Add the garlic, turn the heat on to medium and saute until the smallest pieces start to turn golden. Add the eggs, break the yolks, and turn the heat up to medium high and let the eggs set about half way. Scramble the egss briefly, then add the Chinese broccoli and toss for 20 seconds just to wilt. Add the noodles, the mixed sauce, and sugar; turn the heat to high and toss until the noodles are thoroughly mixed with the sauce.

    Once noodles are well coated, let them sit in the wok without stirring until some of the noodles on the bottom start to toast and turn brown; the timing for this will differ depending on the heat of your stove and the size of your wok, but it could be as fast as 15 seconds if you've got a high BTU stove. Stir the noodles, then let it sit again to toast some more; do this a few times until the noodles are toasted to your liking. Add the pork back into the pan, along with any juices that has collected in the bowl, and toss for 30 more seconds until well combined and the noodles are dry.

    Plate the noodles and sprinkle a little ground white pepper on top, then drizzle with a little of the chili vinegar. Enjoy!

    Join us on Patreon for bonus content and rewards!


    Did you make this recipe?

    Tag @HOTTHAIKITCHEN on Instagram and hashtag it #HotThaiKitchen!

    Glass Noodle Stir-Fry Recipe Hainanese Style ผัดวุ้นเส้นไหหลำ

    August 4, 2017 by Pailin Chongchitnant Leave a Comment

    glass noodle stir fry hainanese

    Jump to video!


    Pad Woon Sen or glass noodle stir-fry is a well-known Thai dish, but this version is lesser known. However, it is the one we make most often at home because it comes from Hainan, my grandma's birthplace! This is one of her signature dishes, and a dish she makes every time I come home to visit. Makes me so happy to know that her recipe will now live on!

    If you love noodle stir fries, may I suggest another great recipe? Pancit canton, a Filipino egg noodle stir fry that's very weeknight friendly!

    Watch The Full Video Tutorial!

    All my recipes come with step-by-step video tutorials with extra tips not mentioned in the blog post, so make sure you watch the video below to ensure success - and if you enjoy the show, please consider subscribing to my YouTube channel. Thank you!


    Print
    clock clock iconcutlery cutlery iconflag flag iconfolder folder iconinstagram instagram iconpinterest pinterest iconfacebook facebook iconprint print iconsquares squares iconheart heart iconheart solid heart solid icon
    glass noodle stir fry hainanese

    Glass Noodle Stir-Fry Recipe Hainanese Style ผัดวุ้นเส้นไหหลำ

    5 Stars 4 Stars 3 Stars 2 Stars 1 Star No reviews
    • Author: Pailin Chongchitnant
    Print Recipe
    Pin Recipe

    Ingredients

    The Sauce

    • 1 ½ Tbsp oyster sauce
    • 1 Tbsp soy sauce
    • 2 tsp sugar
    • ~ ½ cup water or unsalted chicken stock
    • ½ tsp white pepper

    The Protein

    • 125 g pork leg meat (can use loin or tenderloin) sliced into thin, bite-sized pieces (you can sub any other protein you like)
    • 1 tsp soy sauce
    • 1 Tbsp water

    The Rest

    • 3-4 dried shiitake mushrooms
    • 15 g dried black fungus mushroom
    • 2 Tbsp dried shrimp, medium or large size
    • 80g dry glass noodles
    • 2” section daikon, peeled  and cut into batons (1.5 cups cut), see note
    • 4 cloves garlic, chopped
    • ~½ cup water or unsalted chicken stock
    • 2 green onions or 2 stalks Chinese celery

    Note: Make sure you peel a couple of layers off the daikon until the colour turns from bright to translucent white. This is because the outer skin is the bitter part. 

    Ingredients and Kitchen Tools I Use

    Want to save this recipe?

    We can email this post to you, so you can come back to it later!


    Instructions

    Prep your dried ingredients (you can do this part in advance):

    • Cover the shiitake mushrooms in hot water (I use off-the-boil water for fastest soaking) and let them soak till fully hydrated, about 30 minutes or longer if they are large. Once soaked, squeeze out all the water, cut off the stems and slice into thin pieces.
    • Cover the black fungus in hot water for about 15 minutes until fully rehydrated. Slice into ribbons.
    • Soak the dried shrimp in hot water for about 10 minutes to soften. Drain.
    • Soak the glass noodles in room temp water for 10 minutes and drain immediately. Using scissors, cut the noodles into 2-3 sections to shorten. If not using right away, keep the noodles covered in plastic wrap so they don't dry out. 

    Make the sauce by stirring together oyster sauce, soy sauce, white pepper, 2 tablespoon of the water or stock, and sugar. Stir to dissolve the sugar.

    Prep the protein: Combine pork with soy sauce and water, mix well and let sit for at least 15 minutes or until ready to use. If using seafood, no need to marinade it. 

    Blanch daikon in salted water boiling water for 3 minutes, then drain.

    In a wok heated over medium high heat, add a little oil and when hot, add the pork and spread out the pieces. Let the pork brown without stirring for about a minute. Once browned on the bottom side, give the pork a flip and cook until it is done. Put the pork into a bowl along with any pork juices in the wok.

    Add a little more oil into the wok, add garlic and cook until it starts to brown.

    Add both mushrooms, daikon and dried shrimp and toss for about 30 seconds to heat through.

    Add the noodles, lower heat to medium, then add the sauce and toss until the sauce has been all absorbed. Add about ¼ cup of water and toss until all the liquid has been absorbed. Then taste the noodles to see if they are fully cooked, if not, add a splash more water and keep cooking until done.

    Once noodles are done, turn the heat back up to high and add the pork along with any juices in the bowl (do not worry about the extra liquid making it too wet, it won't). Toss to incorporate and to let any extra juices get absorbed. Turn off the heat and toss in green onions or Chinese celery. Taste and adjust seasoning if needed.

    Serve immediately either on its own or as a part of a bigger meal! Enjoy!

    Join us on Patreon for bonus content & rewards!


    Notes

    Note: This recipe requires a bit of advanced planning: the shiitake can take up to 45 minutes to rehydrate depending on the size of the mushroom, so make sure you plan accordingly!

    Did you make this recipe?

    Tag @HOTTHAIKITCHEN on Instagram and hashtag it #HotThaiKitchen!

    • « Previous Page
    • 1
    • …
    • 11
    • 12
    • 13

    Sawaddee ka!

    I'm Pai, a chef, author, and YouTuber. I'm here to demystify Thai cuisine and help you cook great Thai food at home. Want to learn more about me?

    Here's my story

    My Latest Cookbook

    Popular Classics

    • a plate of cashew chicken
      Thai Cashew Chicken Recipe
    • A plate of Thai grilled steak salad with sticky rice - nam tok neua
      Thai Grilled Steak Salad - Neua Yang Nam Tok
    • A plate of pad thai with shrimp and a side of lime and bean sprouts
      Authentic Pad Thai Recipe ผัดไทย
    • a bowl of tom yum soup with shrimp, mushrooms, lemongrass and chilies
      Tom Yum Goong Recipe (Creamy Version)

    Footer

    Subscribe to my newsletter!

    Subscribe for free!
    • Privacy Policy
    • Accessibility Statement
    • Merch
    • All Recipes
    • Contact
    • My Cookbook
    • Patreon
    ↑ back to top

    As an Amazon Associate I earn from qualifying purchases.

    Copyright © Pailin's Kitchen Inc. 2025